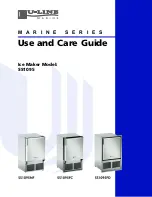
SS1095
15
MARINE SERIES
U-LINE CORPORATION LIMITED WARRANTY
U-Line Corporation warrants each U-Line product to be free from defects in materials and workmanship for a period of
one year from the date of purchase; and warrants the sealed system (consisting of the compressor, the condenser, the
evaporator, the hot gas bypass valve, the dryer and the connecting tubing) in each U-Line product to be free from
defects in materials and workmanship for a period of five years from the date of purchase. During the initial one-year
warranty period for all U-Line products U-Line shall: (1) at U-Lines option, repair any product or replace any part of a
product that breaches this warranty; and (2) for all Marine, RV and Domestic U-Line products sold and serviced in the
United States (including Alaska and Hawaii) and Canada, U-Line shall cover the labor costs incurred in connection with
the replacement of any defective part. During years two through five of the warranty period for the sealed system, U-
Line shall: (1) repair or replace any part of the sealed system that breaches this warranty; and (2) for all Marine, RV and
Domestic U-Line products sold and serviced in the United States (including Alaska and Hawaii) and Canada, U-Line shall
cover the labor costs incurred in connection with the replacement of any defective part of the sealed system. All other
charges, including transportation charges for replacements under this warranty and labor costs not specifically covered
by this warranty, shall be borne by you. This warranty is extended only to the original purchaser of the U-Line product.
The Registration Card included with the product should be promptly completed by you and mailed back to U-Line or you
can register on-line at www.U-LineService.com.
The following are excluded from this limited warranty: installation charges; damages caused by disasters or acts of God,
such as fire, floods, wind and lightening; damages incurred or resulting from shipping, improper installation,
unauthorized modification, or misuse/abuse of the product; customer education calls; food loss/spoilage; door and water
level adjustments (except during the first 90 days from the date of purchase); defrosting the product; adjusting the
controls; door reversal; or cleaning the condenser.
If a product defect is discovered during the applicable warranty period, you must promptly notify either the dealer from
whom you purchased the product or U-Line at P.O. Box 245040, Milwaukee, Wisconsin 53224 or at 414-354-0300. In no
event shall such notification be received later than 30 days after the expiration of the applicable warranty period. U-Line
may require that defective parts be returned, at your expense, to U-Lines factory in Milwaukee, Wisconsin, for
inspection. Any action by you for breach of warranty must be commenced within one year after the expiration of the
applicable warranty period.
This limited warranty is in lieu of any other warranty, express or implied, including, but not limited to any
implied warranty of merchantability or fitness for a particular purpose; provided however, that to the
extent required by law, implied warranties are included but do not extend beyond the duration of the
express warranty first set forth above. U-Lines sole liability and your exclusive remedy under this warranty
is set forth in the initial paragraph above. U-Line shall have no liability whatsoever for any incidental,
consequential or special damages arising from the sale, use or installation of the product or from any other
cause whatsoever, whether based on warranty (express or implied) or otherwise based on contract, tort or
any other theory of liability.
Some states do not allow limitations on how long an implied warranty lasts or the exclusion or limitation of incidental or
consequential damages, so the above limitations may not apply to you. This warranty gives you specific legal rights, and
you may also have other rights which vary from state to state.


