


6
EN
Menu item
Function
White Balance
Adjust the white balance to suit diff erent
light sources.
There fi ve items for option: [Auto] / [Day-
light] / [Cloudy] / [Fluorescent] / [Tung-
sten].
Move Detection
This function can be used to detect the car
camcorder for moving. There two items
for option: [On] / [Off ].
Recording Time
Sets the time of video recording. The next
video will be started when a video is fi n-
ished. There three items for option: [2] /
[5] / [15].
Menu item
Function
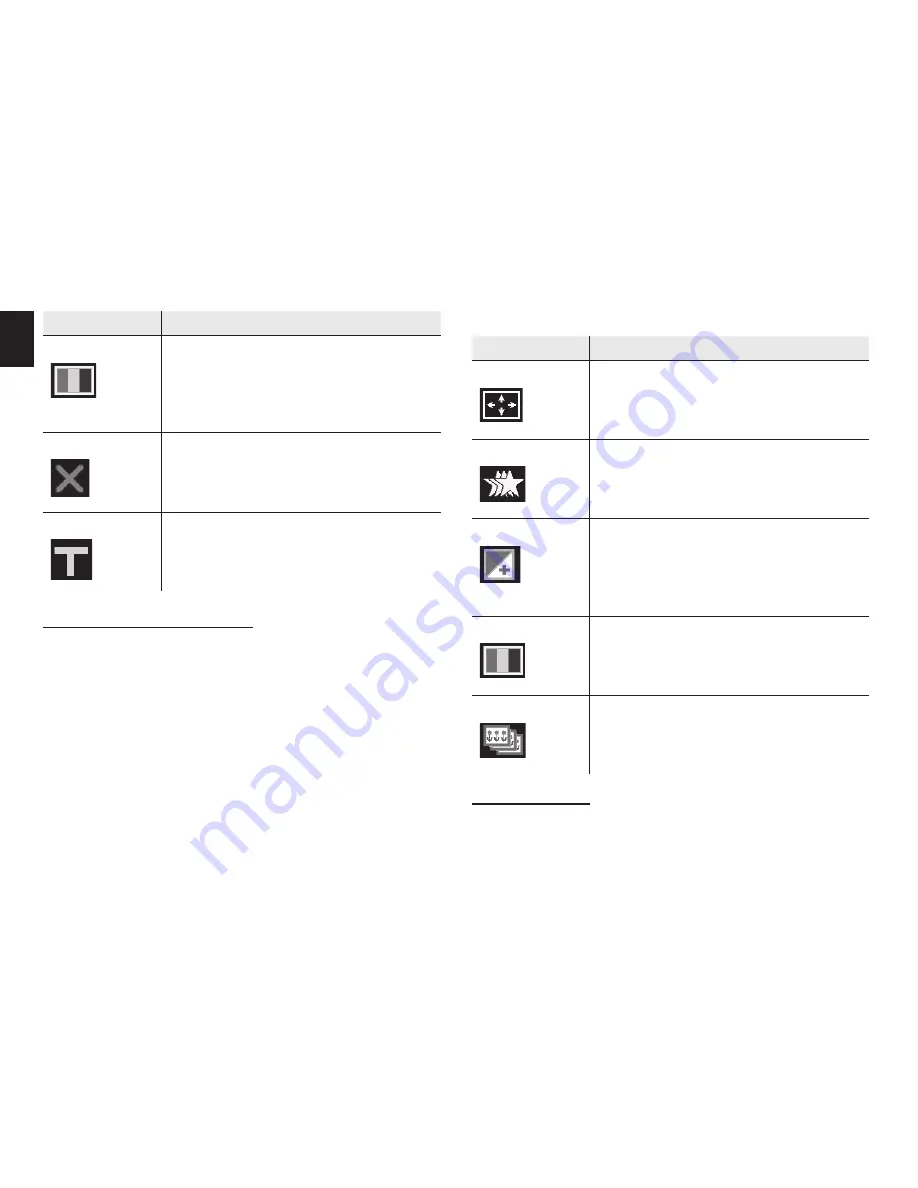
Resolution
There are fi ve options for choice:
5M: [2592X1944] / 3M: [2048X1536] /
2M: [1600X1200] / 1.3M: [1280X960] /
VGA: [640X480]
Quality
Select a lower image quality to decrease
the image size in order to capture more
images. There are three options for
choice:[Super Fine] / [Fine] / [Normal].
Exposure
Set the exposure value manually to com-
pensate for unusual lighting conditions
such as indirect indoor lighting, dark back-
grounds, and strong backlighting. The ex-
posure value range is –2.0 to 2.0.
White Balance
Adjust the white balance to suit diff erent
light sources.
There fi ve items for option: [Auto]/[Day-
light]/[Cloudy]/[Fluorescent]/[Tungsten].
Cont. mode
This function can be used to shoot serial
photos:
[Off ]: Single frame shoot.
[On]: 3 frames shoot .
Menu in capture mode
1. Turn on the car camcorder and set it to capture
mode.
2. Press the
MENU
button to display the menu.
3. Use the
UP
or
DOWN
button to select an item.
4. Press the
OK
button to enter the submenu.
5. Use the
UP
or
DOWN
button to select the desired
item.
6. Press the
OK
button to confi rm the setting.
7. Press the
MENU
button twice to close the menu.
Capture menu list
Setup menu
You can set the system items in setup menu.
1. Turn the power on and press the MENU button to
display the menu.


