


WARNING:
Risk of explosion if a battery is replaced by an incorrect type. Dispose used batteries in accordance with the waste recovery and
recycling regulations in your area.
Product Disposal
The products electrical, electronic equipment, and mercury containing button cell battery should not be placed in municipal waste. Dispose this
product in accordance with the waste recovery and recycling regulations in your area.
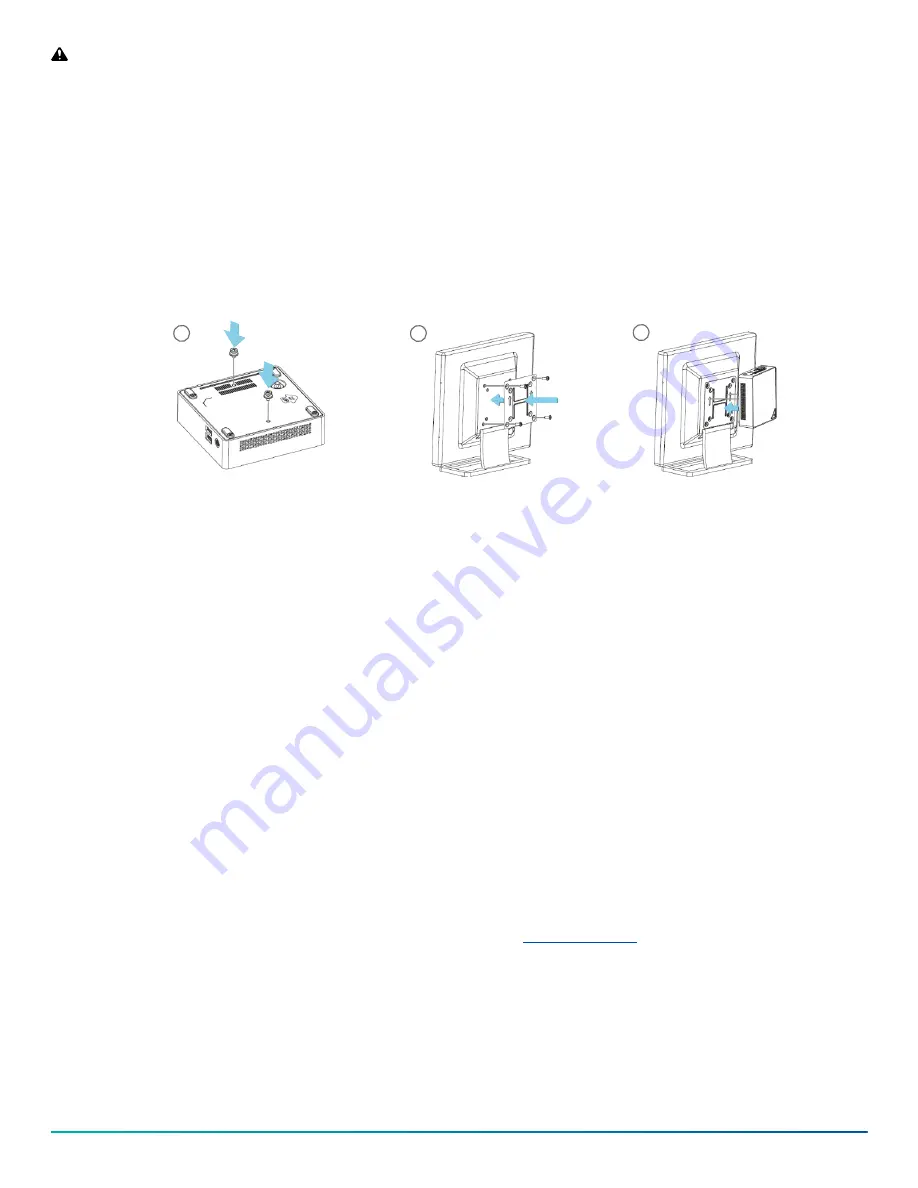
Mounting the system with the VESA mount bracket
To mount the system using the VESA mount bracket, complete the following steps:
1.
Attach the screws provided on the underside of the exacqVision C-Series Standard system.
2.
Attach the VESA mounting plate to the rear of a compatible display using the screws provided.
3.
Slide the device into place to mount the system.
Figure 2: Mounting the exacqVision C-Series Standard system
1
2
3
Initial startup
When you start the exacqVision C-Series server for the first time, create a user name and password for the operating system, then create a root
user name and password for the Enterprise Manager.
1. Turn on the exacqVision server.
2. Create a user name and password for the operating system when the logon dialog box appears.Configure operating system settings as
required.
3. If prompted, log back on to the operating system with the user name and password you just created.
Configuring the exacqVision client
To configure the exacqVision client to connect to one or more exacqVision servers, complete the following steps:
1.
Start the exacqVision client application.
2.
Click the
Config (Setup) window
icon on the toolbar.
3.
From the navigation tree, select
Add Systems
.
4.
To connect to the exacqVision server, in the
Add Systems
window, click
New
and enter the IP address or hostname of the server.
5.
Enter the username and password that was previously configured on the exacqVision server. For information about how to configure the
username and password, refer to the
exacqVision Software User Manual
.
6.
Select a connection speed.
7.
Click
Apply
.
What to do next:
To prevent unauthorized access or modifications to the system, change the default system administration and user accounts
passwords. For more information, refer to the
exacqVision Software User Manual
.
C-Series Standard Quick Start Guide
3


