Rev : A, Product Description : User Manual LP 46 Neo
U
S
E
R
’
M
A
N
L
Barcode Printer
LP 46 NEO
Page 1: ...Rev A Product Description User Manual LP 46 Neo U US SE ER R S S M MA AN NU UA AL L Barcode Printer LP 46 NEO...
Page 2: ...adequate space around the printer so that convenient operation and maintenance can be performed 3 Keep the printer far away from water source and do not expose the printer to direct sunlight strong li...
Page 3: ...print and normal lifetime use recommended paper or its equivalent 12 Shut down the printer when connecting or disconnecting interfaces to avoid damages to control board 13 Set the print darkness to a...
Page 4: ...TER INSTALLATION ON ON ON 5 5 5 5 2 1 INSTALLATION POSITION 5 2 2 PAPER ROLL INSTALLATION 5 2 3 RIBBON INSTALLATION 7 2 4 POWER ADAPTER CONNECTION 10 2 5 COMMUNICATION CABLE CONNECTION 10 2 6 START TH...
Page 5: ...AD 23 4 2 CLEANING PLATEN ROLLER 24 5 TROUBLESHOOTING 5 TROUBLESHOOTING 5 TROUBLESHOOTING 5 TROUBLESHOOTING 25 25 25 25 5 1 TROUBLESHOOTING 25 5 2 PRINT QUALITY PROBLEMS 27 APPENDIX APPENDIX APPENDIX...
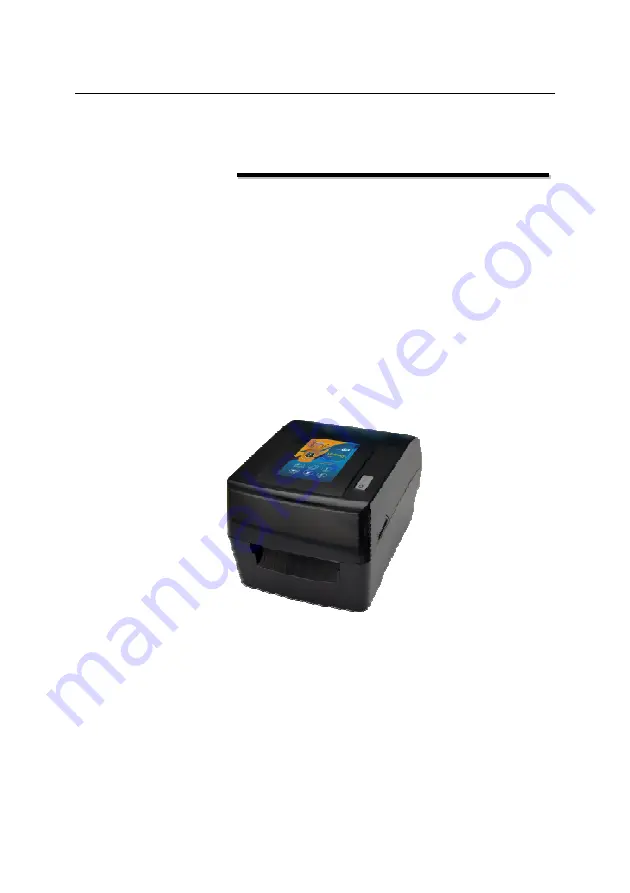
Page 6: ...niversal drivers under the operating systems such as Windows 2000 Windows XP Windows server 2003 Windows Vista Windows server 2008 Windows 7 Windows 8 Main features Thermal thermal transfer printing L...
Page 7: ...acking the printer carton and refer to the packing list to check whether the parts are missing or damaged If there is please contact with SNBC or your local distributor communication cables are option...
Page 8: ...r 5 LED 6 Button 7 Paper guide plate 8 Paper roll holder 9 Ribbon thumb wheel 10 Ribbon holder 11 Paper cabinet 12 Ribbon end cap 13 Open spanner 14 Print head 15 Paper guide block 16 Sensor holder 17...
Page 9: ...rting pole 8 and paper guide plate 7 support the paper roll to avoid left and right shaking of paper roll 3 Paper guide block 15 avoid left or right shaking of paper in the paper out path 4 Power swit...
Page 10: ...d the cover open lever with both hands to turn the top cover upwards and open the top cover of printer see figure 2 2 1 see figure 2 2 1 Figure 2 2 1 Figure 2 2 2 Figure 2 2 3 2 Press the cover open l...
Page 11: ...uffer shaft and finally clamp the paper pulled out with the left and right paper guides see figure 2 2 5 Caution While opening the top cover avoid pressing it with force and open the top cover with fo...
Page 12: ...shown in Figure 2 3 1 please pay attention to the installation direction Firstly rotate the ribbon holder to the position shown in Fig 1 then insert the ribbon into the ribbon end cap in the direction...
Page 13: ...Rotate the ribbon holder to the position shown in Fig 1 then insert the assembled ribbon module into the ribbon end cap in the direction shown in Figure 2 and insert the other end of ribbon into the...
Page 14: ...d the rewinding shaft of ribbon 3 Install the rewinding shaft of ribbon onto the ribbon holder according to the method in step 1 4 Push the ribbon thumb wheel to tighten the ribbon installed paper rol...
Page 15: ...is turned off 2 Connect one end of the AC power input cable to power adapter and then insert the other end of the power adapter into the power adapter interface on the back of printer 3 Insert the oth...
Page 16: ...the actions performed automatically after the printer is turned on including feeding one label starting calibration automatically only valid under discontinuous paper mode The power on action can be...
Page 17: ...has been idled for a long time or replace new kinds of paper roll Cannot identify the marks effectively during the process of printing The using environment of printer has changed greatly Caution Aft...
Page 18: ...a Windows server 2008 Windows 7 Windows 8 Windows 10 The 64 bit operating systems supported by the driver are as follows Windows XP Windows server 2003 Windows Vista Windows server 2008 Windows 7 Wind...
Page 19: ...LP 46 Neo User s Manual 14 2 Select printer type and model to be installed If you want to set the printer as default printer please select Set As Default Printer and click Next...
Page 20: ...it according to actual needs If it is a serial port driver please select COMx x equals to 1 2 3 4 5 6 7 or 8 if it is USB port please select USB00x x equals to 1 2 3 4 5 6 7 or 8 if USB port printer...
Page 21: ...for details 3 1 2 Button functions Button Function Explanation Short press Feed paper In standby status press the button for a short time to feed paper Pause During the printing press the button for a...
Page 22: ...e factory setting Keep pressing the button for a long time and release it after the green LED has flashed five times Note Short press means the duration from pressing down the button to the time when...
Page 23: ...button for a long time under any of the status listed above 3 2 2 Daily operations Operations under idle status It refers to the ready status when the printer is normal and waiting for an operation or...
Page 24: ...task Operations under abnormal status It refers to the status when an exception occurs The printer failure is prompted by LED and buzzer For the details of failure prompting and removing refer to 5 1...
Page 25: ...6 Neo User s Manual 20 Figure 3 3 1 3 4 Print position adjustment 1 Adjust vertical print position When the situation like figure A or B occurs adjust the vertical print position to figure C Figure 3...
Page 26: ...position adjustment is 2 Adjust horizontal print position When the situation like figure D or E occurs adjust the horizontal print position to figure F Figure 3 4 2 Caution Figure D indicates that the...
Page 27: ...icates that the tear off position is upper than the correct position Adjust it in the negative direction The data symbol in the option Tear off position adjustment is Figure H indicates that the tear...
Page 28: ...clear Feed or retract paper with big noise Something else sticks onto the print head Follow the steps below to clean the print head 1 Turn off the printer and open the top cover 2 Lift up the top cov...
Page 29: ...ng 3 Wipe off the dust and stains on the surface of the platen roller with alcohol cotton ball it should be wrung out while turning the platen roller 4 Wait for 5 to 10 minutes until the alcohol evapo...
Page 30: ...me the printer stops the printing Please handle it with reference to the following method Error indication mode Error message Buzzer Error LED Print head up 2 beeps Red LED flashes 2 times circularly...
Page 31: ...r roll again The surface of mark sensor is dirty Clean mark sensor surface The position of reflective sensor is not correct Adjust the sensor position according to the description in 3 4 Paper roll ty...
Page 32: ...er type does not match with sensor type Set the paper type in printer driver to make it consistent with actual paper type Something wrong with marked paper for example no mark or unclear mark Use the...
Page 33: ...er Print width Max 104mm Print speed Max 150mm s CPU 32bit RISC microprocessor Memory FLASH 4MB SDRAM 8MB Print head temperature detection Thermal resistor Print head position detection Micro switch P...
Page 34: ...5mm Paper out mode Tear off Character Barcode Graphics Character enlargement rota tion Support four types of rotation printing 0 90 180 270 Bitmap fonts can be enlarged up to 10 times Vector fonts can...
Page 35: ...f 5 LOGMARS GS1 DataBar RSS 2D barcode PDF 417 MicroPDF417 QR Code DataMatrix MaxiCode GS1 Composite Operation interface Button LED 1 button 2 LEDs Power adapter Input AC 100 240V 50 60Hz Output DC 24...
Page 36: ...f paper 1 Specifications of continuous paper unit mm Type Illustration Index Continuous paper without adhesive Print paper width 18 a 120 Continuous paper with adhesive Base paper width 18 a 120 Print...
Page 37: ...th 18 c 118 Label height d 10 Gap width e 2 Discontinuous punched paper without adhesive Punched paper width 18 a 120 Punched paper height b 10 Detection hole position c a 2 Detection hole width d 5 D...
Page 38: ...nter and the print head test information reflects the status of the print head Printer configuration information BPLZ II is related to the configuration of the printer PRINTER CONFIGURATION BTP U100t...
Page 39: ...HAR 5EH COMMAND CHAR 2CH DELIM CHAR NO MOTION MEDIA POWER UP NO MOTION HEAD CLOSE DEFAULT BACKFEED 0 LABEL TOP 0 LEFT POSITION 100mm s PRINT SPEED 100mm s FEED SPEED 100mm s BACKFEED SPEED 203DPI RESO...
Page 40: ...t and paper out position Figure appendix 3 1 Caution To take marked paper for example the figure above explains the print and paper out position Discontinuous paper locates by the front edge of the ma...
Page 41: ...nal ready 5 SG Signal ground 6 DSR Input Data device ready 7 RTS Output Request transmission 8 CTS Input Allow transmission 9 FG Frame ground Table appendix 4 1 1 printer signal and status 2 Wiring di...
Page 42: ...e meets USB1 1 protocol standard and is optional USB interface transmits signal and power via a four wire cable as shown in the following figure Figure appendix 4 2 1 USB cable Wire D and D in figure...