Simret 4000 Instructions, Issue 10, Jan 2011
© 1994-2011, Turnkey Instruments Ltd. Page 7 of 17
If the instrument has been set to measure Brake Ratio (instead of Deceleration), you will be
prompted to tell in instrument the exact gradient at this point (unless
Slope at Stop
is
selected). The gradient measurements will only be displayed and printed if the instrument is
set to measure Brake Ratio (as recommended for heavy vehicles).
To obtain the most accurate results, the instrument should be aligned in the vehicle to move
parallel to the ground. If the instrument is misaligned by more than 25%g a warning will be
added to the results.
When ready, highlight the type of brake being tested and click.
The instrument is now fully armed for the brake test, accelerate to test speed and apply the
brakes. The BLUE armed light will illuminate and the display will show the speed increase
when accelerating. Note you must accelerate to 5kph (or mph) before you can trigger the test.
The Test Reference number is shown at the top of the display together with whether the
internal or external start trigger will be used (see
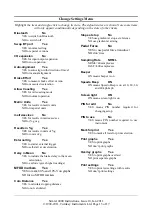
Change Settings
). The Test Reference
Number will auto increment after each successful test. You must accelerate to at least 5 kph
(or mph) before braking otherwise the instrument will not trigger. This allows you to hold the
instrument on the brake while arming and also allows the instrument to determine its direction
of travel (but see
Allow Coasting
in C
hange Settings
).
Until you reach a speed of 5 kph (or mph), you may still elect to measure the
Slope at Stop
and to
Pause
before doing so, move the highlight and click ON or OFF as required (see
Change Settings
). The instrument will beep as this speed is passed. This is also the speed to
which the auto alignment is set If the Speedo Beep feature is enabled, the instrument will
instead beep once at 10 kph (or mph), twice at 20 and so on.
To abandon the test,
hold-down
OK.
At the end of the test, a results summary will be displayed. At this stage you can elect to
accept or reject the test. If any errors or warnings have been detected, you can elect to view
these before accepting or rejecting the test results.
After a successful test the BLUE light will go out, if it flashes it means the instrument has
detected potential errors. The GREEN pass or RED fail light indicate whether or not the
vehicle has exceeded the chosen pass threshold, if these flash it means that calibration is
overdue.
Once accepted you may either:
•
Proceed with another test for that vehicle
•
Review the results in more detail
•
Change the instrument settings
•
Adjust the test parameters
•
Finish testing.
A simple ON-OFF Pedal Pad or Hand Switch can be connected to the DIN socket as an
external trigger (but see also Bluetooth Pedal Force Transducer).
Do not move off until the Pass or Fail light appears.


