Turbo Air MST-24S-N6 Installation And Operation Manual Download Page 11

11

NOTICE TO CUSTOMER

INSTALLATION

Loss or spoilage of products in your refrigerator/freezer is not covered by warranty.

In addition to following recommended installation procedures, you must run the

refrigerator/freezer 24 hours prior to usage. 

1. LOCATION - Allow adequate space and install the refrigerator on a firm and level floor. 

    If the appliance is not level, there may be unusual noises and poor cooling performance.

2. GOOD AIR CIRCULATION - Be sure to avoid any partition and object which may 

    stop the air flow and that air space is allowed to flow to the rear and/or sides of the unit 

    between the refrigerator and the back wall. Insufficient space causes vibration noise, 

    inefficient refrigeration, damage to the refrigeration system, and the waste of 

    electricity (Turbo Air recommends that the rear of the unit should be no less than 

    5 inches from the wall).

3. PLACE ON STRONG FLOOR - Be sure that the floor on which the unit is to be installed 

    is strong enough to support the total weight of the cabinet and any other contents, 

    before starting the installation. 

4. DO NOT PLACE NEAR HEAT - Be sure to avoid hot corners and other locations such 

    as near stoves. High ambient temperature will result in much lower cooling efficiency. 

5. INDOOR USAGE ONLY - Be sure to install this unit indoors only, to prevent getting wet 

    from the rain. Do not install the refrigerator in locations where the temperature is over 

   100°F (43°C) or below 50°F (10°C).

6. STABILIZING - Make sure the unit is installed in a stable condition with the front wheels 

    locked while in use. 

7. LEVELING - Be sure that the unit levels from the front to the back and side to side. 

8. UNIT SHOULD BE ON DEDICATED OUTLET - Plug the refrigerator into a wall socket 

    exclusively for this appliance. Do not run on extension cord. 

9. THE ELECTRICAL PLUG MUST BE ACCESSIBLE WITHOUT MOVING THE UNIT.

10. WHEN POSITIONING FOOD FOR STORAGE, A MAXIMUM OF ONE SHELF MAY 

      BE LOADED LESS THAN 110lb (50kg), BUT DO NOT ALLOW LOADS TO OVER

      HANG FROM THE FRONT AND REAR EDGES OF SHELVES.

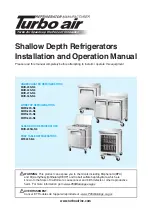
Summary of Contents for MST-24S-N6

Page 1: ...eptahydrate which are known to the State of California to cause cancer and birth defects or other reproductive harm For more information go to www P65Warnings ca gov AVERTISSEMENT Cancer ET Troubles d...

Page 2: ...ION SERIAL NUMBER NOTICE TO CUSTOMER INSTALLATION CLEANING CAUTION OPERATION AND DISPLAY PANEL INSTALLATION OF CASTERS INSTALLATION OF DRAIN PAN TROUBLESHOOTING STAINLESS STEEL EQUIPMENT CARE CLEANING...

Page 3: ...knowledge are not included in this manual and are not required to be included Children shall not play with the appliance Cleaning and user maintenance shall not be made by children without supervisio...

Page 4: ...o not puncture refrigerant tubing CAUTION Risk of fire or explosion Dispose of properly in accordance with federal or local regulations Flammable refrigerant used CAUTION Risk of fire or explosion Fla...

Page 5: ...The amount of refrigerant in your particular appliance is shown on the label inside the cabinet Never start up an appliance showing any signs of damage When in doubt contact a qualified service profe...

Page 6: ...ammable substances in the refrigerator The storage of benzene thinner alcohol ether LP gas or other explosive substances may cause an explosion Do not store or use gasoline or other flammable vapors a...

Page 7: ...ny containers filled with water on top of the appliance If the water spills onto any electrical parts it may lead to fire or electric shock Do not attempt to repair disassemble or alter the appliance...

Page 8: ...wise there is a risk of fire Do not insert your hand into the bottom area of appliance Any sharp edges may cause personal injury After unplugging the appliance wait at least five minutes before pluggi...

Page 9: ...ves into the appliance danger of suffocation or placing themselves into other life threatening situations The appliance may not be disposed of with domestic waste or bulky refuse The refrigerant circu...

Page 10: ...0S N6 MUR 24S N6 MUR 27S N6 MUR 34S N6 MWR 20S N6 MWR 24S N6 MWR 27S N6 MWR 34S N6 MUR 20SG N6 MST 24S N6 115V 60Hz 115V 60Hz 115V 60Hz 115V 60Hz 115V 60Hz 115V 60Hz 115V 60Hz 115V 60Hz 115V 60Hz 115V...

Page 11: ...loor on which the unit is to be installed is strong enough to support the total weight of the cabinet and any other contents before starting the installation 4 DO NOT PLACE NEAR HEAT Be sure to avoid...

Page 12: ...CLEANING 1 Check the unit again for safety 2 Plug unit back in and turn on power switch 3 Check that the unit is operating properly 12 CLEANING CAUTION Before cleaning unplug the unit and disconnect t...

Page 13: ...g press or to adjust the parameter value and then press the set key to return to the menu selection 3 Under any parameter setting pressing the key or 30 seconds keyless operation exists the parameter...

Page 14: ...erature Set Point is set to 37 F for Refrigerators 3 The compressor is set to automatically cycle based on the cabinet temperature and is controlled by the main PCB Controller 4 The defrost cycle is s...

Page 15: ...1 Screw the caster rear side and the caster brakes front side by using caster wrench 2 Use the caster shims to level the cabinet if necessary by inserting them to stems of the casters DRAIN PAN CASTER...

Page 16: ...rflow Remove the drain pan discard the water and place it back like drawing below 2 When installing the drain pan in the compressor mounted base slightly lift vaporizing pipe to place the pan Drain Pa...

Page 17: ...n produce dewdrops during rainy seasons The door is opened too frequently or left open too long Damp food is stored The door is bent The unit is not leveled off The door gasket has come off Turn the t...

Page 18: ...ides to use 8 steps that can help prevent rust on stainless steel 1 Using the correct cleaning tools Use non abrasive tools when cleaning your stainless steel products The stainless steel s passive la...

Page 19: ...eaning agents and water as soon as possible Allow the stainless steel equipment to air dry Oxygen helps maintain the passivity of the film on stainless steel 7 Hydrochloric acid muriatic acid should n...

Page 20: ...ot be considered as proper installation Additional Two Year Compressor Warranty In addition to the three 3 year warranty stated above Turbo Air warrants its hermetically sealed compressor to be free f...

Page 21: ...NSIT OR INSTALLATION FIRE FLOOD ACTS OF GOD OR IMPROPER ELECTRICAL CONNECTIONS TURBO AIR IS NOT RESPONSIBLE FOR THE REPAIR OR REPLACEMENT OF FAILED OR DAMAGED COMPONENTS RESULTING FROM ELECTRICAL POWE...

Page 22: ...22 NOTE...

Page 23: ...www turboairinc com registration within 7 days from the date of purchase Failure to comply may result in your warranty being voided Date of Purchase Name of the Dealer City State Zip Code Turbo Air In...

Page 24: ...www turboairinc com 4184 E Conant St Long Beach CA 90808 Toll Free 1 800 381 7770 Fax 310 900 1033 Email warranty turboairinc com...

Reviews: