


ELE
C
TR
IC S
TANDING D
ESK
7
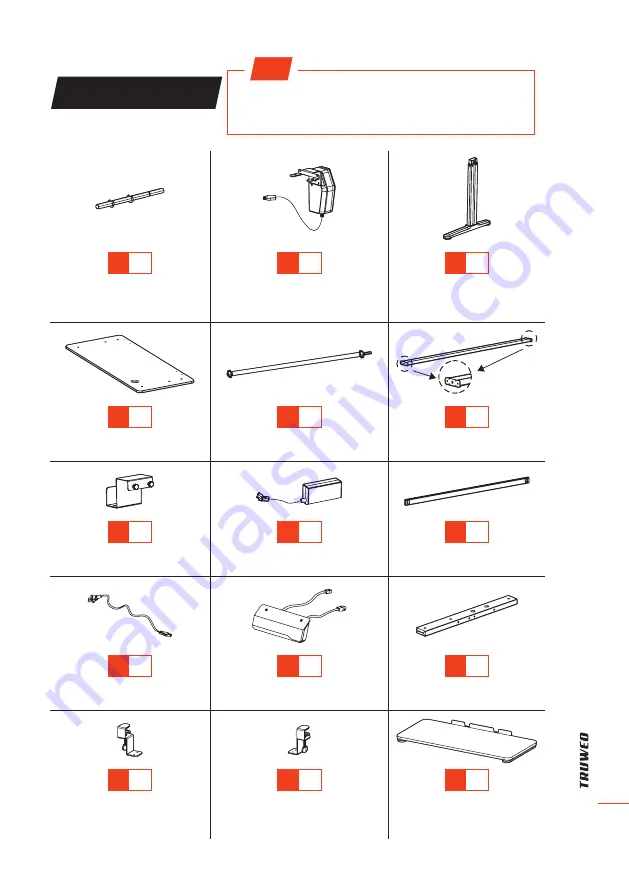
LIST OF PARTS
TIP
Count and inspect all parts before assembly. If anything is
missing or damaged, please contact us immediately for a
quick and free replacement:
A
× 1
Connecting Bar
(Column to Motor)
B
× 1
Motor
C
× 2
Lifting Column
D
× 1
Desktop
E
× 1
Sync Rod
F
× 1
Top Crossbar
G
× 1
Adapter Holder
H
× 1
AC Adapter
I
× 1
Bottom Crossbar
J
× 1
Power Cord
K
× 1
Controller
L
× 2
Side Bracket
M
× 1
Mounting Clamp
(For Keyboard Tray)
N
× 1
Mounting Clamp
(For Keyboard Tray)
O
× 1
Keyboard Tray


