background image

IPCAM-2000

7

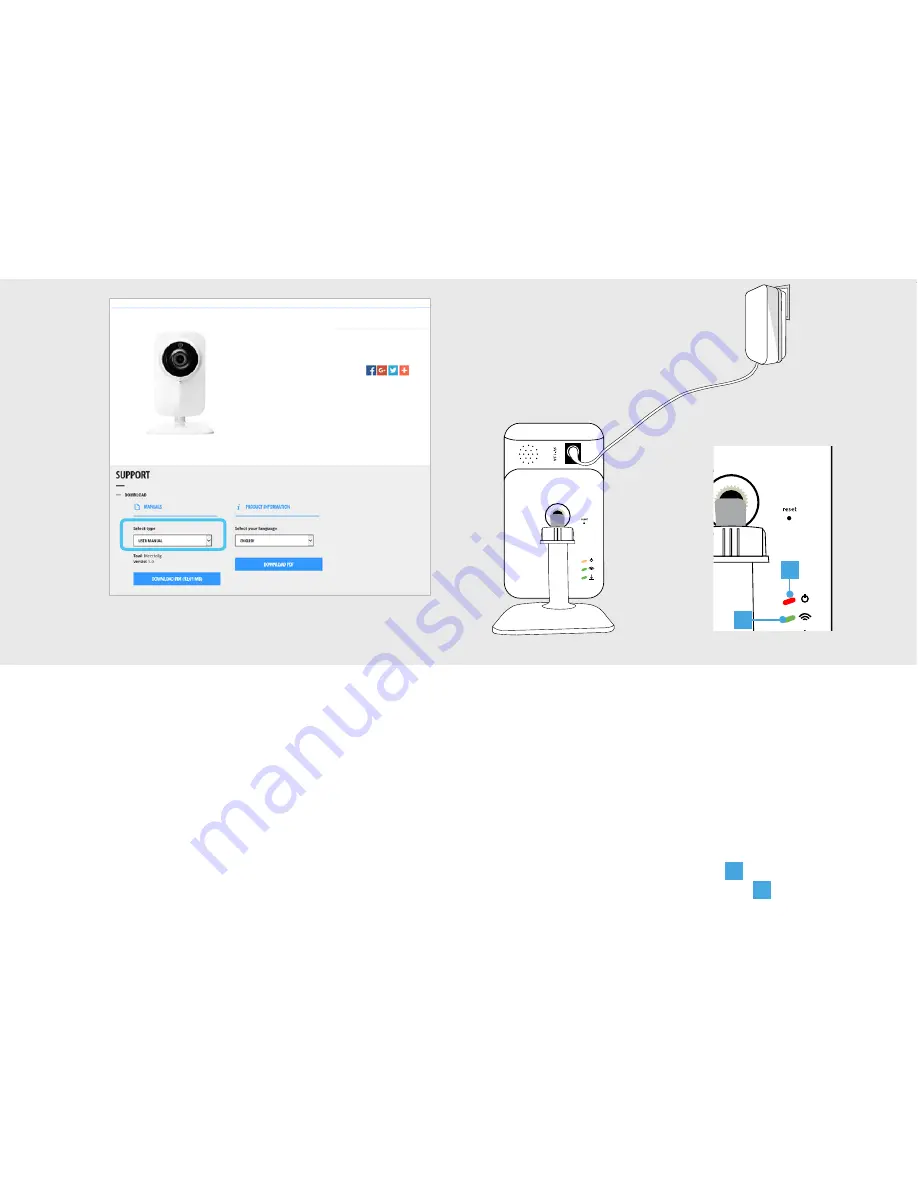
1. Connect the power adapter

Connect the included power adapter to the 

camera and insert the plug of the power 

adapter into a wall socket. The LEDs on the 

back will light up and the camera will start up.

The first time the camera starts it can take 

up to a minute. When the camera is done 

starting up, the power LED (

A

) will be lit red 

continuously and the WIFI LED (

B

) will start 

blinking green. 

This is a quick installation guide with basic 

installation and usage instructions. 

Check the advanced manual on 

trust.com/71119 for more in-depth information 

like:
•  Camera settings

•  Recording video

•  Reset camera

•  Push notifications

•  Motion detection

1

A

B

Summary of Contents for IPCAM-2000

Page 1: ...www trust com ...

Page 2: ...IPCAM 2000 WIFI IP CAMERA WITH NIGHTVISION USER MANUAL Item 71119 Version 2 0 Visit www trust com for the latest instructions ...

Page 3: ...st com 71119 ES El manual en español se encuentra en trust com 71119 PT O manual em português está disponível em trust com 71119 NO Den norske brukerveiledningen er tilgjengelig via www trust com 71119 SV Den svenska manualen finns på trust com 71119 FI Suomenkielinen käyttöopas on saatavissa osoitteessa trust com 71119 DA Den danske manual er tilgængelig på trust com 71119 PL Instrukcja w języku ...

Page 4: ...ние на trust com 71119 EL Το ελληνικό εγχειρίδιο είναι διαθέσιμο στη διεύθυνση trust com 71119 TR Türkçe el kitabını trust com 71119 adresinde bulabilirsiniz RU Руководство по эксплуатации на русском языке доступно на сайте trust com 71119 SL Priročnik v slovenščini je na voljo na spletni strani trust com 71119 HR Priručnik na hrvatskom jeziku dostupan je na trust com 71119 UA Українську версію по...

Page 5: ...LITY IP Camera to monitor your home and loved ones from anywhere in the world WIRELESS RADIO SIGNAL The WIFI signal passes through walls windows and doors WIFI range up to 15 m optimal conditions Read the manual carefully Failure to follow these instructions can be dangerous Incorrect installation will void any warranty on this product ...

Page 6: ...repair this product yourself The device contains no serviceable parts for the user WATER RESISTANT This product is not water resistant CLEANING Clean this product with a dry cloth Do not use harsh chemicals cleaning solvents or strong detergents HANDLING Do not drop the device bump the device against something or shake it Rough handling can damage internal circuit boards and fine mechanics ENVIRON...

Page 7: ... time the camera starts it can take up to a minute When the camera is done starting up the power LED A will be lit red continuously and the WIFI LED B will start blinking green This is a quick installation guide with basic installation and usage instructions Check the advanced manual on trust com 71119 for more in depth information like Camera settings Recording video Reset camera Push notificatio...

Page 8: ...App 2 1 Android Open the Play Store search for the Trust Smarthome app and install the app on your mobile device 2 2 iOS Open the App store search for the Trust Smarthome app and install the app on your mobile device 2 1 2 2 ...

Page 9: ...rust Smart Home App on your mobile device If you own an Octopus Control station ICS 2000 press on the picture of the Octopus Control station login and go to step 4 1 A Press on the picture of the IPCAM 2000 B Press the CREATE ACCOUNT button 3 A B ...

Page 10: ...mation Fill in your name email address and a self created password D Choose if you want to receive a newsletter or not E When all information is filled in press the NEXT button Your account will be registered and the App will open with above following screen C D E ...

Page 11: ...n first press on the IP Camera in the menubar on the bottom of the screen Go to step 4 2 if you are using an Android device A Press the button at the top of the screen to add a new camera B A pop up appears saying you must connect to the Wifi network of the camera Press on the SETTINGS button 4 1 A B ...

Page 12: ...to the WiFi network of the camera by pressing on the IPC H XXXXX network Wait untill the device is connected with the WiFi network of the camera When asked the default password for the camera network is 12345678 After connecting to the network of the camera return to the Trust Smart Home App C D ...

Page 13: ...IPCAM 2000 13 B Fill in a name for the camera and press OK A Press the button at the top of the screen A 4 2 Add a camera 4 2 B ...

Page 14: ...stream If no preview is shown of the video stream try to take the following steps 1 Check if the power adapter is connected to the IP Camera 2 Check if the LEDs on the back of the camera are on For more troubleshooting go to trust com 71119 D A preview of the video stream is shown Press NEXT C D ...

Page 15: ...e WiFi network reconnecting with the App and rebooting This can take up to two minutes G The camera is now connected to your Home WiFi network E Choose your Home WiFi network and fill in the password for this network Press the CONFIRM button when done E F G ...

Page 16: ...n the name of the camera A Press the pencil button at the top of the screen to EDIT the name of the camera or to DELETE it B Press on the name of the camera to begin editing the name Press the CONFIRM button when done C Press the DELETE button to delete the camera Press the CONFIRM button when done H A B C 5 ...

Page 17: ...ing screws Screws with plugs are included Make sure the screw holes are not placed in a crack or a hole A Loosen the stand of the camera by unscrewing it from the foot B Remove the white plastic mounting plate from the camera 6 Mount the IP Camera 3 A B C Metal ring White plastic mounting plate 6 ...

Page 18: ...e camera on the white plastic mounting plate The metal ring does not have to be placed back Screw the stand of the camera back on the foot and tighten it E It is possible to rotate the camera up to 100 degrees D Rotate up to 100 degrees E ...

Page 19: ...y the legal warranty that applies to your country and it begins on the day of purchase For additional information visit www trust com warranty Copyright The contents of the User manual are subject to copyright protection Without prior written permission reproducing or copying is prohibited Information in these documents is subject to change without prior notice Check www trust com 71119 for update...

Page 20: ... Voltage Directive 2014 35 EU ROHS Directive 2011 65 EC R TTE Directive 1999 5 EC The product is compatible with the following norms standards Manufacturer Authorised representative H Donker Procurement Director Dordrecht 09 March 2016 ETSI EN301 489 1 V1 9 2 2011 09 ETSI EN 301 489 7 V1 3 1 2005 11 ETSI EN 300 328 V1 8 1 2012 06 EN 62311 2008 EN 60950 1 2006 A11 2009 A1 2010 A12 2011 A2 2013 EN 5...

Reviews: