background image

Trust Easy Connect 19200 Plus

21


GB 

8. Maintenance

Regularly clean the glass plate using a soft, clean cloth to remove dust and dirt.
A clean glass plate is important, because dirt will show up in the scanned image.

Observe the following safety measures when cleaning the scanner:

1. 

Disconnect the power plug from the mains supply before cleaning the scanner.

2. 

Do not use aggressive cleaning liquids, liquid cleaners or aerosols to clean the scanner or the glass plate.

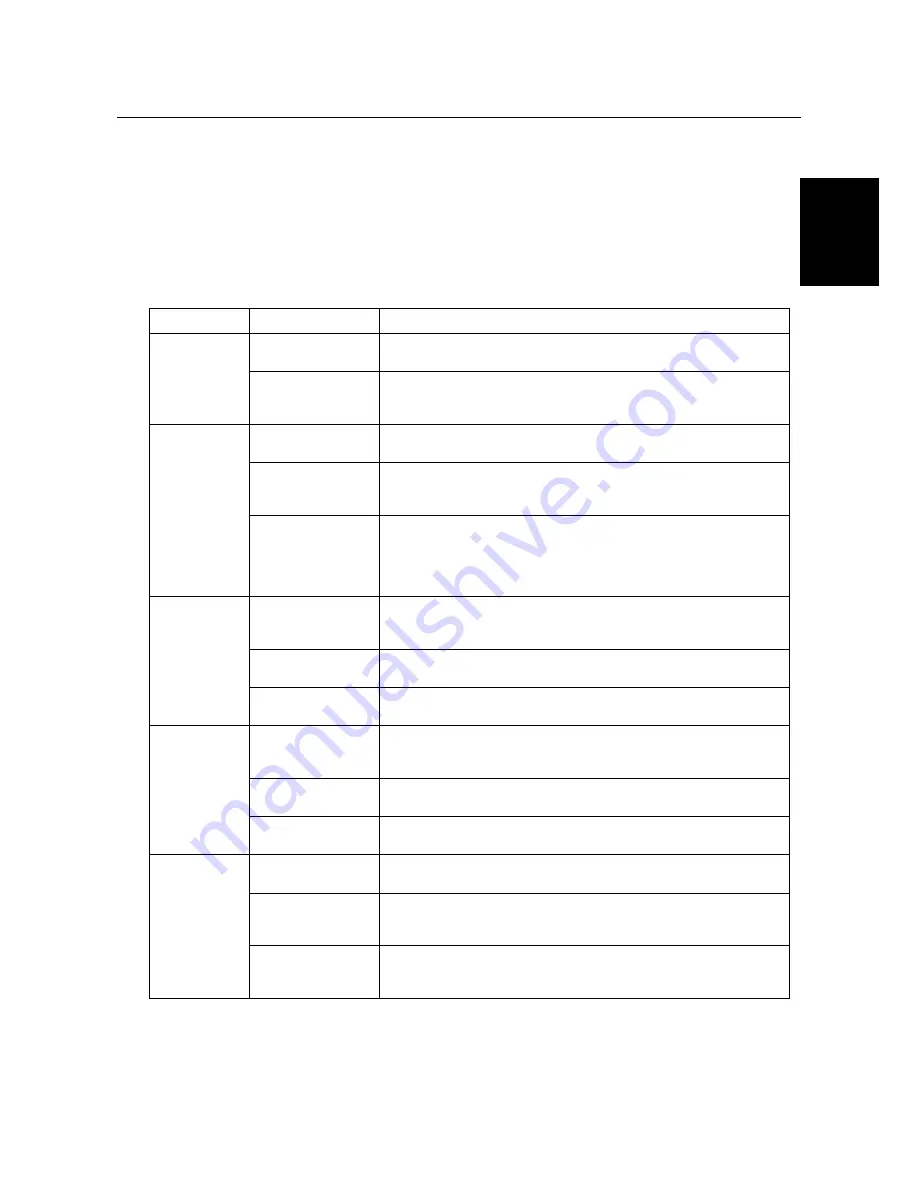
9. Troubleshooting

Problem

Possible cause

Solution

Scan is too
dark.

Monitor is set too
dark.

Adjust the brightness of the monitor.

Number of colours of
the VGA card is too
low.

Set the monitor adapter to a minimum of 65,535 (16 bit) colours.

Resolution is too
low.

Set the resolution in the TWAIN driver to at least 300 dpi.

Number of colours of
the VGA card is set
too low.

Set the monitor adapter to a minimum of 65,535 (16 bit) colours.

Poor quality
scan.

The glass plate is
dirty. Dirt on the
glass plate shows up
in the scanned
image.

Thoroughly clean the scanner glass.

Computer printer
port is not set to
EPP.

Set the computer's printer port in the BIOS set-up to the EEP position.
See the computer's instruction manual.

Resolution has been
set too high.

In practice, a maximum resolution of 300 dpi is enough. Only use a
higher resolution for small original images.

Scanner works
very slowly.

Insufficient memory.

You need a minimum of 8MB RAM. 32 MB is recommended for
Windows 95, 98 and Windows NT 4.

Error message
during scan.

The hard disk is full.

You need 3 times the size of the image to be scanned as free hard
disk space. The required space is shown in the TWAIN window. Free
some hard disk space or choose a lower resolution.

Selected resolution
is too high.

Choose a maximum resolution of 300 dpi when scanning an area
equal to A4.

Selected area is too
large.

Only choose 4800 or 192000 dpi for small original images (5 x 5 mm).

The printer
does not react.

Printer is
incompatible.

The scanner's printer connection can have a problem with a number of
printers. It is advisable to add a printer card.

The scanner is not
connected to the
power supply.

Make sure that the scanner is connected to the power supply.

The printer works
according to the GUI
principle.

Use a separate printer card or connect your printer directly to the
parallel port.

Summary of Contents for Easy Scan 19200 Plus

Page 1: ...Trust Easy Connect 19200 Plus GB TRUST EASY CONNECT 19200 PLUS Instruction manual Version 2 0...

Page 2: ...purchaser s personal use without the prior written permission of the manufacturer Disclaimer Statement The manufacturer specifically disclaims all warranties either express or implied including but no...

Page 3: ...Scanner and camera properties 8 4 5 Installing PhotoExpress 2 0 8 5 Scanning 12 5 1 Opening the scan dialog box 12 5 2 TWAIN dialog box 12 5 2 1 Buttons in the Preview window 13 5 2 2 Settings 13 5 2...

Page 4: ...by Windows DIR Text in this font is to be typed by the user term The text between the parentheses is the English term e g File referred to in the accompanying illustration Additional information is sh...

Page 5: ...wer cord 4 Never stick anything into the slots on the outside of the device 5 Do not try to repair the device yourself 6 If any of the following circumstances occur remove the plug from the power sock...

Page 6: ...nector A Figure 1 4 Remove the interface cable from the packaging and connect it to your computer s parallel port 5 Connect the other end of the interface cable to the scanner s Computer connection co...

Page 7: ...e 3 Click on Start and select Run Figure 2 Figure 2 Starting the installation 4 In the command line type D START EXE and click on OK Figure 3 to start the installation Figure 3 Selecting the language...

Page 8: ...ontinue with the installation A summary of the components to be installed will be given in the next window 10 Click on Start Install to start the installation The files will now be copied 4 2 Installi...

Page 9: ...continue with the installation Figure 9 will appear 6 Click on Language packs to select the languages to use Figure 9 Figure 9 Selecting the languages Note You will only be able to recognize text in t...

Page 10: ...Installing PhotoExpress 2 0 Ulead PhotoExpress 2 0 is an application that can be used to edit scanned images 1 Insert the CD ROM with PhotoExpress 2 0 into your CD ROM drive 2 The CD ROM will start au...

Page 11: ...cense agreement Figure 12 and continue with the installation Figure 12 Licence agreement 8 Click on Next Figure 13 Figure 13 Installing PhotoExpress 2 0 9 Select the background colour that you wish to...

Page 12: ...ling PhotoExpress 2 0 11 Click on Next Figure 16 PhotoExpress will now be installed Figure 17 appears when the installation is completed Figure 16 Installing PhotoExpress 2 0 12 Only select the option...

Page 13: ...on the choice that you make your computer will be restarted or you will return to Windows Figure 18 Completing the installation You have now completed the installation of the TWAIN driver and the app...

Page 14: ...for converting the document to a text file 6 Menu window Sets the paper size scan mode etc 7 Browse icon This icon enables you to select the software application you wish to transport the scanned docu...

Page 15: ...ew window Zoom Increases or decreases the size of the image in the preview window Batch scan Scans several areas of a document Language Sets the language used in the TWAIN window Help Displays informa...

Page 16: ...1 inch Scan size Custom You can determine the area to be scanned yourself in this selection window Resolution 50 19200 Selects set resolutions Custom Choose a resolution yourself between 50 and 19200...

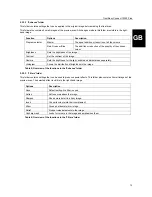
Page 17: ...ightness for the light middle and darker areas separately Histogram Shows the distribution of brightness in the image Table 5 Overview of the functions in the Enhance folder 5 2 3 3 Filters folder Thi...

Page 18: ...ired scan mode colour greyscale black and white 4 Using the mouse select the size of area to be scanned in the preview window or select a default size from the Scan Size menu 5 Set the resolution 300...

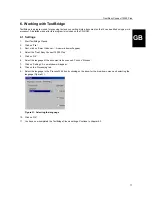
Page 19: ...t click on Select Scanner A new window will appear 4 Select the Trust Easy Connect 19200 Plus 5 Click on OK 6 Select the language of the document to be scanned Click on Process 7 Click on Settings A n...

Page 20: ...ng Page Source 5 Click on OK The TWAIN dialog box Figure 20 will now be opened 6 Click on Prescan to make a test scan 7 Using the mouse select the area you wish to scan 8 Set Scan Mode to BW black and...

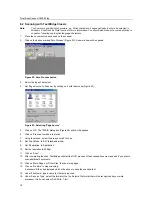
Page 21: ...re 24 will appear Figure 24 TWAIN settings 3 Select Flatbed scanner for the Trust Easy Connect 19200 Plus device 4 Click on OK to continue If you have installed or use several devices that use the TWA...

Page 22: ...Trust Easy Connect 19200 Plus 20 Figure 25 Ulead PhotoExpress...

Page 23: ...port is not set to EPP Set the computer s printer port in the BIOS set up to the EEP position See the computer s instruction manual Resolution has been set too high In practice a maximum resolution of...

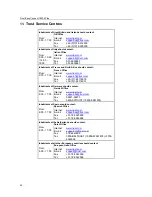
Page 24: ...nnect the power supply adapter see chapter 3 Visit our Internet site www trust com to check the FAQ s and the latest version of the driver If you still have problems with your scanner after trying the...

Page 25: ...um resolution by interpolation 19200 x 19200 dpi Scan method 1 bit black and white 10 bit greyscale 36 bit colour Document size 210 x 297 mm A4 8 5 x 11 inch Letter Interface Parallel port EPP SPP Pow...

Page 26: ...Fax 33 0 1 48174918 Tel 33 0 1 48174931 Inhabitants of Germany should contact From 9 00 17 00 German Office Internet www trust com E mail support de trust com Fax 02821 58873 Tel 0800 00TRUST 0800 00...

Reviews: