True Manufacturing Company TBB-1-B Instruction Manual Download Page 6

............ www.truemfg.com ............

True Food Service Equipment, Inc.

INSTALLATION / OPERATION INSTRUCTIONS

4

4

To ensure that your unit works properly from the first 

day, it must be installed properly. We highly recommend 

a trained refrigeration mechanic and electrician install 

your TRUE equipment. The cost  

of a professional installation is money well spent.

Before you start to install your TRUE unit, carefully 

inspect it for freight damage. If damage is discovered, 

immediately file a claim with the delivery freight carrier. 

TRUE 

is not responsible for damage incurred during shipment. 

OWNERSHIP

•  Adjustable Wrench
•  Phillips Head Screwdriver
•  Level

REQUIRED TOOLS

The following procedure is recommended for uncrating 

the unit:

A.

  Remove the outer packaging, (cardboard and bubbles 

or styrofoam corners and clear plastic). Inspect for 

concealed damage. Again, immediately file a claim 

with the freight carrier if there is damage. 

B.

  Move your unit as close to the final location as 

possible before removing the wooden skid.
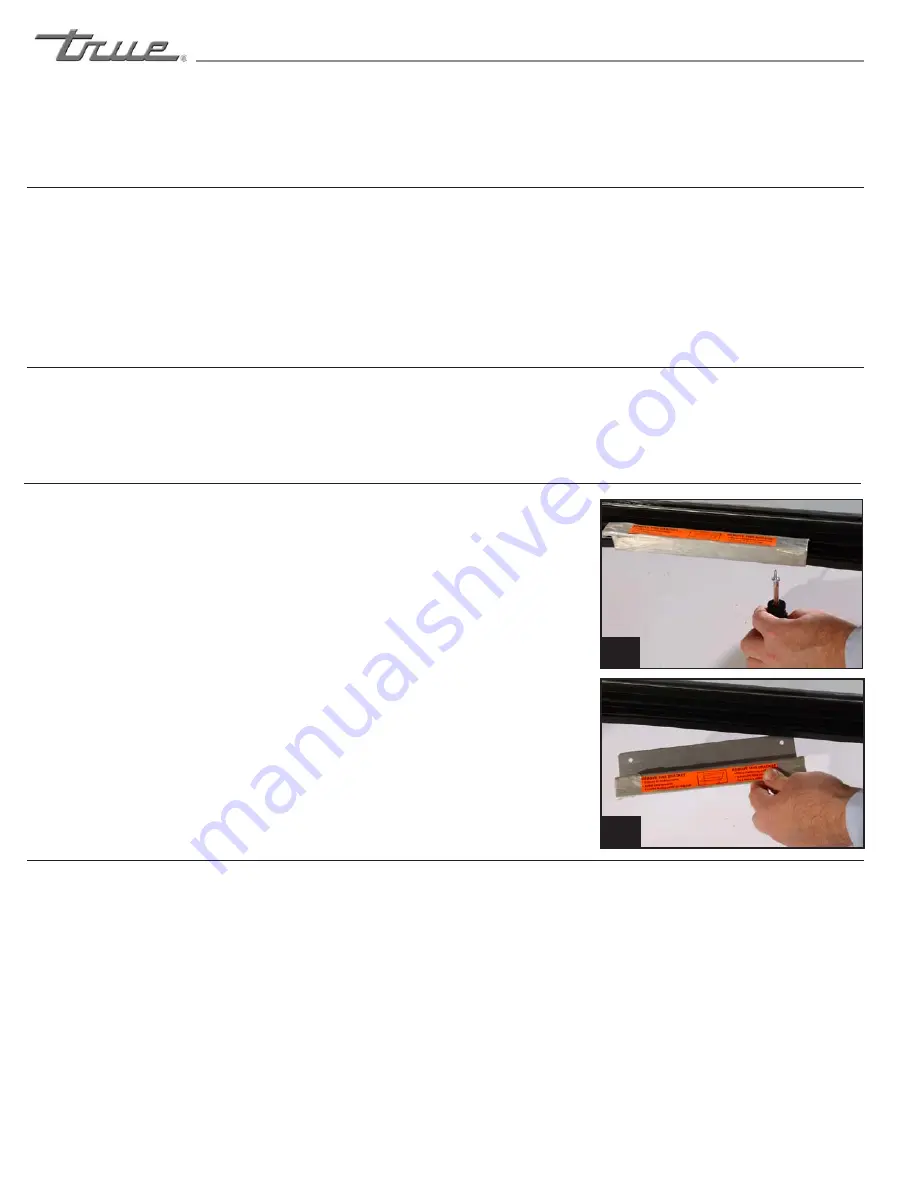
C.

  Remove door bracket on swinging glass door models 

(see image 1-2). 

NOTE


Keys for coolers with door locks are located in warranty 

packets.

UNCRATING

INSTALLATION / OPERATION INSTRUCTIONS

1

2

REMOTE UNITS (This section applies to remotes only!)

•  Remote cabinets must be ordered as remote.  


We do not recommend converting for a  

standard self contained to remote system.

•  All remote cabinets must be hard wired.
•  No castors available.
•  All remote cabinets come standard using 404A  

refrigerant.

•  All remote units come standard with expansion  

valve, liquid line solenoid, heated condensate  

pan, and defrost timer when applicable.

•   Contact TRUE Technical Service for BTU  


requirements.

•  No wiring necessary between cabinet  

and condensing unit.

•  All remote condensing units purchased  

from TRUE are 208/230 volts single phase.

If you have any questions regarding this section,  

please call TRUE at 1-(800)-325-6152.

Summary of Contents for TBB-1-B

Page 1: ...Beer Problems 15 Changing CO2 Gas Cylinder 16 Cleaning Bar System 17 Cleaning the Condenser 18 Important Warranty Information 19 Stainless Steel Equipment Care Cleaning 20 21 Lightbulb Replacement 22...

Page 2: ...www truemfg com True Food Service Equipment Inc...

Page 3: ...rongly recommend that any servicing be preformed by a qualified individual Unplug the refrigerator before cleaning and making repairs Setting temperature controls to the 0 position does not remove pow...

Page 4: ...s in place so that children may not easily climb inside Refrigerant Disposal Your old refrigerator may have a cooling system that uses Ozone Depleting chemicals If you are throwing away your old refri...

Page 5: ...ords that have become frayed or otherwise damaged Do not use a cord that shows cracks or abrasion damage along its length or at either end When removing the refrigerator away from the wall be careful...

Page 6: ...iately file a claim with the freight carrier if there is damage B Move your unit as close to the final location as possible before removing the wooden skid C Remove door bracket on swinging glass door...

Page 7: ...ditions 100 F 38 C you may want to install an exhaust fan WARNING Warranty is void if ventilation is insufficient B Proper leveling of your TRUE cooler is critical to operating success for non mobile...

Page 8: ...de the front door so it is centered on the cabinet The door can not be removed unless it is centered See image 1 for door channel openings and image 2 for centering door Three Door Units Slide the mid...

Page 9: ...5 4 4 3 2 40 10 8 8 6 6 5 5 4 4 3 2 2 45 10 8 6 6 6 5 4 4 3 3 2 1 50 10 8 6 6 5 4 4 3 3 2 1 1 Wire Gauge for 2 Voltage Drop in Supply Circuits 230 Volt Distance In Feet To Center of Load Amps 20 30 4...

Page 10: ...Level cabinet Step 3 Draw an outline on the base on the floor Step 4 Raise and block the front side of the cabinet Step 5 Apply a bead of NSF Approved Sealant see list below to floor on half inch insi...

Page 11: ...ed on the inside cabinet wall ELECTRICAL INSTRUCTIONS On direct draws the drain is located at the front of the cabinet To plumb in the drain connect 3 4 2cm P V C pipe to the 3 4 2cm barbed fitting su...

Page 12: ...or recommended service agent D Good air flow in your TRUE unit is critical Be careful to load product so that it neither presses against the back wall nor comes within four inches of the evaporator h...

Page 13: ...he Danfoss control will cycle the compressor and the evaporator fan s on and off together a The temperature control is sensing the discharge air temperature b The temperature control should be set on...

Page 14: ...e tool in each adjustment screw and turn 1 4 of a revolution clockwise to the right This procedure will adjust both the cut in and cut out about 2 F warmer STEP 5 Make sure to reconnect the pink wire...

Page 15: ...ded rear pegs with holes in line with those desired in front Insert as far as possible and maneuver front pegs in place SHELF INSTALLATION BIN DIVIDER INSTALLATION NOTE Divider positioned in front of...

Page 16: ...gulators to ensure applied pressure remains constant Keep equipment in good repair Do not agitate the kegs unnecessarily If excessive agitation occurs allow kegs to settle for 1 to 2 hours before tapp...

Page 17: ...improperly Faucet in bad or worn condition Kinks dents twists or other obstructions in line Traps in beer lines Beer too warm in kegs or lines Too much pressure Creeping gauge causing too much pressu...

Page 18: ...the pressure release valve on the body of the tap 10 Tap barrel at D with valve C open NOTE Don t lay CO2 cylinders flat Don t drop CO2 cylinders It requires 1 2 pound CO2 to dispense 1 2 barrel of be...

Page 19: ...Use small brush to clean beer faucet parts fig 2 4 Rinse parts thoroughly 5 Fill pump bottle with DBK solution 6 Attach hose from pump bottle to beer column tap outlet be sure rubber gasket is in plac...

Page 20: ...essor assembly to frame rails and carefully slide out tube connections are flexible STEP 4 Clean off accumulated dirt from condensing coil with a stiff bristle brush STEP 5 Lift cardboard cover above...

Page 21: ...to expose the Condenser The Condenser looks like a group of vertical fins You need to be able to see through the condenser for the unit to function at maximum capacity Do not place filter material in...

Page 22: ...ls Use a plastic scouring pad or soft cloth when you cannot see the grain 3 Use alkaline alkaline chlorinated or non chloride containing cleaners While many traditional cleaners are loaded with chlori...

Page 23: ...ssion is applied by rubbing in the direction of the polished lines for stubborn stains and discoloring D Easy off and De Grease It oven aid are excellent for removals on all finishes for grease fatty...

Page 24: ...d correct manner WARNING When replacing a light bulb make sure power to the unit is either turned off or unplugged LIGHT BULB REPLACEMENT IDL INTEGRATED DOOR LIGHTING Remove the lampshield to reveal t...

Page 25: ...er must also be the same capacity as the drier being replaced 3 Micron level vacuums must be achieved to insure low moisture levels in the system 500 microns or lower must be obtained All claims for l...

Reviews: