background image


AWC708C  PLUS  Motion  Control  User  Manual


WWW.SZTROCEN.COM


61 


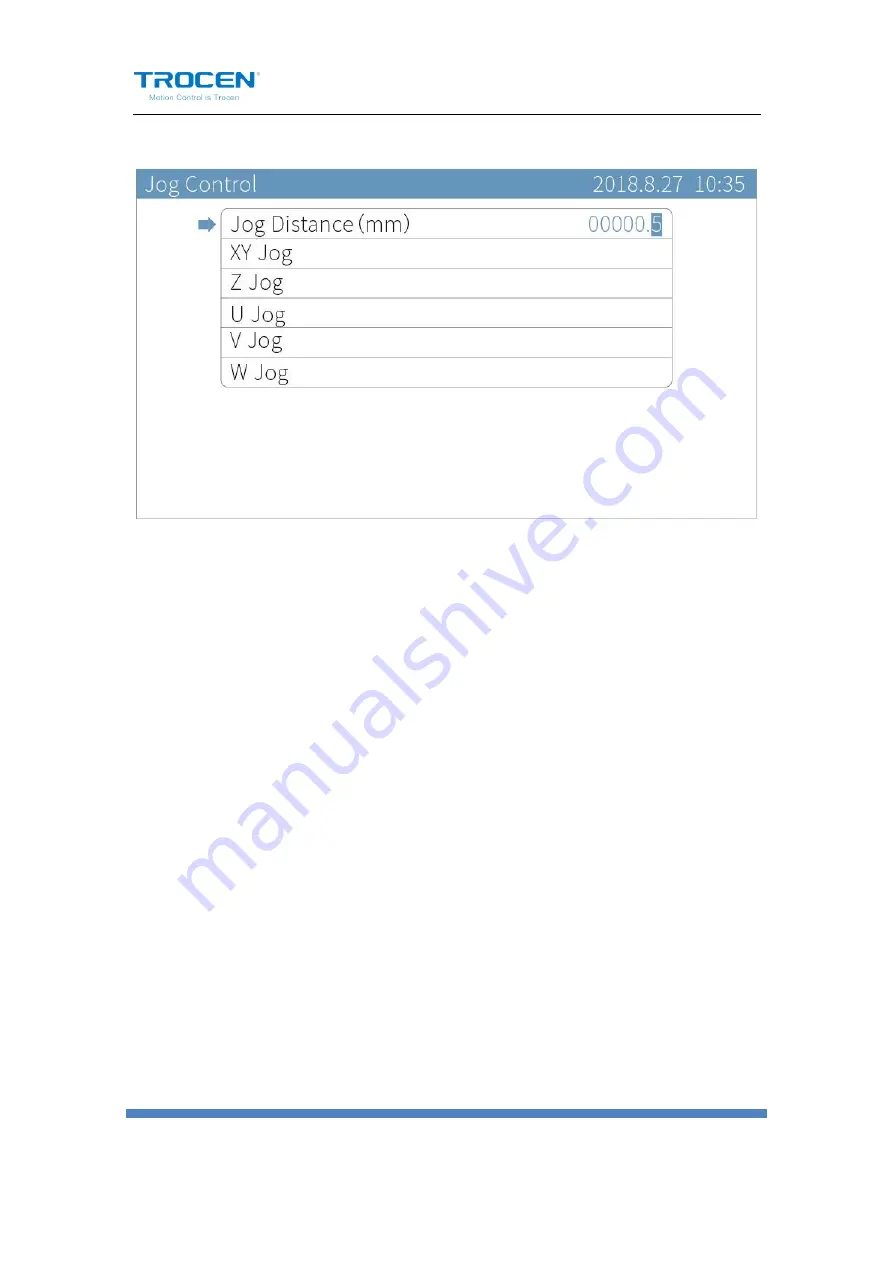
Fiugre6-3-1 Jog Control Interface


6.4 Cut Box


On the main page, press

Menu

and move cursor to

Cut Box

, press 

Enter

to enter the

 Cut Box

 page. Move cursor to

Blank Distance

and press number keys to modify parameters, then move cursor to

Start 

cutting box

and press

Enter

to start cut box function.


When cutting box, the laser head keeps a certain distance (Blank Distance) 

from the outside edge of the graphics s from the registration point, and 

cuts a square, which is used to determine the location of the origin point 

of the laser head and the actual size of graphics.


Summary of Contents for AWC708C LITE

Page 1: ...AWC708C PLUS Motion Control User Manual Laser Motion Control RV 1 0 2017 06 www sztrocen com Copyright 2016 Trocen Automation Tech Co Ltd All Rights Reserved ...

Page 2: ...cally incidental or consequential due to the use of this manual or this product The company has the patent copyright and other intellectual property rights of the product and its software Without authorization it shall not directly or indirectly reproduce manufacture process use this product and its related parts Users have the responsibility to pay attention to the design error and establish prot...

Page 3: ...Us Shenzhen Trocen Automation Tech Co Ltd First Floor Building 4 Zhiheng Industrial Park Nantou Pass Second Road Nanshan District Shenzhen City Guangdong Province China Tel 86 0755 27958262 Fax 86 0755 27447913 608 Email qiancheng sztrocen com Website www sztrocen com ...

Page 4: ...sztrocen com including company profile product introduction technical support and the latest release products etc You could call 86 0755 27958262 for more information Technical Support After Sales Service You could contact technical support and after sales service by the following ways Email qiancheng sztrocen com Tel 86 0755 27958262 Fax 86 0755 27447913 608 Address First Floor Building 4 Zhiheng...

Page 5: ...r Who This manual is applicable to engineers who have a certain understanding of laser mechanical automation and electrical circuits Main Content The composition installation and use of AWC708C PLUS are introduced in detail Relevant Document LaserCAD User Manual ...

Page 6: ...Keys 12 1 5 2 Direction Keys 15 1 5 3 Number Keys 17 1 6 Wiring Board 17 1 6 1 Wiring Board Appearance 18 1 6 2 Port Instruction 19 2 LaserCAD Installation 34 3 Simplified Installation 35 3 1 Hardware Connection 35 3 2 Input Test 36 3 3 Set the Origin Point of Machine 37 3 4 Key Direction 38 3 5 Distance Per Pulse 38 3 6 Hard Limit and Range 41 4 Main Interface Preview 42 5 Main Page Function Intr...

Page 7: ...s 53 6 1 1 Work Files 55 6 1 2 Config Files 56 6 1 3 Upgrade Files 57 6 1 4 Save Current Config to U Disk 58 6 2 Origin Manage 58 6 3 Jog Control 60 6 4 Cut Box 61 6 5 Axes Control 62 6 6 Motion Parameters Settings 63 6 7 Common Parameters Settings 67 6 7 1 Work Mode 67 6 7 2 Common Parameters 73 6 7 3 Axis Speed Parameters 75 6 7 4 Rotate Engraving Cutting 77 6 7 5 CCD Config 81 6 8 Network Setti...

Page 8: ...0 System Version 84 7 Manufacture Params Settings 87 7 1 Axis Parameters 87 7 2 Laser Parameters 90 7 3 I O Parameters 92 7 4 Auto Reset Settings 93 7 5 HardLimit Settings 95 7 6 MultiHead Settings 96 7 7 Function Config 102 8 FQA 104 Appendix 1 Wiring Diagram of Servo Driver 105 ...

Page 9: ...utting engraving machine used for toys and gifts clothing acrylic or packaging fields This system is used by LaserCAD software and motion controller which greatly improves the production efficiency and reduces the production cost Features of LaserCAD User friendly and versatile Support CorelDraw Auto CAD and other professional drawing software Support the file format AI PLT DXF SVG PDF NC DST DSB ...

Page 10: ...ementary software with auto typesetting for laser motion control TFT LCD Panel LCD Panel Control Panel Panel Mainboard 4 3 color TFT LCD control panel The panel is used for specific display and control operations and it is an important part of the system Wiring board Baseboard The baseboard is the control board of the integrated signal input and output control and the motor drive connection Hardwa...

Page 11: ...n Panel and mainboard The panel mainboard of AWC708C PLUS Wiring Board The wiring board of AWC708C PLUS USB Cable 3m Connect computer and panel by USB Network Cable 5m Connect computer and panel by network CN1 1 6m Connect the CN1 port of main board and panel CN2 1 6m Connect the CN2 port of main board and panel 8 PIN 1m Patch cord with USB and network port ...

Page 12: ...AWC708C PLUS Motion Control User Manual WWW SZTROCEN COM 11 Screw 2 Used to fasten the mainboard 1 4 Panel Preview There are LCD display soft keys and U disk slot on panel Figure1 4 1 Panel Preview ...

Page 13: ...three categories function keys number keys and direction keys 1 5 1 Function Keys Function key is designed to directly realize a specific operation function Table1 5 1 Function Keys Instruction Name Icon Instruction Reset No matter what the state of the machine is in pressing this button will make it enter the resetting state File Browse the files stored in the control board ...

Page 14: ...djust optical path Origin Setting machine s starting point of the current file Stop Once pressed the machine will stop its current function and move back to its origin Press Stop direction keys to switch the speed of axis movement quick to slow or slow to quick Start Pause Pause the machine and keep it stay at location Press again to resume Esc Exit edit mode Exit cursor Return to previous menu En...

Page 15: ...TROCEN COM 14 On the main page press File and you could see the memory files stored in the mainboard Figure1 5 1 File Interface Move cursor to the file you need press Enter you could set the file parameters Figure1 5 2 File Parameters Setting Page ...

Page 16: ...nter If the graphics is the same as that in PC the system will prompt File Data OK then the graphics will be allowed to process If not the machine won t process this graphics Figure 1 5 3 File Format Test Users could set other parameters as need 1 5 2 Direction Keys They are used to move the motion axis and cursor also used to modify options in the current view ...

Page 17: ...these two keys are used to move Z axis directly Z U Z axis with auto focus Enter the Z U Control page press Z Z to move cursor and press to move Z U V W axis Z mm U mm V mm and W mm show the current coordinate value Users can move U axis but the coordinate of U axis will not change and it is 0 forever Figure 1 5 4 Z U ...

Page 18: ...ues 0 and C keys also can be used to move feeding axis U axis 1 6 Wiring Board The panel and other parts of machine are connected by wiring board The components as below Connect motor driver Detection of motion axis limit signal Input signal detection Output IO control signal and corresponding power supply ...

Page 19: ...AWC708C PLUS Motion Control User Manual WWW SZTROCEN COM 18 1 6 1 Wiring Board Appearance Figure1 6 1 Wiring Board Appearance ...

Page 20: ...nstruction 1 6 2 1 Power Supply Port The power supply ports provide power to wiring board and panel Please pay more attention to polarity when connect them Don t make the polarity reverse Table1 6 1 Instruction of Wiring Board Power Supply Port Pin Name Introduction 1 24V 24V positive polarity 2 GND Negative pole ...

Page 21: ...able CN2 Connect CN2 port of panel and wiring board with CN2 cable 1 6 2 3 Signal Input There are two groups of signal input ports Table1 6 3 Wiring Board Signal Input Port Instruction PIN Name Instruction 11 IN 1 DC24V Output DC voltage 24V 2 IN1 Door open protection signal This function needs to be turned on in the panel to be effective 3 IN2 Foot switch This function needs to be turned on in th...

Page 22: ...erved 4 GND Power ground Wiring diagram of signal input Figure1 6 3 Wiring Diagram for Signal Input 1 6 2 4 Signal Output There are two groups of output ports to supply power and control signals If you choose OUT2 Blow when laser is power on you must set the parameters of Blow Open Delay or Blow Close Delay on the Common ...

Page 23: ... signal blow all the working time OUT1 Blowing when output is high logic level OUT1 Do not blow when output is low logic level 2 OUT2 Blowing signal blow when laser is powering on OUT2 Blowing when output is high logic level OUT2 Do not blow when output is low logic level 3 OUT3 Reserved 4 GND Power ground OUT 2 OUT 1 OUT4 Reserved 2 OUT5 Reserved 3 OUT6 Reserved 4 GND Power ground OUT ...

Page 24: ...iring diagram is shown below blow all the working time Figure1 6 4 Blowing Control Diagram 1 6 2 5 Laser Power Supply Port The wiring board provides 4 groups of laser output control ports Table1 6 5 Laser Controller Output Instruction PIN Name Instruction 3 Laser4 1 DC5V Output DC voltage 5V 2 WP Water Protection ...

Page 25: ...ection 3 PWM Digital signal The output voltage is 0 5V and it will change according to the power 4 TTL Laser switch signal 5 GND Power ground 5 Laser4 1 DC5V Output DC voltage 5V 2 WP Water Protection 3 PWM Digital signal The output voltage is 0 5V and it will change according to the power 4 TTL Laser switch signal 5 GND Power ground 6 Laser1 1 DC5V Output DC voltage 5V 2 WP Water Protection 3 PWM...

Page 26: ...f main board is connected to the IN pin of laser power source and TTL to the L pin of laser power source All signals have uniqueness which is connected to this group of signals other pins do not need to be connected You could connect the water tank by the WP pin water protection of the main board or the P pin water protection of laser power supply and please pay attention that you could only choos...

Page 27: ...ND 5 5 LASER2 AWC708C PLUS 5V IN Ordinary Glass Tube Laser G P L H Figure1 6 6 Pins of Laser Power Source H L P G IN 5V Laser Light Control High Level Laser Light Control Low Level Water Protect Output DC Voltage 5V Laser Energy Control Signal 5V Power Ground If the laser light control signal is low level connect the L pin of laser power ...

Page 28: ...trol accuracy than step driver Users can choose the appropriate driving mode according to the usage scenario cutting precision requirements and cost factors We take the step driver as an example Various types of servo driver wiring diagram please refer to Appendix 1 of this article Table1 6 6 Motor Driver Connection Instruction PIN Name Instruction X 1 DC5V Output DC voltage 5V 2 PUL Pulse signal ...

Page 29: ...OCEN COM 28 3 DIR Direction signal U 1 DC5V Output DC voltage 5V 2 PUL Pulse signal 3 DIR Direction signal V 1 DC5V Output DC voltage 5V 2 PUL Pulse signal 3 DIR Direction signal W 1 DC5V Output DC voltage 5V 2 PUL Pulse signal 3 DIR Direction signal ...

Page 30: ...Limit Signal The wiring board provides 6 way sensor limit signal access Each axis supports maximum and minimum coordinate limit signal input This system supports working range limitation so users do not need to install hard limit sensor just set the Range parameter on the Axis Parameters page More details about Range please refer to the Chaper 3 6 of this article ...

Page 31: ...axis The input signal of hard limit sensor when X axis moves to the maximum coordinate position 4 ELY The origin limit of the Y axis The input signal of origin limit sensor when the Y axis moves to the minimum coordinate position zero position 5 ELX The origin limit of the X axis The input signal of origin limit sensor when the X axis moves to the minimum coordinate position zero position 6 GND Po...

Page 32: ...axis The input signal of hard limit sensor when Z axis moves to the maximum coordinate position 4 ELU The origin limit of the U axis The input signal of origin limit sensor when the U axis moves to the minimum coordinate position zero position 5 ELZ The origin limit of the Z axis The input signal of origin limit sensor when the Z axis moves to the minimum coordinate position zero position 6 GND Po...

Page 33: ...um coordinate position 3 ELV The hard limit of V axis The input signal of hard limit sensor when V axis moves to the maximum coordinate position 4 ELW The origin limit of the W axis The input signal of origin limit sensor when the W axis moves to the minimum coordinate position zero position 5 ELV The origin limit of the V axis The input signal of origin limit sensor when the V axis moves to the m...

Page 34: ...AWC708C PLUS Motion Control User Manual WWW SZTROCEN COM 33 Figure1 6 8 Diagram of Limit Signal ...

Page 35: ...AWC708C PLUS Motion Control User Manual WWW SZTROCEN COM 34 2 LaserCAD Installation You can go through LaserCAD User Manual for more details about installation and how to use LaserCAD ...

Page 36: ...ontent of this chapter is mainly about the hardware initial installation of the product and the setting of basic software parameters Please refer to the following chapters for the detail settings and descriptions of other parameters 3 1 Hardware Connection Figure3 1 1 Integral Wiring Diagram ...

Page 37: ...fer to the Chapter 1 6 2 6 to know more detail about X Y Z U V W motor driver connection When multi head cutting the laser head 1 2 3 4 are controlled separately by X Z V W driver 3 2 Input Test On the main page press Stop and press Menu two times at the same time you will see the Input Test interface Figure3 2 1 Input Test Interface According to different types of sensors you could choose metal p...

Page 38: ...oves random please press Stop at once Check your installation and wiring of limiters if no mistake then modify the direction of origin point and reset machine On the main page press Stop and Shift at the same time to enter the Manufacture Parameters Settings page Users could set axis parameters Datum direction Key direction Limit Polarity and so on on the Axis Parameters page Figure3 3 1 Axis Para...

Page 39: ...motion axis for each pulse instruction sent by the controller 1 Distance per pulse of X 1 Open the XY AutoReset function and reset machine then mark the current position of laser head with A 2 On the main page press Menu and enter the Jog Control page Set the Jog Distance to 200mm as example Then press Enter to save your modification If you did not set the Range on Axis Parameters page please do n...

Page 40: ... calculated 6 The calculation methods of distance per pulses of Y and U axis are the same as X axis 7 When Z axis works as lifting shaft or platform lifting shaft the calculation method of distance per pulse is the same as X axis 2 Distance per pulse of Z axis when two head working When the machine does multi head cutting the distance per pulse of Z axis is calculated as below 1 Open the Z AutoRes...

Page 41: ... page and move cursor to Distance Per Pulse press Enter Input 200mm into Expected Length and input the distance between A and B into Actual Length Then press Enter the distance per pulse of Z axis will be calculated 6 When multi head cutting the calculation of distance per pulse of U V W is the same as Z axis Mark the position of laser head3 to calculate the distance per pulse of V axis Mark the p...

Page 42: ...users can enable or disable the hard limit parameters AWC708C PLUS supports range function so users do not need to install hard limit sensors just setting Range parameters on the relevant axis parameters page will be enough Set the distance per pulse of X Y Z U axis according to the content of the Chapter 3 5 Then move motion axis to the maximum distance towards positive direction You can set the ...

Page 43: ...wer Time Status Work Working parameters Idle Laser power Table4 1 Main Interface Introduce Name Instruction Top Bar Display the type of control card local date and time File Display the file name currently being processed Count Current counts cumulative counts Speed mm s Displays the default speed of this current file ...

Page 44: ...aterials Max Power3 Min Power3 Max Power4 Min Power4 Press Shift on the main page to switch 1 2 to 3 4 laser power Displays the Max Min power of laser 3 and 4 Max power means working power Min power means turning power During cutting process if the cutting lines is uneven different cutting depth the maximum and minimum power of laser head should be adjusted to ensure the best cutting effect If the...

Page 45: ...AWC708C PLUS Motion Control User Manual WWW SZTROCEN COM 44 process of the current file under working state PX PY Displays the X Y coordinate in the working state ...

Page 46: ...CEN COM 45 5 Main Page Function Introduction 5 1 File 5 1 1 Document Params Settings On the main page press Enter to make the file name highlighted as shown below Then press Enter to open Document Params Settings interface Figure5 1 1 Select File Name ...

Page 47: ...WWW SZTROCEN COM 46 Figure5 1 2 Document Params Settings Move the cursor to Document Property Settings press Enter Press to move cursor press number keys to modify parameters and press Enter to save settings Figure5 1 3 Set Document Property ...

Page 48: ...ent of the feeding axis X Count The number of graphics s processed by machine in the X direction Y Count The number of graphics s processed by machine in the Y direction X Size mm The size of graphics in X direction Y Size mm The size of graphics in Y direction 5 1 2 Layer Params Settings On the Document Params Settings page move cursor to Layer Params Settings and press Enter On the Layer Params ...

Page 49: ...st cutting effect If the maximum and minimum power is set too high the cutting material may be damaged If set too low may cause incomplete cutting Users could set appropriate maximum and minimum power values according to different cutting materials Figure5 1 4 Layer Params Setting Table5 1 2 Layer Params Setting Instruction Name Instruction Work Mode The mode of processing graphics Speed mm s The ...

Page 50: ... Max Power3 The max power of laser head3 working power Min Power3 The min power of laser head3 turning power Max Power4 The max power of laser head4 working power Min Power24 The min power of laser head4 turning power 5 2 Count On the main page press Enter then move cursor to Count Press Enter Move cursor to To Clear Current count and press Enter to clear the current counts Move cursor to To Clear...

Page 51: ...AWC708C PLUS Motion Control User Manual WWW SZTROCEN COM 50 Figure5 2 1 Clear Total Count Figure5 2 2 Clear Total Count ...

Page 52: ...rol User Manual WWW SZTROCEN COM 51 5 3 Working Property On the main page press Enter to make the cursor highlighted and move cursor to Speed Press Enter to open Set Laser Power While Idle page Figure5 3 1 Select Speed Option ...

Page 53: ...r keys to modify parameters and press Enter to save settings Fiugre5 3 2 Idle Laser Power Setting Page Table5 2 1 Idle Laser Power Instruction Name Instruction Key Move Speed The speed of axis when press direction keys on panel Max Power1 Laser power of Laser1 Max Power2 Laser power of Laser2 ...

Page 54: ...iles Insert a U disk into the U disk slot on the panel If your U disk has a light indicator shows connectivity and shows that it s connected press Menu to enter the main menu move the cursor to U Disk Files then press Enter to enter U disk files management Figure6 1 1 Main Menu Interface ...

Page 55: ...e system in advance Quick Format is forbidden Any other files formations are not supported 2 Recommend using a U disk with a light indicator to ensure if the U disk is connected successfully with the main board 3 When the U disk has never been able to read try using a different U disk 4 The U disk can t be used to install system ...

Page 56: ...face below Figure6 1 3 No U Disk Interface 6 1 1 Work Files Move the cursor to Work Files and press Enter On the panel the working file in the U disk will be presented The right side shows the working file previewing Press to move cursor and press Enter to copy the working file from U disk to main board storage ...

Page 57: ...he working file in the U disk is saved with a suffix of UD5 Files other than the UD5 file extension will not readable 6 1 2 Config Files Move cursor to Config File and press Enter Move cursor to the file which you need to copy to main board Then Press Enter to save current config file to mainboard ...

Page 58: ...anual WWW SZTROCEN COM 57 Figure6 1 5 Config Files List 6 1 3 Upgrade Files Move cursor to Upgrade Files and press Enter Move the cursor to the file you need press Enter then it will start the upgrading process Figure6 1 6 Upgrade Files ...

Page 59: ...he mainboard will reset automatically 6 1 4 Save Current Config to U Disk Move cursor to Save Current Config to U Disk and press Enter to save current mainboard config file to the U disk And the file will be named as Params CF5 in the U disk Figure6 1 7 Save Current Config to U Disk 6 2 Origin Manage On the main page press Menu and move cursor to Origin Manage press Enter You will see Origin Manag...

Page 60: ... current position of laser head as origin point Other origin points will be set like this The origin PX and The origin PX show the coordinates of current origin point Users can accurately determine the origin point according to the coordinate value The system supports up to 4 origin points Users can select any origin points for use by pressing Move head to the origin key This function is used for ...

Page 61: ...r to enter Jog Control page Then press Z Z to modify the distance Do not set too large Jog Distance please make sure it within the working range On the Jog Control page press number keys to modify the jog distance press Z Z to move cursor press to make motion axis jog The jog control can move axis accurately and adjust the distance per pulse of axis Please check the Chapter 3 5 to know more about ...

Page 62: ...r to Blank Distance and press number keys to modify parameters then move cursor to Start cutting box and press Enter to start cut box function When cutting box the laser head keeps a certain distance Blank Distance from the outside edge of the graphics s from the registration point and cuts a square which is used to determine the location of the origin point of the laser head and the actual size o...

Page 63: ...en the border of graphics s and the border of cutting 6 5 Axes Control On the main page press Menu and move cursor to Axes Control press Enter to enter Axes Control page Press to move cursor and press Enter to make axis reset The Z axis can be used as the lifting shaft platform lifting shaft and multi head shifting shaft When the Z axis is reset the Z axis will stop at the ...

Page 64: ...gre6 5 1 Axes Control Interface 6 6 Motion Parameters Settings On the main page press Menu and move cursor to Motion Parameters Settings press Enter to enter Motion Parameters Settings page Press to move cursor and press number keys to modify parameters press Enter to save settings ...

Page 65: ...6 6 1 Motion Parameters Instruction Name Instruction Space Speed mm s The movement speed of laser head when there is no laser output Cut Jerk mm s3 The variation of cutting acc increases or decreases in unit of 10 thousand each time Space Jerk mm s3 The variation of movement acc when there is no laser output and it increases or decreases in unit of 10 thousand each time Min Acc The acceleration of...

Page 66: ...tting acrylic or wood It also has an impact on smoothness when turning During cutting process if the actual cutting speed is far less than the working speed users have set it indicates that the Cut Jerk is set too small so that the laser head cannot reach the set working speed quickly If the actual cutting speed is relatively fast the cutting line will jitter this case indicates that the Cut Jerk ...

Page 67: ...ning the parameter is too small If the cutting line is too thin when turning and the graphics cannot be cut completely this case indicates that this parameter value is set too large users should set a smaller value The Engrave ACC is the change rate of speed during engraving This parameter is only valid during engraving During the engraving process if the space distance of laser head is too large ...

Page 68: ...e main page press Menu and move cursor to Common Parameters Settings press Enter Fiugre6 7 Common Parameters Settings Interface 6 7 1 Work Mode On the Common Params Settings page move cursor to Work Mode and press Enter Press to move cursor press to modify options and press Enter to save settings ...

Page 69: ...setting Disable the laser head will stay at the machine origin point zero point after reset Origin Mode Current Position keep the current position of laser head and set this position as origin point to start cutting Key Origin press panel Origin button after the laser head moved to the chosen position Soft Origin set the origin point when drawing a file on LaserCAD software Machine Zero As Origin ...

Page 70: ... cut Count per Light it will be counted as once after laser optical output one time Single of Array it will be counted as once after the solid graphics in the file is cut Feeding Mode Feed after all work feed once after all graphics in the file are cut Feed after array line feed once after cutting a line or column of graphics Feeding Delay Mode Delay after feeding the period between finishing cutt...

Page 71: ...r limit function as required Disable the function if the graphics beyond the working range the system prompts Beyond border limit Continue press Enter key to continue to cut part of the graphics beyond border limit will not be cut as shown in Figure 6 7 3 Press ESC to cancel operation Fiugre6 7 2 Beyond Border Limit ...

Page 72: ...AWC708C PLUS Motion Control User Manual WWW SZTROCEN COM 71 Fiugre6 7 3 Part of the Cutting Panel Fiugre6 7 4 Part of the Cutting LaserCAD ...

Page 73: ...ue to cut part of the graphics beyond border limit will not be cut as shown in Figure 6 7 3 6 7 4 Press ESC to cancel operation As shown in Figure 6 7 5 the green graphics is beyond the current working range If enable the function Auto Origin Beyond border limit the machine will automatically move to the position of the red graphics for cutting If the graphics is still beyond the border after re p...

Page 74: ...ss Enter Press to move cursor and press number keys to modify parameters press Enter to save settings The Z AutoFocus function is mainly used to control the distance between the laser head and the work table If the Z axis is used as the lifting shaft or platform lifting shaft users can turn on the Z AutoFocus function on the Function Config page Manufacturer Params Settings Function ...

Page 75: ...ble6 7 2 Common Parameters Instruction Name Instruction Auto Focus Distance mm The distance between the laser head and working platform Key Move Speed mm s The motion speed of axis when press the direction keys on panel Run Box Speed mm s The speed at which the laser head runs along the outer frame of graphics without laser output Cut Box Speed The speed at which the laser head cuts along the oute...

Page 76: ...ing started Blow Close Delay s The period between laser head optical output stopped and air blowing stopped 6 7 3 Axis Speed Parameters On the Common Params Settings page move cursor to Axis Speed Parameters and press Enter Press to move cursor and press number keys to modify parameters press Enter to save settings Fiugre6 7 7 Axis Speed Parameters Interface ...

Page 77: ... Z axis U Work Speed mm s The work speed of U axis V Work Speed mm s The work speed of V axis W Work Speed mm s The work speed of W axis XY Home Speed mm s The reset speed of XY axis Z Home Speed mm s The reset speed of Z axis U Home Speed mm s The reset speed of U axis V Home Speed mm s The reset speed of V axis W Home Speed mm s The reset speed of W axis ...

Page 78: ...ress to modify options and press number keys to modify parameters press Enter to save settings Fiugre6 7 8 Rotate Engraving Cutting Interface Table6 7 4 Rotate Engraving Cutting Instruction Name Instruction Rotary Enable or Disable rotary engraving function Rotary Axis The axis which rotary engraving uses Pulse Count Per Rotate The pulse parameters for the motor to make the rotary axis rotate one ...

Page 79: ... will change and the machine cannot cut the graphics normally After turning off the function reset the machine again users do not need to set axis parameters like distance per pulse the machine can work normally Fiugre6 7 9 Enable Rotate Engraving Cutting Function Rotate engraving includes fixture type and roller type as shown in Figure 6 7 10 6 7 11 The fixture rotate engraving cutting only needs...

Page 80: ...noneffective Take X axis as rotary axis as example 1 Wrap a layer of paper around the roller 2 In the computer software LaserCAD draw A straight line section with fixed length as A less than the current cutting object girth 3 Press Start Pause key to cut the line on the paper 4 Take the same length of the cut trace along the roller with one wool or other convenient object and measure the length of...

Page 81: ... press Enter key to enter the To Calculate the Pulse Distance interface fill A into the Expected Length option fill B into the Actual Length option and click Enter key to calculate the distance per pulse of X axis rotary axis Figure6 7 11 Roller Rotate Engraving Cutting ...

Page 82: ... and press Enter Press to move cursor press to modify options and press Enter to save settings Figure6 7 12 CCD Config Table6 7 5 CCD Config Instruction Name Instruction CCD Fun The switch of CCD function Connect Type Set USB or network connection type Data Error Check Check if the Mark points in the file loaded are the same with camera ...

Page 83: ... connecting the main board and PC terminal through network cable the computer IP should be modified to make the computer IP address and IP address of the main board in the same network segment For example the computer IP address can be set to 192 168 8 28 Based on the Windows7 system users can modify the native IP address in the following ways First open the Control Panel select Network and Intern...

Page 84: ...User Manual WWW SZTROCEN COM 83 TCP IPv4 option to open the IP address modification interface Finally input the corresponding IP address click OK button to save other parameters do not need to fill in Fiugre6 8 2 Modify IP Address ...

Page 85: ...ngs AWC708C PLUS now supports nine kinds of languages Simplified Chinese Traditional Chinese English Portuguese Turkish Russian French Korea and Arabic Fiugre6 9 1 Language Interface 6 10 System Version On the main page press Menu and move cursor to System Version press Enter to see the system information If the encryption or decryption of the mainboard is successful the product ID will change ...

Page 86: ... authorization code and press Enter Press to move cursor press number keys to modify parameters and press Enter to save settings The user authorization code is used for encryption or decryption If you don t need encryption there is no need to modify it If you need encryption please see the detail in encryption manual ...

Page 87: ...AWC708C PLUS Motion Control User Manual WWW SZTROCEN COM 86 Fiugre6 10 2 User Authorization Code Interface ...

Page 88: ...gs On the main page press Stop Shift together you will see Manufacture Params Settings page Figure7 1 Manufacture Params Interface 7 1 Axis Parameters Move cursor to Axis Parameters and press Enter Take the X axis parameter setting as an example other axis parameter settings are the same ...

Page 89: ...Axis Parameters Interface On the X Axis Parameters page press to move cursor press to modify options press number keys to modify parameters and press Enter to save settings Figure7 1 2 X Axis Parameters Interface Move cursor to Distance Per Pulse press Enter to enter the To ...

Page 90: ... Distance Per Pulse Table7 1 X Axis Parameters Instruction Name Instruction Distance Per Pulse um The single distance or angle which the motor moves when the controller sends a pulse signal If set incorrectly the graphics will change Valid Pulse Edge Effective values for driver level to change Falling Edge or Rising Edge Datum Direction The direction in which the machine moves when reset If set in...

Page 91: ... axis when the axis increases or decreases speed Max Speed mm s The maximum speed which the motion axis supports Zero Offset mm The zero point of machine will move a zero offset distance along X direction In some special cases the machine s origin point cannot be cut AWC708C PLUS supports the Zero Offset function which can move the zero point of machine to other positions along the positive direct...

Page 92: ...Laser Parameters Instruction Name Instruction Laser Mode Laser tube type CO2 Glass Tube RF tube TTL Valid Level The control level of laser tube PWM Frequency Hz Set the pulse frequency of control signal used by laser Max Power The maximum power of laser tube The maximum power value set by user can t be higher than this value and the laser power is displayed as a percentage RF Min Power Turning pow...

Page 93: ...ng Laser3 Water Protect Water protection switch If enable this function the machine will stop working when the machine detects the signal of water stopping Laser4 Water Protect Water protection switch If enable this function the machine will stop working when the machine detects the signal of water stopping 7 3 I O Parameters On the Manufacture Params Settings page move cursor to IO Parameters and...

Page 94: ...he foot switch function Open Protection Enable or disable the open protection function Feed Switch Enable or disable the feed function Input Valid Level Set input IO to low level or high level 7 4 Auto Reset Settings On the Manufacture Params Settings page move cursor to Auto Reset Settings and press Enter Press to move cursor press to modify options and press Enter to save settings ...

Page 95: ...struction XY Auto Reset If enable this function when power on or reset the machine the XY axis will reset to origin point Z Auto Reset If enable this function when power on or reset the machine the Z axis will reset to origin point U Auto Reset If enable this function when power on or reset the machine the U axis will reset to origin point V Auto Reset If enable this function when power on or rese...

Page 96: ...7 5 HardLimit Settings On the Manufacture Params Settings page move cursor to HardLimit Settings and press Enter Press to move cursor press to modify options and press Enter to save settings AWC708C PLUS supports working range limit users do not need to install hard limiter in general just set the Range on the axis parameters page Figure7 5 1 HardLimit Setting Interface ...

Page 97: ... Z axis If use HardLimit enable the function here U HardLimit HardLimit switch of U axis If use HardLimit enable the function here V HardLimit HardLimit switch of V axis If use HardLimit enable the function here W HardLimit HardLimit switch of W axis If use HardLimit enable the function here 7 6 MultiHead Settings On the Manufacture Params Settings page move cursor to MultiHead Settings and press ...

Page 98: ...1MultiHead Instruction Name Instruction Head Count Set the head count 1 or 2 or 3 or 4 for AWC708C PLUS TwoHead Type Single belt or double belt Nearer Laser for LeftOver Enable or disable the function ZX Head Space mm The distance between Z and X axis VZ Head Space mm The distance between V and Z axis ...

Page 99: ...tting effect of the laser head becomes worse while the cutting effect of the other laser head is not affected When the Laser head1 and Laser head2 cutting together if enable the Nearer Laser for LeftOver function cutting to the edge of the graphics where the main laser head can t cut the Laser head2 will continue cutting automatically If disable the function when cutting to the position where the ...

Page 100: ...AWC708C PLUS Motion Control User Manual WWW SZTROCEN COM 99 Figure7 6 2 Common Cutting Figure7 6 3 Mutual Movable Double Laser Head Cutting ...

Page 101: ...ers page and set the distance per pulse of Z axis Please refer to the Chapter 3 5 to know more about the calculation 4 When multi head cutting the graphics in LaserCAD are dashed If the graphics are solid lines the Laser head1 main laser head will cut all the file and the Laser head2 won t cut If the number of graphics in single lines is odd the system defaults to cutting even numbers of graphics ...

Page 102: ...AWC708C PLUS Motion Control User Manual WWW SZTROCEN COM 101 Figure7 6 4 The Odd Number of Graphics Figure7 6 5 The Even Number of Graphics ...

Page 103: ...save settings Figure7 7 1 Function Config Interface Table7 7 1 Function Config Instruction Name Instruction Z Axis for Autofocus The switch of Z axis Autofocus If you need Z AutoFocus function you need to enable this option This parameter is mainly to control the distance between laser head and working platform U Axis For Feeding Enable or disable the function Enable this function U axis will work...

Page 104: ...e laser head cuts once If enable Y Axis Work For Roller function Feed Switch U Axis For Feeding functions shall be enabled and parameters such as Feed Distance Feeding Mode Feeding Delay Mode shall be set as required Please refer to the Chapter 3 5 for more details about the calculation of distance per pulse of U axis In order to avoid deformation or position change of cutting material caused by u...

Page 105: ...ware If the time changes to 0 0 0 it means the battery in the panel has run out of power and can t set password for control card The clock doesn t support power off relay function 2 When the file name is in Chinese it can only show 4 Chinese characters at most and they are in common Chinese character library A file name can display up to 8 characters when it uses number or English characters ...

Page 106: ...g Diagram of Servo Driver 1 Panasonic A5 High Speed Pulse Wiring Diagram Figure 1 1 Panasonic A5 High Speed Pulse Wiring Diagram PIN 44 45 46 47 Signal PULSH1 PULSH2 SIGNH1 SIGNH2 Signal DIR PUL DC 5V PIN 3 2 1 AWC708C PLUS Servo Control Interface Panasonic MINAS A 50P Interface ...

Page 107: ...terface AWC708C PLUS Servo Control Interface Table1 1 Panasonic A5 Series Basic Setting Parameters Mode Value Instruction Pr001 0 Control mode must be set to position mode Pr007 3 Must be Pulse Direction mode Pr005 1 High speed pulse connection mode the parameter is set to 1 and the maximum pulse frequency is 3Mpps Low speed pulse connection mode the parameter is set to 0 and the maximum pulse fre...

Page 108: ...rface AWC708C PLUS Servo Control Interface Table2 1 Yaskawa Σ Series Basic Setting Parameters Mode Value Instruction Pn000 001X Position mode Pn00B None When single phase power input the parameter is set to 0100 Pn200 2000H Positive logic Pulse Direction 0005H negative logic Pulse Direction When the pulse frequency is less than 1Mpps please select 0000H When the pulse frequency reaches 1Mpps 4Mpps...

Page 109: ...driven Pn50B 6548 Negative rolling side can be driven 3 Delta A Series High Speed Pulse Wiring Diagram Figure 3 1 Delta A Series High Speed Pulse Wiring Diagram PIN 38 29 46 40 Signal HPULSE HPULSE HSIGN HSIGN Signal DIR PUL DC 5V PIN 3 2 1 Delta ASD A 50P Interface AWC708C PLUS Servo Control Interface ...

Page 110: ...Delta ASD A Series Basic Setting Parameters Mode Value Instruction P1 00 1102H Position control mode negative logic Pulse Direction Set the parameter to 1102H to open the high speed differential signal and the maximum pulse frequency is 4Mpps Set the parameter to 0102H low speed pulse signal and the maximum pulse frequency is 500K P1 01 00 Select the location mode controlled by the external instru...

Page 111: ...rm function the logic is normally closed 4 Sanyo R Series Wiring Diagram Figure 4 1 Sanyo R Series Wiring Diagram Signal 28 29 26 27 PIN R PC R PC F PC F PC Signal DIR PUL DC 5V PIN 3 2 1 Sanyo R Series 50P Interface AWC708C PLUS Servo Control Interface Table4 1 Sanyo R Series Basic Settings Parameters Mode Value Instruction SY08 00 Position mode Gr8 11 02 Pulse signal mode Pulse Direction ...

Page 112: ...driven Gr9 01 00 Negative rolling side can be driven 5 Schneider 23A High Speed Pulse Wiring Diagram Figure 5 1 Schneider 23A High Speed Pulse Wiring Diagram PIN 38 29 46 40 Signal HPULSE HPULSE HSIGN HSIGN Signal DIR PUL DC 5V PIN 3 2 1 Schneider 23A 50P Interface AWC708C PLUS Servo Control Interface ...

Page 113: ...e5 1 Schneider Lexium 23D Series Basic Settings Parameters Mode Value Instruction P1 00 1102H Position control mode negative logic Pulse Direction Set the parameter to 1102H to open the high speed differential signal and the maximum pulse frequency is 4Mpps Set the parameter to 0102H low speed pulse signal and the maximum pulse frequency is 500K P1 01 X00 Select the location mode controlled by the...

Page 114: ...ing Diagram Figure 6 1 Fuji A5 Series Wiring Diagram PIN 7 8 20 21 Signal CA CA CB CB Signal DIR PUL DC 5V PIN 3 2 1 Fuji A5 26P Interface AWC708C PLUS Servo Control Interface Table6 1 Fuji ALPHA 5 Series Basic Setting Parameters Mode Value Instruction PA 101 0 Position control mode PA 103 0 Pulse Direction the maximum pulse frequency is 1Mpps ...

Page 115: ...s Wiring Diagram PIN 10 11 35 36 Signal PP PG NP NG Signal DIR PUL DC 5V PIN 3 2 1 Mitsu MR J3 A 50P Interface AWC708C PLUS Servo Control Interface Figure 7 2 Mitsu E Series Wiring Diagram PIN 23 22 25 24 Signal PP PG NP NG Signal DIR PUL DC 5V PIN 3 2 1 Mitsu MR E A 26P Interface AWC708C PLUS Servo Control Interface ...

Page 116: ...al WWW SZTROCEN COM 115 Table7 1 Mitsu MR J3 A Series Basic Setting Parameters Mode Value Instruction PA01 0 Control mode Position mode PA13 0011 Negative logic Pulse Direction Notice The maximum pulse frequency of Mitsu J3 Series is 1Mpps ...

Reviews: