


-
-
XM420-V1.2-C
14
——
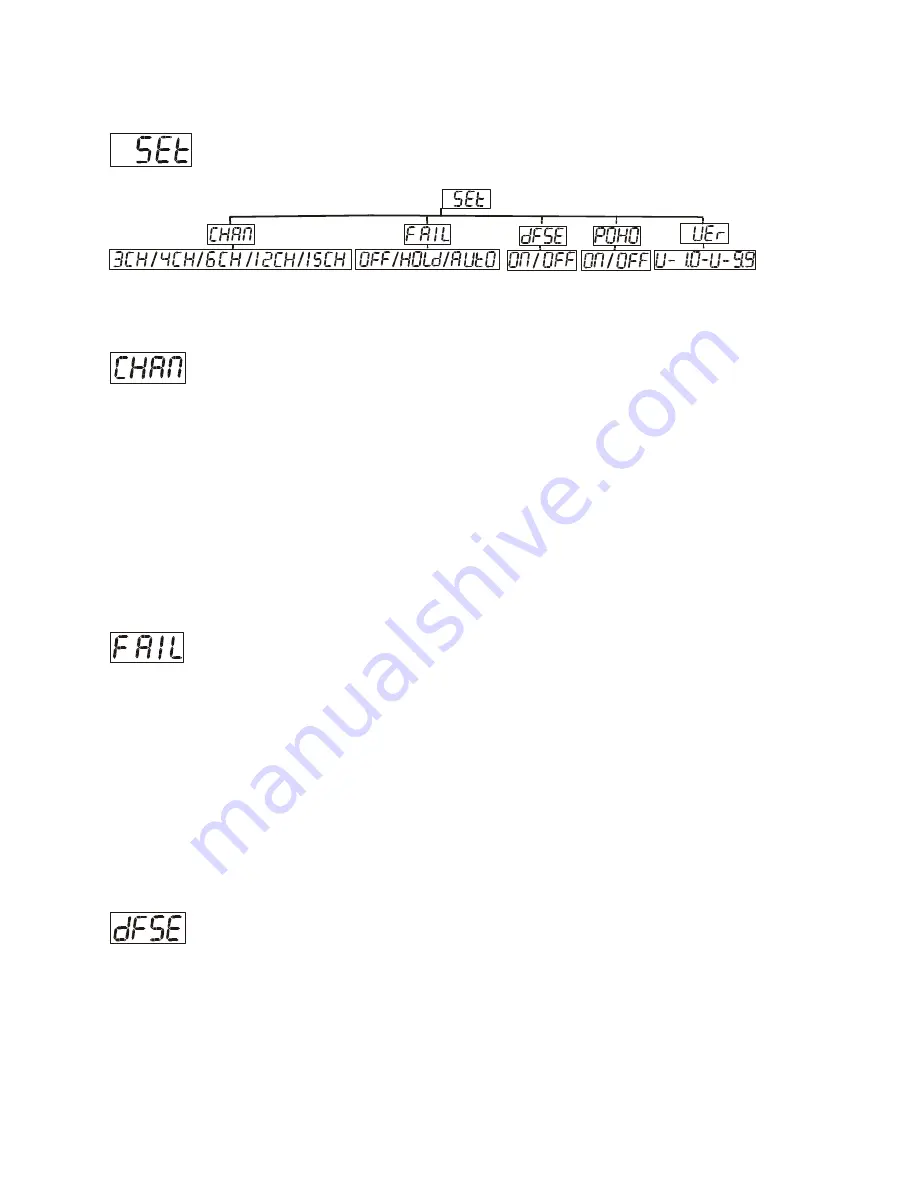
Main menu
1. Press
[MENU]
to enter the main menu (display flashing).
2. Press
[UP]
or
[DOWN]
button. to select
“SET”
.
——
“CHAN”
DMX channel MODE
With this function you can choose DMX channel Mode
1. Select “CHAN” by pressing
[UP]
or
[DOWN]
button.
2. Press
[ENTER]
, the display shows“
“3CH”
,
“4CH”
,
“6CH”
,
“12CH”
,
“15CH”
.
3. Press
[UP]
or
[DOWN]
button to select“3CH”
,
“4CH”
,
“6CH”
,
“12CH”
,
“15CH”,
the default is “3CH”.
4. Press
[ENTER
] to confirm or Press
[MENU]
to return to the main menu.
-Automatic Run by no DMX
With this function you can automatic run the device by no DMX.
1. Select “FAIL” by pressing
[UP]
or
[DOWN]
button.
2. Press
[ENTER]
, the display shows “OFF”, “HOLD” or “AUTO”.
3. Press
[UP]
or
[DOWN]
button to select “OFF”, “HOLD” or “AUTO”, the default is
“HOLD”.
4. Press
[ENTER
] to confirm or Press
[MENU]
to return to the main menu.
- Restore factory settings
With this function you can restore the factory settings of the device. All settings will be
set back to the default values (shaded). Any edited scenes will be lost.
1. Select
“DFSE”
by pressing
[UP]
or
[DOWN]
button.