


8
.
o
peratIon
s
tand
a
lone
o
Peration
:
Set the DIP 10 at ON, DIP 1 at OFF, connect to the power, adjusting the 2 button of the brightness and
speed to the suitable position.
c
ontroller
oPeration
:
Connect the signal cable according to the chart 1, set the DIP 10 and DIP 1 at the ON position in the
same time. Connect to the power, adjusting the brightness of the light, then, you can use the controller
adjust the flash speed of the light. Various strobe connect in a line up to a synchronous effect.
dMX
controller
oPeration
Connect the signal cable according to the chart 2 set the DIP 1 at ON,set the DIP 10 at OFF, set the IP
code, connect to the power, then, use the controller adjust the flash speed and brightness of the light.
Various strobe connect in a line up to a synchronous effect.
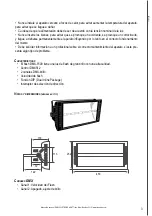
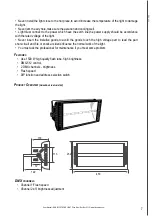
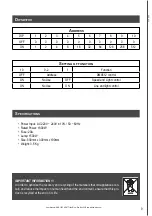
1. c
onnection
oF
dMX 512
Controller have output DMX512 signal standard. Connection via the “input” and “output”—3XLR connec-
tor finish.Control signal cable must connect to the corresponding 3 pin XLR connector when outputting,1
earth, 2(-), 3(+). Or exchange solder 2 and 3. The length of the signal, cable should within 100m, prevent
the interference of other appliance because of the over long signal cable.
2. s
etting
oF
the
iP
code
This light must controller by DMX512 all the light of this model must be set a digital start IP code, easy
for corresponding light and corresponding control signal have funetion. This digital start address is the
frequency phase code, the start of the light is obey to the digital control signal which sent by the console.
This light have 2 digital control frequency phase at present.The address range is 1~512.
out
out
out
out
out
out
in
in
in
in
in
in
line
line
line
line
line
line
english
User Manual | DMX-1500 LIGHT Triton Blue | Rev. Nov.2015 | www.triton-blue.com
Chart 1:
Chart 2: