


5
Initial Setup
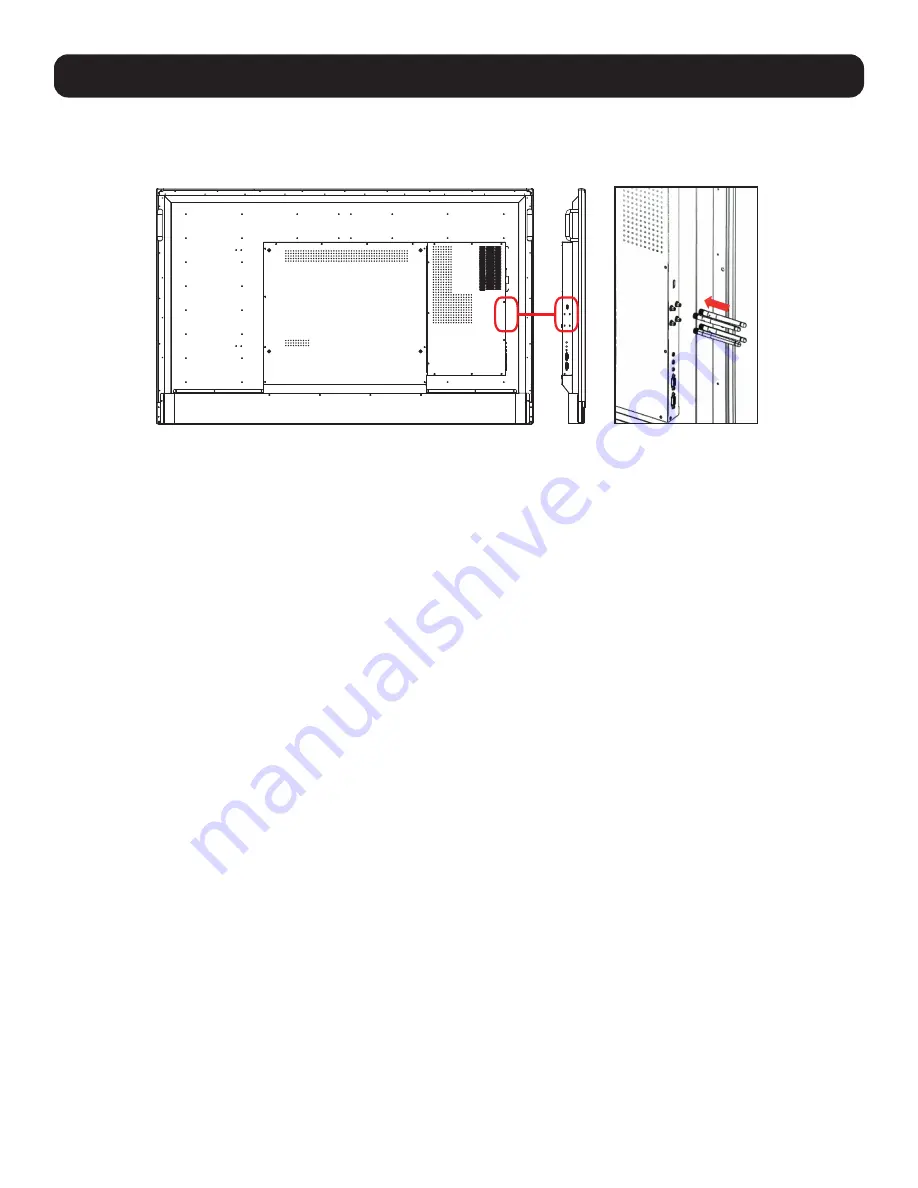
Wi-Fi Antenna Connection
After mounting the unit securely to the included mobile stand or a wall mount, connect the included Wi-Fi antennas to the
rear of the unit.
Camera Connection
Clip the included HD webcam to the top of the display. You can reposition it as needed. Using the included USB cable,
connect the webcam to the camera input at the rear of the unit.
Remote Control Setup
Insert the included AAA batteries into the included remote control. Follow the polarity (+/-) indicated in the battery
compartment.
Power Connection
Connect one end of the included AC input power cord to the unit’s C14 inlet. Connect the plug to a grounded 120V AC
outlet on the included battery system. If you are not using the battery system, connect the plug directly to a properly
grounded 120V 15A AC wall outlet. The master on/off switch next to the C14 inlet must be in the “on” position for the unit
to function. Set the master on/off switch to the “off” position if the unit will be idle for more than a few days.
Initial Display (Android) Startup
Press the power button on the front of the unit or the remote control. After a brief startup sequence, the unit will be ready to
use. Select “menu” and enter the wireless network settings for your location. If you are unsure how to do this, contact your IT
department for the correct network settings.
Refer to the Owner’s Manual for more information.


