

HDCM
4
High definition 1080P LED screen
4
Connections on top for easy access
4
Built-in rechargeable battery plus A/C adapter provided
4
Ruggedized for field use
4
Two-click Input selection
4
Remote Control
4
Separate Master Power Switch lets you turn the screen on and off using the remote
4
Custom carrying case
4
Includes stand
FEATURES
QUICK START GUIDE
Ultra-Compact
Rugged HD Monitor
Screen Cleaning & General Care
Do not use solvents when cleaning the screen as they may cause damage; clean with a soft
cloth. Do not expose the Monitor to wet/damp/humid, dusty, or excessively hot or cold environ-
ments., or leave it in direct sunlight. Make sure all connections are free of dirt and debris at all
times. Do not block vents. Only use the supplied power supply. Turn power off when not in use.
Master Power Switch
(on side)
Turn this switch off when not in use. Leave it on if you want
to be able to use the remote to turn on the screen.
UM-HDCM, REV 03/2017
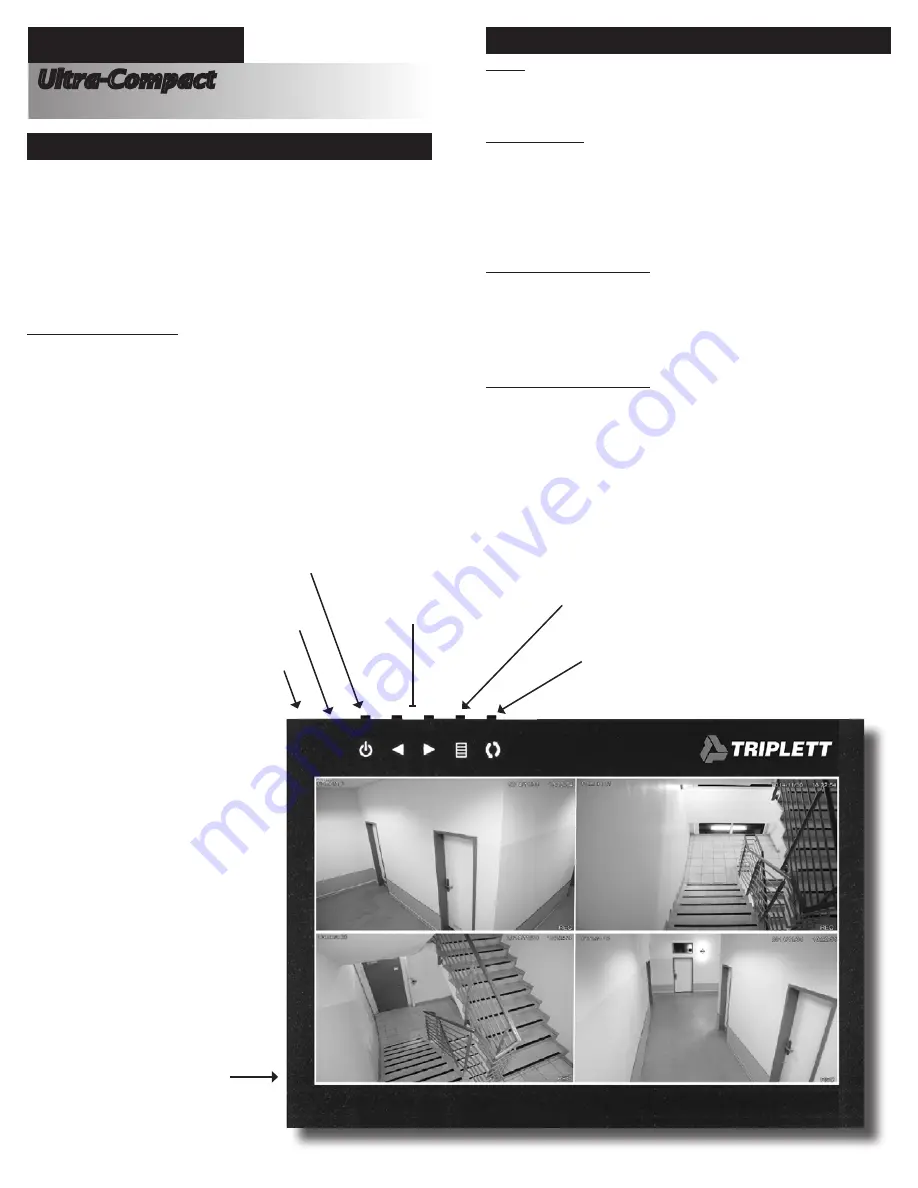
Screen On/Standby Button
(Master Power Switch must be ON first)
Volume Controls &
Left/Right Menu Selectors
Screen Controls Menu
(to adjust brightness, etc.)
Purpose
This is a multi-purpose ruggedized HD LED monitor. It can be used for temporary or perma-
nent connection to any NVR, DVR, Cable/Satelllite box, computer, or other video source that
has an HDMI, AV, VGA, or BNC connection.*
How to display video
Connect your video source to the appropriate connection on the top of the unit. Then, turn
the Master Power Switch (on the lower left side of the unit) to the ON position. The unit will
automatically turn the screen on and attempt to show video. If you receive a “No Signal”
message on the screen, press the Input Selector button on the top to access that menu,
then press it again to scroll through the AV, BNC, HDMI, and VGA options. Once you have
highlighted the option you want to use, press one of the Arrow buttons to select it. Your video
should now display.
Adjusting brightness, contrast, etc.
Press the Screen Controls Menu button to access the menu. There will be four primary icons
on the top row—a Color Wheel icon, a Speaker icon, a Screen Shift icon, and an Advanced
Settings icon (the one with the clock). Use the Left and Right Arrow buttons to highlight/
select one of the menus. Then use the Input Selector button to scroll down the list of Settings.
When you have highlighted the setting you want to adjust, use the Arrow buttons to make the
change. Once you have made the change, select the Screen Controls button again to save it.
IMPORTANT NOTE ABOUT POWER
There is a built-in rechargeable battery. However, leaving the Master Power Switch in the ON
position will drain the battery if you do not have the unit connected to AC power, so be sure to
turn off the Master Power Switch during transport or when the HDCM is not in use. Always use
the AC power adapter if you set up the HDCM in a permanent location.
* The HDCM
will not work directly connected to HD Analog Cameras or anything that uses
proprietary encoding.
Input Selector
(to choose HDMI, VGA, etc.)
Blue Light will illuminate when screen is ON
(
Does not indicate if Power is on!)
Infrared interface for Remote Control
Test Equipment Depot - 800.517.8431 - 99 Washington Street Melrose, MA 02176 - TestEquipmentDepot.com


