background image

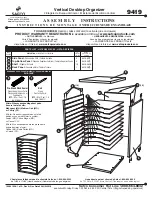
ASSEMBLY INSTRUCTIONS

F

J

K

F

F (4)

J (8)

K (4)

STEP 1

STEP 2

H (4)

A (1)

A (1)

Screw each LEVELER (K) into the bottom of 
each BOTTOM POLE (F). Turn clock-wise to 
screw in place. 
Starting from the bottom of the BOTTOM 
POLE (F), attach two pieces of black plastic 
SLIP SLEEVES (J) on either side of the pole 
in the desired groove. Slide the plastic SLIP 
SLEEVES (J) down until they click into 
position. Repeat for the other three poles. 

Tip: Use the grooves on the pole as a guide 
to ensure a level shelf height.

A

F

J

K

With the SMALL SHELF (A) on its side, slide 
each of the BOTTOM POLES (F) through the 
shelf collars. 

Stand the unit upright and push down on 
the SMALL SHELF (A). Using a rubber mallet 
to lightly hammer the SMALL SHELF (A) 
down over the collars is helpful but not 
necessary. 

Note: For stability, the lowest SMALL SHELF 
(A) should be installed 

no higher

than the 

3rd indentation from the bottom of the 
BOTTOM POLES (F).

F

F

F

© 2021 TRINITY - 800.985.5506

2

Summary of Contents for TBFZ-2701

Page 1: ...rtante DOWNLOAD THE FREE APP T L CHARGER L APPLICATION GRATUITE DESCARGUE LA APLICACI N GRATUITA Directives intelligentes Instrucciones Inteligentes FOR QUICK EASY 3D ASSEMBLY INSTRUCTIONS POUR DES DI...

Page 2: ...506 or customerservice trinityii com Parts can also be requested online via Contact Us section at www trinityii com You will NOT need additional tools for assembly PARTS LIST SMALL SHELF 8 A TOP SHELF...

Page 3: ...into position Repeat for the other three poles Tip Use the grooves on the pole as a guide to ensure a level shelf height A F J K With the SMALL SHELF A on its side slide each of the BOTTOM POLES F thr...

Page 4: ...oles in the desired grooves slide the 2nd SMALL SHELF A from the top of the BOTTOM POLES F onto the pairs of black plastic SLIP SLEEVES J Screw the CONNECTORS L into the top of the BOTTOM POLES F conn...

Page 5: ...ur TOP POLES D and the four MIDDLE POLES E with the CONNECTORS L Repeat STEP 3 for assembly of the 4th SMALL SHELF A A Repeat STEP 3 for assembly of the TOP SHELF B The first tower is ready Repeat STE...

Page 6: ...t closet widths ranging from 56 to 78 Please place towers in position before expanding the HANGING ROD G and attach to HANGING BRACKET H with HANGING SCREW I Place CLOSET ORGANIZER by the wall drill 1...

Page 7: ...3 ZSV 01 013 2523 Pole Connector 10 XBK 01 024 0627 Hanging Screw 4 PBR 04 007 2800 Middle Pole 11 PBR 02 010 0001 Hanging Bracket 5 PBR 03 007 1414 Small Shelf 12 PBR 03 024 1428 Top Shelf 6 PBR 04 0...

Page 8: ...ion 1 XBK 01 011 2543 Slip Sleeve 8 ONA 20 003 1313 Bamboo Board 2 ZSV 04 006 2750 Top Pole 9 ZSV 13 008 2700 Hanging Rod 3 ZSV 01 013 2523 Pole Connector 10 XBK 01 024 0627 Hanging Screw 4 ZSV 04 007...

Reviews: