background image


WIRING UP AND Select the Stereo/Mono Mode 


1. Disconnect the Power Amp from the power source. Never disconnect any wires unless the device is switched off. 

2. Connect the Power Amp MONO input to the audio source for Mono-bridge mode. 

3. Connect the Power Amp Left & Right inputs to the audio sources for stereo mode. 

4. To select the Stereo Mode, press the selection push button on the back of the amp. 

5. Connect the Power Amp to the loudspeakers. Choose the red and white connectors for the stereo mode and use 
the two red connectors for the Mono-bridge mode.


Summary of Contents for Power AMP

Page 1: ...Reference Power AMP MANUAL...

Page 2: ...voltage gain blocks which work in parallel to reduce the noise level and to increase the linearity close to the measurement limits The current output stage of the TRINITY Power Amp contains 168 output...

Page 3: ...Photo PA...

Page 4: ...afety Instructions 5 Scope of Supply 6 Transportation and Cleaning 6 Selecting the Power Voltage 7 Connecting and Starting 7 Wiring Up 8 Technical descriptions 9 THE FINAL MEASUREMENTS 20 Warranty 27...

Page 5: ...he product comes in contact with liquids immediately disconnect it from the power source 5 To exclude the risk of an electric shock please never expose the product to the rain or other source of liqui...

Page 6: ...the scope of supply in the supplied flight case and use the supplied cotton gloves when unpacking and installing the appliances to avoid scratching the enclosures Clean the surfaces using the supplied...

Page 7: ...G AND STARTING To install the TRINITY Power AMP select a stable level surface directly next to the turn table so that the connecting cable to the tone arm is as short as possible Avoid placing the app...

Page 8: ...mp MONO input to the audio source for Mono bridge mode 3 Connect the Power Amp Left Right inputs to the audio sources for stereo mode 4 To select the Stereo Mode press the selection push button on the...

Page 9: ...combination of amplifier and cable can only degrade the signal However as we must use an amplifier and a cable art and science are both employed in order to minimise the inevitable degradation Loudsp...

Page 10: ...cts only sound relevant parameters are the focus in our development The signal to noise ratio should be in the range that there is no noise or hum at full volume in any kind of loudspeakers including...

Page 11: ...transistors If we close the loop the open loop output impedance is reduced by the open loop gain to the closed loop output impedance This closed loop output impedance determines the damping factor wh...

Page 12: ...Figure 1 Simulated Closed Loop Output Impedance Damping Ratio for an 8Ohm loudspeaker...

Page 13: ...2 shows the arrangement of the output stage of a common audio amplifier high over all voltage gain a shunt Zobel network for stability into inductive loads a series output inductor damping resistor f...

Page 14: ...simplified design of the output stage of a TRINITY Power AMP low voltage gain of 2 in the current output stage no shunt Zobel network no series output inductor damping resistor no relay for DC offset...

Page 15: ...or in the data sheet What you see in the measurement results is what you get The measurements are done after a burn in of 48hours The most of the measurements are showing the worst case with the TRINI...

Page 16: ...FFT Voltage Gain Stage 1kHz 1Vrms Input Voltage all distortions are below 140dB...

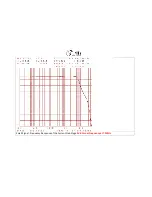
Page 17: ...FREQUENCY RESPONSE of the Complete Power Amp 25Vrms_No Load_8Ohm 4Ohm 2Ohm 0 5dB at 200kHz at full load caused by the extreme low output impedance all curves lay on the top of each other...

Page 18: ...Small Signal Frequency Response of the Current Gain Stage 3dB Corner Frequency at 7 5MHz...

Page 19: ...Small Signal Group Delay Response of the Current Gain Stage is 29 843ns...

Page 20: ...GAIN 25Vrms_No Load_8Ohm 4Ohm 2Ohm...

Page 21: ...Phase 25Vrms_No Load_8Ohm 4Ohm 2Ohm...

Page 22: ...THD vs Frequency 25Vrms_No Load_8Ohm 4Ohm 2Ohm all Harmonics up to 100kHz are counted In the worst case the THD are below 0 004 at 20kHz at full power into 2Ohms...

Page 23: ...THD Noise vs Frequency 25Vrms_No Load_8Ohm 4Ohm 2Ohm all Harmonics up to 100kHz are counted...

Page 24: ...THD vs Input Level 1kHz No Load_8Ohm 4Ohm 2Ohm...

Page 25: ...FFT 20Hz 100W into 8Ohm...

Page 26: ...FFT 20Hz 200W into 4Ohms...

Page 27: ...FFT 20Hz 300W into 2Ohms...

Page 28: ...FFT 1kHz 100W into 8Ohms...

Page 29: ...FFT 1kHz 200W into 4Ohms...

Page 30: ...FFT 1kHz 300W into 2Ohms...

Page 31: ...FFT 10kHz 100W into 8Ohms...

Page 32: ...FFT 10kHz 200W into 4Ohms...

Page 33: ...FFT 10kHz 300W into 2Ohms...

Page 34: ...FFT_IMD_SMPTE_4 1 into 8Ohms...

Page 35: ...FFT_IMD_SMPTE_4 1 into 4Ohms...

Page 36: ...FFT_IMD_SMPTE_4 1 into 2Ohms...

Page 37: ...ogress Any further claims in particular compensation damage of any nature are excluded The warranty period is not extended by any work performed during the warranty period neither for replaced nor rep...

Page 38: ...relating to installation operation or options we will be pleased to answer them TRINITY Electronic Design GmbH Johann Wieser Ring 11 8609 Aschheim Germany Tel 49 0 89 20186577 E mail db trinity ed de...

Reviews: