background image

BEFORE CLEANING THE COOKER, ALWAYS
ALLOW THE COOLING FAN TO COOL THE
COOKER DOWN BEFORE SWITCHING OFF THE
ELECTRICITY SUPPLY.

CLEANING MATERIALS

Before using any cleaning materials on your cooker,
check that they are suitable and that their use is
recommended by the manufacturer.

Cleaners that contain bleach should NOT be used as
they may dull the surface finishes. Harsh abrasives
should also be avoided. Multi-surface anti-bacterial
cleaning products should not be used on the ceramic
hob or on the surrounding trims.

Do not remove the control knobs from the
cooker as damage may occur.    
It is strongly recommended that only hot soapy water
and a soft cloth is used for cleaning the door handles
and control knobs. ANY OTHER CLEANING
MATERIALS MAY DULL THE SURFACE FINISH.
Care should be taken when cleaning, to ensure that
all cleaning products are wiped from the controls
knobs immediately.

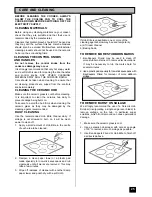
CLEANING THE CERAMIC HOB

Make sure the ceramic glass is cool before cleaning.
It is important to clean the ceramic hob daily to
prevent soilage being burnt on.

Take care to avoid the hob trims when cleaning the
ceramic glass as they may be damaged by the
cleaning agents recommended.

DAILY CLEANING

Use the recommended Hob Brite Cleaner daily. If
soilage is not allowed to burn on it will be much
easier to clean off.

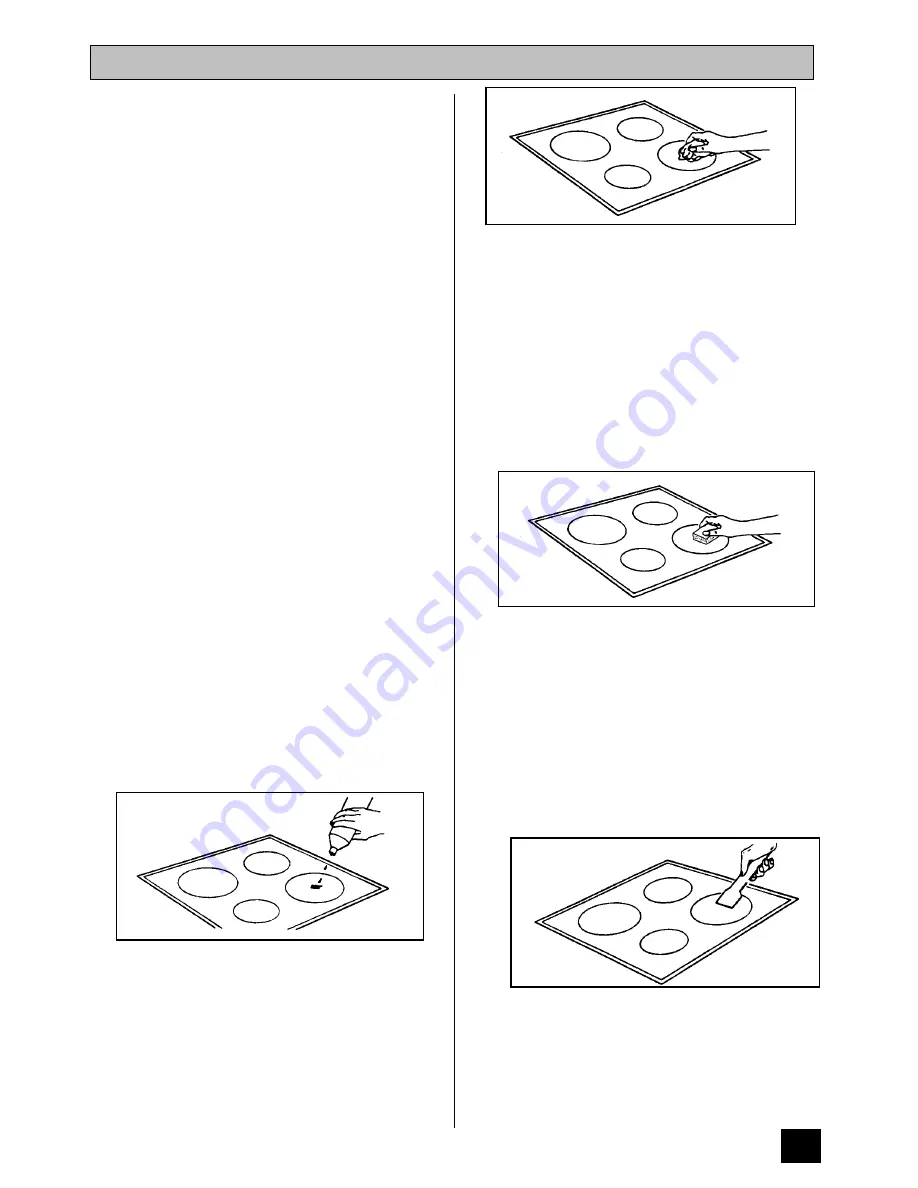
1. Apply a small amount of Hob Brite in the centre

of each area to be cleaned.

2. Dampen a clean paper towel or a plastic pad

made specially for non-stick saucepans and rub
vigorously until all marks are removed. This may
take a few minutes.

3. Wipe off residues of cleaner with another damp

paper towel and polish dry with a soft cloth.

If Hob Brite is unavailable, one or more of the 
cleaning agents below may be used temporarily:
a) Jif Cream Cleaner
b) Baking Soda

TO REMOVE MORE STUBBORN MARKS

1. Bar-Keepers Friend may be used to clean off

more stubborn stains or to remove discolourations.

It may be necessary to rub the marks hard for
several minutes.  

2. Use a plastic pad specially for non-stick saucepans with

Bar-Keepers Friend for removal of more stubborn
soilage.

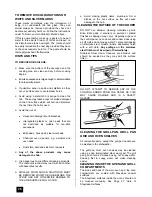
TO REMOVE BURNT ON SOILAGE

We strongly recommend the use of a Ceramic Hob
Scraper (incorporating a single edge razor blade) to
remove spillage on the hob, in particular sugar
solutions, which if not removed can cause permanent
damage. 

1. Make sure the ceramic glass is cool.

2. Use a ceramic hob scraper with care at an angle

of 30° to remove as much soilage as possible.

3. Use Bar-Keepers Friend or Hob Brite to finish off

as directed above.

25

CARE AND CLEANING

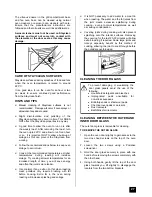
CLEANING THE CONTROL KNOBS
AND HANDLES

Summary of Contents for SIE515

Page 1: ...35 MODEL NO SIE515 OPERATING AND INSTALLATION INSTRUCTIONS ...

Page 2: ...ge 230 240 Volts AC 50Hz Wattage 10 0 10 9kW Height 900mm Width 600mm Depth 598mm This appliance complies with European Council Directive 73 23 EEC EMC Directive 89 336 EEC CE Marking Directive 93 68 EEC 2 TECHNICAL DETAILS ...

Page 3: ...Timer 12 The Ceramic Hob 14 Recommended Saucepans 14 Hints and Tips 14 Hot Hob Indicator 15 Deep Fat Frying 15 Preserving 15 The Grill 16 Uses of the Dual Grill 16 Selecting the Grill 16 Things to Note 16 The Grill Pan and Handle 16 Hints and Tips 17 Grilling Chart 17 The Top Oven 18 Uses of the Top Oven 18 Selecting the Top Oven 18 Things to Note 18 To Fit the Top Oven Shelf 18 Hints and Tips 19 ...

Page 4: ...Hob 25 Hints and Tips 26 Cleaning the Outside of the Cooker 26 Cleaning the Grill Pan Grill Pan Grid and Oven Shelves 26 Cleaning Inside the Oven and Grill Compartments 26 Care of Stayclean Surfaces 27 Hints and Tips 27 Cleaning between the Outer and Inner Door Glass 27 Replacing the Oven Light Bulb 28 Something Not Working 29 Service and Spare Parts 30 Customer Service Centres 31 Guarantee Condit...

Page 5: ...st from your new Tricity Bendix cooker we ask that you PLEASE READ THESE INSTRUCTIONS CAREFULLY Particular attention should be made to cooking times and temperatures which may differ from your previous cooker It is most important that this instruction book is retained with the cooker for future reference Should the cooker be sold or if you move house and leave the cooker always ensure that the boo...

Page 6: ...ntainers on ceramic glass After installation please dispose of the packaging with due regard to safety and the environment DURING OPERATION Do not use this cooker if it is in contact with water Never operate it with wet hands This cooker is designed to be operated by adults Young children must not be allowed to tamper with the cooker or play with the controls During use the cooker becomes Hot Care...

Page 7: ...n or on the cooker in case it is inadvertently switched ON Cookers and hobs become very hot and retain their heat for a long period of time after use Children should be kept well away from the cooker until it has cooled GENERAL Under no circumstances should repairs be carried out by inexperienced persons as this may cause injury or serious malfunction This cooker should be serviced by an authorise...

Page 8: ...ician competent person The electrical connection should be made using a double pole isolating switch cooker socket with at least 3mm contact separation The cable must have conductors of sufficiently high cross sectional area to prevent overheating and deterioration The recommended cross section area is six square millimetres 6 00mm The cable should be routed away from potentially hot areas marked ...

Page 9: ...f the hob See note at the top of this page For your safety wallcoverings at the rear of the cooker should be securely fixed to the wall The cooling fan operates immediately when the grill or top oven is switched on It may run on after the controls are switched off until the appliance has cooled If an automatic programme has been set the cooling fan does not switch on until the cooktime begins Note...

Page 10: ...dle 311468100 Note If you require an additional handle for your grill pan this can be ordered from your local Tricity Bendix Service Centre by quoting part number 311479800 6 1 grill pan grid 311419801 1 straight shelves for grilling and top oven cooking only 2 straight shelves for main oven cooking Scuffing of the Stayclean main oven lining by the oven furniture pack may occur during transit Thes...

Page 11: ...E 515 FEATURES A Timer B Main Oven Temperature Control C Main Oven Indicator Neon D Top Oven Temperature Control E Top Oven Indicator Neon F Selector Control G Hotplate Controls 11 C E G A B D F GETTING TO KNOW YOUR COOKER ...

Page 12: ...he setting knob clockwise until the display shows the time you want The bell symbol will be showing and this will stay lit up during the time Our diagram shows the timer set to 5 minutes If you change your mind and want to cancel the time you have set simply turn the setting knob anticlockwise Then turn the selector to Manual When you are using the minute minder you can make the clock show the tim...

Page 13: ...play 4 What time do you want the food to be cooked by Turn the selector knob to End Time Turn the setting knob until the time the oven is to switch off shows in the display The cookpot will go out The End Time must not be more than 23 hours 59 minutes from the time of day For example if the time of day is 9 00 am the latest End Time will be 8 59 am the next day 5 Set to automatic Turn the selector...

Page 14: ...with a stand Woks with flat bottomed bases are available and do comply with the above recommendations NOTE Occasionally the heated areas may be seen to switch ON and OFF when higher heat settings are being used This is due to a safety device which prevents the glass from overheating Some switching ON and OFF when cooking at high temperatures e g deep fat frying is quite normal causes no damage to ...

Page 15: ...ch food at once or the temperature of the oil will be reduced and may result in soggy greasy food Turn the food if necessary doughnuts float to the surface so will not brown on the upperside if not turned Once cooked drain the food on absorbent paper 5 Double frying chips Double frying will ensure good chips First fry the chips for a few minutes at 170 C 340 F to seal the outside Remove the chips ...

Page 16: ... time only the top oven will operate The inner grill element may appear to glow slightly brighter than the outer element This is quite normal THE GRILL PAN AND HANDLE The grill pan is supplied with a removable handle To attach the handle place the wirework under the cut out in the pan so that the metal plate hooks over the top of the grill pan Slide the handle to the left and over the central bump...

Page 17: ...l Preheat the grill on a full setting for a few minutes before sealing steaks or toasting Adjust the heat setting and the shelf as necessary during cooking l The food should be turned over during cooking as required l When using the centre section of the dual grill ensure food is positioned centrally on the grill pan grid in the grill pan NOTE If you require an additional handle for your grill pan...

Page 18: ...mperature is being maintained TO FIT THE TOP OVEN SHELF The shelf should be fitted with the straight rods uppermost on the frame and the forms towards the back of the oven If not fitted correctly the anti tilt and safety stop mechanism will be affected 18 USES OF THE TOP OVEN The top oven is the smaller of the two ovens It is heated by elements in the top and bottom of the oven It is designed for ...

Page 19: ...king cakes pastry scones bread etc place the tins or baking trays centrally on the shelf directly below the element l DO NOT place dishes or baking trays directly onto the oven base as it becomes very hot and damage may occur l The material and finish of the baking trays and dishes will affect the degree of base browning of the food Enamelware dark heavy or non stick utensils increase base brownin...

Page 20: ...element heats the air which circulates in the oven via the vents in the back panel The advantages of fan oven cooking are PREHEATING The fan oven quickly reaches its temperature so it is not usually necessary to preheat the oven Without preheating however you may find you need to add an extra 5 10 minutes on the recommended cooking times For recipes needing high temperatures e g bread pastries sco...

Page 21: ...ked in the same time l It is recommended that when baking larger quantities the shelf positions should be evenly spaced to suit the load being cooked A slight increase in cooking time may be necessary l DO NOT place dishes or baking trays directly on the oven base as it interferes with the oven air circulation and can lead to base burning use the lower shelf position However non critical dishes ma...

Page 22: ...than one is used 180 190 200 220 200 220 160 170 160 170 160 170 140 150 130 140 130 140 140 150 80 100 170 180 130 140 140 160 180 190 170 190 190 200 190 200 130 140 190 200 190 200 170 180 210 220 190 200 190 210 180 210 150 160 160 180 210 220 190 200 170 180 180 190 180 190 180 190 180 190 210 220 200 210 1 1 1 1 1 1 1 1 1 1 1 1 1 1 1 1 1 1 1 1 1 1 1 1 1 1 1 1 1 1 1 1 1 1 1 1 1 1 170 190 200 ...

Page 23: ... kg 7lb then 10 min per kg 1lb over 3 kg 7lb Duck 160 180 C 25 35 min per kg 1lb and 25 30 min over Pheasant 160 180 C 35 40 min per kg 1lb and 35 40 min over Rabbit 160 180 C 20 min per kg 1lb and 20 min over Potatoes with meat 160 180 C according to size Potatoes without meat 180 190 C according to size The roasting temperatures and times given in the chart should be adequate for most joints but...

Page 24: ... rules of food hygiene to prevent bacterial and microbial growth and cross contamination when defrosting cooking cooling and freezing foods Small or thin fish fillets frozen peeled prawns cubed or minced meat liver thin chops steaks etc can be thawed in 1 2 hours A 1kg 2 lb oven ready chicken will be thawed in approximately 5 hours Remove the giblets as soon as possible during the thawing process ...

Page 25: ...ANING Use the recommended Hob Brite Cleaner daily If soilage is not allowed to burn on it will be much easier to clean off 1 Apply a small amount of Hob Brite in the centre of each area to be cleaned 2 Dampen a clean paper towel or a plastic pad made specially for non stick saucepans and rub vigorously until all marks are removed This may take a few minutes 3 Wipe off residues of cleaner with anot...

Page 26: ...angerous to mix different cleaning products The chemicals in them may react with each other with hazardous results l SOILAGE FROM SUGAR SOLUTIONS MUST BE REMOVED FROM THE HOB BEFORE THE SYRUP HAS SET OTHERWISE DAMAGE TO THE HOB SURFACE WILL OCCUR l Avoid placing plastic items aluminium foil or dishes on the hot surface as this will cause damage to the hob DO NOT use abrasive cleaning materials eg ...

Page 27: ...you will save energy and often the joint is more tender l Use minimal if any extra oil or fat when roasting meat potatoes only require brushing with fat before cooking Extra fat in the oven during roasting will increase splashing and soilage l It is NOT necessary to add water to a meat tin when roasting The water and the fat juices from the joint create excessive splattering during cooking even at...

Page 28: ...use abrasive cleaning materials on the door glass Ensure that all parts are well rinsed and thoroughly dried before attempting to replace the glass REPLACING THE OVEN LIGHT BULB The type of bulb required is a 300C 25 watt small Edison Screw Part number 572 491 5431 00 1 Available through Tricity Bendix service centres CAUTION Disconnect the appliance from the electricity supply before replacing th...

Page 29: ...igh or low Check that the recommended temperatures are being used see page 22 Be prepared to adjust up or down by 10 C to achieve the results you want The hotplates and ovens work but the grill does not Check that you have carefully followed the instructions for operation of the grill If the cooling fan fails the grill will not operate Please call your Local Service Force Centre If the oven is not...

Page 30: ... heading Something Not Working When you contact the Service Centre you will need to give the following details 1 Your name address and post code 2 Your telephone number 3 Clear and concise details of the fault 4 The model product and serial number of the appliance found on the rating plate 5 The purchase date 30 SERVICE AND SPARE PARTS CUSTOMER CARE DEPARTMENT For general enquiries concerning your...

Page 31: ...SAY OWN SALES Leask Electrical Harlsdale Symbister Whalsay Shetland ZE2 9AA NORTHERN IRELAND BELFAST M27 Owenmore House Kilwee Business Park Upper Dunmury Lane Belfast BT17 0HD WALES CARDIFF M28 Guardia Industrial Estate Clydesmuir Road Tremorfa Cardiff CF2 2QS CLYWD M14 Unit 6 7 Coed Parc Abergele Road Rhuddlan Clwyd Wales LL18 5UG DYFED M77 Maes Y Coen High Mead Llanybydder Carmathenshire SA40 9...

Page 32: ...send Kent DA11 0DL HARPENDEN M46 Unit 4 Riverside Estate Coldharbour Lane Harpenden AL5 4UN LETCHWORTH M50 16 17 Woodside Ind Est Works Road Letchworth Herts SG6 1LA LONDON M76 2 4 Royal Lane Yiewsley West Drayton Middlesex UB7 8DL MAIDENHEAD M60 Reform Road Maidenhead Berkshire SL6 8BY MOLESEY M61 10 Island Farm Avenue West Molesey Surrey KT8 2UZ NEWBURY M24 9 Pipers Court Berkshire Drive Thatcha...

Page 33: ... incurred for calls to put right an appliance which is improperly installed or calls to appliances outside the United Kingdom l Appliances found to be in use within a commercial environment plus those which are subject to rental agreements l Products of Tricity Bendix manufacture which are not marketed by Tricity Bendix European Guarantee If you should move to another country within Europe then yo...

Page 34: ...SIE 515 311539403 ...

Page 35: ...35 ...

Page 36: ...e changed 4 MODEL NO PART NO 311539403 SIE 515 TRICITY BENDIX 55 77 HIGH STREET SLOUGH BERKSHIRE SL1 1DZ TELEPHONE 0870 5 950950 Electrolux Household Appliances Limited 2000 From the Electrolux Group The world s No 1 choice The Electrolux Group is the world s largest producer of powered appliances for kitchen cleaning and outdoor use More than 55 million Electrolux group products such as refrigera...

Reviews: