background image

3.1  Basic Function Usage 

3.1.11  To change the audio output

• Press the 

A.L/R

 button on the remote control unit to change the    

output.

• Then on-screen menu is displayed on the top right side of the screen.

• Press the 

A.L/R

 button repeatedly to change the sound mode.  


(Mono, Left, Right, Stereo)
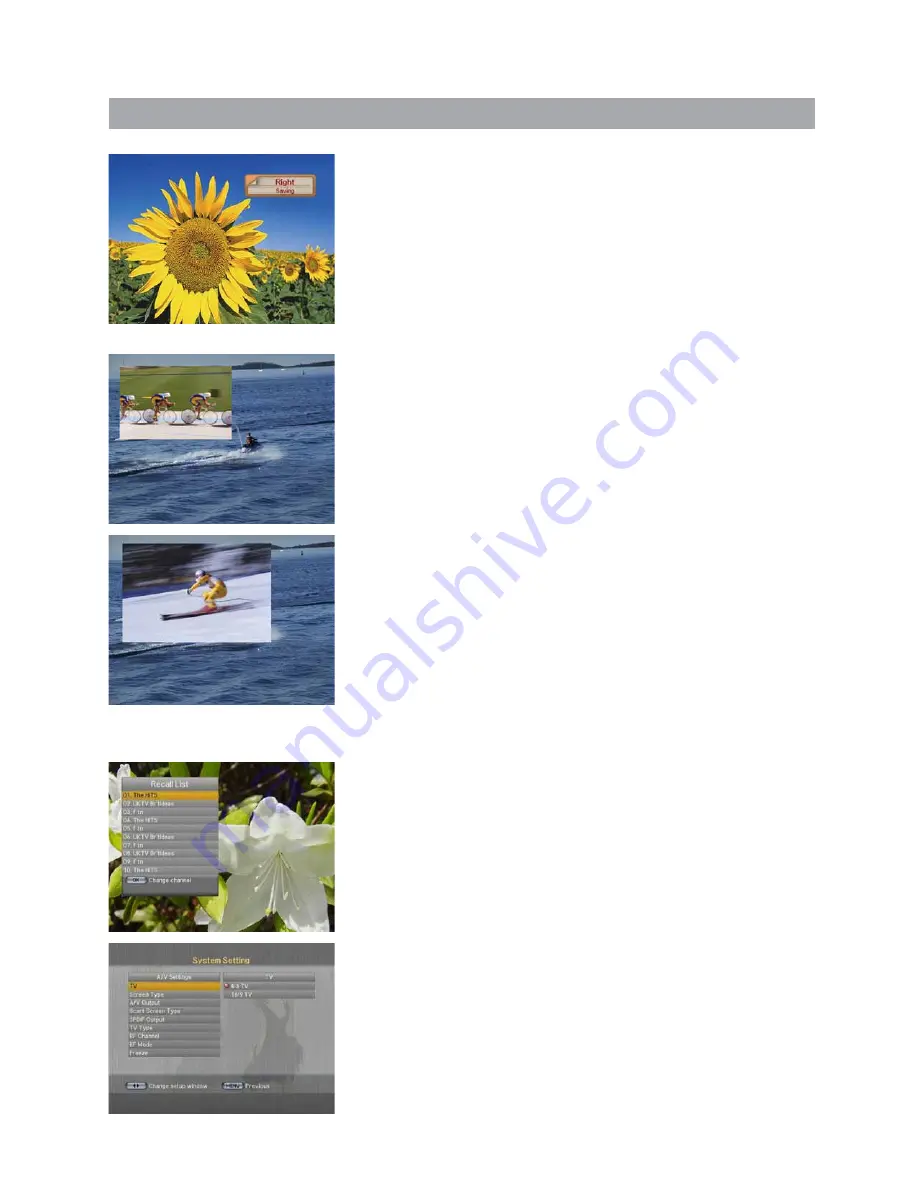
3.1.12  PIP

The PIP (Picture-in-Picture) function allows you to watch two screens 
at the same time. With the PIP function, you can move the PIP screen 
or freely adjust the screen size. 

• If you press the 

PIP

 button while the channel is showing on the    

screen, the PIP will be shown at the top left of the screen.

• If you press the 

PIP CH

 button, the PIP Simple Channel List will    

appear on the screen.

• Press the 

UP/DOWN

 button on the PIP Simple Channel List screen to 

select a channel, and press the 

OK

 button.

• Press the 

FILE/MODE

 button and press the 

UP/DOWN/LEFT/RIGHT

button to change the location of the PIP screen.

• Press the 

FILE/MODE

 button once again and press the the 

UP/DOWN

/LEFT/RIGHT

 button to change the size of the PIP screen.

• If you press the 

FILE/MODE

 button once again, you can see the 

screen as a multi-media window type. The main screen will be 
displayed on the left, and the PIP screen on the right side of the 
screen, as a multi-media window type.

•   Press  the 

SWAP/TUNER

 button to swap the main screen for the PIP 

screen, while the PIP screen is showing.

3.1.13  Recall List

Recall List is to show the previous channels (up to 10 channels). 

• If you press the 

RECALL

 on the screen, the Recall List Pop-up  


window will appear.

• Press the 

UP/DOWN

 button to select the channel and then press the 

OK

 button. The changed channel will be shown with the channel    

banner.

3.1.14  DISPLAY Setting

This mode changes settings such as the RF Channel, RF Mode and TV 
Type.

If you press the 

DISPLAY

 button, the DISPLAY screen of the System 

Setting menu will appear. Change the settings on the screen. 

14

Summary of Contents for CR 317

Page 1: ...N6_ENGLISH 104598 TRIAX CR 317 User s Manual Digital Cable Receiver PREMIUM DUAL PVR...

Page 2: ...y objects including the product itself on top of the power cord If it is damaged it could result in fire or electric shock Do not place metal objects on top of the apparatus If metal objects fall into...

Page 3: ...o so Warning If the product is mishandled it might cause minor damage If the apparatus becomes marked clean it gently with a soft cloth or towel Never use chemical solvents such as benzene thinner ace...

Page 4: ...Module and Smart Card 7 1 5 Connecting and Installation 8 2 Easy Installation 10 3 Basic Operation 12 4 Main Menu Guide 16 4 1 PVR Record Play 16 4 2 Edit Channel List 22 4 3 Program Guide 24 4 4 Sys...

Page 5: ...r play video 14 MUTE To enable or disable audio 15 GUIDE To display the TV RADIO program guide 16 Progress bar 17 CHANNEL UP DOWN To change channel up and down 18 VOLUME UP DOWN To increase or decreas...

Page 6: ...t jack on your television or to the STB 3 RS 232 To connect to a personal computer for software upgrade 4 ANT IN To connect to television antenna input 5 TV OUT To connect a TV via a coaxial cable 6 A...

Page 7: ...tured with unique menus apart from menus given by the receiver Watching Free To Air channel is available regardless of the CAM and smart cards As service providers download new information to smart ca...

Page 8: ...Connect Cable Connect one end of RF cable to the ANT IN on the back of the receiver and the other end to a Cable antenna connection or the jack for the public antenna on the wall 1 5 1 How to connect...

Page 9: ...S PDIF coaxial cable input you can connect the receiver with it to enjoy higher quality sound Connect S PDIF coaxial cable to a digital amplifier Hi Fi System Digital Amp PC 1 5 7 Connecting to the PC...

Page 10: ...2 1 Language The first option is Language Select to select the desired language of the Menu Audio or Subtitle Place the cursor on the sub menu by pressing the keys and press the OK button to change th...

Page 11: ...Press the LEFT RIGHT button to select the current time zone from standard time and then press the OK button When you press the LEFT RIGHT button the time zone will move by 30 minutes Summer Time Mode...

Page 12: ...Now Information Banner you can get a simple EPG of Now Information 3 1 3 Next Information Banner During Channel Banner is appearing when you press the YELLOW button you can get Next Information Banner...

Page 13: ...e channel sort list press the GREEN button Pop up window will be displayed on the screen Select the sort list you want with the UP DOWN buttons and then press the OK button to get it There are seven w...

Page 14: ...N LEFT RIGHT button to change the location of the PIP screen Press the FILE MODE button once again and press the the UP DOWN LEFT RIGHT button to change the size of the PIP screen If you press the FIL...

Page 15: ...watching TV the radio listening screen will appear If you press the TV RADIO button again the TV screen will reappear 3 1 16 Multi Video Multi Video allows you to watch several channels in one screen...

Page 16: ...layed 4 1 3 Multi Channel Recording If you change channels while recording and press the RECORD button recording starts You can record up to Multi channels simultaneously in the manner described above...

Page 17: ...d the QUICK REPLAY FORWARD button you can rewind or fast forward the screen with 4X speed If you release the button the screen will play back 4 1 9 Quick Search You can move to the desired location us...

Page 18: ...software related files GAME This is the directory that the ROM file downloaded from the Internet site can be saved on Select the saved ROM file and press the OK button to play the game IMAGE Directory...

Page 19: ...les in Microsoft Windows after the USB cable is connected Play List Sort If you press the GREEN button on the File List screen the File Sort pop up window will appear Press the UP DOWN button to selec...

Page 20: ...nnel Appears when you set the Type to PVR Press the OK button to set the channel you want to record Power off If you select Yes the receiver turns to the Stand by mode automatically after the recordin...

Page 21: ...ion You can see the HDD Information Size Serial Number Firmware Version Model Name 4 1 19 Event Record Offset With this function you can set the Start Offset time and End Offset time Following is avai...

Page 22: ...1 32 Lock Delete Skip Move Genre Press the OK button to add from edit list at right folder To remove the channel list from edit list at right folder press the To remove the channel list from edit list...

Page 23: ...he OK button 4 2 4 Skip You can skip the TV or Radio channel from the current list Select the channel you want to skip and press the OK button To recover the skipped channel press the OK button from e...

Page 24: ...GHT buttons to check the existing EPG info as per its time In case detailed info content is too long to check you can check its information as a long lists form and resize its lists by pressing BLUE b...

Page 25: ...In this menu you can change default language for audio when changing services Use the UP DOWN buttons to move to language you want and then press the OK button Note Select the audio language between t...

Page 26: ...nguage Press the LEFT RIGHT buttons to select Auto or Manual Press the LEFT RIGHT buttons to select GMT time of each region and setting up the default time Press the LEFT RIGHT button to select either...

Page 27: ...required You can change password for Parental Lock and Receiver Lock simultaneously Input the current PIN code using the NUMERIC buttons on the remote control In the highlighted new PIN code input a n...

Page 28: ...eiver and then press the OK button A V Output If your TV input supports SCART RGB control select SCART RGB Otherwise select SCART CVBS If your TV input supports S VHS select S VHS Scart Screen Type Se...

Page 29: ...Transparency The transparency will be applied on the screen 4 4 6 System Information Displays the system information MODEL name Last Update S W H W Loader version C A Press the UP DOWN button on the S...

Page 30: ...To set up Option Select Option then select Auto Upgrade or Auto Upgrade with notify Note Auto Upgrade If there is new software upgrade will be done automatically Auto Upgrade with notify If there is n...

Page 31: ...OK button the white frame will appear Select the size and position of video you want to expand with the RED GREEN LEFT RIGHT buttons and press the OK button You can see the expanded video Press the YE...

Page 32: ...screen Press OK button Press the OK button to save the channel list and watch the channel searched Press OK button to exit Manual search Press Installation in Main Menu Press the UP DOWN buttons to s...

Page 33: ...Check the volume level of the TV and STB Check the mute status of the TV and STB Check the connection of audio cord Remote Control does not operate Point remote control directly towards the receiver...

Page 34: ...eo Audio RS 232C USB RCA Cinch Video Output CVBS SCART CVBS RGB S VIDEO OUT RCA Cinch Volume Mute Control Resolution 20 bits DAC Max 2Vrms S PDIF of Dolby Digital Bitstream Out Transfer rate 115Kbps 9...

Page 35: ...Note 35...

Page 36: ...www triax com...

Reviews: