


Configuring PAL output modules
15
2. Check the
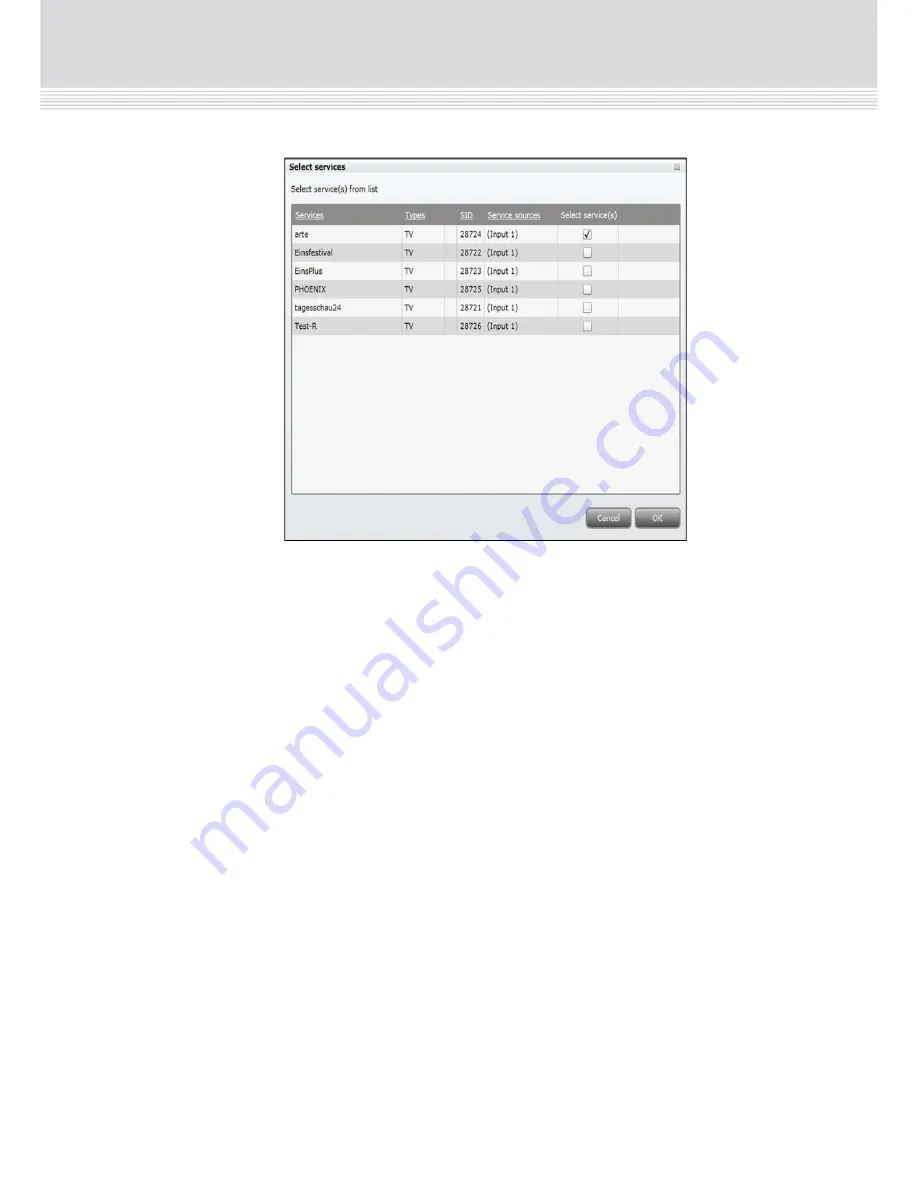
Select service/s
checkbox for the required service.
3. Press the
OK
button.
Note
that only one service can be selected per slot on a PAL output
module, i.e. a tiotal of four services can be selected for one PAL output
module.
Note
that the service selected will no longer be available in the TDX-
pool for other output modules.
Additional settings
1. Make (if required) additional configuration changes in the following
fields/drop-down lists in the configuration window:
RF level correction.
Audio Sub Carrier Attentuation
Use Alternative decoder settings
Aspect ration
First audio language
Second audio language
Audio system
Audio level correction
First subtitle language
Second subtitle language
Preferred subtitling type
Subtitles offset (pixels)
Disable teletext
Completion
5. Press the
Submit
button.
Validation
1. View the
Payload
bar in the configuration page, which graphically
indicates the amount of data being transmitted in relation to the
Configuring PAL output modules
14
The first time the output configuration is opened, it will contain default
and/or empty values, and the output module is disabled.
1. Remove the check from the
Disabled output
checkbox.
Channel, channel
spacing and frequency
PAL modules can be configured either by using the pre-defined channel
plans, or through manual specification.
Pre-defined
1. Select the required
Channel plan
.
2. Select the required
Channel
.
Pre-defined values are loaded in the
Frequency
and
Channel spacing
fields.
Manual
1. Select ‘Frequency’ in the
Channel
drop-down list.
2. Enter the desired frequency (MHz) in the
Frequency
field.
4. Select the required channel spacing in the
channel spacing
drop-down list.
Select input
Input can only be selected for a PAL output module from the TDH Pool.
1. Press the
Services
button.
The
Select services
window is displayed.
Uncheck


