


QUICK GUIDE
Before You Start…
1.
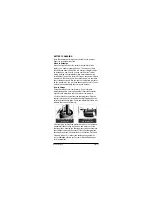
Install the collar strap(s) (page 7).
2.
Install the transmitter antenna (page 9).
3.
Charge collar and transmitter batteries for 14 hours
(page 17).
Using the Remote Trainer
1.
Turn the collar on: Press the gray button on the collar
next to the contact points until the collar light starts
blinking. You will also hear two tones, confirming that
the collar is on. (A rapid blink means that collar batteries
are low.) Repeat the turn-on process to turn the collar off.
One tone confirms that the collar is off. See page 10.
2.
Fit the collar on the dog: Fasten the collar strap midway
between the dog's ears and shoulders, and buckle
snugly. The collar light faces towards the dog's nose.
Do not leave a collar on a dog continuously. See page 10.
3.
Select an intensity level for training: Level 1 is the
lowest; level 6 is the highest (level 5 is the highest on
the Classic 70
S
). Release the transmitter button when
c h a n g i n g levels during training. Intensity selection
tips are in the training manual and video that came
with your Remote Trainer. See pages 12-13.
4.
Stimulation: If you are unfamiliar with the stimulation
f e a t u res of your model, see the chart on page 14. Note that
when the intensity selector is set on “N,” the transmitter
buttons are disabled, and stimulation cannot occur.
5.
Tone and Beeper button: On selected models, the
transmitter light is a push-button that controls an
audible tone in the collar. On the Upland Special
XLS
,
this button turns the Beeper on or off remotely.
See page 15.
6.
Multi-dog models: The color-coded transmitter toggle
switch selects the active collar. See page 16.
Quick Guide
Page 1
Summary of Contents for Classic 70S
Page 27: ...Notes ...


