


4
7.
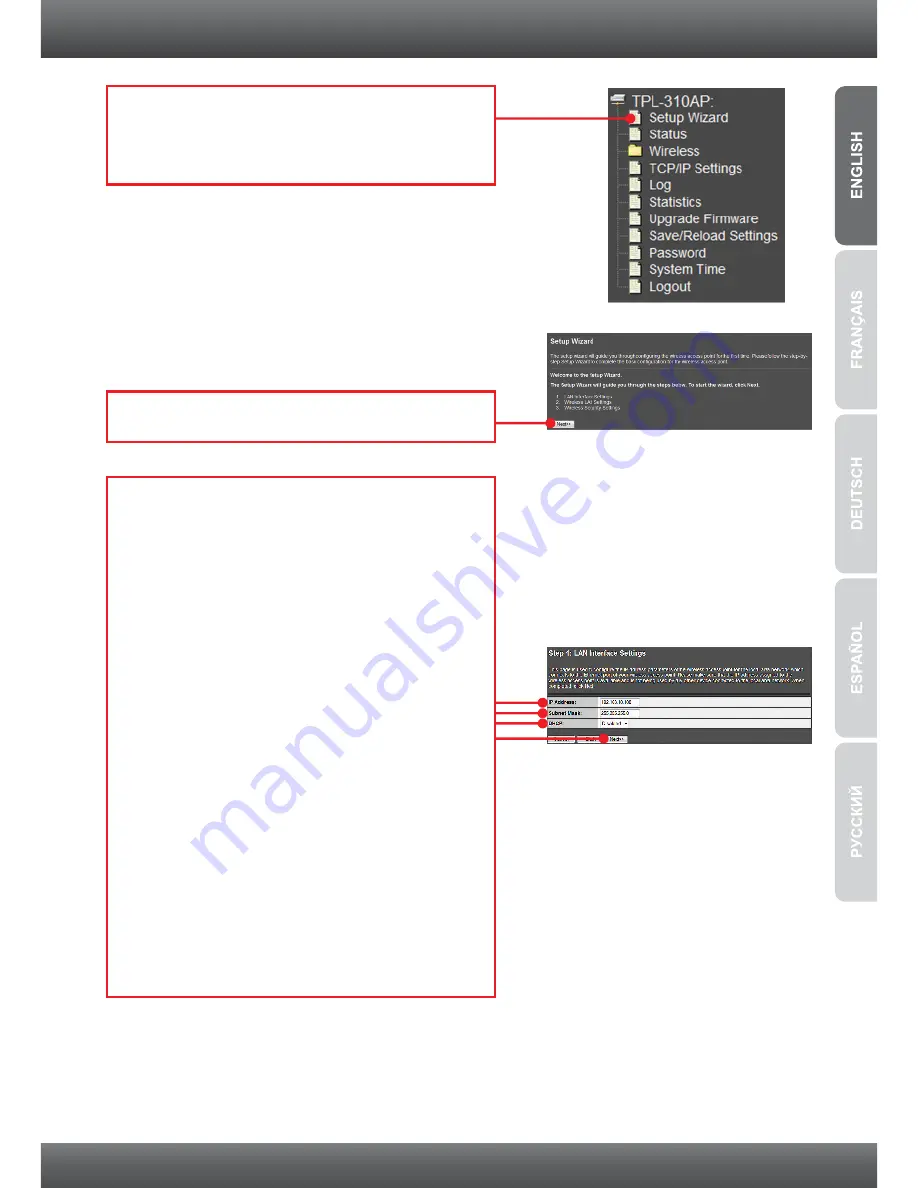
The Setup Wizard will automatically appear.
Click
Setup Wizard
if the Setup Wizard does
not automatically appear.
8.
Click
Next
.
9.
For DHCP, click on the drop down arrow and
Select
Client
for
DHCP
to have the TPL-310AP
automatically obtain an IP address from your
DHCP server (router). If
Disabled
is selected
for
DHCP
, you will need to configure the
following:
IP address
: The assigned IP address should
match your network (e.g. 192.168.10.x,
192.168.0.x, 192.168.1.x). This IP address
should not be used by any other network
device on your network.
Subnet Mask
: In most cases, the default
Subnet Mask (255.255.255.0) should be fine.
Then click
Next
.
Note: It is recommended to manually configure
the LAN Interface Settings (IP address and
Subnet Mask) in case you need to access the
TPL-310AP in the future. Please write down
the IP settings assigned for future reference.
Summary of Contents for TPL-310AP
Page 1: ...Quick Installation Guide TPL 310AP 1 01 ...
Page 19: ......