25.
Connect the TEW-L406/412 to
the outdoor antenna.(e.g. TEW-OA08OK)
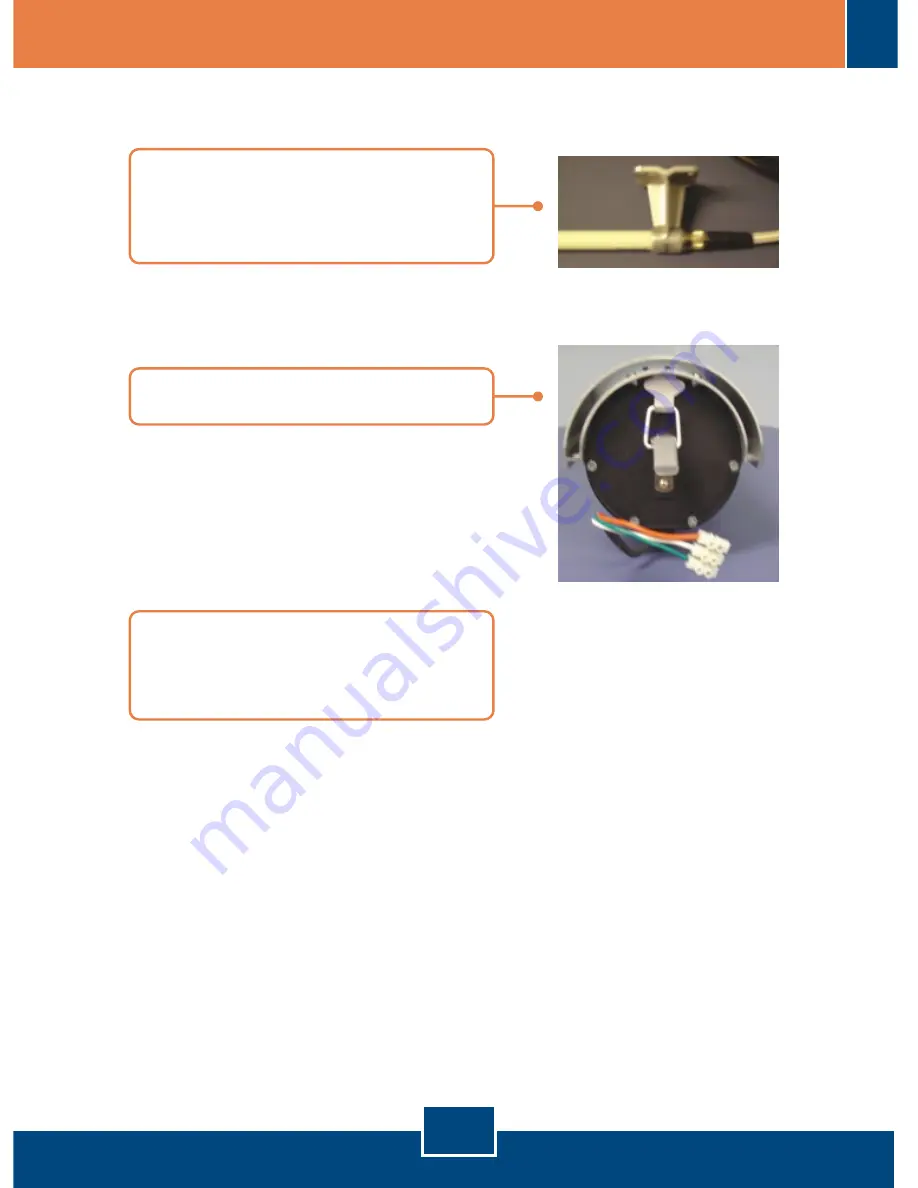
26.
Close and secure the back panel.
27.
Plug the power cord and the
camera power adapter into an available power outlet.
8
English
Page 1: ...15AH 28B Quick Installation Guide...
Page 2: ...100W TV IP201W TV IP301W Dry Wall or Wood surface Power Cord Knife or box cutter Wire Stripper Screwdriver Pliers Electrical Tape TEW ASAK TEW L406 or TEW L412 Outdoor Antenna e g TEW AO14D The follow...
Page 3: ...crews later 1 Lift up the latch and pull the roof upward Note Configure your Internet Camera Server to match your network settings before installing the device 3 Use the following 2 sets of screws and...
Page 4: ...will need to use these screws later 4 Flip over the camera housing and remove the rubber stoppers and washers 7 Cut the rubber insulation using a knife or box cutter 6 Take a power cord and cut it us...
Page 5: ...10 Insert the power cord through the hole and securely screw in the rubber stopper 11 Insert the wires of the power cord into the power receptacle Make sure the green and white wires match up Make sur...
Page 6: ...crew in the last hole 14 Take the camera s power adapter and cut about 7 inches from the end the power connector using the wire cutter Note This is the AC DC adapter that is included with your Interne...
Page 7: ...opper and screw it in securely 17 Run the power adapter and TEW L406 L412 antenna from the base to the top of the mounting arm 19 Connect the two ends of the power adapter back by twisting the copper...
Page 8: ...the Ethernet cable and power adapter to the camera 23 Connect the pigtail cable to the TEW ASAK 24 Connect the TEW L406 412 to the TEW ASAK 21 Reconnect the circuit board back to the camera enclosure...
Page 9: ...25 Connect the TEW L406 412 to the outdoor antenna e g TEW OA08OK 26 Close and secure the back panel 27 Plug the power cord and the camera power adapter into an available power outlet 8 English...
Page 10: ...ition Make sure the drill bit matches the size of the provided white screw anchors 1 Place the mounting bracket against the wall and mark each of the four holes with a pencil 3 Insert the fastener plu...
Page 11: ...tallation is now complete 5 Align the Wall Mount bracket with the fasteners and then use the provided wood screws to secure it 4 Use the bracket screws to mount the mounting bracket to the housing 10...
Page 12: ...irect view of the sun Third if you are using a day night camera with auto iris lens make sure to push the camera all the may to the front so that the lens is touching the glass My antenna cable will n...
Page 13: ...or memory data of customer contained in stored on or integrated with any products returned to TRENDnet pursuant to any warranty There are no user serviceable parts inside the product Do not remove or...
Page 14: ...TTEMPTS TO REPAIR OR MODIFY OR ANY OTHER CAUSE BEYOND THE RANGE OF THE INTENDED USE OR BY ACCIDENT FIRE LIGHTNING OR OTHER HAZARD LIMITATION OF LIABILITY TO THE FULL EXTENT ALLOWED BY LAW TRENDnet ALS...
Page 15: ...ATIONS COULD VOID THE USER S AUTHORITY TO OPERATE THE EQUIPMENT Waste electrical and electronic products must not be disposed of with household waste Please recycle where facilities exist Check with y...
Page 16: ...et Technical Support US Canada 24 7 Tech Support Toll Free Telephone 1 866 845 3673 Europe Germany France Italy Spain Switzerland UK English Espanol 24 7 Francais Deutsch 11am 8pm Monday Friday MET En...