background image


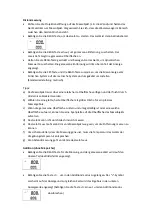
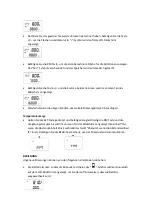
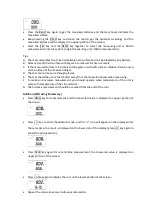
Press  the  READ  key  again  will  toggle  back  and  forth  between  the  length  and  width 
measurement on the upper portion of the screen; 


Press  SET  key  to  clear  the  data  on  the  portion  of  the  screen,  then  can  begin  the  new 
calculation of area. 


To choose measurement mode, press SET key again; 


Tips: 


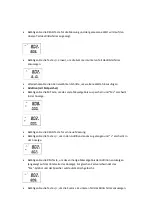
Press the SET key one by one will toggle back and forth between the length, area and 

volume measurement. If there are datum on the display, first pressing the    SET key will 

clear the current datum, and the mode will be invariable. 


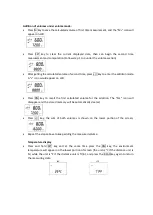
Addition of area under area mode: 


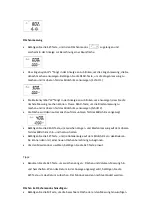
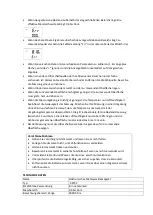
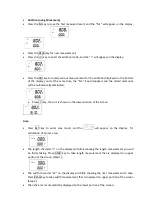
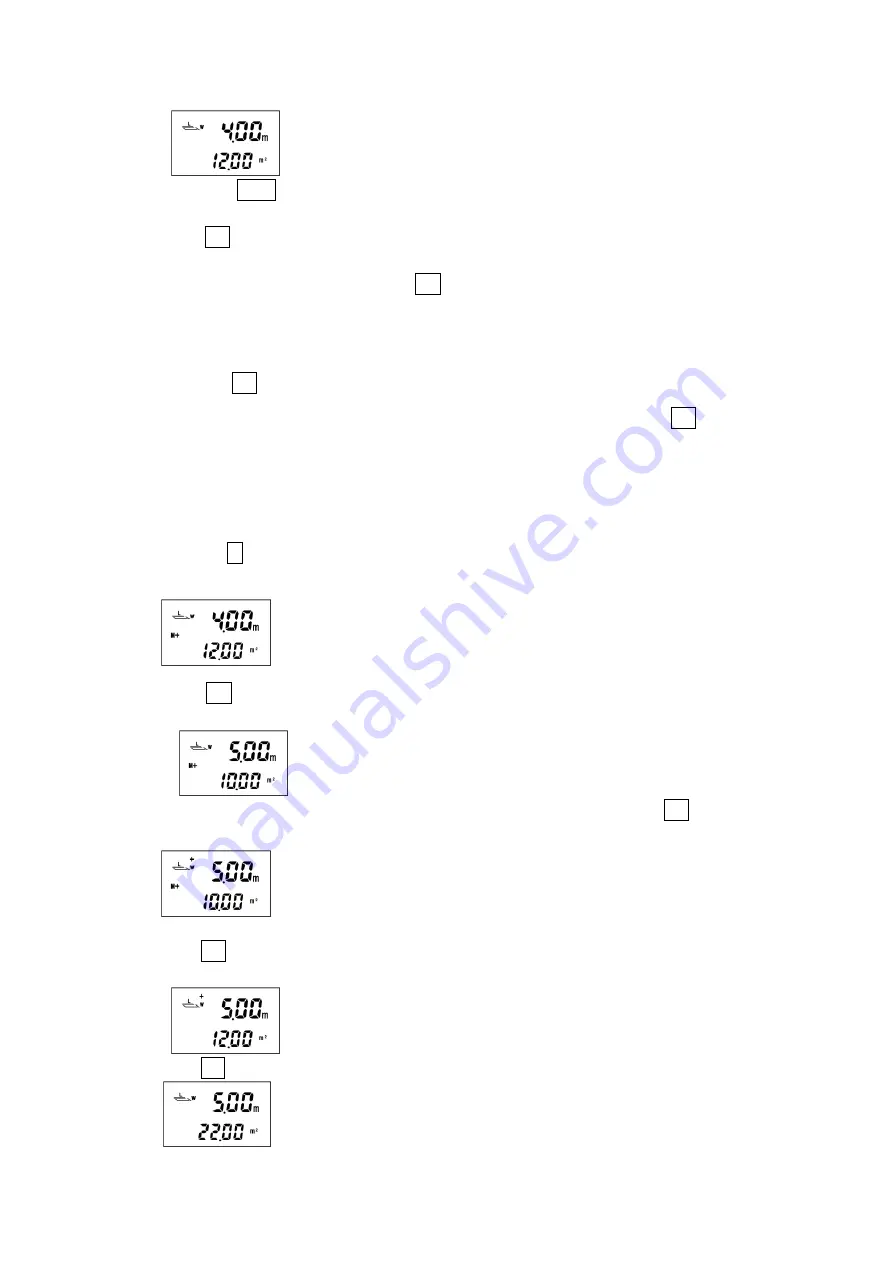
Press the M key to save the calculated area of first time measurement, at the same time, the 
“M+” icon appears on the screen;                                                   


Press  SET  key  to  clear  the  current  displayed  data,  then  can  begin  the  second  time 
measurement and computation (follow step 1 and step 2 under the area section);   


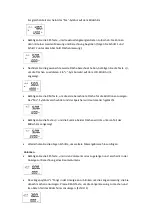
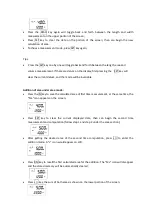
After  getting  the  desired  area  of  the  second  time  computation,  press  +/=  to  enter  the 
addition mode. A “+” icon would appear on LCD.                                     


Press RM key to recall the first calculated area for the addition. The “M+” icon will disappear 
and the stored memory will be automatically cleared; 


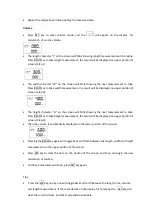
Press +/= key, the sum of both areas is shown on the lower portion of the screen;   


Summary of Contents for 99732

Page 1: ...Distance meter Model 99732 Handleiding afstandsmeter Mode demploi de mesureur de distance Bedienungsanleitung Abstandmesser Manual distance meter ...

Page 2: ... VEILIGHEIDSINSTRUCTIES Als u de onderstaande instructies niet volgt kan dit leiden tot persoonlijk letsel Lees en begrijp alle instructies voordat u het gereedschap gebruikt Verwijder geen labels van het gereedschap Gebruik het gereedschap niet in de nabijheid van brandbare explosieve gassen Gebruik het lasergereedschap niet rond kinderen of geestelijk behinderden en laat kinderen geen gebruik ma...

Page 3: ...n E READ Aan lezen Druk op deze toets om het gereedschap in te schakelen en de gemeten afstand af te lezen blijf op deze toets drukken en verplaats het gereedschap om waarden dynamisch af te lezen F SET Wissen Menu druk op deze toets om het resultaat te wissen of terug te gaan naar het menu om de lengte oppervlakte of volume modus te selecteren G RM Geheugen lezen Lees en toon de waarde van de len...

Page 4: ...ubieke meter GEBRUIKSAANWIJZING Installatie batterijen Open het klepje van het batterijcompartiment op de achterkant van het gereedschap en sluit één 9 Volt blokbatterij aan op de connector Plaats daarna de batterij in het compartiment en sluit de deur van het compartiment Afstand meten Richt de laser op het gereedschap op het voorwerp bijv De muur en houd het gereedschap verticaal ten opzichte va...

Page 5: ...ten c Als het gemeten oppervlak te klein is of onregelmatig met een zacht oppervlak dan kan spaanplaat worden gebruikt op het oppervlak van het voorwerp d Het gereedschap kan niet door glas meten e Het gereedschap moet bij het meten ten minste 2 feet 60cm uit de buurt zijn van het voorwerp dat wilt meten f Om een nauwkeurig meetresultaat te garanderen moet u het apparaat gebruiken wanneer de tempe...

Page 6: ...rgaande meetresultaat op te roepen en op te tellen getoond aan de onderkant van het display Het M icoontje verdwijnt nu en het opgeslagen geheugen wordt automatisch gewist Druk op de som wordt getoond op het onderste gedeelte van het display Oppervlakte Druk op SET om de oppervlaktemodus te openen het icoontje verschijnt op het display en u kunt nu de oppervlakte van een ruimte opmeten Het lengtek...

Page 7: ...k om de meetmodus in te stellen nogmaals op SET Tips Druk herhaaldelijk op SET om te schakelen tussen het opmeten van de lengte een oppervlakte of een volume Als er een datum op het display staat druk dan eerst op SET om de huidige datum te wissen de modus wordt onveranderlijk Oppervlaktes optellen in de oppervlaktemodus Druk op M om de berekende oppervlakte tijdens de eerste meting op te slaan he...

Page 8: ...ten Druk op READ om de lengte op te meten het resultaat wordt getoond op het bovenste gedeelte van het display Stap 1 Het breedtekarakter W knippert op het display om aan te geven dat u nu de breedte moet opmeten Druk op READ om de breedte op te meten het resultaat wordt getoond op het bovenste gedeelte van het display Stap 2 Het hoogtekarakter H knippert op het display om aan te geven dat u nu de...

Page 9: ...an de eerste meting op te slaan het icoontje M verschijnt op het display Druk op SET om de gegevens die worden weergegeven te wissen en begin met de tweede meting en berekening Volg de stappen 1 tot 3 in de paragraaf volume Nadat het tweede volume is berekend drukt u op om de optelmodus te openen Het icoontje A verschijnt op het display Druk op RM om het eerst berekende volume op te roepen voor de...

Page 10: ...rschillende parameters worden opgeteld bijv Lengte plus oppervlakte de wordt genegeerd en het scherm verandert niet Als een andere ultrasone bron of ruis met hoge frequentie in de buurt is verander van locatie of zet het apparaat dat ruis veroorzaakt uit tijdens het meten Als er obstakels tussen het gereedschap en het meetobject zijn Als het gemeten oppervlak niet glad is het gemeten oppervlak moe...

Page 11: ...9 9 vierkante ft 99999 9 Volume 999999 kubieke ft 999999m3 Resolutie 0 01m Golflengte van de laser 630 660nm Temperatuurbereik 0 C tot 40 C Laserklasse Class II Voeding Een 9V batterij Stroomverbruik 50mA Automatisch uitschakelen Het gereedschap schakelt 30 seconden na gebruik automatisch uit Bedrijfstemperatuur 32 C tot 104 C 0 tot 40 Grootte 142mm 70mm 40mm Gewicht Ca 110g batterij niet meegetel...

Page 12: ...ft over het product kunt u contact opnemen met de Trebs klantenservice Telefoonnummer 0900 TREBS 0900 873 27 28 1 00 per gesprek reguliere kosten telefonie Email info trebs nl Trebs BV Thermiekstraat 1a 6361 HB Nuth Nederland Email info trebs nl Internet www trebs nl CE ...

Page 13: ...n outil laser de classe II conformément au standard de sécurité international IEC285 INSTRUCTIONS DE SECURITÉ Le fait de ne pas suivre les instructions listées ci dessous peut être la cause de blessures physiques Avant toute utilisation veuillez lire et comprendre de toutes les instructions N enlevez aucune étiquette de l outil N utilisez pas l outil en présence de gaz inflammables ou explosifs N ...

Page 14: ...la ligne supérieure indiquent le résultat de mesure actuel et les données de la ligne inferieure indiquent le résultat de mémoire calcul D M touche de saisie de mémoire Saisissez la longueur surface ou volume dans la mémoire E READ touche allumage lecture Appuyez sur cette touche pour allumer l outil et lire la distance mesurée continuez d appuyer sur cette touche et déplacez l outil pour lire les...

Page 15: ...distance est comptée depuis l extrémité de l outil Illustration de l écran d affichage A Plus B Surface volume L longueur W largeur H hauteur C Mémoire D Mémoire résultat de calcul E Résultat de mesure en cours F Indication de batterie presque vide G Pied carré H Pied cubique I Mètre carré J Mètre cubique GUIDE D UTILISATION Installation de la batterie Ouvrez le couvercle du compartiment de batter...

Page 16: ...e barrière quelconque B Sélectionnez une surface dure et lisse avec une surface large à mesurer pour un résultat précis C Si la surface mesurée est trop petite et irrégulière ou avec une surface molle vous pouvez utiliser du carton sur la surface de l objet mesurée D L outil ne peut pas mesurer a travers les vitres E L outil doit être placé a plus de 2 pieds 60 cm de l objet mesuré lors de la mesu...

Page 17: ...r entrer en mode addition et l icône apparaitra sur l écran Appuyez sur la touche RM pour rappeler la mesure précédente pour l addition affichée en bas de l écran et en même temps l icône M disparaitra et les mémoires enregistrées seront effacées automatiquement Appuyez sur la touche la somme sur la portion inférieure de l écran Surface Appuyez sur la touche SET pour passer en mode surface et l ic...

Page 18: ...ors commencer à calculer une nouvelle surface Pour choisir le mode de mesure appuyez de nouveau sur la touche SET Astuces Appuyez sur la touche SET permettra de circuler entre les mesures de longueur surface et volume S il y a des données sur l écran commencez par appuyer sur la touche SET pour effacer la donnée actuelle et le mode ne variera pas Addition de surface en mode surface Appuyez sur la ...

Page 19: ...puyez sur la touche READ pour prendre la mesure de longueur affichée sur la portion supérieure de l écran étape 1 Le caractère de la largeur W clignotera sur l écran indiquant que la mesure suivante doit être prise Appuyez sur la touche READ pour prendre la mesure de longueur affichée sur la portion supérieure de l écran étape 2 Le caractère de la hauteur H clignotera sur l écran indiquant que la ...

Page 20: ...esure l icône M apparaitra sur l écran à cristaux liquides Appuyez sur la touche SET pour effacer les données actuellement affichées vous pouvez alors commencer la deuxième mesure et calcul suivez l étape 1 et l étape 3 de la section concernant le volume Après avoir obtenu le volume désiré pour le deuxième calcul appuyez sur la touche pour entrer en mode addition Une icône apparait sur l écran à c...

Page 21: ...suré est hors de la portée spécifiée A ce moment un message d erreur Err apparaitra sur la ligne inferieure de l écran Lors de l addition de divers paramètres ex longueur plus surface le sera ignoré et l écran continuera la lecture de la même unité que celle utilisée précédemment Lorsqu une autre source ultrasonique ou un bruit de haute fréquence se produit à proximité Eloignez vous ou éteignez la...

Page 22: ...nique multifonction Type 99732 Utilisation recommandée Intérieur Portée de mesure 2 a 53 pieds 0 6 a 16 mètres Portée de calcul Longueur 9999 11 9 999 99m Surface 99999 9 pieds carrés 99999 9 Volume 999999 pieds cubes 999999m3 Résolution 0 01m Longueur d onde du laser 630 660 nm Eventail de température 0 C à 40 C Classe de laser Classe II Alimentation Une batterie 9 V Consommation énergétique 50mA...

Page 23: ...entreprises par d autres Service Pour toute question contactez le service clientèle Trebs info trebs nl Trebs BV Thermiekstraat 1a 6361 HB Nuth Nederland Email info trebs nl Internet www trebs nl CE ...

Page 24: ...ERHEITSHINWEISE Nichtbeachtung der nachstehend aufgeführten Anweisungen kann zu Verletzungen führen Lesen und verstehen Sie alle Anweisungen vor der Inbetriebnahme Entfernen Sie keine Etiketten vom dem Gerät Betreiben Sie das Gerät nicht bei Vorhandensein von brennbaren explosiven Gasen Benutzen Sie das Gerät nicht wenn Kinder in der Nähe sind und erlauben Sie keinen Kindern das Laserwerkzeug zu b...

Page 25: ...s D M Speicher Eingabe Taste Eingabe der Länge Fläche oder Volumen in den Speicher E READ Ein Lese Taste Betätigen Sie diese Taste um das Gerät einzuschalten und den gemessenen Abstand abzulesen Halten Sie die Taste gedrückt und bewegen Sie das Gerät um die Werte dynamisch abzulesen F SET Löschen Menü Betätigen Sie diese Taste um Ihre Eingabe zu löschen oder zum Menü zurückzukehren um den Längen F...

Page 26: ...eräts aus ABBILDUNG DES BILDSCHIRMS a Plus b Fläche Volumen L Länge W Breite H Höhe c Speicher d Speicher Rechenergebnis e Aktuelles Messergebnis f Anzeige bei Mangel der elektrische Größe g Quadratfuß h Kubikfuß i Quadratmeter j Kubikmeter BEDIENUNG Einlegen der Batterie Öffnen Sie das Batteriefach auf der Rückseite des Geräts und schließen Sie eine 9 Volt Batterie am Batterieanschluss an Legen S...

Page 27: ...berfläche verfügen und darf nicht durch Hindernisse blockiert werden b Wählen Sie eine glatte harte Oberfläche mit großer Fläche für ein präzises Messergebnis c Wenn die gemessene Oberfläche zu klein und unregelmäßig ist oder eine weiche Oberfläche aufweist können Sie eine Spanplatte auf die Oberfläche des Messobjekts aufsetzen d Das Gerät kann nicht durch Glas hindurch messen e Das Gerät muss meh...

Page 28: ... Sie die M Taste um das erste Messergebnis zu speichern und M erscheint in der Anzeige Betätigen Sie die READ Taste für ein neue Messung Betätigen Sie die Taste um in den Additionsmodus zu gelangen und erscheint in der Anzeige Betätigen Sie die RM Taste um das vorherige Messergebnis der Addition anzuzeigen angezeigt auf der Unterseite der Anzeige Zur gleichen Zeit verschwindet das M Symbol und der...

Page 29: ...itt 2 Die Fläche wird dann automatisch auf dem unteren Teil des Bildschirms angezeigt Betätigen Sie die READ Taste um zwischen Längen und Breitenmessung auf dem oberen Teil des Bildschirms hin und herzuschalten Betätigen Sie die SET Taste um die Datenanzeige auf dem Bildschirms zu deaktivieren Sie können dann mit einer neuen Flächenberechnung zu beginnen Um den Messmodus zu wählen betätigen Sie di...

Page 30: ...e um die erste berechnete Fläche für die Addition anzuzeigen Das M Symbol verschwindet und der Speicher wird automatisch gelöscht Betätigen Sie die Taste und die Summe beider Flächen wird im unteren Teil des Bildschirms angezeigt Wiederholen Sie die obigen Schritte um weitere Messergebnisse hinzuzufügen Volumen Betätigen Sie die SET Taste um in den Volumenmodus zu gelangen und erscheint in der Anz...

Page 31: ...d herzuschalten Betätigen Sie die SET Taste um die Datenanzeige auf dem Bildschirms zu deaktivieren Sie können dann mit einer neuen Volumenberechnung zu beginnen Um den Messmodus zu wählen betätigen Sie die SET Taste erneut Tipps Benutzen Sie die SET Taste um zwischen Längen Flächen und Volumen Messung hin und herschalten Wenn das Datum in der Anzeige angezeigt wird betätigen Sie die SET Taste um ...

Page 32: ...ritte um weitere Messergebnisse hinzuzufügen Temperaturanzeige Halten Sie die SET Taste gedrückt und betätigen Sie gleichzeitig die RM Taste und die Umgebungstemperatur wird im unteren Teil des Bildschirms angezeigt die Einheit ist wenn die Abstandseinheit M ist während das Gerät benutzt wenn die Abstandseinheit ft in ist Betätigen Sie die READ Taste erneut um zum Messzustand zurückzukehren BEDIEN...

Page 33: ...st die Genauigkeit der Messung Machen Sie Ihre Messung in einer Umgebung ohne Wind und achten Sie darauf dass die Temperatur des Geräts mit der Umgebungstemperatur übereinstimmt Die gilt insbesondere für die Abstandsmessung zwischen 12 und 16 m Die relative Luftfeuchtigkeit muss über 48 liegen und die Größe der gemessenen Oberfläche muss mindestens 3 mal 3 m sein Bei der Messung muss die Ultrascha...

Page 34: ...E Wir garantieren dass das Messgerät für Zwei Jahr ab Kaufdatum frei von Materialfehlern und Verarbeitungsfehlern ist Hinweis Die Garantie gilt nicht für die folgenden Bedingungen Bei Auseinanderbauen des Geräts erlischt die Garantie Schäden die unter anderem durch Verschleiß Wasser Fallenlassen oder Reparatur durch Dritte entstehen Kundendienst SERVICE Der Service in Deutschland wird durchgeführt...

Page 35: ...IEC285 international safety rule SAFETY INSTRUCTIONS Failure to follow the instructions listed below may cause personal injury Read and understand all instructions prior to any operation Do not remove any labels from the tool Do not operate the tool with the presence of flammable explosive gases Do not operate the laser tool around the children or allow children to operate the laser tool failure t...

Page 36: ... Press this key to start the tool and read the measured distance keep pressing this key and move the tool to read values dynamically f SET Clear Menu press this key to clear or return back to the menu to select length area or volume mode g RM Memory read key Read out and display the value of length area or volume that are stored in the last time h Addition key Add the measured length area or volum...

Page 37: ... door on the back of the tool and plug one 9 Volt block battery onto the battery connector and put the battery back to the compartment and close the door Distance measurement Make the induction hole of the tool face against the measured object e g the wall and keep the tool vertical to the measured object make sure the point of the level vial stands between the two line of the level vial by adjust...

Page 38: ...he measured object D The tool cannot measure through glasses E The tool should be over 2 feet 60cm away from the measured object when measuring F To make sure accurate measurement you should operate when temperature of the unit is same with temperature of the circumstance G The distance measurement should be counted from the end of the tool Addition W O using M memory Press READ key for measuremen...

Page 39: ...d Press key the sum is shown on the lower portion of the screen Area Press SET key to enter area mode and the will appear on the display for calculation of a room area The length character L on the display will blink showing the length measurement you will be firstly taking Press READ key to take length measurement that is displayed on upper portion of the screen Step 1 The width character W on th...

Page 40: ...d the mode will be invariable Addition of area under area mode Press the M key to save the calculated area of first time measurement at the same time the M icon appears on the screen Press SET key to clear the current displayed data then can begin the second time measurement and computation follow step 1 and step 2 under the area section After getting the desired area of the second time computatio...

Page 41: ...n the screen will blink showing the next measurement to take Press READ key to take height measurement the result will be displayed on upper portion of screen Step 3 Then the volume is automatically displayed on the lower portion of the screen Pressing the READ key again will toggle back and forth between the length width and height measurement on the upper portion of the screen Press SET key to c...

Page 42: ...d appear on LCD Press RM key to recall the first calculated volume for the addition The M icon will disappear and the stored memory will be automatically cleared Press key the sum of both volumes is shown on the lower portion of the screen Repeat the steps above to keep adding the measured volume Temperature display Press and hold SET key and at the same time press the RM key the environment tempe...

Page 43: ...rface When the measured surface is not smooth the measured surface should be smooth hard and of homogeneity When the measuring environment is not good the temperature and humidity will affect the accuracy of measurement and take measurement under environment of no wind and temperature of the unit should be same with temperature of the circumstance especially for long distance measuring between 40 ...

Page 44: ...104 C 0 to 40 Size 142mm 70mm 40mm Weight About 110g battery not included WARRANTY The product is warranted to be free from defects in materials and workmanship for a period of two years from the date of purchase Notice The warranty does not apply to the following conditions Disassembling the laser tool will void the warranty Any damage resulting from but not limited to wear water being dropped or...

Reviews: