background image


10 

Formatting the Solid State Drive


WARNING! Formatting the disk will erase all of the data on your ESD200. 

You must have Administrator Rights to format in Windows. 


  Windows

®


XP/Vista/7/8 

1. 

Plug the ESD200 into an available USB port on a Windows

®  

XP/Vista /7/8 computer. 

2.  Unplug  all  other  USB  storage  devices  from  your  computer

.  This  is  to  prevent 

accidentally formatting a different USB drive. 

3. 

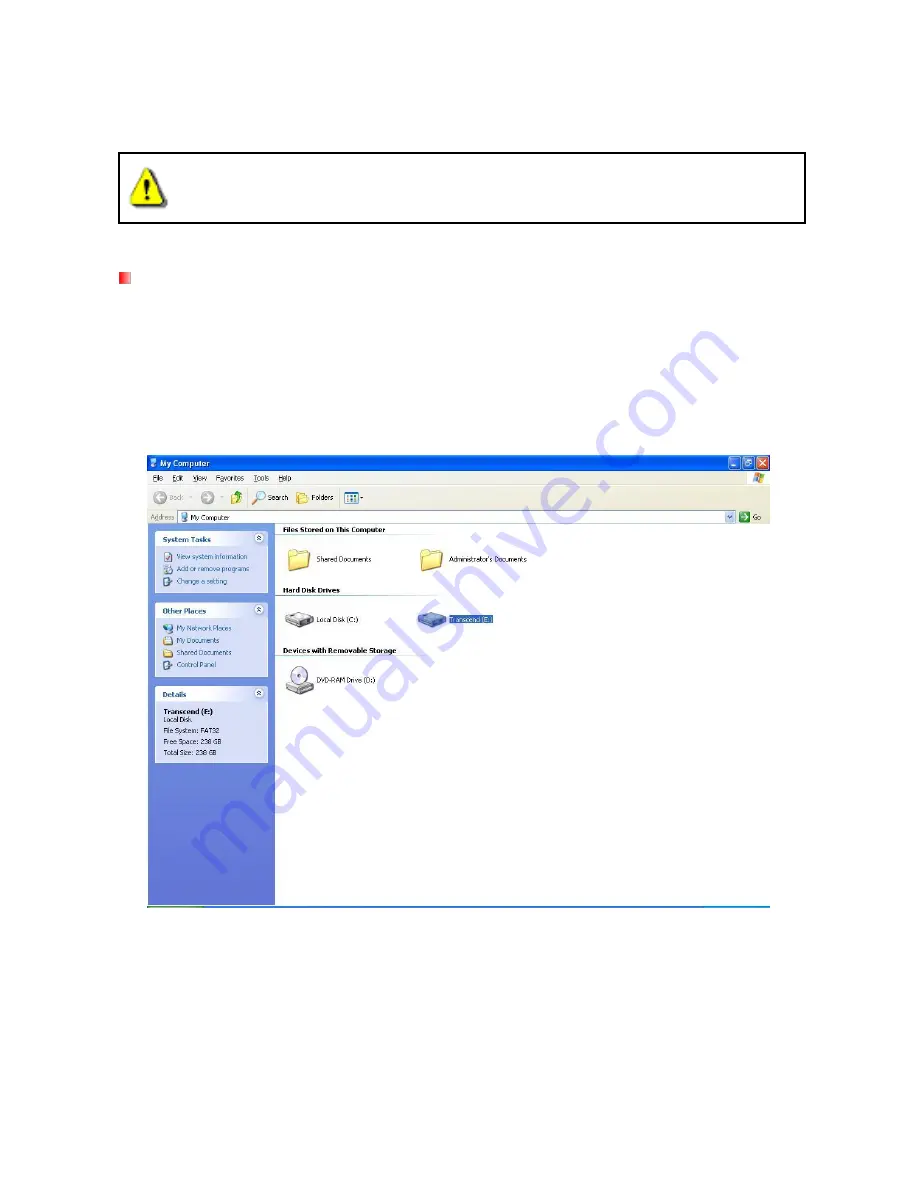
In the 

―My Computer‖ window, right-click the ESD200 drive icon, then choose ―Format‖. 

4. 

You may choose 

―Quick Format‖ or change the volume label if desired. 

5. 

Click 

―OK‖ to begin formatting. All data on the disk will be erased. 


Summary of Contents for ESD200

Page 1: ...User s Manual USB 3 0 Portable Solid State Drive ESD200 Version 1 0 ...

Page 2: ...al Use 4 Backing up Data 4 Transporting 4 Power 4 Reminders 5 Product Overview 5 Connecting to a Computer 6 Disconnecting from a Computer 8 Windows 8 Mac OS 9 Linux 9 Formatting the Solid State Drive 10 Windows XP Vista 7 8 10 Mac OS 11 Linux 13 Troubleshooting 14 Specifications 16 Transcend Limited Warranty 17 ...

Page 3: ...SB 3 0 mode the compact ESD200 is ideal for carrying your files folders documents photos music and videos In addition the ESD200 comes with very useful software that can increase your mobile productivity This User s Manual is designed to help you get the most from your new device Please read it in detail before using the ESD200 Note Transcend Elite software only works in Windows and Mac OS please ...

Page 4: ...Gbits per second Extra large storage capacity Sleek ultra portable design Easy Plug and Play operation no drivers required USB powered no external adapter necessary One Touch Auto Backup button Includes Transcend Elite backup and security software Multicolor LED indicator power data transfer USB 2 0 3 0 connection type System Requirements ...

Page 5: ...3 Desktop or notebook computer with a working USB port One of following Operating Systems Windows XP Windows Vista Windows 7 8 Linux Kernel 2 6 31 or later Mac OS X 10 4 or later ...

Page 6: ...up Data Transcend does NOT take any responsibility for data loss or damage during operation If you decide to store data on your ESD200 we strongly advise that you regularly backup the data to a computer or other storage medium To ensure SuperSpeed USB 3 0 data transfer rates when using your ESD200 please make sure that your computer has the relevant drivers and hardware to support USB 3 0 If you a...

Page 7: ...is not located where it can be tripped over or stepped on Reminders Always follow the procedures in the Disconnecting from a Computer section to remove the ESD200 from your computer Product Overview A Micro USB 3 0 Port B One Touch Auto Backup Button C LED Indicator ...

Page 8: ...ook computer 3 When the ESD200 is successfully connected to a computer its LED will either light up green USB 2 0 or blue USB 3 0 to indicate the USB connection type In Windows a new Local Disk drive with a newly assigned drive letter will appear and a Removable Hardware icon will appear in the Windows System Tray The ESD200 comes pre formatted with the FAT32 file system which is compatible with m...

Page 9: ...SB cable into the correct port on your computer USB 3 0 ports are usually color coded to differentiate them from USB 2 0 Linux users may have to configure the ESD200 manually To do this first create a directory for the ESD200 Example mkdir mnt SSD Then mount the ESD200 Example mount a t msdos dev sda1 mnt SSD Note D and G above are example drive letters the letter in your My Computer window may di...

Page 10: ... have installed the bundled Backup Manager software you can press the ESD200 s One Touch Auto Backup Button to instantly backup your data see the Backup Manager Software User s Manual for details One Touch Auto Backup Button Disconnecting from a Computer NEVER disconnect the ESD200 from a Computer when its LED is flashing Windows 1 Left click on the Hardware icon on the system tray 2 The Safely Re...

Page 11: ...D200 from the USB port WARNING To prevent data loss always use this procedure to remove the SSD from Windows Mac OS Drag and drop the Disk icon that represents your ESD200 into the trashcan Then unplug your ESD200 from the USB port Linux Execute umount mnt Storejet to un mount the device Then unplug your ESD200 from the USB port ...

Page 12: ... into an available USB port on a Windows XP Vista 7 8 computer 2 Unplug all other USB storage devices from your computer This is to prevent accidentally formatting a different USB drive 3 In the My Computer window right click the ESD200 drive icon then choose Format 4 You may choose Quick Format or change the volume label if desired 5 Click OK to begin formatting All data on the disk will be erase...

Page 13: ...cidentally formatting a different drive 3 If a message window appears like the one below click the Initialize button If no message appears go to Applications Utilities to open Disk Utility 4 In the Disk Utility window choose your ESD200 from the list on the left 5 Select the Erase tab 6 Choose the Volume Format you want Mac OS Extended Journaled is recommended ...

Page 14: ...12 7 Input a name for your new drive otherwise your drive will be named Untitled 8 Click the Erase button in the bottom right corner of the window 9 Click Erase again to confirm ...

Page 15: ...B storage devices from your computer This is to prevent accidentally formatting a different USB drive 3 Type fdisk dev sda replace dev sda with your actual USB device 4 Press p 5 Press n 6 Press w 7 Type mkfs ext3 dev sda1 8 Go to etc fstab and add dev sda1 mnt usbdrive auto user noauto 0 0 9 Type mkdir mnt usbdrive 10 Type mount mnt usbdrive ...

Page 16: ...rt 2 Are you using the USB 3 0 cable that came in the ESD200 package If not try using the Transcend USB 3 0 cable to connect the ESD200 to your computer Using a USB cable other than the one supplied may not provide stable transfer ability 3 Is your ESD200 connected to a Mac Keyboard If so unplug it and plug it into an available USB port on your Mac desktop computer 4 Is the USB port enabled If not...

Page 17: ...matted with the Windows NTFS file system which may not be 100 compatible with Mac OS To store and backup data on your Mac please see the Formatting the Solid State Drive section of this manual to convert the drive to a Mac OS compatible file system If you plan to regularly use the drive with both Windows and Mac computers we recommend formatting the drive to the FAT32 file system the ESD200 comes ...

Page 18: ...92mm 62mm 10 5mm Weight 56g Storage Media NAND Flash Power Supply 5V DC supplied from the USB port Transfer Speed USB 3 0 Up to 5Gb s USB 2 0 Up to 480Mb s Operating Temperature 0 32 to 70 158 Certificates CE FCC BSMI Warranty 3 Years ...

Page 19: ...of the product s intended use or for tooling or testing purposes alteration abnormal mechanical or environmental conditions including prolonged exposure to humidity acts of nature improper installation including connection to incompatible equipment or problems with electrical power including undervoltage overvoltage or power supply instability In addition damage or alteration of warranty quality o...

Reviews: