background image

www.TrailFX.com


Page 

3

 of 

4                                                                                                                                                                                                             

Rev 031618 


2. 

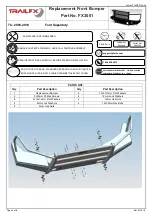
Attach the license plate to the Replacement Bumper 

(Fig 2)

. Fasten the license plate with the hardware. 


3. 

 Attach the Bumper to the frame. Fasten the Bumper with the hardware 

(Fig 3)

.  


4. 

Using the previously removed hardware, reinstall the hood release lever into the bracket on the bumper  (Fig 4). 


5. 

Reinstall the factory wiring harness to the fog light. 
 

6. 

Level and adjust the bumper, make sure that all hardware is secure and tight. 
 

7. 

Installation is finished, pick up all tools. 

Fig 

4


Fig 

2


(4)5mm Lock Washers 
(4)5×15×1.2mm Flat Washers 
(4)5mm Hex Nuts 

(4)5×15×1.2mm Flat Washers 
(4)5×20 Phillips Screws 

Fig 

3


(2)12×50mm Hex Bolts 
(4)12×37×3mm Flat Washer 
(2)12mm Lock Washer 
(2)12mm Hex Nut 

Summary of Contents for FX3001

Page 1: ...ts Replacement Front Bumper Part No FX3001 Fits 2008 2010 Ford Superduty ASSISTANCE IS RECOMMENDED REMOVE CONTENTS FROM BOX VERIFY ALL PARTS ARE PRESENT READ INSTRUCTIONS CAREFULLY BEFORE STARTING INSTALLATION DO NOT OVER TORQUE STANDARD OPERATING LOAD FOR TIGHTEN BODY MOUNT NUTS BOLTS VARIES FROM 45 TO 65 FOOT POUND 60 180 min support trailfx com 1 866 638 4870 POLISHED STAINLESS STEEL LIMITED LI...

Page 2: ...cle Preparation 1 Disconnect the factory fog lamp connectors zip tie harness to frame 2 Remove fasteners holding OEM bumper to chassis 3 Remove fastener holding hood release lever to OEM bumper 4 Remove OEM bumper assembly Bumper Installation 1 Remove the fog light from the vehicle Use the OEM screws and nut plates to fasten the fog light to the bumper Fig 1 Fig 1 ...

Page 3: ...e reinstall the hood release lever into the bracket on the bumper Fig 4 5 Reinstall the factory wiring harness to the fog light 6 Level and adjust the bumper make sure that all hardware is secure and tight 7 Installation is finished pick up all tools Fig 4 Fig 2 4 5mm Lock Washers 4 5 15 1 2mm Flat Washers 4 5mm Hex Nuts 4 5 15 1 2mm Flat Washers 4 5 20 Phillips Screws Fig 3 2 12 50mm Hex Bolts 4 ...

Page 4: ...ist 6 Product not installing properly Ensure make model year cab length and bed size of your vehicle is listed in the application All installation steps are followed correctly Check out these other TrailFX Products www TrailFX com PRODUCT CARE Periodically check the product to ensure all fasteners are tight and components are intact Regular waxing is recommended to protect the finish of the produc...

Reviews: