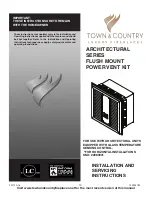
Town & Country Fireplaces 22080041 Installation And Servicing Instructions Download Page 1

ARCHITECTURAL 
SERIES 
FLUSH MOUNT 
POWER VENT KIT

INSTALLATION AND
SERVICING
INSTRUCTIONS

IMPORTANT:
THESE INSTRUCTIONS ARE TO REMAIN 
WITH THE HOMEOWNER

These instructions are supplementary to the Installation and 
Operating Instructions supplied with the fireplace and should 
be kept together. Refer to the  Installation and Operating 
Instructions for proper gas supply, safety requirements and 
operating instructions.

TC

100004780

  
241120-16

Visit www.townandcountryfireplaces.net for the most recent version of this manual

FOR USE WITH ARCHITECTURAL UNITS 
EQUIPPED WITH GLASS TEMPERATURE 
SENSING CONTROL.
 *FOR HORIZONTAL INSTALLATIONS
SKU: 22080041

Summary of Contents for 22080041

Page 1: ...gInstructionssuppliedwiththefireplaceandshould be kept together Refer to the Installation and Operating Instructions for proper gas supply safety requirements and operating instructions TC 100004780 241120 16 Visit www townandcountryfireplaces net for the most recent version of this manual FOR USE WITH ARCHITECTURAL UNITS EQUIPPED WITH GLASS TEMPERATURE SENSING CONTROL FOR HORIZONTAL INSTALLATIONS...

Page 2: ...m Clearances 4 Power Vent Details 5 Power Vent Dimensions 5 Mounting the Power Vent 6 Removing the grill 6 Installing the fan unit 6 Minimum Clearances to Combustibles 6 Framing the Power Vent 7 Electrical Connection 8 Vibration Collar Installation 10 Attaching the vibration collar 10 Fan Motor Replacement 11 Fan removal 11 Disconnect the motor wiring 12 Installing the motor 13 ...

Page 3: ...tural Fuel Gas Code ANSI Z223 1 NFPA 54 or the Natural Gas and Propane Installation Code CSA B149 1 All electrical installation should be performed by a qualified electrician to national codes CSA C22 1 ANSI NFPA 70 and or local electrical codes Direction of air flow Flush mount power vent 36 Min clearance from outlet 36 Min clearance from intake Adjacent structure Direction of exhaust flow Air in...

Page 4: ...prevent condensation on window 12 inches 30 cm 12 inches D Vertical clearance to ventilated soffit located above the terminal within a horizontal distance of 2 feet 61 cm from the center line of the terminal 20 inches 51 cm min 20 inches min E Clearance to unventilated soffit from the center line of the terminal 20 inches 51 cm min 20 inches min F Clearance to outside corner 6 inches 15 cm min 6 i...

Page 5: ...Power Vent Dimensions Power Vent Details 115 VAC Single phase 60 50 Hz 1 2 HP 6 8 Amps Weight Aprox 30 lbs 5 28 BRICK LEDGE 26 1 8 Ø11 7 8 14 3 8 28 30 28 30 28 26 1 8 1 1 2 Figure 3 Architectural series power vent dimensions ...

Page 6: ...ust be removed before installing the unit into its frame Locate and remove the four screws affixing the grill to the unit Figure 4 remove grill and set aside Installing the fan unit The fan unit weighs approximately 30 lbs and so the constructed frame must be able to support its weight The fan unit is secured to the constructed frame using the 12 supplied screws Note The constructed frame must be ...

Page 7: ...commended framing Consult local building codes for more information on framing and building envelope waterproofing 27 69mm 27 69mm Figure 5 PV Framing Dimensions Figure 6 Fan without grill installed ai 7 Framing the Power Vent ...

Page 8: ...he Power Vent for the 120VAC power and minimum 18ga 2 conductor bell alarm wire from the fireplace to the power vent for the 24VAC blower control See the fireplace manual for connections at the fireplace Strip the Control wires and connect using wire nuts make sure that the colour pairing matches that at the fireplace as well i e black to grey at both ends or red to red at both ends Figure 7 Feedi...

Page 9: ...n secured tighten the strain relief at the rear of the unit so that there is no undue stress on the power line Figure 9 The noise supression foam may need to be removed for access glue it back in place after strain relef is tightened Figure 9 Strain relief ...

Page 10: ...onto the exposed flange Figure 11 on the rear of the fan unit Affix the collar to the fan using six supplied Tek screws evenly distributed around the circumference of the collar Figure 12 Attach venting material to the outside ring of the vibration collar and affix with six supplied Tek screws evenly distributed around the circumference of the collar Figure 10 Vibration collar Figure 11 Rear of fa...

Page 11: ...igure 13 and Figure 14 which secure the fan assembly to the fan housing and remove all four bolts At this point the fan assembly can be removed from the unit There is one location post each at the top and bottom of the fan tower near the bolt locations Figure 13 and Figure 14 The unit may stick a little when removing and reinstalling back into the housing Remove the fan assembly from the housing L...

Page 12: ...ring connections before disconnecting Alternatively refer to the wiring drawing Figure 19 on page 14 Locate and remove the 1 4 20 set screws using a 1 8 Allen key which secures the impeller to the motor shaft Figure 18 Note that the motor shaft has a flat side for one of the set screws to engage with Figure 16 Motor electrical connections ...

Page 13: ...stalling the motor Install the replacement motor into the fan tower and secure with the four nuts Figure 18 Use thread lock on the threaded posts before installing the nuts Be sure that the motor is positioned so that the connector socket is facing up Re install the impeller on the shaft There should be a space of 1 from the back of impeller to the mounting box Re install the rest of the assembly ...

Page 14: ...ousing Locate and line up the two threaded location posts at the top and bottom of the tower near the securing bolts Figure 13 and Figure 14 Secure using the four 1 4 bolts removed earlier Note that there may be some resistance when reinstalling the fan assembly back into the housing Rotate the impeller to ensure that it rotates freely Reinstall the front grill Power to the fan unit can now be re ...

Page 15: ...241120 16 100004780 50 15 ...

Page 16: ... V9L 6V8 Printed in Canada For Technical Support please contact your retailer 2020 Copyright Pacific Energy Fireplace Products LTD Reproduction adaptation or translation without prior written permission is prohibited except as allowed under the copyright laws ...

Reviews: