background image

  15”/17”/19” LCD 

MONITOR


_____________________________________


13 


FOLLOW THESE STEPS T O INSTALL THE 
MONITOR 

1.   

Before you connect the cables, make sure that the monitor 

and the system unit power switches are OFF 


2.   

Plug one end of the 15pin signal cable to the monitor and the 

other end to the video signal connector at the rear of the 
system. Tighten the two screws on the cable connector on 
both ends, otherwise the screen will be abnormal and LED 
light is yellow color, not the normal green color. 


3.  

Connect the power to the monitor through the AC/DC adapter   


4.  

Connect the power cord on the AC outlet, see the below 


5.  

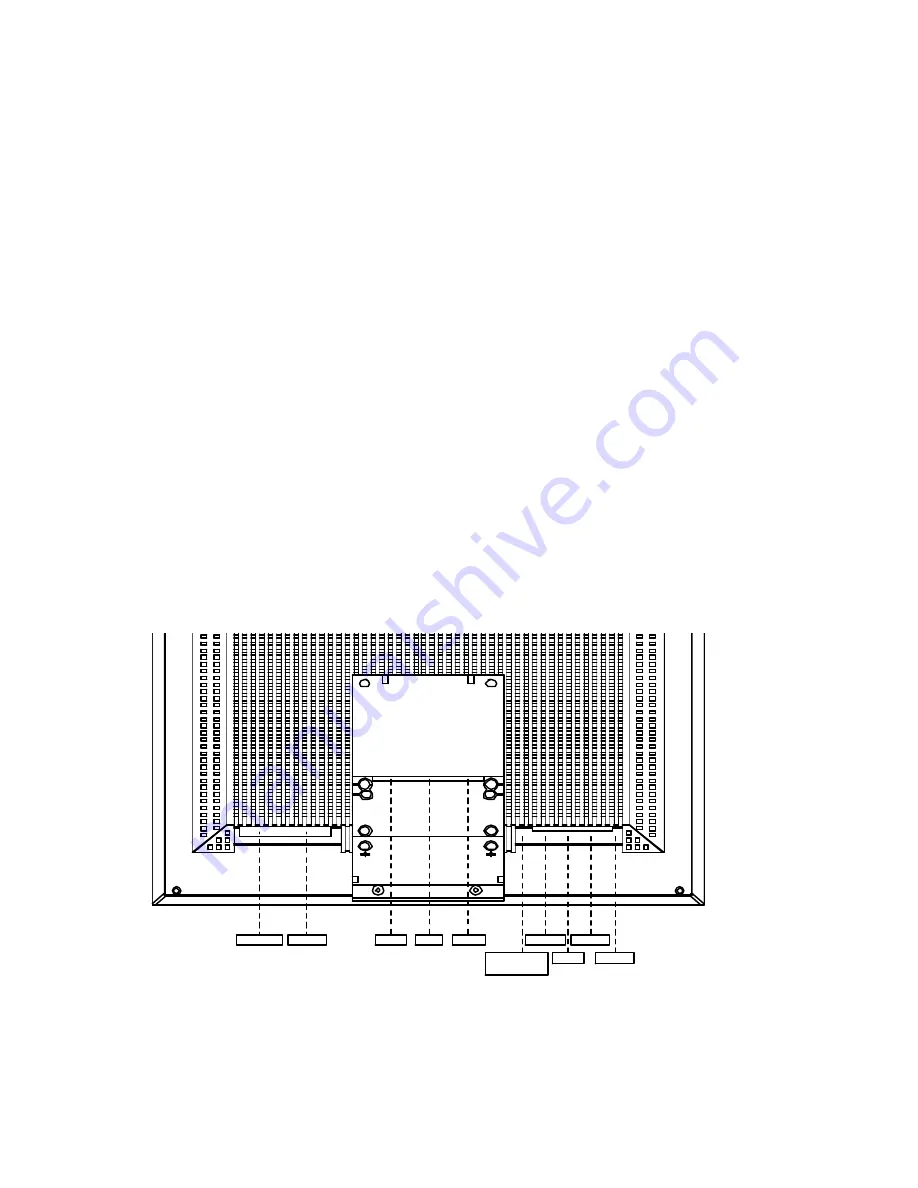
Connectivity of video cable as below 


RGB

DC IN

Audio

Y c b C r

C o m p o m e n t

S-Video

Video

Audio L

Audio R

BNC IN

BNC Out


  For LCD-1700V 17” and LCD-1900V 19” LCD monitor connection 

Summary of Contents for LCD-1700V

Page 1: ......

Page 2: ......

Page 3: ...l Power Input 110 240VAC auto sensing Frequency 48 62Hz Consumption 45Watts maximum on 3 Watts Power saving off mode PC RGB Connector 15pin Mini D sub Standard Audio connector 1 x stereo input Speaker 2W x 2 RGB Signals Video Analog RGB 0 7Vp p 75Ω Sync Separate Display Data Channel Compatibility VESA DDC 1 2B Video connector input S connector x 1 S Video In AV connector x 3 one for video Two for ...

Page 4: ...osition V position OSD position Audio volume bass treble mute Load default Control Type Digital Compatibility IBM and compatible Apple Macintosh NEC Environmental Limits Operating Temp 32 to 103 F 0 to 40 C Storage Temp 4 to 140 F 20 to 60 C Operating Humidity 10 to 85 without Condensation Storage Humidity 10 to 95 without Condensation Agency Approval EMI FCC B and CE Emissions MPR II Energy Savin...

Page 5: ... one glass filter l Every effort has been made to protect the panel however the monitor is an extremely fragile product CLEANING l The display area is highly prone to scratching Do not use ketone type material ex Acetone Ethyl alcohol toluene ethyl acid or Methyl chloride to clear the panel It might permanently damage the panel l The desirable cleaners are water IPA Iso Prophyl Alcohol or Hexane l...

Page 6: ...RAGE l Do not store the monitor in temperature higher than 35 degree Celsius or humidity higher than 70 and no condensation l Store in dark places away from sunlight and ultra violet UV radiation l Air bubble may develop within the glass panel if this is not observed ...

Page 7: ... LCD Monitor l Accessory Box 1 VGA cable x 1 2 AC to DC adapter x 1 3 Power Cord x 1 4 User s manual Warranty Card x 1 5 Audio cable x 1 6 Mini DIN RCA cable for Component Video In use INSTALLING THE MONIT OR The monitor is equipped with a auto sensing power supply for voltage ranges from 110 240VAC 60 50Hz Confirm the line voltage designation on the rear panel of the monitor Note The drawing is u...

Page 8: ...deo signal connector at the rear of the system Tighten the two screws on the cable connector on both ends otherwise the screen will be abnormal and LED light is yellow color not the normal green color 3 Connect the power to the monitor through the AC DC adapter 4 Connect the power cord on the AC outlet see the below 5 Connectivity of video cable as below RGB DC IN Audio YcbCr Compoment S Video Vid...

Page 9: ..._____________________ 17 l LCD 1700V 17 Monitor The control key description 1 Power Switch 2 Decrement Increment or Volume control 3 Cursor Up Down or Brightness control 4 MENU Activate the on screen display function 5 Auto Auto adjustment ...

Page 10: ...activating OSD screen these two keys are used to change the speaker volume value 3 Select down up key Brightness Control keys The two keys have two functions controlled by the MENU key When activating OSD screen the two keys are used to select the wanted adjustment items When de activating OSD screen these two keys are used to change the Brightness value 4 Menu Press the Menu key to activate the o...

Page 11: ...ugh or key 2 Pressing Sel key to move the arrow down or up If the selected item has many option to choose press or to enter into the sub menu 3 Then move the Sel key to item you want to change the item will be highlighted as red characters then press or to change the value 4 If you finish the setting press the MENU to key to return to the main OSD then repeat the item 2 and 3 to do the changes you...

Page 12: ...0K user mode and 6500K option Brightness adjustment Let user adjust the brightness The range if from 0 to 99 Contrast setup Provide user to separately adjust each R G and B contrast and intensity value When Move to this icon and press or key then the screen will show below 1024x768 60KHz 75Hz VER XGA KD841 5100 Color balance Intensity R Intensity G Intensity B Contrast R Contrast G Contrast B Exec...

Page 13: ...reen size The range is from 0 to 99 Phase Adjust phase tracking to reduce the display flicker The range is from 0 to 31 H Position Move the whole screen horizontally The range is from 0 to 120 V Position Move the whole screen vertically The range is from 0 to 100 OSD H Position Move the OSD horizontally The range is from 0 to 15 OSD V Position Move the OSD screen vertically The range is from 0 to ...

Page 14: ... Composite S video YCbCr PIP composite PIP S video PIP YCbCr and PIP off for user s selection Note The PIP function is only valid on video on VGA screen We can t support video on video screen Speaker volume control We provide Volume Bass Treble Mute and PIP audio for audio setup Volume Adjust the speaker volume The range is from 0 to 32 Bass Adjust the speaker Bass value The range is from 0 to 10 ...

Page 15: ...he selected item Then you can change the setting through or key 2 Pressing Sel key to move the arrow down or up If the selected item has many option to choose press or to enter into the sub menu 3 Then move Sel key to item you want to change the item will be highlighted with red characters then press or to change the value 4 If you finish the setting press the MENU to key to the main OSD then repe...

Page 16: ...s from 0 to 15 H position Move the screen horizontally The Range is from 0 to 20 V Position Move the screen vertically The range is from 0 to 20 OSD H Position Move the OSD horizontally The range is from 0 to 15 OSD V Position Move the OSD screen vertically The range is from 0 to 15 Source Select we provide VGA Composite S video YCbCr source for user s selection Speaker volume control We provide V...

Reviews: