P. 6
Installation and Detaching
■
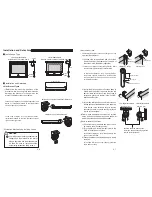
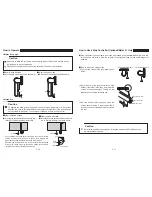
Installation Type
< Ceiling Attachment>
Install inside of a window frame.
Window
frame
<Wall Attachment>
Install on a wall or outside of a window frame.
Window
frame
■
Installation and Detaching
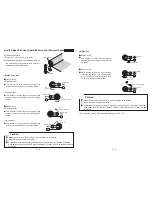
<Side Bracket Type>
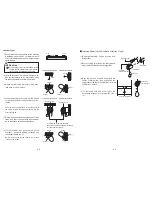
(1)Determine the mounting positions of the
brackets while ensuring that the dimension
between the brackets is the same as the
width of the product that you ordered.
* In the case of Mytec 01 Loop (right operation) and
Mytec 01, install the brackets so that the bracket
shown at right is on the left side.
* In the case of Mytec 01 Loop (left operation),
install the brackets so that the bracket shown at
right is on the right side.
(2)Install the brackets using the fixing screws.
Use fixing screws that are suitable for the
strength and the material of the wall or
window frame to which the brackets are to
be fixed. Be sure to install each side
holder using at least two fixing screws.
Caution
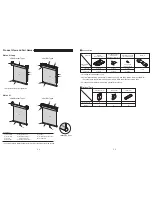
Product Width
<Mytec 01 Loop (right operation)/ Mytec 01>
<Mytec 01 Loop (left operation)>
Ceiling
Wall
P. 7
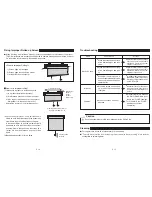
1) Pull down the screen about 5 and 10 cm, then
insert the dowel (transparent) at the end of
the screen into Side Holder (right side).
* In the case of Mytec 01 Loop (left operation), insert
the protrusion into Side Holder on the left side.
2) Install the black knob on roll screen body to
Side Holder (left side) to ensure that the red
part is visible at the front. Once the screen is
correctly in place, turn the dial in the “CLOSE”
direction until it clicks.
3) In the case of Mytec 01 Loop, set the screen so
that the position of the ball chain cover is at the top.
* Push the tab on the ball chain cover to the side
opposite the screen, and while keeping it pressed,
turn the cover through 90°.
* In the case of Mytec 01 Loop, set the chain as
the position of Chain Connector is located on the
rear side, then attach Chain Connector is about 3
cm below Bottom Bar.
(3)Install the screen.
* The illustration applies to the case of Mytec 01 Loop
(right operation)/Mytec 01.
(4)Finally, open and close the screen two or three
times, and check the operation and speed at
which the screen ascends and descends.
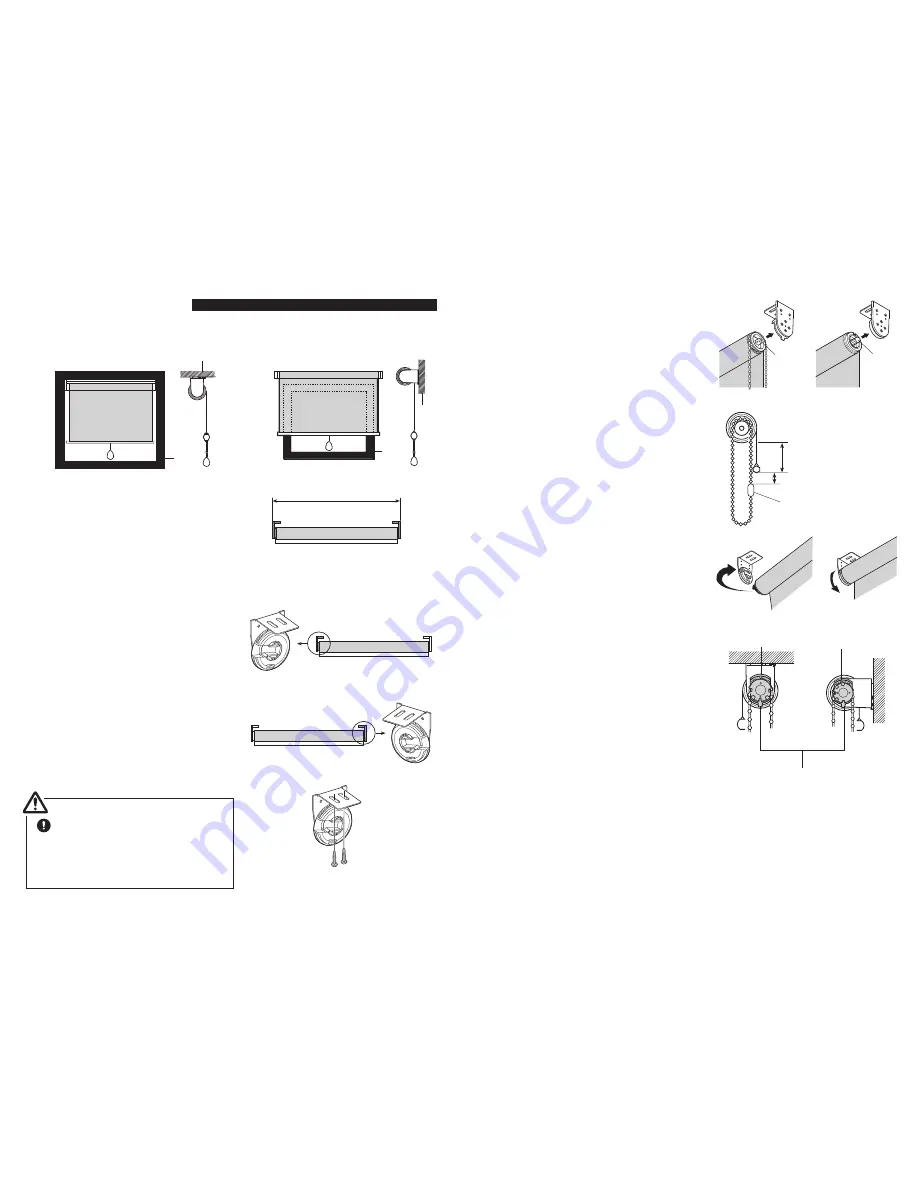
(5)How to remove the screen
1) Pull down the screen between about 5 and
10 cm and stop it in that position.
2) Turn the dial on Side Holder (left side) in the
“OPEN” direction until it stops.
* In the case of Mytec 01 Loop (left operation), the
dial is on the right side.
3) Grasp the product with both hands, and slowly
remove it.
* In the case of Mytec 01 Loop, take care that the
chain does not drop.
Dowel
(transparent)
Dowel
(transparent)
About 3cm
Chain Connector
About 5-10cm
<Ceiling Attachment>
<Mytec 01 Loop>
<Mytec 01>
<Wall Attachment>
Ball chain cover
Ball chain cover
Push this tab to the side opposite
the screen, and while keeping it pressed,
turn the cover through 90°.


