Adjustments
26
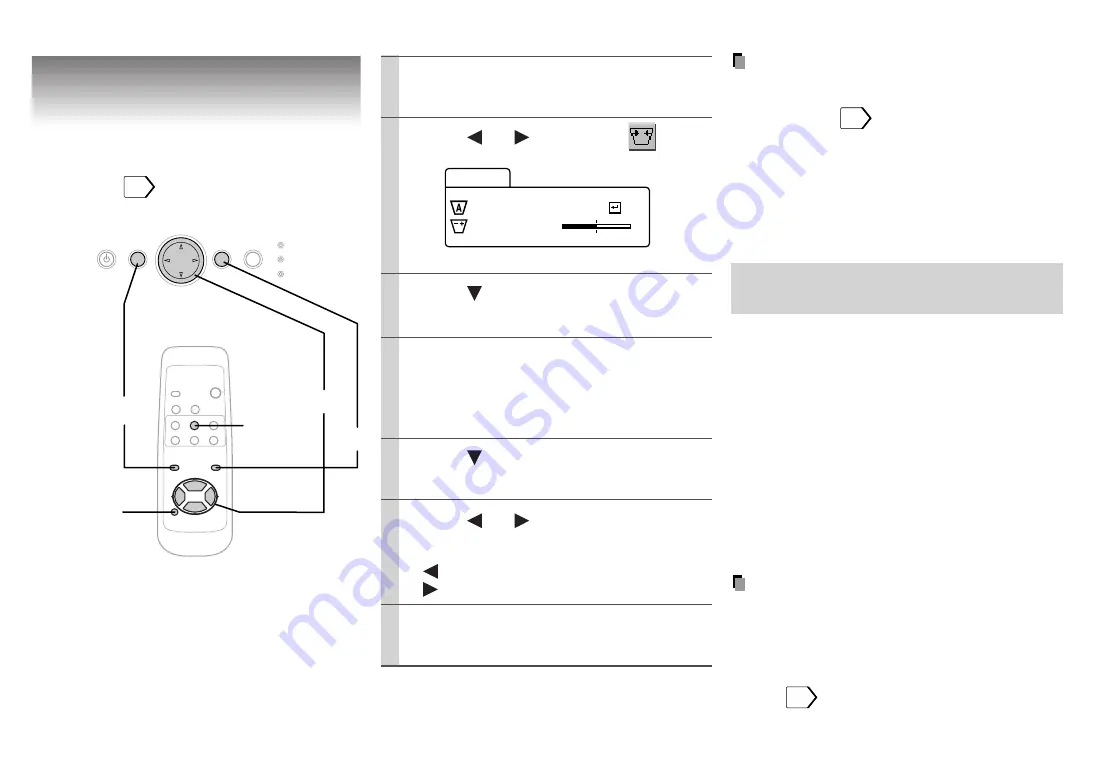
Keystone correction
– Keystone
Notes
• Pressing KEYSTONE on the remote control
can also correct the keystone distortion
automatically.
20
• These adjustments are stored until you turn
the power off.
• Pressing RESET will return the adjustment or
setting currently selected to default.
• Pictures may be slightly deteriorated by the
keystone correction.
0 degrees setting for the automatic
keystone correction
Depending on the operating condition such as
vibration, the distortion may be beyond the
automatic keystone correction. The horizontal
condition setting (0 degrees setting) may be
disordered. In such a case, perform the
following 0 degrees setting to correct the
distortion.
1) Place the projector on a level surface.
2) On the menu, select “Auto set” in
“Keystone”.
3) Press RESET.
Notes
• Do not make the 0 degrees setting on an
inclined or unstable surface or in a shaky
place as it may not be performed properly.
• To store this setting even if the power is
turned off, follow the procedure of “Saving
data”.
30
Preparation
• Display the image as explained in “Picture
Projection”.
19
RESET
KEYSTONE
ON/STANDBY
MENU
ENTER
SELECT/ADJUST
INPUT
ON
LAMP
TEMP
1,7
4
2,3,5,6
VIDEO
RGB
AUTO SET
KEYSTONE
RESIZE
FREEZE
MENU
RESET
+
-
ENTER
MUTE
MARKER
CALL
ON/
STANDBY
A u t o s e t
Ke y s t o n e
A d j u s t
–
+
1
3
2
5
6
4
7
Press MENU to display the
menu.
Press or to select
.
Press to select “Auto set”.
Press ENTER.
The keystone distortion is corrected
automatically. For further correction,
follow the below steps.
Press .
Press or to correct the
distortion.
(–): To reduce the upper width.
(+): To reduce the lower width.
Press MENU.
The menu disappears.


