4/00, Tecra
Toshiba TRR
Page 24
Tecra 750 Series Disassembly Overview, (cont.)
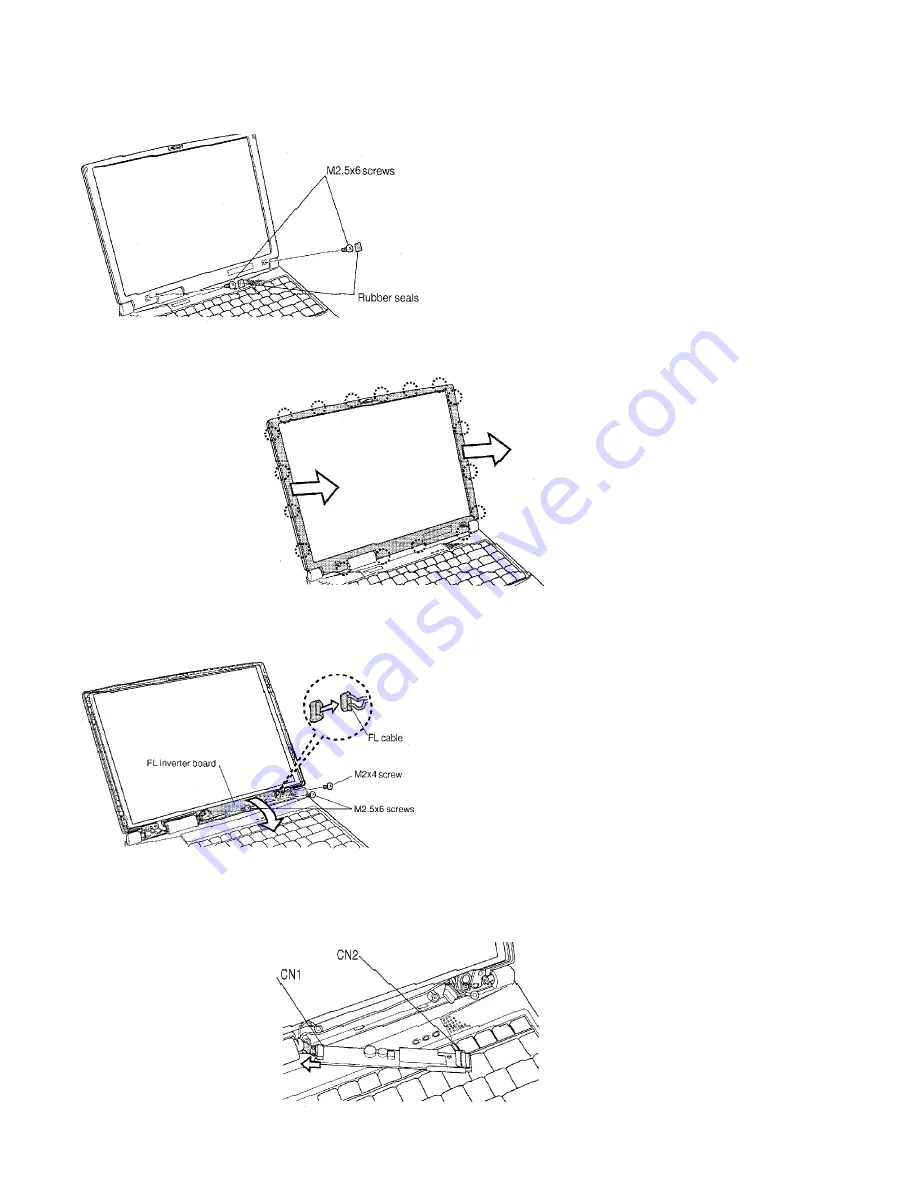
To remove the display mask, follow the steps
below.
1.
Turn off the power to the computer.
Disconnect the AC adapter and all
external cables connected to the
computer.
2.
Remove the battery pack.
3.
Remove two rubber seals at the
bottom corners of the display
assembly.
4.
Remove two M2.5x6 screws that were
covered by the rubber seals.
NOTE: Support the display with your hand
when you remove the screws.
5.
Release 18 latches along the edges of
the display mask. Begin at the top (six
latches), continue along the sides (four
latches on each side) and the bottom
(four latches).
6.
Remove the display mask.
î
To remove the FL inverter board, follow the
steps below.
1.
Turn off the power to the computer.
Disconnect the AC adapter and all
external cables connected to the
computer.
2.
Remove the battery pack, and the
display mask.
3.
Lay the display panel on its back and
remove one M2x4 screw securing the
microphone and its ground cable.
4.
Remove two M2.5x6 screws securing
the FL inverter board and its ground
cable.
5.
Rotate out the top end of the FL
inverter board and disconnect the FL
cable from CN2.
6.
Disconnect the FL inverter cable from
CN1 and lift out the FL inverter board.
î


