background image

2

Introduction

SAFETY PRECAUTIONS

WARNING:

TO REDUCE THE RISK OF FIRE OR ELECTRIC SHOCK, do not expose this appliance to rain
or moisture.

CAUTION:

TO PREVENT ELECTRIC SHOCK DO NOT USE THIS POLARIZED PLUG WITH AN

EXTENSION CORD, RECEPTACLE OR OTHER OUTLET UNLESS THE BLADES CAN

BE FULLY INSERTED TO PREVENT BLADE EXPOSURE.

FCC NOTICE

:

This equipment has been tested and found to comply with the limits for a Class B digital device,
pursuant to Part 15 of the FCC Rules. These limits are designed to provide reasonable protection
against harmful interference in a residential installation. This equipment generates, uses and can
radiate radio frequency energy and, if not installed and used in accordance with the instructions,
may cause harmful interference to radio communications.
However, there is no guarantee that interference will not occur in a particular installation. If this
equipment does cause harmful interference to radio or television reception, which can be deter-
mined by turning the equipment off and on, the user is encouraged to try to correct the interference
by one or more of the following measures:

- Reorient or relocate the receiving antenna.
- Increase the separation between the equipment and receiver.
- Connect the equipment into an outlet on a circuit different from that to which the receiver is

connected.

- Consult the dealer or an experienced radio/TV technician for help.

CAUTION:

Changes or modifications not expressly approved by the party responsible for compliance with the
FCC Rules could void the user's authority to operate this equipment.

CAUTION:

THIS DIGITAL VIDEO PLAYER EMPLOYS A LASER SYSTEM.

TO ENSURE PROPER USE OF THIS PRODUCT, PLEASE READ THIS USER'S GUIDE CARE-
FULLY AND RETAIN FOR FUTURE REFERENCE. SHOULD THE UNIT REQUIRE MAINTE-
NANCE, CONTACT AN AUTHORIZED SERVICE LOCATION.

USE OF CONTROLS, ADJUSTMENTS OR THE PERFORMANCE OF PROCEDURES OTHER
THAN THOSE SPECIFIED HEREIN MAY RESULT IN HAZARDOUS RADIATION EXPOSURE.

TO  PREVENT DIRECT EXPOSURE TO LASER BEAM, DO NOT TRY TO OPEN THE
ENCLOSURE. VISIBLE LASER RADIATION MAY BE PRESENT WHEN THE ENCLOSURE IS
OPENED.  DO NOT STARE INTO BEAM.

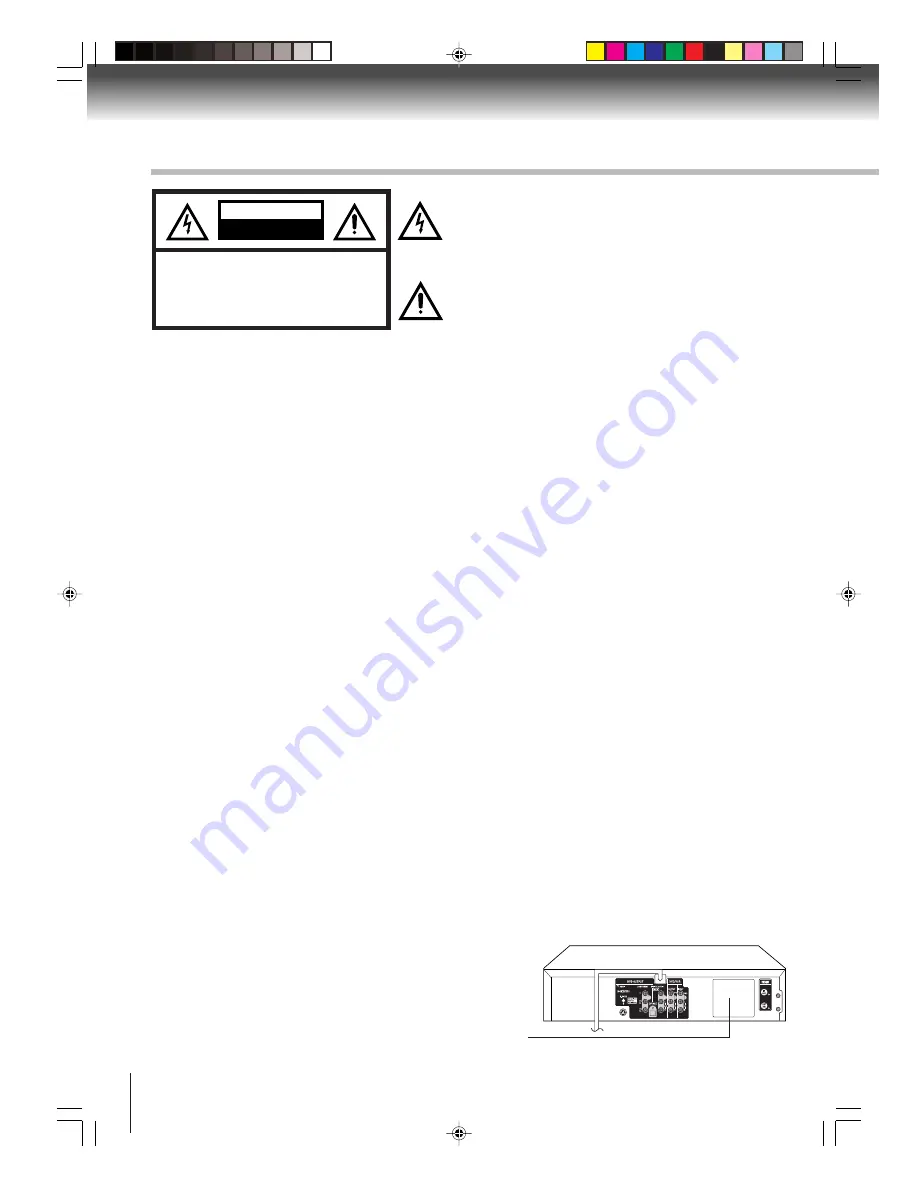
The lightning flash with arrowhead symbol, within an
equilateral triangle is intended to alert the user to the presence
of uninsulated dangerous voltage within the product's
enclosure that may be of sufficient magnitude to constitute a
risk of electric shock to persons.

The exclamation point within an equilateral triangle is intended
to alert the user to the presence of important operating and
maintenance (servicing) instructions in the literature
accompanying the appliance.

Location of the required Marking

The rating sheet and the safety caution are on the rear of the unit.

CERTIFICATION: COMPLIES WITH FDA RADIATION PERFORMANCE
STANDARDS, 21 CFR SUBCHAPTER J.

RISK OF ELECTRIC SHOCK

DO NOT OPEN

CAUTION


 2F90201B (E)p02-15

5/9/05, 4:31 PM

2

Summary of Contents for SD-V593

Page 1: ...ECORDER SD V593SU OWNER S MANUAL 2005 Toshiba Corporation This device does not tape record copy protected DVD Video Discs Connections Basic setup Playback VCR Recording VCR Other functions VCR Basic playback DVD Advanced playback DVD Function setup DVD Others 2F90201A E COV 4 4 05 9 01 PM 1 ...

Page 2: ...lt the dealer or an experienced radio TV technician for help CAUTION Changes or modifications not expressly approved by the party responsible for compliance with the FCC Rules could void the user s authority to operate this equipment CAUTION THIS DIGITAL VIDEO PLAYER EMPLOYS A LASER SYSTEM TO ENSURE PROPER USE OF THIS PRODUCT PLEASE READ THIS USER S GUIDE CARE FULLY AND RETAIN FOR FUTURE REFERENCE...

Page 3: ... and to protect it from overheating These openings must not be blocked or covered The openings should never be blocked by placing the unit on a bed sofa rug or other similar surface This unit should never be placed near or over a radiator or heat source This unit should not be placed in a built in installation such as a bookcase or rack unless proper ventilation is provided and or the manufacturer...

Page 4: ...I NFPA 70 provides information with respect to proper grounding of the mast and supporting structure grounding of the lead in wire to an antenna discharge unit size of grounding conductors location of antenna discharge unit connection to grounding electrodes and requirements for the grounding electrode EXAMPLE OF ANTENNA GROUNDING AS PER THE NATIONAL ELECTRICAL CODE ANTENNA DISCHARGE UNIT NEC SECT...

Page 5: ...f the laser beam It may cause sight damage 25 DISC Do not use a cracked deformed or repaired disc These discs are easily broken and may cause serious personal injury and product malfunction 26 NOTE TO CABLE TV SYSTEM INSTALLER This reminder is provided to call the Cable TV system installer s attention to Article 820 40 of the NEC that provides guidelines for proper grounding and in particular spec...

Page 6: ...R If you use a chemical saturated cloth to clean the unit follow that product s instructions Notes on moisture condensation Moisture condensation damages the DVD VCR Please read the following carefully Moisture condensation occurs for example when you pour a cold drink into a glass on a warm day Drops of water form on the outside of the glass In the same way moisture may condense on the head drum ...

Page 7: ...e function 35 Playback VCR Setting the video channel 25 Setting the language 26 Clock setting 27 Tuner setting 30 Basic setup Playing a disc 45 Basic playback DVD Advanced playback DVD Zooming 48 Locating desired scene 48 Marking desired scenes 49 Repeat playback 50 A B Repeat playback 50 Program playback 51 Random playback 51 Changing angles 52 Title selection 52 DVD menu 52 Changing soundtrack l...

Page 8: ...re discs in places subject to moisture and dust such as a bathroom or near a humidifier Store discs vertically in a case Stacking or placing objects on discs outside of their case may cause warping Playback side DVD video disc Title 1 Title 2 Chapter 1 Chapter 2 Chapter 1 Chapter 2 Chapter 3 Track 1 Track 2 Track 3 Track 4 Track 5 Structure of disc contents Normally DVD video discs are divided int...

Page 9: ...an enjoy two playback variations depending on types of discs Video CD not equipped with PBC function Version 1 1 Sound and movie can be played on this DVD VCR in the same way as an audio CD Video CD equipped with PBC function Version 2 0 In addition to operation of a Video CD not equipped with the PBC function you can enjoy playback of interactive software with search function by using the menu di...

Page 10: ...ideo CDs Approx 4 hours single sided disc Approx 8 hours double sided disc Approx 80 minutes single sided disc Approx 160 minutes double sided disc Approx 74 minutes Approx 20 minutes 8 cm 12 cm 8 cm 12 cm Audio Video moving pictures Audio Video moving pictures Audio CDs Approx 74 minutes Approx 20 minutes 8 cm CD single 12 cm Audio The following discs are also available DVD R RW discs of DVD vide...

Page 11: ...d of Media card Do not use commercially sold labels which can cause a malfunction when the card is inserted or ejected When ejecting the Media card after extended use it may feel warm to the touch This is normal The Media card is not malfunctioning For instructions on using your Media card refer to the own er s manual for your Media card This unit can play the following cards Do not insert any car...

Page 12: ...jack DVD COMPONENT OUT jacks ANT OUT jack ANT IN jack AUDIO L R VIDEO IN LINE IN1 jacks DVD VCR common AUDIO L R VIDEO OUT jacks AC power cord 5 Media card slot SD memory card MMC MultiMediaCard xD Picture Card Memory Stick PRO Media card slot CompactFlash memory card HDMI OUT jack DVD OPTICAL DIGITAL AUDIO OUT jacks Identification of controls See the page in for details When connecting the optica...

Page 13: ...3 Each press of DISPLAY the status display of the disc will appear on the screen and change as follows DVD 00 34 56 01 12 33 1 9 Title 1 99 1 8 1 32 Chapter 1 999 Eng DolbyDigital Eng CD VCD DISC OPERATION TRACK NO ELAPSED TIME CHAPTER NO ANGLE NO A KIND OF AUDIO DISC OPERATION TITLE NO ELAPSED TIME TOTAL TIME TOTAL TIME OUTPUT SELECTION Timer Recording indicator VCR Multifunctional indicator Reco...

Page 14: ...utton 43 PROGRAM button 66 RETURN button 58 STOP button 45 33 HDMI button 22 DVD VCR SELECT button 25 TV VCR button 25 REC OTR button 37 TIMER REC button 40 39 SLOW button 47 34 CLOCK COUNTER button 36 FF button 47 SKIP button VISS button 47 36 AUDIO SELECT button AUDIO button 42 53 33 MENU button 52 ENTER button 26 58 SKIP button CABLE BOX button 67 Direct channel selection buttons 0 9 Number but...

Page 15: ...h new ones When necessary to replace batteries in the remote control always replace both batteries with new ones Never mix battery types or use new and used batteries in combination Always remove batteries from remote control if they are dead or if the remote control is not to be used for an extended period of time This will prevent battery acid from leaking into the battery compartment Press DVD ...

Page 16: ...d the type of antenna system you are using and follow the connection diagram If both VHF and UHF antennas have 300 ohm twin lead flat wires use a combiner having two 300 ohm inputs and one 75 ohm output Note Combination VHF UHF Antenna with 75 ohm Coaxial Cable Combination VHF UHF Antenna with 300 ohm Twin Lead Flat Wire Separate VHF and UHF Antennas DVD VCR VHF UHF 300 ohm Twin Lead Flat Wire not...

Page 17: ...5 ohm VHF antenna inputs TV with 300 ohm UHF and 300 ohm VHF antenna inputs After you have connected the antenna to the DVD VCR you must connect the DVD VCR to the TV Below are 3 common methods of connecting your DVD VCR to a TV Find the type of TV you are using and follow the connection diagram This DVD VCR has a single 75 ohm output for connection to a TV If your TV has separate VHF and UHF ante...

Page 18: ...e timer to record only the channel selected at the converter box Prevents Recording one channel while watching another Using the DVD VCR tuner to select channels DVD VCR Incoming Cable TV Converter Descrambler Incoming Cable TV TV Note To record from converter descrambler DVD VCR tuner must be tuned to the converter output channel usually channel 3 or 4 DVD VCR DVD VCR Note Whenever a Converter De...

Page 19: ... through the converter box Prevents Watching scrambled channels while recording another channel Using the DVD VCR tuner to select channels DVD VCR Splitter Converter Descrambler TV DVD VCR Converter Descrambler A B Switch TV Incoming Cable Splitter Allows Recording of nonscrambled channels Recording of one channel while watching another Watching premium channels through the converter while recordi...

Page 20: ...R to a Y cable adapter not supplied and then connect to your TV Connect the DVD VCR directly to your TV If you connect the DVD VCR to a VCR TV VCR combination or video selector the playback picture may be distorted as DVD video discs are copy protected TV or monitor with audio video inputs Connecting to a TV Note This method transports VHS and DVD video signals For enhanced DVD video performance w...

Page 21: ... VIDEO OUT To PB CB VIDEO OUT To Y video input To PB CB video input Audio system To ANALOG AUDIO OUT To S VIDEO OUT Component video cable not supplied To S video input S video cable not supplied Audio cable not supplied Connecting to an audio system andTV equipped with S video input component video inputs If you connect the DVD VCR to your TV with the DVD OUT jacks select the corresponding video i...

Page 22: ...sing the HDMI cable Switching the video quality HDMI mode using HDMI button on the remote control Press HDMI on the remote control to receive suitable video quality The video quality is required to match your TV having HDMI feature and suitable quality please check your TV owner s manual Pressing HDMI changes the video quality as follows Notes Refer to the Owner s manual of the connected TV as Wel...

Page 23: ...l cable not supplied To COAXIAL type digital audio input Amplifier equipped with a DTS decoder To COAXIAL type digital audio input This selection uses the following reference mark To ANALOG AUDIO OUT To audio input Audio cable not supplied 75 Ω coaxial cable not supplied Dolby Digital Dolby Digital is the surround sound technology used in theaters showing the latest movies and is now available to ...

Page 24: ...Laserdisc use only and is incompatible with the OPTICAL or COAXIAL DIGITAL AUDIO OUT jack of the DVD VCR Connect the OPTICAL DIGITAL AUDIO OUT jack of the DVD VCR to the OPTICAL input of a Receiver or Processor Connect the COAXIAL DIGITAL AUDIO OUT jack of the DVD VCR to the COAXIAL input of a Receiver or Processor Refer to the owner s manual of the connected equipment as well When you connect the...

Page 25: ... 5 6 7 The VCR indicator will appear in the display window For a push button TV tuner If CH 3 or 4 corresponding to the video channel cannot be tuned on your TV proceed as follows set the VCR 3 4 channel selector and the TV to CH 3 or 4 play back a prerecorded tape and tune the TV to receive a sharp color picture from the video cassette recorder Refer to your TV owner s manual for details Note If ...

Page 26: ...e on screen displays 1 2 Press SET or to select the desired language English ENGLISH Spanish ESPAÑOL or French FRANCAIS then press ENTER 3 Press VCR MENU until the MENU screen is cleared 4 Notes Both the VCR and the DVD have their own player menus If no buttons are pressed for more than 60 seconds the VCR MENU screen will return to normal TV operation automatically Preparation Turn ON the TV and s...

Page 27: ...L to check the clock setting on the on screen display 5 If the clock is not set check the antenna condition The AUTO CLOCK may not function properly if the reception condition is not good 6 AUTO CLOCK adjustment To set AUTO CLOCK to off The auto clock adjustment will be updated at 6 00 AM 12 00 PM and 6 00 PM everyday when the DVD VCR turned off If you use a cable box and you want AUTO CLOCK adjus...

Page 28: ...E then press ENTER 2 Press SET or to select one of the options then press ENTER Press VCR MENU until the MENU screen is cleared 3 Notes When shipped from factory the DAYLIGHT SAVING TIME is set to AUTO position When the clock is not set DAYLIGHT SAVING TIME setting is not available When there is no DAYLIGHT SAVING TIME in your area al ways select OFF position in step 3 When you want to set the DAY...

Page 29: ...me To make corrections any time during the process Press CANCEL repeatedly until the item you want to change blinks then press SET or Press SET or to select SYSTEM SETUP then press ENTER 2 Press SET or to select CLOCK SET then press ENTER 3 Press SET or to set the month then press ENTER 4 Set the day year and time as in step 4 5 If the AUTO CLOCK process did not set the date and time correctly you...

Page 30: ...O CH MEMORY TV CABLE selection Setting channels automatically Repeat left step 1 and press SET or to select AUTO CH MEMORY 1 Press ENTER Auto tuning will begin The channel dis play will count up and when finished the screen returns to normal 2 0 Note You can t select CH SETUP if you set the channel to L1 or L2 Press ENTER to select the TV or CABLE mode The arrow indicates the selected mode 3 Press...

Page 31: ...ars on the screen To delete channels Press ENTER until DELETE appears on the screen The channel number will blink 3 Repeat 1 to 2 to add or delete other channel Noise elimination When you don t want to receive a weak signal broadcast a Blue back screen can be obtained by selecting the NO NOISE BACK GROUND ON When the unit is shipped from the factory the NO NOISE BACKGROUND is set to ON Repeat the ...

Page 32: ...d at your left An inverted cassette tape cannot be inserted Automatic playback When loading a cassette tape without an erase prevention tab playback will start automatically Automatic power ON When you insert a cassette tape the DVD VCR power will turn ON automatically 2 Erase prevention tab Adhesive tape Remove the cassette tape Erase prevention tab Unloading To prevent accidental erasure To prev...

Page 33: ...TOP on remote To discontinue the tape winding press STOP To switch to playback directly without STOP press PLAY Notes This VCR selects the playback tape speed SP LP or SLP au tomatically The Cassette tape and DVD disc can be played back simulta neously If you press DVD VCR SELECT the tape playback and DVD playback alternate with each other on the screen via CH3 4 or video connection 2To start play...

Page 34: ... picture search mode there will be noise bars This is not a defect Playback will commence after approx 5 minutes to protect the video tape against excessive wear during pause mode Press ATR to reactivate automatic tracking again AUTO TR will appear on the screen PICTURE SEARCH SPEED PRESS TWICE TAPE SPEED PRESS ONCE SP Standard Play LP Long Play SLP Super Long Play 5 X 9 X 15 X 3 X 7 X 9 X REV PLA...

Page 35: ...0 00 00 counter position automatically Press CLOCK COUNTER The counter display shows the tape run ning time during playback or recording 1 Press COUNTER RESET at the desired tape position The counter display will be reset to 00 00 00 position e g the beginning of recording 2 Press STOP when playback or recording is completed Press ZERO RETURN The tape will automatically rewind or fast forward to t...

Page 36: ...ideotapes INDEX marks may not be found if it is extremely close to the point where the search began In recording if you stop recording temporarily the INDEX mark is not recorded on the tape Video index search system Press CLOCK COUNTER The clock and tape counter alternate with each other in the display window Notes If you rewind the tape beyond 00 00 00 a minus sign will be displayed in front of t...

Page 37: ...60 85 AAA ZZZ 86 94 86 94 95 99 A 5 A 1 100 125 100 125 01 5A TV mode direct channel selection All channels can be instantly selected by using two buttons for example to select channel 2 press 0 then 2 If you press only 2 channel selection will be delayed for two seconds For channels 10 and above press the 2 digits in order CABLE mode direct channel selection 1 9 Press 0 twice and then 1 9 as requ...

Page 38: ...top recording temporarily While the VCR is recording select your desired channel on the TV When a TV is connected with an antenna cable only press TV VCR to select the TV position The VCR display will go off and recording will continue Select the TV channel you want to watch by using the TV channel selector Note Some Cable TV hookups do not permit viewing one channel while recording another See pa...

Page 39: ...annel selection buttons 0 9 or CH to select the channel to be recorded 4 Press REC OTR Recording begins Press the button again to stop recording after 30 minutes Each additional press of REC OTR will increase recording time as shown in the chart below up to a maximum of 6 hours The OTR and recording time will appear on the screen for about 4 seconds And will appear on the display 5 To cancel OTR P...

Page 40: ... DVD VCR Press DVD VCR SELECT to select the VCR mode Load a cassette tape with the erase prevention tab intact Check the time and date are correct Example Program a timer recording for the 26th day channel 125 Cable TV 11 00 11 30 PM on timer program number 1 Tape speed SLP 1 Press SET or to select one of the program line then press ENTER 2 Press SET or to select the date then press ENTER 3 Set th...

Page 41: ...ily weekly recording can be made continuously until the recording is canceled or the tape reaches the end During timer recording the automatic rewinding mechanism does not function 8 00 11 00 9 00 10 00 Program 1 Prog 1 Deleted Parts Non Recorded Portion Parts Prog 2 Prog 3 Program 2 Program 3 Recording Control Settings ENTER CANCEL MENU DATE START END CH 26 SA 11 00PM 11 30PM125SLP Notes If there...

Page 42: ...rogram Each time when you press the button OUTPUT SELECTION display appears on the screen for several seconds Refer to the chart below Output selection Your DVD VCR is fitted with a SAP broadcast system which enables you to switch to a second audio program when view ing a selected channel This function applies only when the program is broadcast in multi languages through the SAP broadcast system W...

Page 43: ...ith Camcorder Press SP SLP to select the desired tape speed SP or SLP It is recommended that you set the tape speed to the SP mode on the recording VCR for best results 1 Press INPUT SELECT once or twice to select AUDIO VIDEO input position L1 or L2 will appear in the display 2 Press REC OTR on the recording VCR The duplicating process begins 3Press PLAY on the playback VCR or Camcorder 4 Press ST...

Page 44: ...indicator will light 2 Press PLAY to start playback 3 4 Press STOP if you finish recording If you wish to stop a DVD CD disc press DVD VCR SELECT selector to change the DVD mode then press STOP 5 Notes You may not be able to record the beginning of the disc Begin VCR recording once program playback commences on the DVD When the scanning mode is set to the progressive mode you cannot duplicate a di...

Page 45: ...f the disc has a menu feature Press or to select title Press ENTER Title is selected and play commences Press STOP to end playback The unit records the stopped point depending on the disc appears on the screen Press PLAY to resume playback from the scene point If you press STOP again or unload the disc appears on the screen the unit will clear the stopped point Press ON STANDBY The DVD VCR turns o...

Page 46: ...on and the function activating The screen saver does not operate when connecting the DVD video player to the TV using the HDMI cable If the Media card is inserted during the playback playback will stop and change to the CARD mode automatically If you wish to change to the DVD mode press DVD CARD To obtain a higher quality picture Occasionally some picture noise not usually visible during a normal ...

Page 47: ...e The sound is muted during slow motion playback Press SKIP or repeatedly to display the chapter or track number you want Playback starts from the selected chapter or track To locate succeeding chapters or tracks Playback starts from the beginning of the current chapter or track When you press twice in quick successions playback starts from the beginning of the preceding chapter or track A Prohibi...

Page 48: ...lay back In the case of VCD CD discs time and track are used to locate the desired point to play back To check the title chapter and time press DISPLAY 1 4 2 3 Note In case of the Video CD playback with PBC the SEARCH does not work To turn off PBC 54 C D B A ZOOM 0 9 ENTER DISPLAY CLEAR SEARCH In the zoom mode press ZOOM repeatedly to return to a 1 1 view Off Press SEARCH during playback or stop m...

Page 49: ...celled when you open the disc tray or turn the power off Some subtitles recorded around the marker may fail to appear To cancel the Marker Follow the above steps 1 2 then press CLEAR DVD VCD DVD VCD ENTER CLEAR MARKER C D Press MARKER during playback Select the blank Marker using C or D Then press ENTER at the desired scene Repeat this procedure to set the other 2 scenes Press MARKER to remove thi...

Page 50: ...ck Press A B RPT again Off appears on the screen A B DVD VCD CD D B A PLAYMODE A B RPT Repeat Off Play Mode Notes Some discs may not work with the repeat operation In case of Video CD with PBC repeat functions are prohib ited during playback DVD Press B B B B B A A A A A to select Chapter or Title The unit automatically starts repeat playback after finishing the current ti tle or chapter Audio CD ...

Page 51: ...BC you cannot set Program playback The program is cancelled when you open the disc tray or turn the power off Play Mode Off Repeat Off Play Mode ENTER C D B A PLAYMODE PLAY 0 9 CLEAR To change the program 1 In the program mode press C D B A to select the track number 2 Press Number buttons 0 9 to select the track number to be replaced To clear the program one by one In the program mode press C D B...

Page 52: ...be able to select the title Depending on the DVD a title menu may simply be called a menu or title in the instructions supplied with the disc 2 Press C C C C C D D D D D B B B B B A A A A A to select the desired item Some DVDs allow you to select the disc contents using the menu When you play back these DVDs you can select the subtitle language and sound track language etc using the menu 1 Press E...

Page 53: ...AUDIO repeatedly until the desired lan guage is selected The on screen display will disappear after a few seconds B A Press B or A to select On The on screen display will disappear after a few seconds 1 Setting surround sound This DVD video player equipped with a QSound It can produce the effect of being in a cinema or a concert hall 2 To cancel Surround mode Follow the left steps 1 2 then press B...

Page 54: ... change when you open or close the disc tray In some cases a selected subtitle language may not be changed immediately Off Subtitles Press SUBTITLE repeatedly during playback until your desired language appears 1 8 Eng 2 DVD ENTER PLAYMODE C D B A To turn off the PBC Video CD version 2 0 Press to select Play Mode then press to select Off 1Press PLAYMODE in the stop mode 2 Press PLAYMODE again to m...

Page 55: ...es per disc card MP3 WMA JPEG files cannot be used for the purpose of recording If the disc card has both audio tracks and MP3 WMA JPEG files only audio tracks are played It may take more than one minute for this unit to read MP3 WMA JPEG files depending on its structure Music recorded by Joliet Recording Specification can be played back the file name is displayed within 16 letters on the screen L...

Page 56: ...scene point If you press STOP again unload the disc or change the DVD mode and the CARD mode the unit will clear the stopped point About file menu Notes The picture menu is displayed when the FUJICOLOR CD or the Kodak Picture CD are played To display the file menu press TOP MENU In the case of a CD containing a mixture of MP3 WMA and JPEG files the files are played back by selecting them from the ...

Page 57: ...show the slide show stops temporary 4 appears briefly on the pic ture If the picture appears upside down or sideways press ANGLE repeatedly until it s right side up or appears briefly on the screen Press PLAY or SKIP again to resume the slide show When the slide show playback finished the file list ap pears To stop the slide show press STOP The file list ap pears JPEG slide show 1 To display next ...

Page 58: ...mance to your preference ENTER C D B A Repeat steps 3 and 4 to change other settings To select another operation go back to step 2 by pressing C repeatedly Function setup DVD Press B or A to select the desired section then press D or ENTER Press C or D to select the desired option 4 Change the selection using B or A by referring to the corresponding pages 60 63 SETUP DVD VCD CD Enter Setup Return ...

Page 59: ...ed picture mode from Video Film or Auto To select a preferred setting for the slide show play back To select On or Off for DRC Dynamic Range Con trol To select On or Off for QSound To select an output sound format corresponding to your system connection Input 4 digit password to set the parental level To select a preferred parental level for the parental setting To select a preferred file type for...

Page 60: ... ability On Enhanced grey scale 0 IRE cut off Off Standard grey scale 7 5 IRE cut off TV Screen You have the following screen sizes to choose from 4 3 Letter box Select this mode when connecting to a conven tional TV When playing back a wide screen DVD disc it displays the wide picture with black bands at the top and bottom of screen 4 3 Pan scan It displays the wide picture on the whole screen wi...

Page 61: ...o signal and converts it in the progressive output formatappropriately Suitable for playback of video content pictures Note Depending on the disc pictures may be cut off or doubled In this case select Video QSound This DVD video player equipped with a QSound It can produce the effect of being in a cinema or a concert hall On The QSound operates Off The QSound is disengaged On DRC TV Loud sound suc...

Page 62: ...ss you enter the correct password 4 Press OPEN CLOSE to activate Parental control setting See Temporary disabling of rating level by DVD disc on page 64 Notes Depending on the discs the unit cannot limit playback Some discs may not be encoded with specific rating level information though its disc jacket says adult For those discs the age restriction will not work Select Files When playing back a C...

Page 63: ...rogressive scan incompatible no image will be seen on the video display In this case you must reset the unit by pressing STOP on the front panel for five seconds The video output will be restored to Interlace setting and a picture will once again be seen on a conventional analog display Notes Some discs may not be played back with the progressive scanning mode correctly because of the disc charact...

Page 64: ...as been designed to temporarily cancel the Rating level the screen which follows the ReadingDisc screenwillchange depending on which disc is played If you select YES with the ENTER key Your disc exceeds the parental control level screen will then appear If you wish to cancel the set rating level tempo rarily select Parental Control Level with C C C C C or D D D D D then press ENTER If the 4 digit ...

Page 65: ...Thai 3018 Bihari 1218 Hungarian 1831 Oriya 2528 Tibetan 1225 Breton 1228 Icelandic 1929 Panjabi 2611 Tigrinya 3019 Bulgarian 1217 Indonesian 1924 Pashto Pushto 2629 Tonga 3025 Burmese 2335 Interlingua 1911 Persian 1611 Turkish 3028 Byelorussian 1215 Irish 1711 Polish 2622 Turkmen 3021 Cambodian 2123 Italian 1930 Portuguese 2630 Twi 3033 Catalan 1311 Japanese 2011 Quechua 2731 Ukrainian 3121 Chines...

Page 66: ... If you replace the remote control s batteries set the brand code again While holding down PROGRAM enter the two digits of your TV s brand code listed below using Number buttons 0 9 then release PROGRAM Point the remote control at your TV and use each button listed below to make sure that your TV is operated correctly POWER To turn the TV on or off CH M M M M M To select TV channels in the upper o...

Page 67: ...me of Brand Code your cable box Toshiba 36 Anvision 13 20 21 22 23 24 25 26 58 62 84 Archer 1 20 21 29 42 44 63 88 91 Cablestar 13 20 21 22 23 24 25 26 58 62 84 Cableview 30 42 44 52 63 88 Citizen 30 42 44 52 63 88 Curtis 8 9 56 61 Diamond 1 20 21 29 42 44 63 88 91 Eagle 13 20 21 22 23 24 25 26 58 62 84 Eastern 26 28 GC Brand 30 42 44 52 63 88 Gemini 4 30 85 General 1 2 3 4 31 34 55 83 85 91 Hamli...

Page 68: ...mory play etc cannot be performed Some discs may not do some of the functions 45 8 10 No Cable TV reception Check all Cable TV connections Station or Cable TV system problems try another station 18 19 Noise bars on screen Tracking adjustment beyond range of automatic tracking circuit Try Manual tracking adjustment Video heads are dirty The tape is worn or damaged VCR The erase prevention tab of th...

Page 69: ...N ratio Harmonic distortion Wow and flutter Operating conditions General Input Output DVD VCR Video input 1 0 V p p 75 Ω negative sync pin jack x 2 Video output 1 0 V p p 75 Ω negative sync pin jack x 1 Audio input 8 dBm 50 kΩ negative sync pin jack L R x 2 Audio output 8 dBm 1 kΩ negative sync pin jack L R x 1 DVD S video output Y 1 0 V p p 75 Ω negative sync Mini DIN 4 pin x 1 C 0 286 V p p 75 Ω...

Page 70: ... the first rental or thirty 30 days after the date of shipment to the rental firm whichever comes first Commercial Units DVD VDR Combinations sold and used for commercial purposes have a limited ninety 90 day warranty for all parts and labor Owner s Manual and Product Registration Card Read this owner s manual thoroughly before operat ing this DVD VCR Combination Complete and mail the enclosed pro...

Page 71: ...EGOING WARRANTY IS EXCLUSIVE AND IN LIEU OF ALL OTHER WARRANTIES GUARANTEES AGREEMENTS AND SIMILAR OBLIGATIONS OF TACP WITH RESPECT TO THE REPAIR OR REPLACEMENT OF ANY PARTS IN NO EVENT SHALL TACP BE LIABLE FOR CONSEQUENTIAL OR INCIDENTAL DAMAGES INCLUDING BUT NOT LIMITED TO LOST PROFITS BUSINESS INTERRUPTION OR MODIFICATION OR ERASURE OF RECORDED DATA CAUSED BY USE MISUSE OR INABILITY TO USE THIS...

Page 72: ...Printed in Thailand ColorStream and ColorStream Pro are registered trademarks of Toshiba America Consumer Products L L C 2F90201B E p70 BACK 5 9 05 4 32 PM 72 ...

Reviews: