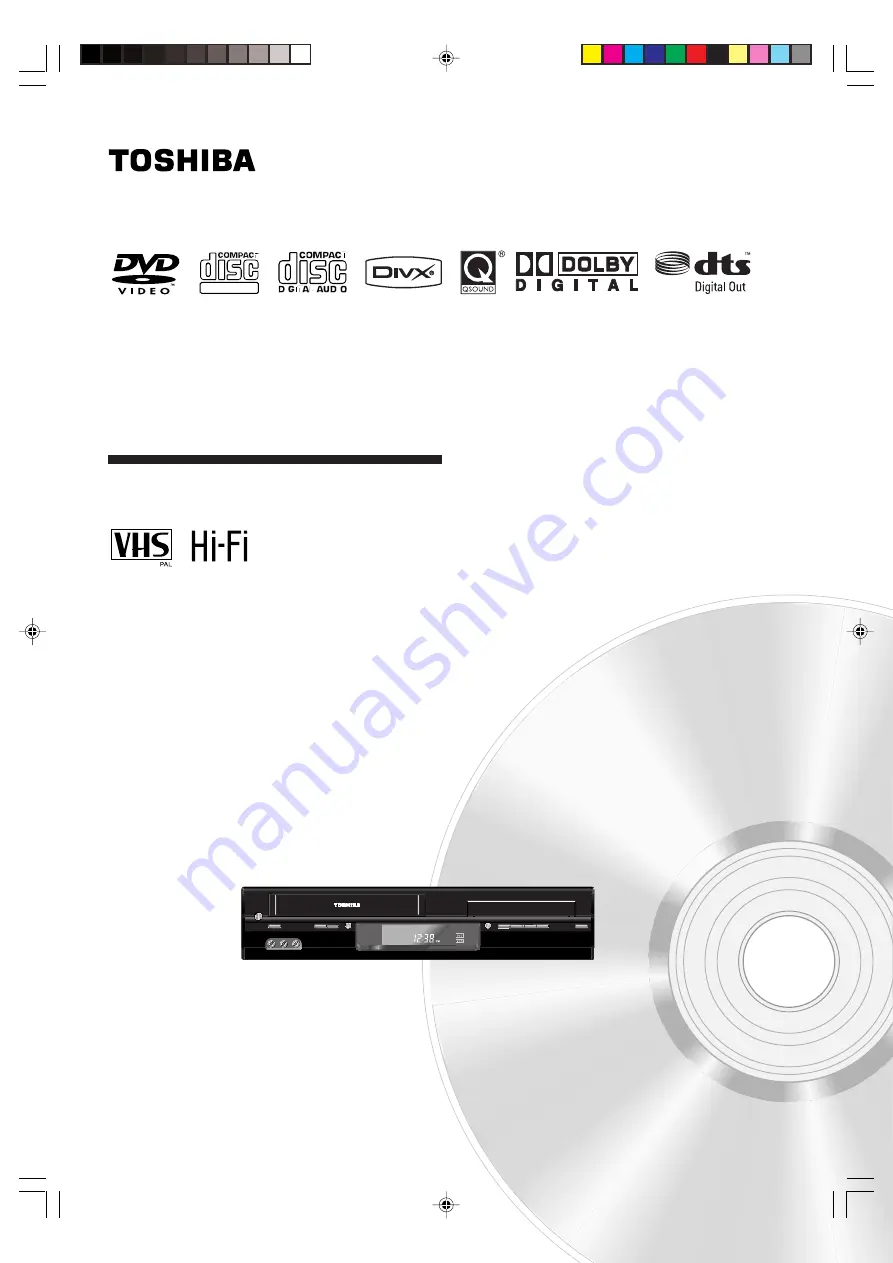
DVD VIDEO PLAYER & VIDEOCASSETTE RECORDER
SD-38VEKE
©2007 Toshiba Corporation
OWNER’S MANUAL
DIGITAL VIDEO
2K20301A [EN] cov
2/3/07, 2:20 PM
1
Page 1: ...DVD VIDEO PLAYER VIDEO CASSETTE RECORDER SD 38VEKE 2007 Toshiba Corporation OWNER S MANUAL DIGITAL VIDEO 2K20301A EN cov 2 3 07 2 20 PM 1 ...
Page 2: ...ay result in hazardous radiation exposure To prevent direct exposure to laser beam do not try to open the enclosure Visible and invisible laser radiation when open and interlocks defeated DO NOT STARE INTO BEAM CAUTION Servicing instructions are for use by qualified service personnel only To reduce the risk of electric shock do not perform any servicing other than that contained in the operating i...
Page 3: ...vided according to the instructions DON T listen to headphones at high volume as such use can permanently damage your hearing DON T leave equipment switched on when it is unattended unless it is specifically stated that it is designed for unattended operation or has a stand by mode Switch off using the switch on the equipment and make sure that your family know how to do this Special arrangements ...
Page 4: ... may damage the surface of the DVD VCR Notes on moisture condensation Moisture condensation damages the DVD VCR Please read the following carefully Moisture condensation occurs for example when you pour a cold drink into a glass on a warm day Drops of water form on the outside of the glass In the same way moisture may condense on the head drum or the optical pick up lens inside this unit one of th...
Page 5: ...under the Copyright Laws of the United States and other countries and may subject you to civil and criminal liability This product incorporates copyright protection technology that is protected by method claims of certain U S patents and other intellectual property rights owned by Macrovision Corporation and other rights owners Use of this copyright protection technology must be authorized by Macr...
Page 6: ...ay the following discs You cannot play discs other than those listed above You cannot play discs of DVD RAM DVD ROM CD ROM Photo CD etc or non standardized discs even if they may be labeled as above Some CD R RWs cannot be played back depending on the recording conditions This DVD VCR output the PAL NTSC colour system depending on the discs and cannot output other colour system SECAM etc NTSC DVD ...
Page 7: ... TV stations 18 Manual TV station presetting 21 Setting up the VCR section Playing a disc 38 Zooming Locating desired scene 41 Marking desired scenes 42 Repeat playback A B Repeat playback 43 Program playback Random playback 44 Changing angles Title selection DVD menu 45 Changing soundtrack language Setting surround sound 46 Subtitles To turn off the PBC Disc status 47 MP3 JPEG DivX and Audio CD o...
Page 8: ...T Composite IN OUT L1 COMPONENT VIDEO OUT Y PB PR jacks ON STANDBY button AUDIO L R VIDEO IN LINE IN 3 jacks EJECT button Disc tray Display window REC button CHANNEL buttons OPEN CLOSE button Remote sensor VCR mode indicator DVD mode indicator Cassette loading slot VCR DVD mode selector button STOP button PLAY button REV button FWD button 2K20301A EN P08 13 2 12 07 3 53 PM 8 ...
Page 9: ...nd at CD Track number display for CD TV channel position display External input display Timer recording display Video tape is in the unit Track display for CD Normal recording display flashes during One touch Timer Recording OTR Note Some discs may not playback correctly or chapter number playback time etc may not be displayed Display window 1 2 3 4 5 6 8 9 10 11 1 2 3 8 9 10 11 4 6 5 Description ...
Page 10: ...E STEP Still picture Recording pause on off 25 29 39 40 PLAY Playback 24 38 INDEX Search for the INDEX mark of a tape 28 SKIP Skip chapter track to forward or reverse direction 40 REV Rewind Review playback 24 25 40 FWD Fast Forward Forward search playback 24 25 40 REC OTR Recording OTR 29 31 TIMER REC Timer recording On Off 31 33 SP LP Sets the tape speed for recording 29 PLAY MODE Select playbac...
Page 11: ... remote control Leak proof batteries will not leak immediately when they are flat As long as the remote control is still working there is no danger of leakage To prevent damage remove the batteries if you do not use the remote control for a long period of time Damage because of leakage is not covered by the guarantee Distance of Remote Control Operation Effective angle approx 60 approx 7m Point th...
Page 12: ...on can automatically switch the TV to its AV channel for playback If your TV set does not switch to video playback operation automatically please turn your TV s video switch to VIDEO position manually Note Make sure that both the television and the DVD VCR are switched off before connecting the cables Connect a TV with the Scart socket TV AC power cord 230V 50 Hz DVD VCR Antenna Input To Scart soc...
Page 13: ... press AUX on the remote control of DVD VCR repeatedly until L1 appears on the front display To record TV program from Satellite Receiver press VCR DVD to select the VCR mode Then load a blank cassette tape with the erase prevention tab intact and select the desired TV program And follow steps 3 4 on page 29 Connection to a Decoder for Premiere Programs Satellite Antenna Satellite Receiver DVD VCR...
Page 14: ... enjoy the highest quality DVD picture playback Connecting to an audio system and TV equipped with component video inputs Note In connecting to TV s that are not capable of reproducing a progressively scanned video signal using the component sockets do not select Progressive in Output menu If you do the component video outputs do not feed the correct signals and you cannot see any picture see page...
Page 15: ...utton to turn on the DVD VCR Press VCR to select the VCR mode The VCR indicator will light You can choose from five different languages for the on screen displays Press VCR MENU Press or to select the GRUNDEINSTELLUNG menu then press ENTER If you use the unit for the first time and press VCR MENU instead of the main menu screen on the right the LANGUAGE setup menu screen in step 3 may appear Press...
Page 16: ...nter again The clock will begin operation CLOCK SET DAY WED AUTO TIME ON 31 MONTH YEAR TIME 1 2007 0 00 SELECT SET 0 9 OK ENTER EXIT MENU You must set the date and time manually for timer recordings Notes In case of a power failure the clock will continue to operate for another 30 min utes with quartz controlled precision To indicate that the power failure has lasted for an excessive period of tim...
Page 17: ...UTO TUNING appears When the setting finished the CHANNEL MAPPING menu will appear Press VCR MENU repeatedly until the TV picture appears on the screen Note To cancel skipping select the skipped channel using number buttons 0 9 then press CANCEL The channel No does not blink any longer and the channel No now can be selected again using CH To skip a channel position Unwanted channels can be skipped ...
Page 18: ...ns appears Press the number button 1 The first display line will change to CHANGE BROADCAST NAME Press or repeatedly until the desired character appears Then press Use or to select the next character Then press Up to four char acters can be used to create a station name The character stands for a space Then press ENTER Each press of will change the screen display as follows Press VCR MENU repeated...
Page 19: ...TV station to be reassigned blinks Press the number button 2 Then the TV station will be moved to the first display line Press or repeatedly until the po sition number blinks to which the selected TV station is to be moved then press ENTER WAIT blinks The data will be ordered in the table newly After approx 12 seconds the station BR3 is set in new position 2 The ZDF will be extracted to the first ...
Page 20: ... until the skipped TV station blinks then press CANCEL The brackets will disappear Press or repeat edly until the TV station to be skipped blinks Press or to select CHAN NEL MAPPING Then press ENTER CH TUNING AUTO TUNING CHANNEL SETUP CHANNEL MAPPING SELECT ENTER EXIT ENTER MENU 4 5 1 2 3 Mapping TV stations Skipping unwanted TV stations Skip those TV stations that are not wanted to be selected by...
Page 21: ...n Turn ON the TV and set to the video input mode Press VCR to select the VCR mode The VCR indicator will light Example Preset the SAT1 on program position 5 Press VCR MENU Press or to select CHANNEL SETUP Then press ENTER Press or to select CH TUN ING Then press ENTER DEC OFF will blink Press ENTER DEC OFF does not blink anymore SEARCH will appear Note If you wish to store the PREMIERE manually th...
Page 22: ...on That picture will appear with disturbance e g waving lines Only in this rare case use the Fine Tuning to tune the concerned station manually In step 6 press or until the station is adjusted to the best position Then press ENTER Please wait until OK ENTER appears It may take a few sec onds Then press ENTER In the next step the program position on which this station should be stored will be set P...
Page 23: ...b playback will start automatically Unloading Press EJECT on the DVD VCR Even if a tape is being played press this button only once Remove the cassette tape Automatic tape eject This VCR will automatically rewind the tape when the tape has ended and when the tape has rewound to it s beginning the cassette tape will be ejected automatically To prevent accidental erasure Remove the erase prevention ...
Page 24: ...ess FWD NTSC video cassette playback Whenusingapre recordedNTSCvideocassettetape theconnected TV must operate with a 60 Hz vertical frequency Otherwise the on screen picture will be affected by vertical rolling Even if your VCR is capable of processing NTSC video signals the picture may be shortened vertically appearance of black bars at the top and at the bottom of the TV screen The dubbing of a ...
Page 25: ... adjustment Whenever you insert a tape and start playback automatic tracking starts working and continuously analyzes the signal to enable optimum picture quality during playback Manual tracking adjustment If automatic tracking cannot eliminate noises well during playback press SET or SET to eliminate the noises MANUAL TR will appear Press it briefly for a fine adjustment or press and hold for a c...
Page 26: ...ted Then press or ENTER to se lect ON or OFF If ON is selected the playback will be repeated endlessly Press VCR MENU repeatedly until the menu screen is cleared To start the playback press PLAY The playback will be repeated endlessly To cancel normal repeat mode Follow the above step 2 then press or ENTER to select the OFF position Press VCR MENU repeatedly to return to the TV screen Press VCR ME...
Page 27: ... to the 00 00 00 position e g the beginning of recording Press STOP when playback or recording is finished Press ZERO RETURN The tape will be rewinded or fast forwarded and automatically stop at the 00 00 00 position The CLOCK COUNTER button Press CLOCK COUNTER during the playback The clock and tape counter alternate with each other on the display Note You can set the tape counter to 00 00 00 with...
Page 28: ...is short recording process will be sufficient to set an index mark This will result in about 10 seconds of the TV commercials to be overwritten by another recording Due to the system the end of this recording will be followed by a recording gap noise signal of approx 5 seconds Recording several Index marks Due to the system only one index mark will be recorded at the beginning of a recording If yo...
Page 29: ...rase prevention tab intact The DVD VCR will auto matically turn on Select the program e g 29 you want to record with CH or Number buttons 0 9 1 9 e g 5 press 5 10 80 e g 29 press 2 and 9 If a recording in Long Play mode is intended press SP LP to display LP Press REC OTR to start recording If the erase prevention tab is removed the tape will eject when REC OTR is pressed for recording see page 23 ...
Page 30: ...Select the TV channel you want to watch on the TV set Although the TV set now shows another program the DVD VCR will continue recording the previously selected program Using TV VCR you can switch the TV screen between the DVD VCR picture and the TV picture If the VCR indicator is lit on the display you will watch the DVD VCR picture This will not affect on the recording To Display VCR operation St...
Page 31: ...th the erase prevention tab intact The DVD VCR will automatically turn on Select the program e g 29 you want to record with CH or number buttons 1 9 e g 5 press 5 10 80 e g 29 press 2 and 9 If a recording in Long Play mode is intended press SP LP to dis play LP Press REC OTR twice The recording will start and stop after 30 minutes Each additional press of REC OTR will increase the recording time t...
Page 32: ...er setting will have to be set Preparation Turn ON the TV and set to the AV input mode Press VCR to select the VCR mode The VCR indicator will light Load a video cassette with the erase prevention tab intact Make sure with CALL that the time and date are correct see page 30 Example Timer recording for channel 1 13 00 to 14 30 with Tape speed LP on timer program number 1 Press VCR MENU Press or to ...
Page 33: ...s TIMER REC at first then press VCR to change to VCR mode Press TIMER REC again to set the VCR into timer recording standby mode Timer Recording Special Case Weekly e g WKL TUE each Tuesday or daily e g MON SAT Monday to Saturday Timer recording Follow the procedure for timer recording on page 32 At picture 3 press or repeatedly until the desired setting appears Then press When you press or repeat...
Page 34: ...n most cases is explicitly stated as VPS time make sure to enter only this time data 4 The starting time of the subsequent TV program is considered to be the end time of the recording 5 If you program the recording of several subsequent TV programs enter the start and end times separately for each TV program It is not sufficient to solely enter the start time of the first and the end time of the l...
Page 35: ...ecorded in stereo you have to connect the DVD VCR with the stereo audio system or the stereo TV Preparation Turn ON the TV and set to the video input mode Press VCR to select the VCR mode The VCR indicator will light NICAM stereo sound reception Press VCR MENU Press or to select NICAM Then press or ENTER to select AUTO Press the VCR MENU button repeatedly until the TV picture appears NICAM program...
Page 36: ... cassette tapes re corded on another VCR the sound out put may be distorted This is normal and no indication of a unit malfunction Try to minimizesounddistortionsbyusingSET or change to MONO by pressing of AUDIO SELECT German A2 stereo sound reception Stereo program indication It will be displayed for approx 4 secondswhenstereoprograms are being received Bilingual program indica tion It will be di...
Page 37: ...an record disc material in DVD Video CD Audio CD etc onto a video tape with this DVD VCR only If the DVD disc has a Copy guard feature the duplicating is not possible A symbol mark will appear on the screen for approx 4 seconds See page 38 for more information about the DVD playback Preparation Load a cassette tape with the erase prevention tab intact Select the tape speed in the VCR mode see page...
Page 38: ...e disc tray If the disc is out of the guide it may damage the disc and cause the DVD VCR to malfunction Do not place a disc which is unplayable in this DVD VCR 1 3 4 5 2 6 To start playback in the stop mode Press PLAY OR Reading This section shows you the basics on how to play a disc Basic playback DVD VCD CD Preparations When you want to view a disc turn on the TV and select the corresponding vid...
Page 39: ...lfunction Do not push up on the disc tray or put any objects other than discs on the disc tray Doing so may cause the unit to malfunction In many instances a menu screen will appear after playback of a movie is completed Prolonged display of an on screen menu may damage your television set permanently etching that image onto its screen To avoid this be sure to press POWER on your remote control on...
Page 40: ...u press twice in quick successions playback starts from the beginning of the preceding chapter or track Notes A prohibition symbol may appear at the upper right of the screen This symbol means either the feature you tried is not available on the disc or the DVD VCR cannot access the feature at this time This does not indicate a problem with the DVD VCR The unit is capable of holding a still video ...
Page 41: ...se of VCD Audio CD discs time and track are used to locate the desired point to playback To check the title chapter track and time press DISPLAY 1 4 2 3 In the zoom mode press ZOOM repeatedly to return to a 1 1 view Off Press JUMP during playback or resume stop mode Press C C C C C or D D D D D to select the Title Track Chapter or Time Press Number buttons 0 9 to input the number If you input a wr...
Page 42: ...e steps 1 2 then press CLEAR Press MARKER during playback Select the blank Marker using C or D Then press ENTER at the desired scene Repeat this procedure to set the other 2 scenes Press MARKER to clear this display Press ENTER Playback starts from the marked scene Press C or D to select the Marker 1 3 The unit stores the points that you want to watch again up to 3 points You can resume playback f...
Page 43: ...ack Press A B RPT again Off appears on the screen Play Mode Repeat Off Notes Some discs may not work with the repeat operation In case of Video CD with PBC Repeat function is prohibited during playback Chapter Track repeat function is cancelled whenever SKIP or is pressed DVD Press ENTER repeatedly to select Chapter or Title The unit automatically starts repeat playback after finishing the current...
Page 44: ... CD with PBC you cannot set Program playback The program is cancelled when you open the disc tray or turn the power off Press C C C C C D D D D D to select Mode then press ENTER repeatedly to select Program Press B A C D to select the programming position Use Number buttons 0 9 to input the track numbers If you input a wrong number press CLEAR Press PLAY MODE during playback or stop mode If you se...
Page 45: ...continues to another screen Repeat steps 2 and 3 to set the item completely 3 2 Press TOP MENU during playback Title menu appears on the screen Press DVD MENU during playback The DVD menu appears on the screen PressDVDMENUagaintoresume playback at the scene when you pressed DVD MENU Note Depending on the DVD you may not be able to resume playback from the scene point when you press DVD MENU 1 2 Ch...
Page 46: ...nds Press B or A to select On The on screen display will disappear after a few seconds 1 Setting surround sound DVD This DVD video player is equipped with a QSound It can produce the effect of being in a cinema or a concert hall 2 To cancel Surround mode Follow steps 1 2 on the left then press B or A to select the Off position Notes The QSound is effective only for the sound of disc The QSound set...
Page 47: ... is selected 2 To turn off the PBC VCD see page 6 Press to select Mode then press ENTER repeatedly until Off appear 1Press PLAY MODE in the stop mode 2 Press PLAY MODE again to clear the screen 3 Follow the above steps 1 2 then press ENTER repeatedly until PBC appear To turn on the PBC 1 5 Eng Off 1 2 3 Play Mode Repeat Off Program Playback Mode Off With press of DISPLAY the status of the disc wil...
Page 48: ...DivX files cannot be played back Standard sampling frequency and the bit rate MP3 MPEG 1 Audio 32kHz 44 1kHz 48kHz 32kbps 320kbps constant bit rate or variable bit rate The recommend recording setting for a high quality sound is 44 1kHz of sampling frequency and 128kbps of constant bit rate DivX video DivX version DivX 3 4 5 and 6 specifically 3 1 1 4 1 2 5 0 2 5 0 5 5 1 1 5 2 1 6 0 at Home Theate...
Page 49: ...and 53 Place an Audio CD or a disc on which MP3 files have been recorded onto the disc tray 1 A file browser screen will appear on the screen 2 3 Press ENTER The selected file starts playing back 4 Press STOP to end playback The unit records the stopped point appears on the screen Press PLAY to resume playback from the scene point If you press STOP again or unload the disc the unit will clear the ...
Page 50: ...NGLE repeatedly until it s right side up or appears on the screen When the slide show playback finished the file list appears To stop the slide show press STOP The file list appears Slide show playback The slide show enables you to view pictures files one after another automatically Preparation Set JPEG Interval setting to 5 Seconds 10 Sec onds or 15 Seconds see page 56 1 When PLAY is pressed afte...
Page 51: ...begin automatically 4 DivX CD playback Playing DivX VOD content DivX VOD content is protected by DRM Digital Rights Management system This restricts playback of content to specific registered devices If the incorrect DRM file is loaded Authorization Error This player is not authorized to play this video will appear on the screen When you attempt to play DivX VOD the number of plays is limited and ...
Page 52: ...ect Track or All Press PLAY The unit automatically starts repeat playback after finishing the current track Random playback CD To resume normal playback Select Repeat Off in step 2 In the file browser press B A C D to select Mode in stop mode Press ENTER to select Random Press PLAY The Random playback will start To resume normal playback Select Mode Off in step 2 Notes The repeat or random functio...
Page 53: ...P3 3 Repeat Off Mode Off Edit Mode Program playback CD Press C D to select Program View then press ENTER Program View shows only the programed files that you have added at step 2 Browser View In the Program View press PLAY The files start to playback in programmed order that were added by you To remove file from program list in stop mode In the Edit Mode switch to Program View Select the files you...
Page 54: ...val Off Screen Saver On Parental Off Set Password Output Interlace DivX R VOD DRC Off QSound On Menu English Subtitle English Audio English E B L On TV Screen 4 3 Display On Picture Mode Auto JPEG Interval Off Screen Saver On You can change the default settings to customize performance to your preference Setting procedure Setting details Section Option Menu Subtitle Audio E B L TV Screen Display P...
Page 55: ...ing screen sizes to choose from 4 3 Letter box Select this mode when connecting to a conven tional TV When playing back a wide screen DVD disc it displays the wide picture with black bands at the top and bottom of screen 4 3 Pan scan It displays the wide picture on the whole screen with left and right edges automatically cut off 16 9 Wide Select this mode when connecting to a wide screen TV A wide...
Page 56: ...detects source content film or video of playback source and converts that signal in an appropriate method Film The DVD player converts film content pictures in the progressive output format appropriately Suitable for playback of film content pictures Video The DVD player filters video signal and converts it appropriately Suitable for playback of video content pictures Note Depending on the disc pi...
Page 57: ...ord has been set Be sure to remember this number Customizing the function settings QSound This DVD video player is equipped with QSound It can produce the effect of being in a cinema or a concert hall Off The QSound is disengaged On The QSound operates Notes The QSound setting can also be changed with AUDIO on the remote control see page 46 This function works only when the disc recorded with Dolb...
Page 58: ...n RGB output is disabled Note If each setup pages 55 58 has been completed the unit can always work under the same condition especially with DVD discs Each setup will be retained in the memory even if you turn the power off If you forget the password 1 Press OPEN CLOSE to open the disc tray 2 Remove the disc 3 Press OPEN CLOSE again to close the disc tray No Disc appears on the screen 4 While hold...
Page 59: ...ct 2 4 If the DVD disc has been designed to temporarily cancel the Rating level the screen which follows the Reading screen will change depending on which disc is played If you select YES with the ENTER key password input screen will then appear Enter the password with Number buttons 0 9 Then press ENTER 3 To exit from the entry press RETURN Depending on the DVD disc the disc may try to temporaril...
Page 60: ...abi 2611 Tigrinya 3019 Bulgarian 1217 Indonesian 1924 Pashto Pushto 2629 Tonga 3025 Burmese 2335 Interlingua 1911 Persian 1611 Turkish 3028 Byelorussian 1215 Irish 1711 Polish 2622 Turkmen 3021 Cambodian 2123 Italian 1930 Portuguese 2630 Twi 3033 Catalan 1311 Japanese 2011 Quechua 2731 Ukrainian 3121 Chinese 3618 Javanese 2033 Rhaeto Romance 2823 Urdu 3128 Corsican 1325 Kannada 2124 Romanian 2825 ...
Page 61: ...EO Set to VIDEO or equivalent Channel is set to the external mode No sound Check the unit is connected correctly Check the input selector of the amplifier is set properly The unit is in the Special playback mode 12 12 14 12 14 25 40 Select proper language in the menu options Display is not shown in your language 55 Playback doesn t start No disc is inserted The disc may be dirty Clean up the disc ...
Page 62: ...etting Audio soundtrack and or subtitle language is not changed when you playback a DVD Multilingual language is not recorded on the DVD disc 15 57 55 Video head clogging The video heads are the means by which the DVD VCR reads the picture from the tape during playback In the unlikely event that the heads become dirty enough to be clogged no picture will be played back This can easily be determine...
Page 63: ...jack 3 8 dBm 1 k Ω 20Hz to 20kHz More than 75dB PAL 4 Rotary Heads Hi Fi Sound 2 Tracks MONO Sound 1 Track E2 E12 X Z 2 S1 S41 E21 E69 Approx 1minute and 48 seconds with E 180 Cassette Tape PAL NTSC DVD 12cm 8cm CD 12cm 8cm DVD 4Hz 22KHz CD 4Hz 20KHz 85dB 0 06 Below Measurable Level Audio RCA 12dB 1 k Ω Digital Audio 0 5Vp p 75 Ω Component video Y 1 Vp p 75 Ω PR 0 7 Vp p 75 Ω PB 0 7 Vp p 75 Ω CD W...
Page 64: ...you will help prevent potential negative consequences for the environment and human health which could otherwise be caused by inappropriate waste handling of this product For more detailed information about recycling of this product please contact you local city office your household waste disposal service or the shop where you purchased the product 2K20301A EN P61 Back 2 3 07 2 23 PM 64 ...