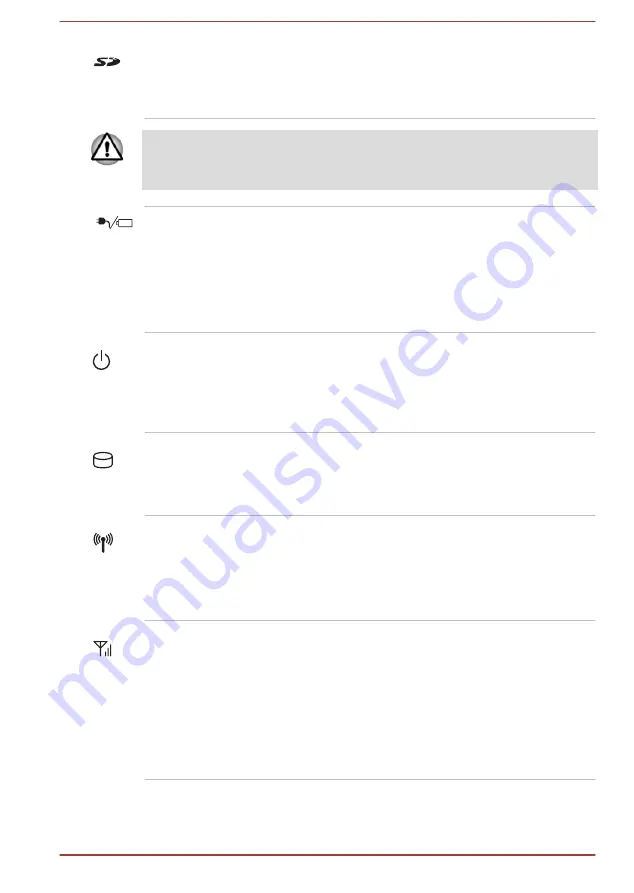
background image

Memory media slot

This slot lets you insert an SD™/SDHC™/
SDXC™ memory card, miniSD™/microSD™
Card and MultiMediaCard™. Refer to the

Memory media

 section for more information.

Keep foreign metal objects, such as screws, staples and paper clips, out of
the Memory media slot. Foreign metal objects can create a short circuit,
which can cause damage and fire, possibly resulting in serious injury.

DC IN/Battery
indicator

The 

DC IN/Battery indicator

 shows the

condition of the DC IN and the battery's charge -
green indicates the battery is fully charged while
the power is being correctly supplied from the AC
power adaptor.
Please refer to the 

Power Condition Description

section for more information on this feature.

Power indicator

The 

Power indicator

 normally glows green when

the computer is turned on. However, if you turn
the computer off into Sleep Mode, this indicator
will flash orange - approximately two seconds on,
two seconds off.

Hard Disk Drive/
Optical Disc Drive/
eSATA indicator

The 

Hard Disk Drive/Optical Disc Drive/

eSATA indicator

 blinks green whenever the

computer is accessing the built-in hard disk drive,
optical disc drive or eSATA device.

Wireless
communication
indicator

The 

Wireless communication indicator

 glows

orange when the Wireless functions are turned
on.
Some models are equipped with Wireless
functions.

Wireless WAN/WiMAX
indicator

The 

Wireless WAN/WiMAX indicator

 glows

blue when the Wireless WAN/WiMAX functions
are turned on.
In some models, the indicator will glow and blink
in order to indicate the connection status of the
Wireless WAN/WiMAX function.
Some models are equipped with a Wireless
WAN/WiMAX function.

User's Manual

3-2

Summary of Contents for Satellite Pro A50-A

Page 1: ...User s Manual TECRA A50 A Satellite Pro A50 A ...

Page 2: ...9 Chapter 2 Getting Started Equipment checklist 2 1 Conventions 2 1 Using your computer for the first time 2 2 Turning off the power 2 6 Chapter 3 The Grand Tour Front with the display closed 3 1 Left side 3 3 Right side 3 4 Back 3 6 Underside 3 7 Front with the display open 3 8 Internal Hardware Components 3 11 Power Condition Descriptions 3 14 Chapter 4 Operating Basics Using the Touch Pad 4 1 T...

Page 3: ...l features 5 5 USB Charge 5 6 TOSHIBA Password utility 5 9 TOSHIBA HWSetup 5 11 TOSHIBA PC Health Monitor 5 12 Using the Hard Disk Drive HDD Protection 5 14 TOSHIBA HDD Protection Properties 5 14 System Recovery 5 16 Chapter 6 Troubleshooting Problem solving process 6 1 Hardware and system checklist 6 4 TOSHIBA support 6 14 Chapter 7 Appendix Specifications 7 1 AC Power Cord and Connectors 7 2 Inf...

Page 4: ...l format alteration transfer of copied material and distribution on a network without the permission of the copyright owner is a violation of copyright or author s rights and is subject to civil damages or criminal action Please comply with copyright laws in making any reproduction from this manual Disclaimer This manual has been validated and reviewed for accuracy The instructions and description...

Page 5: ...ed trademark of Realtek Semiconductor Corporation All other product names and service names in this manual may be trademarks or registered trademarks of their respective companies Regulatory Information The regulatory information herein may vary Pease check the ID information on the back of the device for specific information applicable to the model you purchased FCC information FCC notice Declara...

Page 6: ... the external devices and the computer s External RGB monitor port Universal Serial Bus USB 2 0 and 3 0 ports HDMI port and microphone jack Changes or modifications made to this equipment not expressly approved by TOSHIBA or parties authorized by TOSHIBA could void the user s authority to operate the equipment FCC conditions This device complies with part 15 of the FCC Rules Operation is subject t...

Page 7: ...re designed to observe the related EMC Electromagnetic Compatibility and safety standards However TOSHIBA cannot guarantee that this product still observes these EMC standards if options or cables not produced by TOSHIBA are connected or implemented In this case the persons who have connected implemented those options cables have to provide assurance that the system PC plus options cables still fu...

Page 8: ...re for general safety reasons the use of this product in environments with explosive atmospheres is not permitted VCCI Class B Information この装置は クラスB情報技術装置です この装置は 家庭環境で使 用することを目的としていますが この装置がラジオやテレビジョン 受信機に近接して使用されると 受信障害を引き起こすことがあります 取扱説明書に従って正しい取り扱いをしてください VCCI B Canadian regulatory information Canada only This digital apparatus does not exceed the Class B limits for radio noise emissions from ...

Page 9: ...act your local city office or the shop where you purchased the product Disposal of batteries and or accumulators The crossed out wheeled dust bin symbol indicates that batteries and or accumulators must be collected and disposed of separately from household waste If the battery or accumulator contains more than the specified values of lead Pb mercury Hg and or cadmium Cd defined in the Battery Dir...

Page 10: ... hazardous substances in electrical and electronic equipment The number of possible pixel failures of your display is defined according to ISO 9241 307 standards If the number of pixel failures is less than this standard they will not be counted as defect or failure Battery is a consumption product since the battery time depends on the usage of your computer If the battery can not be charged at al...

Page 11: ... style Open Source licenses In case of any license issues related to OpenSSL please contact openssl core openssl org OpenSSL License Copyright c 1998 2011 The OpenSSL Project All rights reserved Redistribution and use in source and binary forms with or without modification are permitted provided that the following conditions are met 1 Redistributions of source code must retain the above copyright ...

Page 12: ... NEGLIGENCE OR OTHERWISE ARISING IN ANY WAY OUT OF THE USE OF THIS SOFTWARE EVEN IF ADVISED OF THE POSSIBILITY OF SUCH DAMAGE This product includes cryptographic software written by Eric Young eay cryptsoft com This product includes software written by Tim Hudson tjh cryptsoft com Original SSLeay License Copyright C 1995 1998 Eric Young eay cryptsoft com All rights reserved This package is an SSL ...

Page 13: ...thereof from the apps directory application code you must include an acknowledgement This product includes software written by Tim Hudson tjh cryptsoft com THIS SOFTWARE IS PROVIDED BY ERIC YOUNG AS IS AND ANY EXPRESS OR IMPLIED WARRANTIES INCLUDING BUT NOT LIMITED TO THE IMPLIED WARRANTIES OF MERCHANTABILITY AND FITNESS FOR A PARTICULAR PURPOSE ARE DISCLAIMED IN NO EVENT SHALL THE AUTHOR OR CONTR...

Page 14: ... You can use this software for whatever you want in parts or full form without having to pay us royalty free usage You may not pretend that you wrote this software If you use it or only parts of it in a program you must acknowledge somewhere in your documentation that you have used the FreeType code credits We specifically permit and encourage the inclusion of this software with or without modific...

Page 15: ...HT HOLDERS BE LIABLE FOR ANY DAMAGES CAUSED BY THE USE OR THE INABILITY TO USE OF THE FREETYPE PROJECT 2 Redistribution This license grants a worldwide royalty free perpetual and irrevocable right and license to use execute perform compile display copy create derivative works of distribute and sublicense the FreeType Project in both source and object code forms and derivative works thereof for any...

Page 16: ...s license or another one contracted with the authors grants you the right to use distribute and modify it Therefore by using distributing or modifying the FreeType Project you indicate that you understand and accept all the terms of this license 4 Contacts There are two mailing lists related to FreeType freetype nongnu org Discusses general use and applications of FreeType as well as future and wa...

Page 17: ...ode by pressing the power button Products that earn the ENERGY STAR prevent greenhouse gas emissions by meeting strict energy efficiency guidelines set by the US EPA and the EU Commission According to the EPA a computer meeting the new ENERGY STAR specifications will use between 20 and 50 less energy depending on how it is used Visit http www eu energystar org or http www energystar gov for more i...

Page 18: ...r beam do not try to open the enclosure Location of the Required Label Sample shown below Location of the label and manufacturing information may vary TOSHIBA SAMSUNG STORAGE TECHNOLOGY KOREA CORPORATION 14F Bldg No 102 Digital empire2 486 Sin dong Yeongtong gu Suwon si Gyeonggi do Korea 443 734 Precautions CAUTION This appliance contains a laser system and is classified as a CLASS 1 LASER PRODUCT...

Page 19: ... computer Always operate your computer on a hard flat surface Using your computer on a carpet or other soft material can block the vents Always provide sufficient space around the computer Overheating your computer or AC adaptor could cause system failure computer or AC adaptor damage or a fire possibly resulting in serious injury Creating a computer friendly environment Place the computer on a fl...

Page 20: ...e AC adaptor you should disconnect it and let it cool before moving it Do not lay the AC adaptor on a material that is sensitive to heat as the material could become damaged Pressure or impact damage Do not apply heavy pressure to the computer or subject it to any form of strong impact as this can damage the computer s components or otherwise cause it to malfunction Cleaning the computer To help e...

Page 21: ... or the card resulting in computer failure Always use a suitable carry case when transporting the computer When carrying your computer be sure to hold it securely so that it does not fall or hit anything Do not carry your computer by holding any of its protruding elements ExpressCard overheating Some ExpressCards can become hot during prolonged use which may result in errors or instability in the ...

Page 22: ...y hazardous situation which could result in death or serious injury if you do not follow instructions A caution informs you that improper use of equipment or failure to follow instructions may cause data loss equipment damage or may result in minor or moderate injury Please read A note is a hint or advice that helps you make best use of your equipment User s Manual 1 19 ...

Page 23: ...er Battery pack Is preinstalled in some computers AC adaptor and power cord 2 pin plug or 3 pin plug Spare AccuPoint pointing device cap Is included with some models Documentation A50 Quickstart Instruction Manual for Safety and Comfort Warranty information If any of the items are missing or damaged contact your dealer immediately Conventions This manual uses the following formats to describe iden...

Page 24: ...ive while using a notebook computer By following the recommendations in it you may reduce your chance of developing a painful or disabling injury to your hand arms shoulders or neck This section provides basic information to start using your computer It covers the following topics Connecting the AC adaptor Opening the display Turning on the power Initial setup Use a virus check program and make su...

Page 25: ...e power cables that comply with the legal voltage and frequency specifications and requirements in the country of use Failure to do so could result in a fire or electric shock possibly resulting in serious injury The supplied power cord conforms to safety rules and regulations in the region the computer is bought and should not be used outside this region For use in other regions please buy power ...

Page 26: ...k on your computer Figure 2 3 Connecting the DC output plug to the computer 1 2 1 DC IN 19V jack 2 DC output plug 3 Plug the power cord into a live wall outlet the DC IN Battery indicator should glow Opening the display The display panel can be opened to a wide range of angles for optimal viewing While holding down the palm rest with one hand so that the main body of the computer is not raised slo...

Page 27: ...en the display panel and the keyboard When opening or closing the display panel place one hand on the palm rest to hold the computer in place and use the other hand to slowly open or close the display panel Do not use excessive force when opening or closing the display panel Turning on the power This section describes how to turn on the power the Power indicator will then indicate the status Pleas...

Page 28: ...install the operating system When it is displayed be sure to read the License Terms carefully Turning off the power The power can be turned off in one of the following modes either Shut Down Mode Sleep Mode or Hibernation Mode Shut Down Mode When you turn off the power in Shut Down Mode no data will be saved and the computer will boot to the operating system s main screen the next time it is turne...

Page 29: ...e the Shut down button and then select Restart from the menu Press CTRL ALT and DEL simultaneously once to display the menu window and then select Restart from the Shut down options Sleep Mode If you have to interrupt your work you are able to turn off the power without exiting from your software by placing the computer into Sleep Mode In this mode data is maintained in the computer s main memory ...

Page 30: ... the Wake up on Keyboard option is enabled within the TOSHIBA HWSetup utility If the computer enters Sleep Mode while a network application is active the application might not be restored when the computer is next turned on and the system returns from Sleep Mode To prevent the computer from automatically entering Sleep Mode disable Sleep Mode within the Power Options To use the Hybrid Sleep functi...

Page 31: ...ion Mode feature does not save the status of any peripheral devices connected to the computer Save your data While entering Hibernation Mode the computer saves the contents of memory to the Hard Disk Drive However for safety sake it is best to save your data manually Data will be lost if you remove the battery or disconnect the AC adaptor before the save is completed Do not install or remove a mem...

Page 32: ...em and Security Power Options 2 Click Choose what the power button does or Choose what closing the lid does 3 Enable the desired Hibernation Mode settings for When I press the power button and When I close the lid 4 Click the Save changes button Data save in Hibernation Mode When you turn off the power in Hibernation Mode the computer will take a moment to save the current data in memory to the Ha...

Page 33: ...ng figure shows the front of the computer with the display panel in the closed position Figure 3 1 Front of the computer with display panel closed 1 1 3 4 5 6 7 8 2 1 Stereo speakers 5 Hard Disk Drive Optical Disc Drive eSATA indicator 2 Memory media slot 6 Wireless communication indicator 3 DC IN Battery indicator 7 Wireless WAN WiMAX indicator 4 Power indicator 8 Fingerprint Sensor Provided with...

Page 34: ...ower indicator normally glows green when the computer is turned on However if you turn the computer off into Sleep Mode this indicator will flash orange approximately two seconds on two seconds off Hard Disk Drive Optical Disc Drive eSATA indicator The Hard Disk Drive Optical Disc Drive eSATA indicator blinks green whenever the computer is accessing the built in hard disk drive optical disc drive ...

Page 35: ...dels Product appearance depends on the model you purchased Cooling vents The cooling vents help the processor to avoid overheating DisplayPort A DisplayPort is provided on the left side of the computer Some models are equipped with a DisplayPort HDMI out port HDMI out port can connect with Type A connector HDMI cable Some models are equipped with an HDMI out port External RGB monitor port This por...

Page 36: ... mini headphone microphone jack enables connection of a monaural microphone or a stereo headphone USB 3 0 port s may work as USB 2 0 port s when operating in USB Legacy Emulation mode Please note that it is not possible to confirm the operation of all functions of all USB devices that are available Some functions associated with a specific device might not operate properly Keep foreign metal objec...

Page 37: ...uipped with a ExpressCard slot PC Card slot This slot allows you to install a PC Card Some models are equipped with a PC Card slot Optical disc drive The computer may be configured with a DVD Super Multi drive Universal Serial Bus USB 2 0 ports One or two Universal Serial Bus ports which comply to the USB 2 0 standard are provided on the right side of the computer The USB 2 0 port is not compatibl...

Page 38: ...ould only use the model of AC adaptor supplied with the computer at the time of purchase using the wrong AC adaptor can cause damage to the computer Security lock slot A security cable can be attached to this slot and then connected to a desk or other large object in order to deter theft of the computer Back The following figure shows the back of the computer Figure 3 4 The back of the computer 1 ...

Page 39: ...y release latch Slide and hold this latch into its Unlock position in order to release the battery pack for removal For more detailed information on removing the battery pack please refer to the Battery section Docking port This port enables connection of an optional TOSHIBA Hi Speed Port Replicator III 180W 120W described in TOSHIBA Hi Speed Port Replicator III 180W 120W Some models are equipped ...

Page 40: ...emory Main System please refer to the Legal Footnotes section Do not block the cooling vents Keep foreign metal objects such as screws staples and paper clips out of the cooling vents Foreign metal objects can create a short circuit which can cause damage and fire possibly resulting in serious injury Carefully clean the dust on the cooling vents surface using a soft cloth Front with the display op...

Page 41: ...mera 11 Keyboard 5 Display screen 12 Touch Pad 6 Display hinges 13 AccuPoint control button 7 Touch Pad ON OFF indicator 14 AccuPoint Provided with some models Product appearance depends on the model you purchased Wireless communication antennas Some computers in this series are equipped with the Wireless LAN Bluetooth antennas Legal Footnote Wireless LAN For more information regarding Wireless LA...

Page 42: ... to clean the lens if it becomes dirty Display screen 39 6cm 15 6 LCD screen configured with the following resolutions HD 1366 horizontal x 768 vertical pixels FHD 1920 horizontal x 1080 vertical pixels Please be aware that when the computer is operating on the AC adaptor the image displayed on the internal screen will be somewhat brighter than when it operates on battery power This difference in ...

Page 43: ...used to control the movement of the on screen pointer To use the Touch Pad simply touch and move your fingertip across it in the direction you want the on screen pointer to go AccuPoint control buttons Control buttons below the keyboard let you select menu items or manipulate text and graphics designated by the on screen pointer Only models equipped with an AccuPoint are equipped with AccuPoint co...

Page 44: ... of prolonged non use and or exposure to high temperatures the SSD may be vulnerable to data retention errors Legal Footnote Hard Disk Drive HDD Capacity For more information regarding Hard Disk Drive HDD Capacity please refer to the Legal Footnotes section RTC battery The internal RTC battery backs up the Real Time Clock RTC and calendar Video RAM The memory in a computer s graphics adaptor used ...

Page 45: ... is running under battery mode using the internal LCD display only The Display Power Saving Technology feature is enabled at factory default If you want to disable this feature you can disable it The Display Power Saving Technology feature can be disabled in the Intel HD Graphics Control Panel Intel Graphics and Media Control Panel You can access this control panel in the following way Right click...

Page 46: ...D orange Quick charge LED orange AC adaptor not connected Remaining battery capacity is above low battery trigger point Operates LED off Remaining battery capacity is below low battery trigger point Operates LED flashes orange Remaining battery capacity is exhausted Computer shuts down DC IN Battery indicator Check the DC IN Battery indicator to determine the status of the battery pack and the pow...

Page 47: ...arge will stop and the DC IN Battery indicator will go out When the battery pack s temperature falls to a normal range charging will resume this process will occur regardless of whether the computer s power is on or off Power indicator Check the Power indicator to determine the power status of the computer the following indicator conditions should be noted Green Indicates power is being supplied t...

Page 48: ...r out Two Finger Scroll Place two fingers down and slide them vertically or horizontally from anywhere on the Touch Pad This allows you to operate the scroll bars of a window Some of the Touch Pad operations described in this section are only supported in certain applications The Keyboard The number of keys available on your keyboard will depend on which country region your computer is configured ...

Page 49: ...format NUM LOCK When the NUM LOCK indicator glows you can use the number keys on the keyboard for number entry Function Key The function keys F1 F12 are the twelve keys at the top of your keyboard Function keys let you enable or disable certain features of the computer The functions can be performed by pressing the associated function keys Mute Pressing FN ESC turns the volume on and off Lock Pres...

Page 50: ... resolution ODD Pressing FN TAB ejects the disc tray Reduce Pressing FN 1 reduces the icon size on the desktop or the font sizes within one of the supported application windows Enlarge Pressing FN 2 enlarges the icon size on the desktop or the font sizes within one of the supported application windows Volume down Pressing FN 3 decreases the volume in increment Volume up Pressing FN 4 increases the...

Page 51: ...Utilities Accessibility Windows special keys The keyboard provides two keys that have special functions in Windows the Windows Start Button key activates the Start menu while the application key has the same function as the secondary right mouse button This key activates the Windows Start menu This key has the same function as the secondary right mouse button Using the AccuPoint To use the AccuPoi...

Page 52: ...e with the peg Using the Fingerprint Sensor This product has a fingerprint utility installed for the purpose of enrolling and recognizing fingerprints By enrolling the ID and password onto the fingerprint authentication feature it is no longer necessary to input the password from the keyboard Fingerprint feature enables you to Logon to Windows and access a security enabled homepage through Interne...

Page 53: ...ause fingerprint reading to fail Check the center of the fingerprint whorl before swiping and then ensure this is swiped along the center line of the sensor There is a possibility of authentication failures if the finger is swiped too quickly or too slowly follow any on screen instructions to adjust the speed used during the swipe process Points to note about the Fingerprint Sensor Please be aware...

Page 54: ...ingers if a recognition failure often occurs when using already enrolled fingers Check the condition of your finger any conditions which have changed since enrollment such as injury rough skin and extremely dry wet soiled dirty oily soaked or swollen fingers may lower the recognition success rate Also if the fingerprint is worn down or the finger becomes thinner or fatter the recognition success r...

Page 55: ...the following procedure when first using fingerprint authentication In use the fingerprint authentication system will use the same username and password as defined within the Windows operating system If no Windows password has been configured you must do this before starting the fingerprint registration process This sensor has the memory space for at least twenty fingerprint patterns You might be ...

Page 56: ...he fingerprint data for the currently logged in user Click an enrolled finger you want to delete Do you want to delete message box will appear on the screen and then click OK If you want to delete other fingerprints repeat this step If only one fingerprint is registered the message At least one fingerprint is required will appear after clicking OK You are not allowed to delete a unique fingerprint...

Page 57: ...place the keyboard based User Password authentication system when booting up If you do not want to use the fingerprint authentication system for password authentication when booting up but prefer to use the keyboard based system instead follow the on screen instructions when the Fingerprint System Authentication screen is displayed This will switch the password input screen across to the keyboard ...

Page 58: ...g the Pre Boot authentication and Single Sign On feature You should check that your fingerprint is enrolled before configuring the settings 1 Logon as Administrator means a user has administrator privileges 2 In the TOSHIBA Fingerprint Utility main menu click Run As Administrator 3 User Account Control window is displayed Click Yes 4 Swipe your finger across the fingerprint sensor 5 Select Setting...

Page 59: ...optical disc drives The full size drive provides high performance execution of disc based programs You can run either 12 cm 4 72 or 8 cm 3 15 discs without an adaptor Use the DVD playback application to view DVD Video discs For precautions on writing to discs refer to the Writing discs section To load discs follow the steps as detailed below 1 When the computer s power is on press the eject button...

Page 60: ... the center of the disc until you feel it click into place The disc should lie below the top of the spindle flush with the spindle base 5 Push the center of the disc tray to close it Press gently until it locks into place If the disc is not seated properly when the disc tray is closed the disc might be damaged Also the disc tray might not open fully when you press the eject button Removing discs T...

Page 61: ...re 4 6 Manual release with the manual eject hole Φ1 0mm 1 1 Manual eject hole Turn off the power before you use the manual eject hole If the disc is spinning when you open the disc tray the disc could fly off the spindle and cause injury Writable discs This section describes the types of writable discs Check the specifications of your drive to see the types of discs it can write Use TOSHIBA Disc C...

Page 62: ... not assume responsibility for the following Damage to any disc that may be caused by writing or rewriting with this product Any change or loss of the recorded contents of media that may be caused by writing or rewriting with this product or for any business profit loss or business interruption that may be caused by the change or loss of the recorded contents Damage that may be caused by using thi...

Page 63: ...and 16x speed media DVD R DL MITSUBISHI KAGAKU MEDIA CO LTD for 8x speed media DVD RW DVD Specifications for Recordable Disc for Version 1 1 or version 1 2 Victor Company of Japan Ltd JVC for 2x 4x and 6x speed media MITSUBISHI KAGAKU MEDIA CO LTD for 2x 4x and 6x speed media DVD RW MITSUBISHI KAGAKU MEDIA CO LTD for 4x and 8x speed media DVD RAM DVD Super Multi drive only DVD Specifications for D...

Page 64: ...ewrite operation is completed before going into either Sleep Mode or Hibernation Mode You can remove an optical media on the optical disc drive after writing is completed If the media is of poor quality or is dirty or damaged writing or rewriting errors may occur Set the computer on a level surface and avoid places subject to vibration such as airplanes trains or cars In addition do not use the co...

Page 65: ... 2 In addition to this some DVD ROM and DVD ROM CD R RW drives cannot read this added data regardless of the operating system TOSHIBA Disc Creator does not support recording to DVD RAM discs to achieve this you should use Windows Explorer or another similar utility When you back up a DVD disc be sure that the source drive supports recording to DVD R DVD R DL DVD RW DVD R DVD R DL or DVD RW media i...

Page 66: ... or ALL Do not playback video while watching or recording television programs using other applications Doing so may cause video playback or television program recording errors In addition if prescheduled recording starts during video playback it may cause video playback or television program recording errors Please view video during times when there is no recording prescheduled The resume function...

Page 67: ...isplay or television stop the TOSHIBA VIDEO PLAYER and change the screen resolution To change the screen resolution click Start Control Panel Appearance and Personalization Display Adjust resolution However video cannot be output to some external displays and televisions due to output or playback conditions When viewing video on an external display or TV change the display device before playing Vi...

Page 68: ...packs for extended use of the computer away from an AC power source although you should not change the battery pack while the AC adaptor is connected Before you remove the battery pack save your data and shut down the computer or place the computer into Hibernation Mode Please be aware that when placing the computer into Hibernation Mode the contents of memory will be saved to the hard disk drive ...

Page 69: ...laced used handled or disposed Dispose of the battery as required by local ordinances or regulations Charge the battery pack only in an ambient temperature between 5 and 35 degrees Celsius Otherwise the electrolyte solution might leak battery pack performance might deteriorate and the battery life might be shortened Never install or remove the battery pack without first turning off the power and d...

Page 70: ...e charging time when the computer is on is affected by ambient temperature the temperature of the computer and how you are using the computer if you make heavy use of external devices for example the battery might scarcely charge at all during operation Battery charging notice The battery may not begin charging immediately under the following conditions The battery is extremely hot or cold if the ...

Page 71: ...puter needs this time to check the battery s remaining capacity and then calculate the remaining operating time based on this together with the current power consumption Please be aware that the actual remaining operating time may differ slightly from the calculated time With repeated discharges and recharges the battery s capacity will gradually decrease In view of this it will be noted that an o...

Page 72: ...Down Mode Battery pack 24Wh 3 cell about 2 days about 60 days Battery pack 48Wh 6 cell about 5 days about 125 days Battery pack 67Wh 6 cell about 6 days about 170 days Extending battery life To maximize the life of your battery packs At least once a month disconnect the computer from a power source and operate it on battery power until the battery pack fully discharges Before doing so follow the s...

Page 73: ...iod of time This section explains how to remove and install the battery pack and begins with the removal process which is detailed through the following steps Do not remove the battery pack while the computer is in Sleep Mode as data is stored in RAM so if the computer loses power it could be lost In Hibernation Mode data will be lost if you remove the battery pack or disconnect the AC adaptor bef...

Page 74: ... cause injuries 1 Insert the battery pack as far as it will go into the computer 2 Ensure that the battery pack is securely in place and the battery lock is in its locked position 3 Turn your computer over LAN The computer may have built in support for Ethernet LAN 10 megabits per second 10BASE T Fast Ethernet LAN 100 megabits per second 100BASE TX or Gigabit Ethernet LAN 1000 megabits per second ...

Page 75: ...le If you are using Fast Ethernet LAN 100 megabits per second 100BASE TX be sure to connect with a CAT5 cable or higher You cannot use a CAT3 cable If you are using Ethernet LAN 10 megabits per second 10BASE T you can connect with a CAT3 or higher cable Connecting the LAN cable To connect the LAN cable follow the steps as detailed below Connect the AC adaptor before connecting the LAN cable The AC...

Page 76: ...at are made of materials that hold or generate static electricity When installing or removing a memory module you must ensure that you do not touch any other internal areas of the computer Use only memory modules approved by TOSHIBA Do not try to install or remove a memory module under the following conditions a The computer is turned on b The computer was shut down in either Sleep or Hibernation ...

Page 77: ...connected to the computer 3 Close the display panel 4 Turn the computer upside down and remove the battery pack refer to Replacing the battery pack section if required 5 Loosen the screw securing the memory module cover in place please note that the screw is attached to the cover in order to prevent it from being lost 6 Slide your fingernail or a thin object under the cover and lift it off Figure ...

Page 78: ... Do not touch the connectors on the memory module or on the computer Debris on the connectors may cause memory access problems Do not touch any objects other than the memory module memory slot and memory module cover The slot A is reserved for the first memory module Use the slot B for expanded memory If only one module is installed use the slot A Align the grooves along the edges of the memory mo...

Page 79: ...d Security System Removing a memory module To remove the memory module follow the steps as detailed below 1 Shut down the computer ensure that the Power indicator is off 2 Remove the AC adaptor and all cables and peripherals connected to the computer 3 Close the display panel 4 Turn the computer upside down and remove the battery pack 5 Loosen the screw securing the memory module cover in place pl...

Page 80: ...dule cover Figure 4 12 Removing the memory module 3 2 1 1 1 Latches Product appearance depends on the model you purchased 9 Seat the memory module cover in place and secure it with the screw Take care to ensure that the memory module cover is firmly closed 10 Install the battery pack 11 Turn the computer over Memory media The computer is equipped with a memory media slot that can accommodate some ...

Page 81: ...SDMI Secure Digital Music Initiative which is a technology adopted to prevent unlawful copy or playback of digital music For this reason you cannot copy or playback protected material on another computer or other device and you may not reproduce any copyrighted material except for your personal enjoyment Below is a simple explanation for distinguishing SD memory cards from SDHC memory cards and SD...

Page 82: ...pose cards to liquids or store in humid areas or lay media close to containers of liquid Do not touch the metal part of a card or expose it to liquids or let it get dirty After using card return it to its case The card is designed so that it can be inserted only one way Do not try to force the card into the slot Do not leave a card partially inserted in the slot Press the card until you hear it cl...

Page 83: ... insert the media in wrong direction you may not be able to remove it When inserting the memory media do not touch the metal contacts You could expose the storage area to static electricity which can destroy data Do not turn the computer off or switch to Sleep Mode or Hibernation Mode while files are being copied doing so may cause data to be lost Removing memory media The following instructions a...

Page 84: ...ll feature allows you to insert ExpressCards while the computer is turned on Do not insert an ExpressCard while the computer is in Sleep Mode or Hibernation Mode as you may find that some cards do not work properly To insert an ExpressCard follow the steps as detailed below 1 Press the Dummy card in order to eject the Dummy card partially out of the computer 2 Grasp the Dummy card and draw it 3 In...

Page 85: ... built in display but you can also connect other external displays via available ports on the computer Some models may include the Dual Monitor function that can display image on Dual external Monitor independently External RGB monitor port An external analog monitor can be connected to the External RGB monitor port on the computer To connect an external analog monitor follow the steps as detailed...

Page 86: ... connect an HDMI compatible display device follow the steps as detailed below As the port operation of all HDMI display devices have not been confirmed some HDMI display devices may not function properly To connect a device to the HDMI out port you must purchase an HDMI cable 1 Plug one end of the HDMI cable into the HDMI in port of the HDMI display device 2 Plug the other end of the HDMI cable in...

Page 87: ... key to select the display device before starting to play video Do not change the display device while playing video Do not change the display device under the following conditions While data is being read or written While communication is being carried out Selecting HD Format To select the display mode follow the steps as detailed below 1 Click Start Control Panel 2 Click Appearance and Personali...

Page 88: ... external display before you turn the computer s power off be sure to switch to the internal display TOSHIBA Hi Speed Port Replicator III 180W 120W In addition to the ports available on the computer the TOSHIBA Hi Speed Port Replicator III 180W 120W also provides several kinds of ports The Port Replicator connects directly to the docking interface on the underside of the computer The AC adaptor co...

Page 89: ...you undock the computer You can undock the computer in one of the following ways Press the Eject button on the port replicator Click Start select Undock from the Shut down options Open the Safely Remove Hardware and Eject Media icon on the Windows Taskbar and select Eject Docking Station To access the utility click Start All Programs TOSHIBA Tools Utilities TOSHIBA Docking Station Utility System s...

Page 90: ...nversion cable comes with the models which are equipped with a Serial Connector RS 232C compatible devices include the following Modem Mouse Printer To connect a Serial Device follow the steps as detailed below 1 Turn the computer s power off 2 Remove the cap of the Serial port conversion cable 3 Connect the Serial port conversion cable to your computer Figure 4 19 Connecting the Serial Connector ...

Page 91: ...ms that are available from your reseller or TOSHIBA dealer Memory Kit DDR3 memory modules can easily be installed in the computer The available option memory depends on TOSHIBA authorization Universal AC Adaptor If you frequently use your computer at more than one site it may be convenient to purchase an additional AC adaptor to be kept at each site in order to remove the need to always carry the ...

Page 92: ...Speakers icon on the Taskbar and then select Playback devices from the sub menu 2 Select Speakers and click Properties 3 On the Enhancements tab select the sound effects you would like and click Apply DTS Studio Sound DTS Studio Sound is a premium audio enhancement suite that utilizes revolutionary audio technology to provide the most immersive and realistic listening experience ever offered for a...

Page 93: ...ton to view hardware information software information and language setting Power Management The audio controller in your computer can be turned off when the audio function is not used To adjust the configuration of audio power management click the Power Management button When audio power management is enabled the circle button at the upper left of the Power Management is blue and convex When audio...

Page 94: ... for example a 3D application or video playback you may see some disturbance flickering or frame dropping on your screen If that occurs adjust the resolution of display lowering it until the screen is displayed properly User s Manual 4 47 ...

Page 95: ...y shifting some power consumption to periods when demand is lower For instance in peak hours of power consumption such as in the daytime in the summer the power consumed from the AC power source is automatically stopped and the battery is used for PC operation The AC power can then be used to charge the battery during periods where power demand is reduced such as at night thereby reducing the load...

Page 96: ...ntication a fingerprint or password is required again at the login phase TOSHIBA HDD Protection This feature uses the acceleration sensor built in the computer to detect vibration and shocks and automatically moves the hard disk drive s read write head to a safe position in order to reduce the risk of damage that could be caused by head to disk contact Refer to the Using the Hard Disk Drive HDD Pr...

Page 97: ...lities eco Utility For details on TOSHIBA eco utility see the help file TOSHIBA Disc Creator You can create CDs and DVDs in a number of formats including audio CDs that can be played on a standard CD player and data discs which can store copies of the files and folders on your computer s hard disk drive To start this utility click Start All Programs TOSHIBA Media Entertainment Disc Creator TOSHIBA...

Page 98: ...ccordance with the rules and regulations as well as applicable data protection law To access this utility click Start All Programs TOSHIBA Support Recovery Service Station TOSHIBA PC Health Monitor The TOSHIBA PC Health Monitor application proactively monitors a number of system functions such as power consumption battery health and system cooling informing you of significant system conditions Thi...

Page 99: ...put or hardware access for a specified time This can be specified in the Power Options Power on password Two levels of password security supervisor and user are available to prevent unauthorized access to your computer Intelligent power supply 1 A microprocessor in the computer s intelligent power supply detects the battery s charge automatically calculates the remaining battery capacity and prote...

Page 100: ... button or pressing the keyboard will wakeup the computer Heat dispersal 1 To protect against overheating the processor is equipped with an internal temperature sensor which activates a cooling fan or lowers the processing speed if the computer s internal temperature rises to a certain level You are able to select whether to control this temperature by either turning on the fan first then if neces...

Page 101: ... bus power DC5V As for the specifications of the external devices please contact the device manufacturer or check the specifications of the external devices thoroughly before use Using the sleep and charge function to charge external devices will take longer than charging the devices with their own chargers If Sleep and Charge function is enabled the computer s battery will discharge during hibern...

Page 102: ...rnal device thoroughly before use Always use the USB cable that was included with your USB device Enable under Battery Mode This option can be used to enable disable sleep and charge under battery mode It also displays the remaining battery capacity Move the slider to enable or disable this function Enabled Enables Sleep and Charge function under battery mode Disabled Enables Sleep and Charge func...

Page 103: ... When System ON CDP Charge Mode or USB Sleep and Charge function is enabled the USB Wakeup function may not work In that case use a USB port without USB Sleep and Charge function or disable both System ON CDP Charge Mode and USB Sleep and Charge function TOSHIBA Password utility The TOSHIBA Password Utility provides two levels of password security User and Supervisor Passwords set by the TOSHIBA P...

Page 104: ...wner String text box You can use this box to associate text with the password After you enter text click Apply or OK When the computer is started this text will be displayed together with the prompt asking you to enter a password You can launch the BIOS setup utility to set change or delete the HDD Password or HDD Master Password If you forget your HDD User Password TOSHIBA will NOT be able to ass...

Page 105: ...Getting Started section The following message will appear in the screen Password At this point the function keys do not work They will function after you enter the password 2 Enter the Password 3 Press ENTER If you enter the password incorrectly three times in a row or if you don t enter the password within 1 minute the computer shuts off In this case some features that can power on the computer a...

Page 106: ...evice or function The settings or options explained here may vary depending on the model you purchased After you changed the settings a dialog box may appear to prompt you that the changes will take effect after the computer is restarted Make sure to restart your computer immediately to apply these changes TOSHIBA PC Health Monitor The TOSHIBA PC Health Monitor application proactively monitors a n...

Page 107: ...not extend or modify TOSHIBA s obligations under its standard limited warranty in any way TOSHIBA s standard limited warranty terms and limitations apply Starting the TOSHIBA PC Health Monitor The TOSHIBA PC Health Monitor can be started using the following methods Click Start All Programs TOSHIBA Support Recovery PC Health Monitor Click the icon in the notification area then click the Enable PC H...

Page 108: ...played on the screen and the icon in the Taskbar notification area will change to the protection state This message is displayed until the OK button is pressed or 30 seconds pass When vibration subsides the icon returns to the normal state Taskbar icon Normal TOSHIBA HDD Protection is enabled Protection TOSHIBA HDD Protection is active The hard disk drive head is in a safe position OFF TOSHIBA HDD...

Page 109: ...n whether it runs with the AC power desktop or with batteries handheld or mobile usage the detection level automatically switches according to the power connection mode 3D Viewer This feature displays a 3D object on the screen which moves in according to tilting or vibration of the computer When the TOSHIBA HDD Protection detects computer vibration the Hard Disk Drive head is parked and the 3D obj...

Page 110: ...y Hard Disk Drive System Recovery Options The System Recovery Options feature is installed on the hard disk when shipped from the factory The System Recovery Options menu includes tools to repair startup problems run diagnostics or restore the system See the Windows Help and Support content for more information about Startup Repair The System Recovery Options can also be run manually to repair pro...

Page 111: ...ter is stored on the Hard Disk Drive and can be copied to either disc media or USB Flash Memory by using the following steps 1 Select either blank disc or USB Flash Memory The application will allow you to choose from a variety of different media onto which the recovery image can be copied including disc media and USB Flash Memory Please note that some of the disc media may not be compatible with ...

Page 112: ...ve the recovery partition and are trying to create Recovery Media you will see the following message The Recovery Media Creator can not be launched because there is no recovery partition When there is no recovery partition the Recovery Media Creator cannot make Recovery Media However if you have already created a Recovery Media you can use it to restore the recovery partition If you have not creat...

Page 113: ... on your computer 3 Follow the on screen instructions to finish the recovery Ordering Recovery Discs from TOSHIBA You can order Product Recovery discs for your notebook from the TOSHIBA Europe Backup Media Online Shop Please note that this service is not free of charge 1 Visit https backupmedia toshiba eu on the Internet 2 Follow the on screen instructions You will receive your Recovery Discs with...

Page 114: ... in this chapter are meant only as a guide they are not definitive problem solving techniques In reality many problems can be solved simply but a few may require help from TOSHIBA Support if you find you need to consult others be prepared to describe the problem in as much detail as possible Preliminary checklist You should always consider the simplest solution first the items detailed in this che...

Page 115: ...random characters Make a screenshot of the current display and if possible look up the messages in the documentation included with the computer software or operating system Check that all connecting cables are correctly and firmly attached as loose cables can cause erroneous or intermittent signals Do any indicators light if so which ones what color are they and do they stay on or blink Write down...

Page 116: ...teen seconds before turning the power on again by pressing the power button Your program stops responding If you are working with a program that suddenly freezes all operations chances are the program has stopped responding You can exit the failed program without shutting down the operating system or closing other programs To close a program that has stopped responding 1 Press CTRL ALT and DEL sim...

Page 117: ...Media Card Pointing Device USB device Additional memory module Sound system External monitor LAN Wireless LAN Bluetooth Power When the computer is not plugged into an AC power outlet the battery pack is the primary power source However your computer also has a number of other power resources including an intelligent power supply and a Real Time Clock RTC battery all of which are interrelated with ...

Page 118: ...the computer and a working power outlet Check the condition of the cord and terminals If the cord is frayed or damaged it should be replaced while if the terminals are soiled they should be cleaned with a clean cotton cloth If the AC adaptor still does not power the computer you should contact TOSHIBA Support Battery If you suspect a problem with the battery you should check the status of the DC I...

Page 119: ...lace the battery taking care to ensure that it is securely seated in the computer Check the DC IN Battery indicator if it does not glow allow the computer to charge the battery for at least twenty minutes If the DC IN Battery indicator starts to glow after this period allow the battery to continue to charge for at least another twenty minutes before turning on the computer However if the indicator...

Page 120: ...start Keyboard Keyboard problems can be caused by the setup and configuration of the computer please refer to the The Keyboard section for further information Problem Procedure Output to screen is garbled Please refer to your software s documentation to ensure that it is not remapping the keyboard in any way remapping involves changing or reassigning the function of each key If you are still unabl...

Page 121: ...ere is a disc in the optical disc drive if so remove it and try to start the computer again If this has no effect check the Boot Setting within the TOSHIBA HWSetup Slow performance The files on the Hard Disk Drive may be fragmented in this instance you should run the disk Defragmentation utility to check the condition of your files and the Hard Disk Drive Please refer to the operating system s doc...

Page 122: ...ia card from the computer and then reinsert it in order to ensure it is firmly connected If the problem persists then you should refer to the documentation supplied with your memory media card for further information You cannot write to a memory media card Remove the memory media card from the computer and check to ensure that it is not write protected You cannot read a file Check to ensure the re...

Page 123: ... try changing the speed setting within the Mouse Control utility 1 To access this utility click Start Control Panel Hardware and Sound Mouse 2 Within the Mouse Properties window click the Pointer Options tab 3 Set the pointer speed as required and click OK The reaction of Touch Pad is either too sensitive or not sensitive enough Adjust the touch Sensitivity To access it click Start Control Panel H...

Page 124: ...OK The on screen pointer moves erratically The elements of the mouse responsible for detecting movement might be dirty please refer to the documentation supplied with the mouse for instructions on how to clean it If you are still unable to resolve the problem contact TOSHIBA Support USB device In addition to the information in this section please also refer to the documentation supplied with your ...

Page 125: ...l microphone or an external microphone connected to the computer please refer to Sound System and Video mode for further information Volume cannot be adjusted during Windows start up or shut down If you are still unable to resolve the problem contact TOSHIBA Support External monitor Please also refer to Operating Basics and to the documentation supplied with your monitor for further information Pr...

Page 126: ...e computer before disconnecting the external monitor When the display panel and an external monitor are set to clone mode and they are turned off by the timer the display panel or the external monitor may not display when turned on again If this occurs press the function key to re set the display panel and external monitor to clone mode Display error occurs Check that the cable connecting the exte...

Page 127: ...A support If you require any additional help using your computer or if you are having problems operating the computer you may need to contact TOSHIBA for additional technical assistance Before you call Some problems you experience may be related to software or the operating system so it is important that you investigate other sources of assistance first Before contacting TOSHIBA try the following ...

Page 128: ...t If you are still unable to solve the problem and suspect that it is hardware related write to TOSHIBA at the location listed in the enclosed warranty booklet or visit www toshiba europe com on the Internet User s Manual 6 15 ...

Page 129: ... 27 8 34 9 h millimeters not including parts that extend beyond the main body Environmental Requirements Conditions Ambient temperature Relative humidity Operating 5 C 41 F to 35 C 95 F 20 to 80 noncondensing Non operating 20 C 4 F to 60 C 140 F 10 to 90 noncondensing Wet bulb temperature 29 C maximum Conditions Altitude from sea level Operating 60 to 3 000 meters Non operating 60 to 10 000 meters...

Page 130: ...A Data Signal I O 13 HSYNC Horizontal Sync Signal O 14 VSYNC Vertical Sync Signal O 15 SCL Data Clock Signal O I O I Input to computer I O O Output from computer AC Power Cord and Connectors The power cord s AC input plug must be compatible with the various international AC power outlets and the cord must meet the standards for the country region in which it is used All cords must meet the followi...

Page 131: ...d must be VDE type H05VVH2 F or H03VVH2 F and for three conductors power cord must be VDE type H05VV F For the United States and Canada two pin plug configuration must be a 2 15P 250V or 1 15P 125V and three pin plug configuration must be 6 15P 250V or 5 15P 125V as designated in the U S National Electrical code handbook and the Canadian Electrical Code Part II The following illustrations show the...

Page 132: ...etooth Specification depending on the model you purchased as defined and approved by the Bluetooth Special Interest Group Logo certification with Bluetooth wireless technology as defined by the Bluetooth Special interest Group This Bluetooth product is not compatible with devices using Bluetooth Version 1 0B specifications The wireless devices have not completed verification of connection and oper...

Page 133: ...of the organization These situations may for example include Using the Wireless products equipment on board of airplanes or In any other environment where the risk of interference to other devices or services is perceived or identified as harmful If you are uncertain of the policy that applies on the use of wireless devices in a specific organization or environment e g airports you are encouraged ...

Page 134: ...or cause the loss or destruction of stored data TOSHIBA is not liable for the loss of data due to eavesdropping or illegal access through the wireless LAN and the damage thereof Card Specifications Form Factor PCI Express Mini Card Compatibility IEEE 802 11 Standard for Wireless LANs Network Operating System Microsoft Windows Networking Media Access Protocol CSMA CA Collision Avoidance with Acknow...

Page 135: ... functions and an external Bluetooth adaptor simultaneously For reference Bluetooth wireless technology has the following features Security Two advanced security mechanisms ensure a high level of security Authentication prevents access to critical data and makes it impossible to falsify the origin of a message Encryption prevents eavesdropping and maintains link privacy Worldwide operation The Blu...

Page 136: ... able to use this type of functionality Product Support The latest information regarding operating system support language support or available upgrades can be found on our web site http www toshiba europe com computers tnt bluetooth htm in Europe or www pcsupport toshiba com in the United States Radio Regulatory Information The Wireless device must be installed and used in strict accordance with ...

Page 137: ...vice supply Russian Federation Limited e i r p 100mW Permitted to use only for indoor applications closed industrial and warehouse areas and on board aircraft 1 Permitted to use for local networks of aircraft crew service communications on board aircraft in area of the airport and at all stages of flight 2 Permitted to use for public wireless access local networks on board aircraft during a flight...

Page 138: ...ject to the following two conditions 1 This device may not cause harmful interference and 2 this device must accept any interference received including interference that may cause undesired operation The term IC before the equipment certification number only signifies that the Industry Canada technical specifications were met Ce dispositif est conforme à la norme CNR 210 d Industrie Canada applica...

Page 139: ... should not be less than 20cm Please refer to the computer user s manual for the details regarding antenna location The installer of this radio equipment must ensure that the antenna is located or pointed such that it does not emit RF field in excess of Health Canada limits for the general population consult Safety Code 6 obtainable from Health Canada s website www hc sc gc ca Caution Radio Freque...

Page 140: ...ation and specified low power radio station 1 Important notice The frequency bandwidth of this equipment may operate within the same range as industrial devices scientific devices medical devices microwave ovens licensed radio stations and non licensed specified low power radio stations for mobile object identification systems RFID used in factory production lines Other Radio Stations 1 Before usi...

Page 141: ...t uses FH SS modulation 3 1 The interference range of this equipment is less than 10m 4 This equipment uses a frequency bandwidth from 2 400 MHz to 2 483 5 MHz It is impossible to avoid the band of mobile object identification systems 4 About the JEITA 5GHz Wireless LAN supports W52 W53 W56 Channel Device Authorization This device obtains the Technical Regulation Conformity Certification and it be...

Page 142: ...andard by the countries regions in the following table If you use this equipment in the countries regions which are not listed in the table blow please contact TOSHIBA Support As of June 2013 Austria Belgium Bulgaria Canada Cyprus Czech Rep Denmark Estonia Finland France Germany Greece Hong Kong Hungary Iceland India Indonesia Ireland Italy Japan Korea Latvia Liechtenstein Lithuania Luxemburg Malt...

Page 143: ... may vary depending on the specific computer model please refer to your computer documentation or visit the TOSHIBA website at www pcsupport toshiba com for details CPU performance may also vary from specifications due to design configuration Under some conditions your computer product may automatically shut down This is a normal protective feature designed to reduce the risk of lost data or damag...

Page 144: ...ing system Even though some tools might display the actual physical memory built into your computer the memory available to the operating system will still be approximately 3 GB only Computers configured with a 64 bit operating system can address 4 GB or more of system memory Battery Life Battery life may vary considerably depending on product model configuration applications power management sett...

Page 145: ...n operating in AC power mode and may decrease considerably when operating in battery power mode Total Available Graphics Memory is the total of as applicable Dedicated Video Memory System Video Memory and Shared System Memory Shared System Memory will vary depending on system memory size and other factors Wireless LAN The transmission speed over the wireless LAN and the distance over which wireles...

Page 146: ...c random Access Memory DVD R DL Digital Versatile Disc Recordable Dual Layer DVD ROM Digital Versatile Disc read Only Memory DVD RW Digital Versatile Disc rewritable DVD R DL Digital Versatile Disc Recordable Double Layer FAT File Allocation Table FCC Federal Communications Commission GB gigabyte GBps gigabytes per second HDD Hard Disk Drive HDMI High definition Multimedia Interface HDMI CEC High ...

Page 147: ...k S P DIF Sony philips Digital Interface Format SD Secure Digital SDHC Secure Digital High Capacity SDRAM Synchronous Dynamic Random Access Memory SSD Solid State Drive TFT Thin film Transistor URL Uniform Resource Locator USB Universal Serial Bus UXGA Ultra Extended Graphics Array VGA Video Graphics Array WAN Wide Area Network WSXGA Wide Super Extended Graphics Array WSXGA Wide Super Extended Gra...

Page 148: ...1 17 Cooling vents 3 3 D DC IN Battery indicator 3 14 Display automatic power off 5 5 hinges 3 10 opening 2 4 screen 3 10 Display controller 3 13 Documentation list 2 1 Dual Pointing Device AccuPoint 4 4 Touch Pad 6 9 DVD Super Multi drive using writing E Equipment checklist 2 1 ExpressCard inserting 4 37 removing 4 37 External monitor problems 6 12 F FN 1 reduce 4 3 FN 2 enlarge 4 3 FN 3 Volume d...

Page 149: ...cial keys 4 4 L LAN cable types 4 28 connecting 4 28 M Media care Card care 4 35 Memory card care 4 35 Memory installing 4 30 removing 4 32 memory media card inserting 4 36 removing 4 36 Memory media slot 4 33 Moving the computer 1 18 MultiMediaCard removing 4 36 P Password power on 5 5 Starting the computer by password 5 11 Supervisor 5 10 user 5 9 Pointing Device Touch Pad 3 11 Power conditions ...

Page 150: ...upport 6 14 Touch Pad 6 9 USB device 6 11 USB mouse 6 10 R Recovery hard disk drive 5 18 Recovery Media 5 18 5 19 Restarting the computer 2 7 S SD SDHC SDXC Card formatting 4 35 note 4 34 Security lock 4 43 Sleep Mode setting 2 7 System automatic 5 5 Sound system problems 6 11 T TOSHIBA Disc Creator 4 17 TOSHIBA HDD SSD Alert Utility 5 3 TOSHIBA PC Diagnostic Tool 5 1 U USB device problems 6 11 V ...

Reviews: