Toshiba RD-XS32SC Owner'S Manual Download Page 94

94

Merging chapters

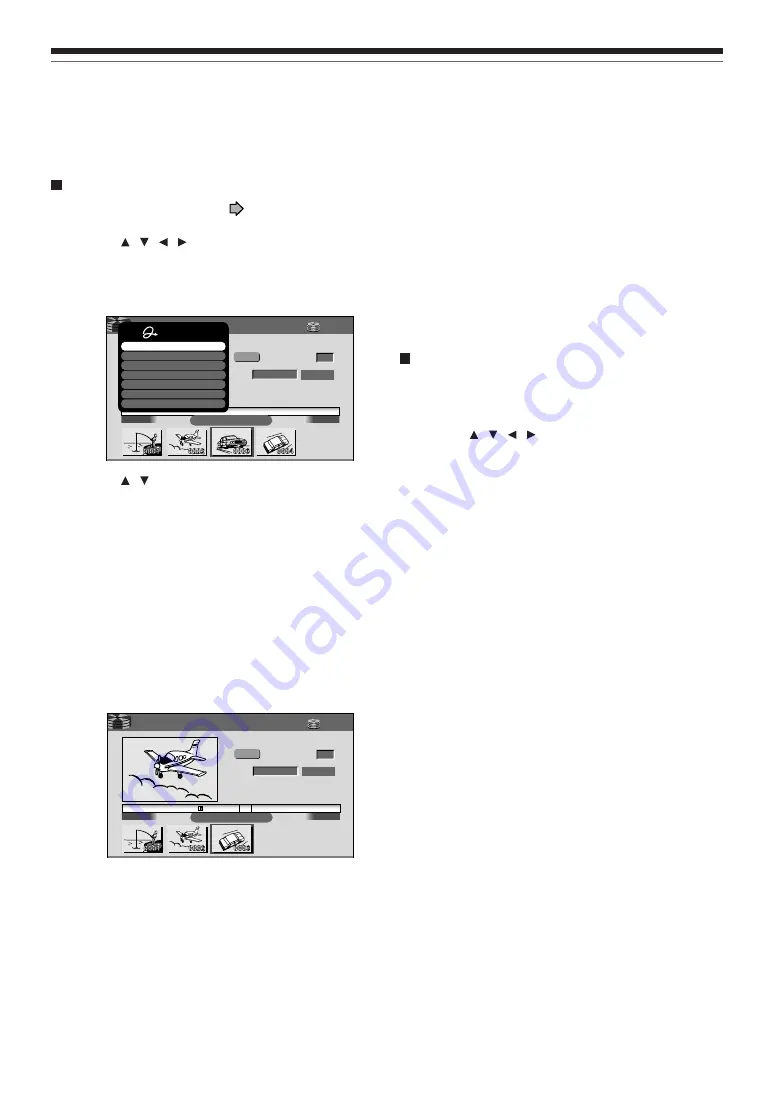
1) Perform steps 1 to 5 on 

 pages 90 to 91, to

view the EDIT MENU Chapter Editing display.

2) Press   /   /   /   to highlight a chapter.

Pressing the PICTURE SEARCH button can
access preceding or following pages.

3) Press QUICK MENU.

4) Press   /   to select an item.

Merge with previous cptr

:

To delete the chapter division between the selected
chapter and the previous one.

Merge with following cptr

:

To delete the chapter division between the selected
chapter and the succeeding one.

Merge all chapters

:

To merge all chapters in the title.

5) Press ENTER.

e.g. When “Merge with previous cptr” is selected:
The selected chapter is merged into the previous
chapter and its thumbnail is erased.

Notes

• To turn off the EDIT MENU Main Menu, press the EDIT

MENU button.

• When chapters are merged, the numerical value of

following chapters will decrease correspondingly.

• Merging chapters does not affect the related titles

(Playlist). You can also merge chapters in the title (Playlist).
In this case, the title (Original) is not affected.

• You can access the feature of merging chapters also from

the Quick Menu on the CONTENT MENU Chapter List.

Naming a chapter

1) From the EDIT MENU Chapter Editing, select a

chapter which you want to name.

2) Press QUICK MENU.

3) Press   /   /   /   to select “Edit Chapter

Name”, then press ENTER.

A keyboard appears.
Enter a name following the on-screen icon guides.

Notes

• There is a limit to the number of chapters which can be

named. If exceeded, a message appears.

• You can also access the keyboard to enter a chapter name

by selecting a chapter with the PICTURE SEARCH button
on the CONTENT MENU Title Information, and by
selecting “Edit chapter name” from the Quick Menu on the
CONTENT MENU Chapter List.

• You can change chapter names also on a DVD-R/RW disc,

if the disc is not finalized yet.

Creating chapters (Continued)

Editing

00:54:30

00:00:00

B

Chapter Create

00:00:00:03F

  4:3

Original

Aspect Ratio

Location

To create new chapter, select
desired start point via remote.
To set, press enter.

Divide

2003/06/10  05:09pm  CH:3

Title: 002  Chapter: 0004

HDD

EDIT

MENU

Quick Menu

Chapter break edit mode

Merge with previous cptr

Merge with following cptr

Merge all chapters

Auto chapter create

Exit

Edit chapter name

e.g.

00:54:30

00:00:00

B

Chapter Editing

00:00:00:03F

  4:3

Original

Aspect Ratio

Location

To create new chapter, select
desired start point via remote.
To set, press enter.

Divide

2003/06/10  05:09pm  CH:3

Title: 002  Chapter: 0004

HDD

EDIT

MENU

e.g.

Summary of Contents for RD-XS32SC

Page 1: ...iting OPERATIONS Read INSTALLATION GUIDE first TOSHIBA HDD DVD VIDEO RECORDER RD XS32SU RD XS32SC S Printed in China Printed on 70 Recycled Paper HDD DVD VIDEO RECORDER RD XS32SU RD XS32SC 2004 Toshiba Corporation DIGITAL VIDEO PM0016170012 RD XS32SU_Ope_E001 180 04 3 18 4 20 PM 1 ...

Page 2: ...rded 63 Playing at various speeds 64 Playing in fast reverse or fast forward 64 Skipping to the next previous chapter or track 65 Playing in slow motion 65 Playing frame by frame 66 Viewing still pictures Playing a disc that contains still pictures 66 Locating by entering the number 67 Locating by entering the number of a desired section 67 Locating a specific point by entering its elapsed time Ti...

Page 3: ...Searching 141 Jumping 142 Viewing Library data 143 Viewing title information 143 Viewing disc information 143 Maintenance of Library data 144 Checking the disc space 146 Viewing a number and space of a disc 147 Viewing remaining space 147 Function Setup Customizing the function settings 150 DVD Player settings 154 Picture Audio settings 157 Display settings 159 Operational settings 160 DVD recorde...

Page 4: ...4 Introduction Introduction Caution for safety Read SAFETY PRECAUTIONS IMPORTANT SAFETY INSTRUCTIONS Precautions and others of the INSTALLATION GUIDE first ...

Page 5: ...s on them may become unplayable You can reduce these risks by using high quality DVD recordable discs and checking their playability from time to time If it becomes necessary to service your DVD recorder it may be necessary to delete some or all of the programs on the HDD Playback Restrictions This owner s manual explains the basic instructions for this recorder Some DVD video discs are produced i...

Page 6: ... library DVD RAM discs comply with the global standard DVD VR Video Recording format and are optimized for recording of TV programs You can rewrite repeatedly without deterioration of an image quality erase unnecessary parts divide a chapter or specify playback area by frame Its cartridge is suitable for a longer term storage and family use and its large capacity of 9 4 GB allows more recording sp...

Page 7: ...r playback only DVD video disc 12cm 43 4 in 8cm 31 4 in Region number 1 or ALL Color system NTSC The region number of this DVD recorder is 1 If region numbers corresponding to a specific playable area are printed on your DVD video disc and you do not find 1 or ALL or the disc is encoded to permit playback only in regions other than Region 1 disc playback will not be allowed by the recorder Disc Ma...

Page 8: ... do not remove the disc even when you can Refer to the instruction manual that comes with the disc if it is absolutely necessary to remove the disc Some commercially available cartridge discs cannot be recorded or edited once the inside discs are removed To protect recorded contents Slide the write protect tab to PROTECT with something small enough The disc can play but cannot be edited or erased ...

Page 9: ...RM compatible this recorder can only be used to record copy free material DVD VR mode recording is not possible Recommended discs Victor JVC VD RW47BU Note Each disc has a limitation of its rewriteability Operation has been confirmed with recommended discs and tested discs but some other discs may not be usable Marks on DVD video discs The following are examples of marks and the meanings 4 3 LB 16...

Page 10: ...in a case Stacking or placing objects on discs outside of their case may cause warping Compatible discs Continued Structure of disc contents Normally DVD video discs are divided into titles and the titles are subdivided into chapters VIDEO CDs audio CDs are divided into tracks Title Divided contents of a DVD video disc Roughly corresponds to a story title in short stories Chapter Divided contents ...

Page 11: ...se recorded contents to use the disc repeatedly Initialize the disc Yes Yes If the disc has been executed DVD Video finalizing process first cancel the process then delete contents Yes If the disc has been executed DVD Video finalizing process first cancel the process then delete contents Yes Yes After you execute DVD Video finalizing process on a recorded disc you cannot name a title or create a ...

Page 12: ...age 35 60 Stops playback or recording momentarily 7 REC button page 34 Starts recording The above illustration displays the front panel with the cover open See the following page on how to open or close the cover 8 STOP button page 35 60 Stops playback or recording 9 PICTURE SEARCH button page 64 Scans the picture backwards 10 PICTURE SEARCH button page 64 Scans the picture forward 11 PLAY button ...

Page 13: ...ree mode indicator page 32 55 60 Indicates the selection by the three mode button 17 Media indicator Indicates the current media 18 Operation Status Indicator HDD Indicates the operation status of the HDD Recording Playing Copying within the disc 19 HDD indicator Illuminates in the HDD mode 20 Operation Status Indicator DVD Indicates the operation status of the DVD Recording Playing Copying within...

Page 14: ...the cap inserted to protect it from dust intrusion 1 AC IN socket page 15 in INSTALLATION GUIDE Connects to the supplied power cord 2 Ventilation fan 3 VHF UHF RF IN FROM ANT input socket page 14 in INSTALLATION GUIDE Connects to an antenna or cable signal 4 VHF UHF RF OUT TO TV output socket page 14 in INSTALLATION GUIDE Connects the supplied coaxial cable to a TV 5 INPUT1 INPUT3 jacks page 37 Us...

Page 15: ...15 Recording Playback Editing Library Function setup Others Introduction 10 OUTPUT1 OUTPUT2 jacks page 15 17 20 in INSTALLATION GUIDE Outputs video and audio signals to a connected TV or amplifier ...

Page 16: ...OOM P in P TIME BAR CHP DIVIDE DISPLAY INPUT SELECT PROGRESSIVE QUICK MENU INSTANT SKIP INSTANT REPLAY TOP MENU MENU RETURN DVD TV TIMESLIP HDD DVD F R A M E ADJUST PICTURE S E A R C H SK I P S L O W SETUP ENTER 1 2 3 4 5 6 10 7 8 9 DELETE T SEARCH VCR Plus REC MODE CLEAR 0 EXTEND TV CODE 1 2 3 4 5 6 7 8 9 10 11 12 13 14 15 16 17 18 19 20 21 44 45 46 47 43 48 49 50 51 52 42 41 40 39 38 37 36 35 34...

Page 17: ...R button page 19 FL SELECT button page 19 Buttons for TV operation page 46 in INSTALLATION GUIDE ON STANDBY button page 20 21 RETURN button 2 CHANNEL buttons page 20 33 AUDIO button page 73 DVD button page 32 55 60 INSTANT SKIP button page 64 INSTANT REPLAY button page 64 CONTENT MENU button page 55 95 EDIT MENU button page 108 SKIP button page 65 PICTURE SEARCH button page 55 64 ENTER button page...

Page 18: ...cording time is displayed 6 VCD CD indicator VCD Illuminates when a VIDEO CD is loaded CD Illuminates when an audio CD is loaded 7 Title indicator Illuminates when a title number is displayed 8 TRK Track indicator Illuminates when a track number is displayed 9 CHP Chapter indicator Illuminates when a chapter number is displayed 10 SAP indicator Illuminates when receiving a SAP broadcast 11 DUBBING...

Page 19: ...n the disc or recording conditions 14 Channel indicator Displays the current channel or other numbers such as a title number track number bit rate or input selection 15 Multi display Displays the current time elapsed time remaining time starting time of programmed recording chapter number or message etc 16 Analog output level indicator Displays the analog output level L R Stereo and bilingual left...

Page 20: ...r will output TV channel signals to the connected TV also in the stop mode You can select a desired channel by pressing the CHANNEL or the number buttons These buttons can select channels of a connected cable box or satellite system if IR control page 37 in INSTALLATION GUIDE is set to On Loading a disc Check disc compatibility beforehand page 6 7 and use a proper playable disc Caution Keep your f...

Page 21: ...ization of the disc using the formatting function of the recorder may refresh it However all contents stored on the disc will be completely erased by this initialization process This recorder may indicate alert messages with some DVD RAM discs right after insertion If such a disc is used for playback or recording on other equipment all data in the disc may be damaged and the disc will not be playe...

Page 22: ... Main on screen displays Depending on the disc some of these may not appear Playback Pause Stop Fast forward Fast reverse Forward skip Reverse skip Forward slow motion Reverse slow motion Forward frame by frame playback Reverse frame by frame playback Recording Recording pause When title playback is completed Instant skip Instant replay Chapter division Forward skip by 1 20 Revers skip by 1 20 Acc...

Page 23: ...ure to the full of the screen You can change playback speed See page 64 3 To stop press STOP A current channel broadcast appears TV xxxch accompanies Pressing the REC button starts recording On recording see page 25 Continued 005 2004 04 03 07 00am TV 18 TV 12ch Original 00 54 30 00 10 15 HDD Play Time Time Slip TR TV Viewing Delete Title Finalize R RW Format RAM RW Dubbing Setup Timer Recording P...

Page 24: ...operational status 2 Press to select an item then press ENTER To exit the Quick Menu Press QUICK MENU again Alternatively Select Exit with then press ENTER Key operation EASY NAVI QUICK MENU continued To exit the EASY NAVI Press EASY NAVI again Note For a disc other than the specified one the finder cannot be operated To play the disc exit the EASY NAVI then press the PLAY button or select the Pla...

Page 25: ...D containing JPEG or MP3 WMA files see page 76 78 Most instructions are based on remote control operation unless otherwise noted You can use the buttons on the remote control and those on the main unit as well when they have the same function If copy protection signal is detected during recording on this recorder the recording automatically pauses and a message appears In this case the PAUSE butto...

Page 26: ...g on a DVD RAM disc Confirm disc compatibility and prepare an available DVD RAM disc to record on page 6 8 Some discs may need to be formatted for use on this recorder A message will appear asking you to execute disc formatting Follow the procedure displayed on screen to format the DVD RAM disc compatible with this recorder Some DVD RAM discs formatted on a PC may not be usable Note This recorder ...

Page 27: ...s disconnected from a wall outlet or a power failure occurs during recording If a power failure occurs within 5 minutes prior to the programed recording start time the programmed recording may not be executed A programmed recording may not be executed correctly if scheduled when Daylight Saving time starts or ends Programmed recording and operational status The recorder gives priority to programme...

Page 28: ...iminate the window Before recording Continued Recording Be sure to read this section prior to using a DVD RAM RW disc on this recorder for the first time For DVD R initializing is not necessary Initializing a DVD RAM RW disc Logical Format A disc should be initialized in the following cases The recorder may display a message to request you to do so e g When you use a DVD RAM RW disc on this record...

Page 29: ...rectly The disc which has errors during writing because of dirt on the disc and cannot be further recorded or cannot initialize normally You need to start physical formatting from the first step again when you use a failed disc Physical formatting does not work if the disc contains a lot of voids beyond the limitation of this recorder If an error occurs in physical formatting ERR 01 appears in the...

Page 30: ...uage Before entering a character move a cursor to the language selection area by pressing the buttons Then press the buttons to select a language then press the ENTER button Title information MENU CONTENT 003 Chapter English Spanish French German Italian etc Input 1 2 3 4 5 6 7 8 9 Select Return Save Caps Lock Space All Clear BkSp Direct 0 9 Cursor CLEAR CLEAR CLEAR DELETE DELETE DELETE 1 2 3 4 5 ...

Page 31: ...the cursor Select BkSp by pressing the buttons then press the ENTER button Alternatively open the lid of the remote control and press the DELETE button 1 Press the button to select an input mode 2 Press the buttons to select a character then press the ENTER button The selected character is input on the cursor 3 Repeat steps 1 and 2 to enter characters 4 When finished press to save the characters T...

Page 32: ...ied IR control cable and the necessary settings are all done you can select channels of the connected set top box with the recorder s remote control If not select the proper channel on the set top box to receive the desired program Preparation When you record on a DVD RAM R RW disc load it into the recorder Load a disc which has sufficient space available to record the program Make sure the loaded...

Page 33: ...ality Continued 1 2 3 4 5 6 7 8 9 0 QUICK MENU ENTER ENTER F R A M E ADJUST TIMESLIP HDD DVD EASY NAVI INSTANT SKIP INSTANT REPLAY SETUP ENTER T SEARCH CLEAR 3 1 2 VCR Plus REC MODE EXTEND TV CODE 4 5 6 DELETE 10 7 8 9 0 PLAY STOP PAUSE REC LIBRARY REC MENU EDIT MENU CONTENT MENU ANGLE OPEN CLOSE SUBTITLE AUDIO CHANNEL REC QUICK MENU TOP MENU MENU RETURN DVD F R A M E ADJUST PICTURE S E A R C H SK...

Page 34: ... sound is recorded as stereo sound When playing this recorded sound you will hear MAIN and SAP sounds simultaneously Press the AUDIO button to select a desired sound When DVD compatible mode is set to Main or SAP the unit records the same sounds on both the left and right channels when receiving monaural sound When receiving the multi channel sound the selected sound Main or SAP is recorded on bot...

Page 35: ...art recording while playing a disc Stop playback then select the other disc by pressing the HDD or DVD button and start recording on that disc To play a disc while recording on another disc Select the disc that is not being recorded by pressing the HDD or DVD button and start playback on the disc Note During a dubbing job the unoccupied drive is available for recording or playback however cannot p...

Page 36: ...e playback picture may appear after a delay of several seconds While you are using this function the following operations functions are not available Programmed playback repeat playback intro scan etc Editing Playlist programming dubbing title chapter naming title thumbnail setting etc This function is not available at a 10 minutes overlapped portion of the relay recording or A B recording page 48...

Page 37: ...ration When you record on a DVD RAM R RW disc load it into the recorder Load a disc which has sufficient remaining space to record the program Make sure the loaded disc is not write protected Notes Even if a source of high quality sound track such as DVD audio is recorded with this recorder the sound quality becomes regular audio CD s one Refer to the instructions of the connected equipment When y...

Page 38: ... 116 2 Press HDD or DVD to select a recording media HDD To record on the HDD DVD To record on a DVD RAM R RW disc 3 Start playback of the source content on the connected equipment 4 Press REC of this recorder to start recording 5 When recording is completed press STOP TIMESLIP HDD DVD EASY NAVI INSTANT SKIP INSTANT REPLAY PLAY STOP PAUSE REC LIBRARY REC MENU EDIT MENU CONTENT MENU ANGLE OPEN CLOSE...

Page 39: ... source equipment during recording on this recorder Operations such as pausing resuming fast forwarding CUE and fast reversing REVIEW etc may produce noises which may be detected as copy protection signals Therefore first start playback on the source equipment to confirm that the desired source can be played properly and then start recording on this recorder Do not operate the source equipment dur...

Page 40: ...ve to the top of the next line then repeat steps 2 to 4 5 Press REC MENU to exit Your programme is entered If you want to turn off the power press the power button REC MENU ENTER ENTER ENTER REC MENU F R A M E ADJUST TIMESLIP HDD DVD EASY NAVI INSTANT SKIP INSTANT REPLAY SETUP ENTER T SEARCH CLEAR 3 1 2 VCR Plus REC MODE EXTEND TV CODE 4 5 6 DELETE 10 7 8 9 0 PLAY STOP PAUSE REC LIBRARY REC MENU E...

Page 41: ...audio CD but recordable time will be shorter A programmed recording onto a Reservation Disc is marked with an icon Exec CH Date Start End Media Video Bit Rate Audio Disc 2 69 TV 1 125 Cable 0 999 When IR control is On L1 L3 Specified date from today to 2 month later Every Sunday to Saturday Monday to Thursday Monday to Friday Monday to Saturday everyday 12 00 am 11 59 pm 12 00 am 11 59 pm DVD HDD ...

Page 42: ...tio Video mode Select the aspect ratio when recording onto a DVD R RW disc page 162 High rate save Use this feature when you want to save space while using the best picture quality rate for recording This will use 9 2 Mbps for recording and reduce the rate temporarily for the portion where the high rate is not required where picture is fairly constant Off This feature is disabled and the normal re...

Page 43: ...ou want to delete 3 Press QUICK MENU The Quick Menu appears 4 Press to select Program cancel then press ENTER Check the message then delete the entry 5 Press REC MENU to exit Note You cannot delete a timer program while another is executed Correcting a timer program 1 Press REC MENU The REC MENU appears 2 Press to select a timer program you want to change then press ENTER 3 Press to select an item...

Page 44: ...ER button You can adjust to a lower mode SP to LP and or lower the rate to reduce the quality of the recording and thus provide more disc capacity space 6 Press Program modification is registered 7 Press REC MENU to exit the GUI Selected program Available disc space When the entry item is marked X the recording does not fit Change the setting Elapsed programing using past data for programing 1 Pre...

Page 45: ...press QUICK MENU The Quick Menu appears 2 Press to select Auto power off then press ENTER Keeping the power on even after the programmed recording finished If the recorder turns itself on to execute a programmed recording it will turn itself off after finishing the recording You can restrict this and keep the recorder powered on 1 While executing a programmed recording press QUICK MENU 2 Press to ...

Page 46: ...1858 1 Open the lid of the remote control and press VCR Plus The REC MENU Timer Programing with the PlusCode input window appears 2 Press the appropriate number buttons to enter the PlusCode Refer to newspapers or TV magazines to obtain PlusCodes To correct entered digits press the CLEAR button to erase them and press the number buttons to re enter again Note When you enter the number starting fro...

Page 47: ...am starts even if when the start time arrives prior to the end of the previous program 4 Select an item by pressing then press ADJUST to set the item if necessary For details about items see page 40 Recording channels and IR control setting page 37 INSTALLATION GUIDE When set to Off make sure CH shows the channel you want to record When set to On select a channel on the set top box connected to th...

Page 48: ...ient for the recording one DVD RAM disc DVD RW R discs are not available on the A B recording To use the A B recording function At step 3 page 40 set Media to A B Video is automatically set to AT When the timer setting is completed illuminates on the front panel display When recording starts The same content is recorded on the HDD and the DVD RAM disc 10 minutes before the unit exchanges the recor...

Page 49: ...servation Disc setting Load the disc you want to cancel and select the recording option on the REC MENU Press the QUICK MENU button to select Unlock program record then Yes and press the ENTER button To delete the information of a Reservation Disc If you lose a Reservation Disc delete the information of the Reservation Disc Press the QUICK MENU button to select the program of which data you want t...

Page 50: ... title chapters Deleting all chapters in a title erases the title itself Title and chapter which contains still pictures cannot be deleted On a DVD R RW disc deleting is not possible if the disc is finalized page 132 Chapters in a DVD R RW disc cannot be deleted On a DVD RW disc only a title last recorded can restore the disc capacity by being deleted On a DVD R disc deleting cannot restore the di...

Page 51: ...r in a scene with fast action or a scene with light and shadows such as a water surface This recorder has a two settings 2 hour recording at SP mode or 4 hour recording at LP mode both assume a blank 4 7 GB DVD RAM It is recommended to consider the SP mode as a standard mode and use the LP mode when you want to record for long time regardless of the picture quality If you want to record for about ...

Page 52: ......

Page 53: ...ater Playing a TV program currently being recorded Playing at various speeds Locating by entering the number Watching a TV broadcast in the sub window P in P Playback Selecting the camera angle Selecting Subtitles Zooming a picture Selecting the Sound Viewing JPEG files Playing MP3 WMA Files Checking the current status and settings Functions in the Quick Menu ...

Page 54: ... start recording Press the STOP button to stop playback Then press the HDD or DVD button to select a recording media and press the REC button to start recording Screen Protection If you pause playback or display a menu and leave it still for about 15 minutes the recorder switches the output picture source to a TV broadcast or connected equipment A still picture may be displayed after all titles ar...

Page 55: ...d in every thumbnail when HDD RAM title play page 160 is set to Title resume When set to Serial playback it is displayed in a thumbnail last operated You can change a thumbnail picture See page 100 You cannot display the CONTENT MENU for DVD R RW discs recorded on other devices For playing a recorded title while recording another see page 36 A black thumbnail with Recording means that the title is...

Page 56: ...dly until the beginning of the title appears To play the other title Press the SKIP button repeatedly Notes Depending on the status or the contents playback may not start from the location last stopped but instead another location For example from the beginning of the disc or title Depending on the disc there may be a slight difference between the location the recorder memorized and the actual loc...

Page 57: ... in the order of the thumbnails on the CONTENT MENU as if they were recorded in one video tape 1 During stop press QUICK MENU The Quick Menu appears 2 Press to select Special playback mode then press ENTER e g 3 Press to select Play all ORG titles then press ENTER e g Playback starts from the beginning of title 1 Notes To stop Play all ORG titles press the STOP button twice However doing this when...

Page 58: ...The Quick Menu appears 2 Press to select Title information then press ENTER Detailed information of a selected title chapter appears You can switch the chapters in the title by pressing the PITURE SEARCH buttons Notes From the Quick Menu on the CONTENT MENU Title Information you can change the details such as name genre or time which will help sorting and searching on Library system page 140 Also ...

Page 59: ...ress ENTER The specified page appears Playing a DVD RW disc recorded in DVD VR mode See page 55 Notes Some disc s conditions or discs which contain copy once contents may not permit proper playback Title resume page 160 is not available HDD Original 2004 06 08 07 00 am TV 4 Title List Page MENU CONTENT 1 2 0 53 45 Original 2004 06 08 11 00 pm TV 6 0 29 50 Original 2004 07 11 07 00 am TV 8 0 54 30 ...

Page 60: ... the data of a disc To stop playback Press STOP To pause playback still playback Press PAUSE To resume normal playback press the PLAY button or the PAUSE button Note Sound is muted during still mode Note DVD video disc provides high resolution pictures and a lot of information Because of this you may notice some fine picture noises on TV screen which you have never seen with regular broadcast TV p...

Page 61: ...n which you can view the structure of contents or select a scene Most of the top menus automatically appear in certain scenes and also are displayed on demand Actual operation of the top menu depends on the disc This section explains a general example of how to operate a top menu Also refer to the instructions of the disc itself 1 Press TOP MENU 2 Press to select the title you want If the titles i...

Page 62: ...n To resume normal playback press the PLAY button You can play in fast forward to within 10 seconds prior to the current broadcast 4 Press TIMESLIP to exit this mode The recorder stops storing the broadcast on the HDD A message appears and asks you whether you will save the stored data or erase it Press the buttons to select then press the ENTER button Notes This function is not available during r...

Page 63: ...playback stops when the disc is filled up You can play up to a location where the recorder stopped the recording The time slip recording playback cannot begin if the disc is full The playback picture may appear after a delay of several seconds The playback location will never be identical to the record location in the program It will always trail the record location by a few seconds While using ti...

Page 64: ... whole During playback press Each time you press the button you can skip by 1 20 of the current title or track if it is longer than 1 minute Time bar display Fast forward or fast reverse playback automatically displays a time bar e g For details see page 81 To skip back in pre determined increments During playback press INSTANT REPLAY Each time you press the button you can go back by the specified...

Page 65: ...cate chapters only in the current title if DVD title stop page 156 is set to On To access chapters in other titles set to Off However in this instance even though you press the SKIP button to go back to the previous title playback starts not from the last chapter of the title but from the first chapter Playing in slow motion 1 Press SLOW during playback Forward slow motion Reverse slow motion Each...

Page 66: ...at contains still pictures 1 Press PLAY The first still picture on a disc is displayed Some DVD video discs may allow you to change the pictures using the PLAY ENTER or SKIP button 2 Press FRAME Displays the next still picture Displays the previous still picture PAUSE DVD VIDEO VCD DVD R DVD RW HDD DVD RAM PLAY STOP PAUSE REC QUICK MENU F R A M E ADJUST PICTURE S E A R C H SK I P S L O W ENTER REM...

Page 67: ...utton several times depending on the disc This method of locating a title is available only on a disc that contains title numbers If a title is erased the numbers of the following titles decrease respectively When you record a new title Original on the HDD or a DVD RAM disc it is added prior to current titles Playlist and each following title Playlist reference number will advance by a factor of 1...

Page 68: ...isely as you specified This method for accessing specific locations is available only within the current title of the HDD or a DVD RAM R RW DVD video disc or within a current track of a VIDEO CD audio CD Pressing the CLEAR button resets the numbers ENTER TIMESLIP HDD DVD EASY NAVI INSTANT SKIP INSTANT REPLAY SETUP ENTER T SEARCH CLEAR 3 1 2 VCR Plus REC MODE EXTEND TV CODE 4 5 6 DELETE 10 7 8 9 0 ...

Page 69: ...re with the picture within the sub window or change the audio settings Press the P in P button during Chase Play or Pause TV the actual broadcast appears on the sub window in real time If this function is stopped after shifting the sub window before you press the P in P button again the sub window will appear in the last position you set However if you turn off the power the sub window re appears ...

Page 70: ...w setting when you resume normal playback If you pause a picture immediately after changing a camera angle the resumed playback picture may not display the new camera angle Depending on the disc the camera angle may not change even though the angle number changes To turn off the angle icon Set On screen display in the setup menu to Off page 159 Most of the on screen display including the angle ico...

Page 71: ...lection Notes Some DVD video discs are set to display subtitles automatically Depending on the scene subtitles may not appear immediately after you set the subtitle function to on Some DVD video discs will allow you to change subtitle languages and turn subtitles on or off only via the disc menu To turn the subtitles on or off At step 2 select Off by pressing the ADJUST button SUBTITLE SUBTITLE EN...

Page 72: ... on the picture size you select page 44 in INSTALLATION GUIDE The zoom feature is not available while displaying a GUI The zoom feature is canceled when you stop playback or start playback To cancel the zoom Press ZOOM DVD VIDEO VCD DVD R DVD RW HDD DVD RAM ZOOM ENTER CLEAR TIMESLIP HDD DVD EASY NAVI INSTANT SKIP INSTANT REPLAY PLAY STOP PAUSE REC LIBRARY REC MENU EDIT MENU CONTENT MENU ANGLE OPEN...

Page 73: ...ons to select Output you can select the audio output setting page 158 by using the ADJUST buttons Sounds in playback You can play SAP and or stereo broadcasts with this recorder Refer to steps 1 and 2 to select a desired audio Desired sound SAP sound Stereo sound L R indicators on the front panel R right is on Both R right and L left are on Sound output SAP Stereo Sound MTS Broadcast Compatibility...

Page 74: ...o Mono Stereo On Stereo SAP L R SAP Dual Mono Mono SAP Mono SAP Dual Mono Stereo L R Stereo Mono Mono Mono Stereo Main Off Stereo SAP L R Stereo Mono SAP Mono Mono Stereo Stereo L R Stereo Mono Mono Mono Stereo On Stereo SAP L R L R Stereo Mono SAP Mono Mono Stereo Stereo L R Stereo Mono Mono Mono Stereo SAP Off Stereo SAP L R Stereo Mono SAP Mono Mono Stereo Stereo L R Stereo Mono Mono Mono Stere...

Page 75: ...8 kHz 16 bit Bitstream Bitstream 44 1 kHz 16 bit 44 1 kHz 16 bit Bitstream Bitstream 48 kHz 16 bit Bitstream 48 kHz 16 bit Bitstream Analog L R jacks 48 kHz 20 bit 48 kHz 16 bit 48 kHz 20 bit 48 kHz 24 bit 48 kHz 16 bit 48 kHz 20 bit 48 kHz 24 bit 48 kHz 16 bit 44 1 kHz 16 bit 44 1 kHz 16 bit Noise 48 kHz 20 bit 48 kHz 16 bit 48 kHz 20 bit 48 kHz 16 bit 48 kHz 16 bit BITSTREAM PCM jack Bitstream 4...

Page 76: ... the STOP button playback will start from the photo you stopped To pause playback slide show Press PAUSE To resume press the PAUSE button again or press the PLAY button To skip photos During playback press the SKIP button repeatedly To skip forward To skip backward To rotate a picture Press ANGLE repeatedly Each time you press the button the picture rotates by 90 degree Notes The rotated image is ...

Page 77: ...RW is not recommendable CD physical format Mode 1 Mode 2 XA Form 1 File system ISO9660 Level 1 2 or Joliet File name A file name should be in alphabet and numerals only and must incorporate JPG extension e g JPG Total number of folders Less than 256 Total number of files Less than 1000 Some files may not display their own entire image depending on the size Some discs may not permit this operation ...

Page 78: ...U Audio List appears Notes WMA tracks copy protected cannot be played The DIGITAL AUDIO OUT BITSTREAM PCM jack outputs MP3 WMA sounds in the linear PCM format regardless of the current Audio out select page 158 selection You cannot change the playback speed of MP3 WMA playback TIMESLIP HDD DVD EASY NAVI INSTANT SKIP INSTANT REPLAY PLAY STOP PAUSE REC LIBRARY REC MENU EDIT MENU CONTENT MENU ANGLE O...

Page 79: ...hat permission is required in order to download MP3 WMA files and music from the internet Toshiba has no right to grant such permission Permission should always be sought from the copyright owner Microsoft Windows Media and the Windows Logo are trademarks or registered trademarks of Microsoft Corporation in both the United States and other countries 001 Track Search e g Quick Menu Special playback...

Page 80: ...back mode Operating disc Receiving channel e g DISPLAY TIMESLIP HDD DVD EASY NAVI INSTANT SKIP INSTANT REPLAY PLAY STOP PAUSE REC LIBRARY REC MENU EDIT MENU CONTENT MENU ANGLE OPEN CLOSE SUBTITLE AUDIO CHANNEL QUICK MENU TOP MENU MENU RETURN DVD F R A M E ADJUST PICTURE S E A R C H SK I P S L O W ENTER TV VIDEO CHANNEL VOLUME REMAIN DIMMER FL SELECT ZOOM P in P TIME BAR CHP DIVIDE DISPLAY INPUT SE...

Page 81: ...al playing time of the disc Elapsed recording time per 30 minutes Recording end time if it comes within 30 minutes Elapsed time Locator Shows the current location TIME BAR Changing the location of the time bar While the time bar is displayed press The time bar shifts up and down Turning off the time bar Press TIME BAR Note Time display is an approximation PLAY STOP PAUSE REC QUICK MENU F R A M E A...

Page 82: ...o repeat the same chapter Track repeat To repeat the same track Disc repeat To repeat the entire disc Repeat all ORG titles To repeat all original titles in a disc Repeat all PL titles To repeat all playlist titles in a disc Cancel repeat in Repeat playback mode To resume normal playback Playback of the HDD or a DVD RAM disc stops Notes Some discs may not permit repeat operation You cannot use the...

Page 83: ...er Input each 3 digit number To input a 1 or 2 digit number first input 0 e g 0 0 3 To cancel the numbers press the CLEAR button To input a chapter number press the buttons to shift the cursor 01 T CT 11 T CT 21 T CT 02 T CT 12 T CT 22 T CT 03 T CT 13 T CT 23 T CT 04 T CT 14 T CT 24 T CT 05 T CT 15 T CT 25 T CT 06 T CT 16 T CT 26 T CT 07 T CT 17 T CT 27 T CT 08 T CT 18 T CT 28 T CT 09 T CT 19 T CT...

Page 84: ... then press ENTER Bit rate Note To turn off the bit rate display select this item again To check information on a title DVD R DVD RW HDD DVD RAM 1 During playback press QUICK MENU 2 Press to select Title information then press ENTER Title information To exit the Quick Menu DVD VIDEO VCD CD DVD R DVD RW HDD DVD RAM Press QUICK MENU again or Press to select Exit then press ENTER Exit ...

Page 85: ...cs Before editing Creating chapters Playlist editing Creating thumbnails Before dubbing High speed Library dubbing Dubbing selected items Rate conversion dubbing Line U dubbing Deleting selected items Combine Original titles Creating a DVD Video using DVD R RW DVD Video finalizing process DV recording ...

Page 86: ...cessary scenes from a title to save first make a Playlist virtual title by collecting necessary scenes then copy the Playlist to change it into a new title finally delete the original one This method is more simple and can save your time and reduce possibility of such fragmentation troubles of the HDD To avoid HDD fragmentations it is also recommended that you execute periodically deletion of all ...

Page 87: ... created as you recorded programs five times from Monday to Friday The content you recorded is called Title Original All chapters in a title Original are chapters Original Specify the range a favorite song you need in each title Original To specify the range create a chapter A segment of a song becomes one chapter by creating divisions in a chapter at the beginning and end of a song In the example...

Page 88: ...the right example the chapter names are Monday Wednesday and Friday and the playback order is Wednesday Friday Monday For actual playback the contents of the source chapter Original are played Basically it is a list for the recorder to go and find the content You can create a part from the Original as many times as you want and you can make different titles with the same parts by changing the comb...

Page 89: ...or a chapter Original Therefore changing or deleting a title Original or a chapter Original will affect the related title Playlist or chapter Playlist Some recorded content cannot be edited for example a title including still images The boundary of the title with unnecessary part deleted and titles Playlist having different parts cannot be played back seamlessly without break Proceed to the practi...

Page 90: ...vide a title of a DVD R RW disc into chapters It is possible to create chapters in a DVD R RW disc by pressing the CHP DIVIDE button during recording at the desired points or by selecting an option that inserts chapter marks automatically during recording at regular intervals page 162 If you want to modify the chapter division or want to place a chapter mark more precisely monitoring the frame cou...

Page 91: ...EC MENU EDIT MENU CONTENT MENU ANGLE OPEN CLOSE SUBTITLE AUDIO CHANNEL QUICK MENU TOP MENU MENU RETURN DVD F R A M E ADJUST PICTURE S E A R C H SK I P S L O W ENTER TV VIDEO CHANNEL VOLUME REMAIN DIMMER FL SELECT ZOOM P in P TIME BAR CHP DIVIDE DISPLAY INPUT SELECT PROGRESSIVE TV SKIP PAUSE FRAME SLOW PICTURE SEARCH ENTER ENTER PLAY 00 54 30 00 00 00 03F 00 00 00 4 3 B Chapter Editing Original Asp...

Page 92: ...tinued Editing 00 54 30 00 00 21 24F 00 00 00 4 3 B Chapter Editing Original Aspect Ratio Location To create new chapter select desired start point via remote To set press enter Divide Title 004 Chapter 0001 HDD EDIT MENU Fishing Guide e g 00 54 30 00 00 21 24F 00 00 00 4 3 B Chapter Editing Original Aspect Ratio Location To create new chapter select desired start point via remote To set press ent...

Page 93: ... Chapter divisions are automatically marked at the selected intervals Editing chapter break You can adjust positions of chapter marks You can shift the beginning of a chapter currently selected 1 Perform steps 1 to 5 on page 90 to 91 2 Press QUICK MENU 3 Press to select Chapter break edit mode then press ENTER 4 Press to select the item then press ENTER by frame VR mode The chapter mark shifts by ...

Page 94: ...ming a chapter 1 From the EDIT MENU Chapter Editing select a chapter which you want to name 2 Press QUICK MENU 3 Press to select Edit Chapter Name then press ENTER A keyboard appears Enter a name following the on screen icon guides Notes There is a limit to the number of chapters which can be named If exceeded a message appears You can also access the keyboard to enter a chapter name by selecting ...

Page 95: ...0 am TV 4 Title List Page MENU CONTENT 1 2 0 53 45 Original 2004 06 08 11 00 pm TV 6 0 29 50 Original 2004 07 11 07 00 am TV 8 0 54 30 Original 2004 07 12 09 00 pm TV 10 0 51 28 Original 2004 06 12 09 00 pm TV 3 0 52 40 Original 2004 07 12 11 00 pm TV 4 0 30 08 HDD e g Quick Menu Title information Create thumbnail High speed dubbing Rate conversion dubbing Chapter function Edit functon Special pla...

Page 96: ...ntire time HDD EDIT MENU e g TIMESLIP HDD DVD EASY NAVI INSTANT SKIP INSTANT REPLAY PLAY STOP PAUSE REC LIBRARY REC MENU EDIT MENU CONTENT MENU ANGLE OPEN CLOSE SUBTITLE AUDIO CHANNEL QUICK MENU TOP MENU MENU RETURN DVD F R A M E ADJUST PICTURE S E A R C H SK I P S L O W ENTER TV VIDEO CHANNEL VOLUME REMAIN DIMMER FL SELECT ZOOM P in P TIME BAR CHP DIVIDE DISPLAY INPUT SELECT PROGRESSIVE TV A A A ...

Page 97: ...hapter which is being edited cannot be selected as an item You cannot add a title of still pictures or a title or a chapter which contains both still and moving pictures to a playlist By copying dubbing a Playlist a title Original of the same contents is created You cannot program a Playlist of contents recorded on a DVD R RW disc To make a Plailist using contents of DVD RW discs copy them to the ...

Page 98: ...ess QUICK MENU 3 Press to select Playlist re editing and then press ENTER The EDIT MENU Playlist editing appears Follow the procedure from steps 5 on page 96 add or delete parts as necessary Note You cannot edit a title Playlist of still pictures or a title Playlist which contains both still and moving pictures Using a part in a Playlist also in another Playlist 1 In play or stop mode of a Playlis...

Page 99: ...t every week To sort out programs recorded on the same time of the same day of the week to make a Playlist 4 Press ENTER Notes Only titles Original can be sorted The maximum number of sorted titles is 99 If you modify the recording start time or date of one of the recorded serials the title will not be sorted out Contrarily any program can be sorted if its channel recording start time and date are...

Page 100: ...TV 8 0 54 30 Original 2004 07 12 09 00 pm TV 10 0 51 28 Original 2004 06 12 09 00 pm TV 3 0 52 40 Original 2004 07 12 11 00 pm TV 4 0 30 08 HDD e g TIMESLIP HDD DVD EASY NAVI INSTANT SKIP INSTANT REPLAY PLAY STOP PAUSE REC LIBRARY REC MENU EDIT MENU CONTENT MENU ANGLE OPEN CLOSE SUBTITLE AUDIO CHANNEL QUICK MENU TOP MENU MENU RETURN DVD F R A M E ADJUST PICTURE S E A R C H SK I P S L O W ENTER TV ...

Page 101: ...LIBRARY REC MENU EDIT MENU CONTENT MENU ANGLE OPEN CLOSE SUBTITLE AUDIO CHANNEL QUICK MENU TOP MENU MENU RETURN DVD F R A M E ADJUST PICTURE S E A R C H SK I P S L O W ENTER TV VIDEO CHANNEL VOLUME REMAIN DIMMER FL SELECT ZOOM P in P TIME BAR CHP DIVIDE DISPLAY INPUT SELECT PROGRESSIVE TV SKIP FRAME SLOW PICTURE SEARCH PLAY PAUSE ENTER 00 54 30 2004 06 08 11 00pm Ch 6 00 00 00 HDD 0 29 50 B 00 00 ...

Page 102: ...n a title that contains a still picture If you create a chapter thumbnail and then shift the chapter mark page 93 or record or edit the disc on other devices the chapter thumbnail may return to the top of the chapter Creating thumbnails Continued Editing ...

Page 103: ...en a DVD RAM disc was recorded with the other equipment which is not compatible with this recorder s recording format and you want to copy it to a DVD R RW Set DVD compatible mode to Main or SAP Rate conversion dubbing of several parts You can select titles and chapters and change the data size and copy them all at once Use this function when you unify the compatibility of several titles and conte...

Page 104: ...ew Playlist Notes If either the HDD or DVD RAM is not in optimum physical condition an error may occur when you execute Move and some titles or chapters may be lost If you want to Move non copy protected titles and chapters it is recommended for safety that you first Copy them to the opposite drive and confirm they have been copied properly Then delete the titles and chapters to which you have exe...

Page 105: ...g may be stopped if a timer program recording starts While recording during dubbing the CONTENT MENU and the LIBRARY MENU cannot appear Playing a recorded title while recording another on the same disc page 36 is not possible while dubbing HDD DVD HDD HDD HDD HDD DVD DVD DVD HDD DVD DVD Playback Available Not available Not available Available Recording Available Not available Not available Availab...

Page 106: ... ENTER The CONTENT MENU High Speed Library Dubbing appears Editing TIMESLIP HDD DVD EASY NAVI INSTANT SKIP INSTANT REPLAY PLAY STOP PAUSE REC LIBRARY REC MENU EDIT MENU CONTENT MENU ANGLE OPEN CLOSE SUBTITLE AUDIO CHANNEL QUICK MENU TOP MENU MENU RETURN DVD F R A M E ADJUST PICTURE S E A R C H SK I P S L O W ENTER TV VIDEO CHANNEL VOLUME REMAIN DIMMER FL SELECT ZOOM P in P TIME BAR CHP DIVIDE DISP...

Page 107: ...t available on DVD R RW Move is not available between the HDD and DVD R RW Some parts in DVD R RW may be divided if dubbed For a copy once permitted content only moving from the HDD to a DVD RAM disc is available Executing this will delete the original content in the HDD and the one moved to a DVD RAM will not be able to moved or copied High speed dubbing is not available between the HDD and DVD R...

Page 108: ...2 Press the buttons to select Change media to HDD or Change Media to DVD 3 Press the ENTER button TIMESLIP HDD DVD EASY NAVI INSTANT SKIP INSTANT REPLAY PLAY STOP PAUSE REC LIBRARY REC MENU EDIT MENU CONTENT MENU ANGLE OPEN CLOSE SUBTITLE AUDIO CHANNEL QUICK MENU TOP MENU MENU RETURN DVD F R A M E ADJUST PICTURE S E A R C H SK I P S L O W ENTER TV VIDEO CHANNEL VOLUME REMAIN DIMMER FL SELECT ZOOM ...

Page 109: ...on The selected part is inserted into the location of the cursor Continued TIMESLIP HDD DVD EASY NAVI INSTANT SKIP INSTANT REPLAY PLAY STOP PAUSE REC LIBRARY REC MENU EDIT MENU CONTENT MENU ANGLE OPEN CLOSE SUBTITLE AUDIO CHANNEL QUICK MENU TOP MENU MENU RETURN DVD F R A M E ADJUST PICTURE S E A R C H SK I P S L O W ENTER TV VIDEO CHANNEL VOLUME REMAIN DIMMER FL SELECT ZOOM P in P TIME BAR CHP DIV...

Page 110: ...he item by using the buttons and press the QUICK MENU button to display the Quick Menu Press the buttons to select Preview or Title information then press the ENTER button Each part when selected shows its name at the bottom of the menu for about 2 seconds High speed dubbing is not available between the HDD and DVD R RW recorded on other equipment Dubbing procedures to DVD R RW always comply with ...

Page 111: ... steps 4 to 6 on page 109 to insert the item into its desired location Cancelling during dubbing Press QUICK MENU to display the Quick Menu Press to select Cancel dubbing then press ENTER Note This procedure copies items according to their order indicated in the lower area Therefore there may be a case that some items have already been copied at the time you cancel dubbing A A A B B Dub Selected I...

Page 112: ...is applied to all parts You cannot set different rate to each part Preparation Press the HDD or DVD button to select a disc containing the parts that you want to dub 1 Perform steps 1 and 2 on page 106 2 Press QUICK MENU The Quick Menu appears 3 Press to select Rate conversion dubbing then press ENTER The CONTENT MENU Rate Conversion Dub appears Rate Conversion Dubbing for Part by Part DVD R DVD R...

Page 113: ... full recording of any length program or whole use of unoccupied volume 6 Press ENTER Copying starts To confirm the job progress press the TIME BAR button to display the time bar The time bar cannot be copied When copying is completed the buzzer sounds and the current broadcast picture appears Pictures and sounds displayed during copying are for monitoring purposes only Recorded picture quality ma...

Page 114: ...on to display the Quick Menu 2 Press the buttons to select AV record quality and press the ENTER button 3 Press the ADJUST button to select the setting number and press the ENTER button When Copy on the bottom shows X the selected parts are beyond the disc capacity Change the rate for picture and sound quality or reduce parts to dub Rate Conversion Dubbing for multiple parts EDIT MENU ENTER TIMESL...

Page 115: ...he same DVD RAM R RW disc is not possible The recorder automatically inserts a black picture for a moment before and after the new title produced by this recording process You cannot use the Rate Conversion Dubbing for copying from a DVD RAM disc to another DVD RAM disc During Rate conversion dubbing the relay recording function page 163 is disabled even if Relay Recording is set to On During Rate...

Page 116: ...mple To copy from a DVD RAM disc to the HDD 1 Press INPUT SELECT or CHANNEL repeatedly to select LineU A black screen appears 2 Press HDD 3 Press REC Recording starts 4 Press DVD 5 Start playing Line U Stereo DVD R DVD RW HDD DVD RAM INPUT SELECT CHANNEL HDD REC DVD PLAY TIMESLIP HDD DVD EASY NAVI INSTANT SKIP INSTANT REPLAY PLAY STOP PAUSE REC LIBRARY REC MENU EDIT MENU CONTENT MENU ANGLE OPEN CL...

Page 117: ... set as programme recording When doing this procedure programme recording must not be initiated If you display the REC MENU playback is automatically canceled When setting the input to Line U audio output is set to stereo automatically You cannot switch the audio channel During Line U dubbing you can change the audio output Accompanying audio content to be recorded with Line U dubbing is always in...

Page 118: ...TIMESLIP HDD DVD EASY NAVI INSTANT SKIP INSTANT REPLAY PLAY STOP PAUSE REC LIBRARY REC MENU EDIT MENU CONTENT MENU ANGLE OPEN CLOSE SUBTITLE AUDIO CHANNEL QUICK MENU TOP MENU MENU RETURN DVD F R A M E ADJUST PICTURE S E A R C H SK I P S L O W ENTER TV VIDEO CHANNEL VOLUME REMAIN DIMMER FL SELECT ZOOM P in P TIME BAR CHP DIVIDE DISPLAY INPUT SELECT PROGRESSIVE TV HDD DVD A A A B B Del Selected Item...

Page 119: ...Deleting cannot be canceled once started Be careful when executing the deletion process If you select a title for the part to be removed you cannot select chapters in that title Chapters in DVD R RW discs cannot be selected to delete 4 Following steps 4 to 6 on page 109 assemble the items to delete 5 Press repeatedly to select Start then press ENTER The recorder begins the deletion process To canc...

Page 120: ...DVD button to select a disc that contains titles or chapters you want to merge TIMESLIP HDD DVD EASY NAVI INSTANT SKIP INSTANT REPLAY PLAY STOP PAUSE REC LIBRARY REC MENU EDIT MENU CONTENT MENU ANGLE OPEN CLOSE SUBTITLE AUDIO CHANNEL QUICK MENU TOP MENU MENU RETURN DVD F R A M E ADJUST PICTURE S E A R C H SK I P S L O W ENTER TV VIDEO CHANNEL VOLUME REMAIN DIMMER FL SELECT ZOOM P in P TIME BAR CHP...

Page 121: ...rted You cannot combine titles if their length will exceed 9 hours You cannot combine a protected title or a title containing still pictures The title name of the first title is given to the title after combining The second title is combined into the first title maintaining the chapter divisions and chapter names Titles and chapters show their names for about 2 seconds at the bottom of the screen ...

Page 122: ...g time of the contents if the disc contains too little contents or too many quality and picture settings etc If a start time of a programmed recording comes during this procedure the recording is made onto the HDD However while making a menu theme the recording is not executed Also programmed recordings to DVD media with Off setting of Relay recording page 163 are not executed If a programmed reco...

Page 123: ...EC LIBRARY REC MENU EDIT MENU CONTENT MENU ANGLE OPEN CLOSE SUBTITLE AUDIO CHANNEL QUICK MENU TOP MENU MENU RETURN DVD F R A M E ADJUST PICTURE S E A R C H SK I P S L O W ENTER TV VIDEO CHANNEL VOLUME REMAIN DIMMER FL SELECT ZOOM P in P TIME BAR CHP DIVIDE DISPLAY INPUT SELECT PROGRESSIVE TV PICTURE SEARCH ENTER A A A B B DVD Video Create Selected Items Sourece Title Original Next HDD EDIT MENU e ...

Page 124: ...to select Edit title name or Modify title thumbnail to change the title or Edit chapter name or Modify chapter thumbnail to change the chapter and press the ENTER button 3 Use the entry screen to change the title or chapter name To change a title thumbnail or a chapter thumbnail see the steps on page 100 Cursor ENTER TIMESLIP HDD DVD EASY NAVI INSTANT SKIP INSTANT REPLAY PLAY STOP PAUSE REC LIBRAR...

Page 125: ... The number of characters is limited for the disc name you can enter If you selected None for Menu Create at step 8 select Writing on the bottom right corner and press the ENTER button Skip to step 14 TIMESLIP HDD DVD EASY NAVI INSTANT SKIP INSTANT REPLAY PLAY STOP PAUSE REC LIBRARY REC MENU EDIT MENU CONTENT MENU ANGLE OPEN CLOSE SUBTITLE AUDIO CHANNEL QUICK MENU TOP MENU MENU RETURN DVD F R A M ...

Page 126: ...EAVE HERE DO NOT LEAVE HERE DO NOT LEAVE HERE DO NOT LEAVE HERE DO NOT LEAVE HERE DO NOT LEAVE HERE DO NOT LEAVE HERE DO NOT LEAVE HERE DO NOT LEAVE HERE DO NOT LEAVE HERE DO NOT LEAVE HERE DO NOT LEAVE HERE DO NOT LEAVE HERE DO NOT LEAVE HERE DO NOT LEAVE HERE DO NOT LEAVE HERE DO NOT LEAVE HERE DO NOT LEAVE HERE DO NOT LEAVE HERE Deep Blue Olive Sepia Light Blue DO NOT LEAVE HERE DO NOT LEAVE HE...

Page 127: ...appears except when Auto power off see below is set If you select Yes you can make one more DVD R RW of the same content If you select No you can complete creating the DVD Video You can set the recorder to turn off automatically when the job finishes 1 During the job press the QUICK MENU button 2 Press the buttons to select Auto power off 3 Press the ENTER button TIMESLIP HDD DVD EASY NAVI INSTANT...

Page 128: ...e the DVD creation of the content may failure In this case set Set Aspect Ratio to 4 3 fixed on the menu Option Settings Even if the title is recorded with DVD compatible mode set to Main or SAP using a recorder other than this may cause failure when recording to a DVD R RW If the DVD R creating fails to be completed most of the discs cannot be used again If an error occurs while a DVD Video is cr...

Page 129: ...und picture Loading 2003 06 10 05 09pm CH 3 Title 002 Chapter 0004 HDD EDIT MENU T001 00 00 23 e g Quick Menu Enter DVD Video menu name Delete name Delete all menus Exit To delete a captured image Press to select an image to delete then press QUICK MENU Press to select Delete menu then press ENTER Follow the message to operate To delete all captured images select Delete all menus Selecting color o...

Page 130: ...he loaded DVD R useless Canceling is not always possible A A A B B DVD Video Create Selected Items Sourece Title Original Next HDD EDIT MENU e g Creating Media DVD Capacity Quick Menu Cancel selected title Preview Preview all selected items Title information Clear all selected items Auto power off Exit To improve legibility of characters on menus Press to set Back ground color to On Then select Co...

Page 131: ...to select Cancel selected title and press the ENTER button If you do not do this and continue the copying process an error may occur and the disc will be rendered useless Playing a created DVD Video You can play the DVD R RW in the same manner as you would play a DVD video disc See page 60 If you want to correct the contents of a DVD RW after the DVD Video creation procedure Cancel the finalizatio...

Page 132: ...T SKIP INSTANT REPLAY PLAY STOP PAUSE REC LIBRARY REC MENU EDIT MENU CONTENT MENU ANGLE OPEN CLOSE SUBTITLE AUDIO CHANNEL QUICK MENU TOP MENU MENU RETURN DVD F R A M E ADJUST PICTURE S E A R C H SK I P S L O W ENTER TV VIDEO CHANNEL VOLUME REMAIN DIMMER FL SELECT ZOOM P in P TIME BAR CHP DIVIDE DISPLAY INPUT SELECT PROGRESSIVE TV EDIT MENU ENTER ENTER DVD RW DVD R A A A B B DVD Video Finalize Opti...

Page 133: ...ANUALS LEAVE HERE DO NOT LEAVE HERE DO NOT LEAVE HERE DO NOT LEAVE HERE DO NOT LEAVE HERE DO NOT LEAVE HERE DO NOT LEAVE HERE DO NOT LEAVE HERE DO NOT LEAVE HERE DO NOT LEAVE HERE DO NOT LEAVE HERE DO NOT LEAVE HERE DO NOT LEAVE HERE DO NOT LEAVE HERE DO NOT LEAVE HERE DO NOT LEAVE HERE DO NOT LEAVE HERE DO NOT LEAVE HERE DO NOT LEAVE HERE DO NOT LEAVE HERE DO NOT LEAVE HERE DO NOT LEAVE HERE DO N...

Page 134: ...Menu then press the ENTER button 9 Press ENTER on the EDIT MENU DVD Video Finalize Chapter Menu Select display and select Yes by then press ENTER A message appears to ask you if you want the power to turn off automatically or not when the process is completed 10Press to select Yes or No then press ENTER A message disappears and the finalize process starts The progress is displayed on the screen an...

Page 135: ... If a start time of a programmed recording comes during finalizing process the recording is made onto the HDD However while making a menu the recording is not executed Also when Relay recording is set to Off the recording will not start To cancel the finalize process DVD RW You can cancel the DVD Video finalizing process executed to a DVD RW disc so that the disc can be recordable again 1 During s...

Page 136: ...Create Off By Date By Scene DV Audio Input AV Record Quality Stereo1 L2 R2 Stereo2 L2 R2 DVD Video CHP Create Off 5min 10min 15min 20min 4 6 D M1 SP DV terminal TIMESLIP HDD DVD EASY NAVI INSTANT SKIP INSTANT REPLAY PLAY STOP PAUSE REC LIBRARY REC MENU EDIT MENU CONTENT MENU ANGLE OPEN CLOSE SUBTITLE AUDIO CHANNEL QUICK MENU TOP MENU MENU RETURN DVD F R A M E ADJUST PICTURE S E A R C H SK I P S L ...

Page 137: ...use by the buttons then press the ENTER button To stop the recording select Stop Save by the buttons then press the ENTER button TIMESLIP HDD DVD EASY NAVI INSTANT SKIP INSTANT REPLAY PLAY STOP PAUSE REC LIBRARY REC MENU EDIT MENU CONTENT MENU ANGLE OPEN CLOSE SUBTITLE AUDIO CHANNEL QUICK MENU TOP MENU MENU RETURN DVD F R A M E ADJUST PICTURE S E A R C H SK I P S L O W ENTER TV VIDEO CHANNEL VOLUM...

Page 138: ...tal video camera such as a PC Depending on the connected DV format digital video camera the display at step 5 may not show Manufacturer or Equipment If the DV terminal is connected to more than one DV format digital video camera DV recording may not work properly For proper functioning of DV recording connect only one device to the DV terminal DV recording is not compatible with Relay recording Do...

Page 139: ...Library To facilitate your collecting Using Library data Searching for a desired title Checking the Library data Checking remaining space ...

Page 140: ...select an item then press ENTER For details on each item see from the next page TIMESLIP HDD DVD EASY NAVI INSTANT SKIP INSTANT REPLAY PLAY STOP PAUSE REC LIBRARY REC MENU EDIT MENU CONTENT MENU ANGLE OPEN CLOSE SUBTITLE AUDIO CHANNEL QUICK MENU TOP MENU MENU RETURN DVD F R A M E ADJUST PICTURE S E A R C H SK I P S L O W ENTER TV VIDEO CHANNEL VOLUME REMAIN DIMMER FL SELECT ZOOM P in P TIME BAR CH...

Page 141: ... tTitles MENU LIBRARY 1 2 HDD 2004 06 20 07 00pm 7 00 pm 11 00 pm 7 00 pm 9 00 pm 11 00 pm 9 00 pm 9 00 pm 9 00 pm 10 27 pm 5 2004 6 20 HDD 2004 06 19 11 00pm 4 2004 6 19 HDD 2004 06 18 07 00pm 3 2004 6 18 HDD 2004 06 17 09 00pm 3 2004 6 17 HDD 2004 06 13 11 00pm 2 2004 6 13 HDD 2004 06 13 09 00pm 4 2004 6 13 HDD 2004 06 11 09 00pm 2004 6 11 HDD 2004 06 9 09 00pm L1 2004 6 9 Su Sa Fr Th Su Su Fr W...

Page 142: ...Tu HDD 2004 06 9 10 27pm L2 2004 6 8 L1 etc e g 2 49 pm 6 22 Tu No Date Day Time CH Genre Title Name Specific Disc No Jump Disc No 0 0 1 Title Summary All tTitles MENU LIBRARY 1 2 HDD 2004 06 20 07 00pm 7 00 pm 11 00 pm 7 00 pm 9 00 pm 11 00 pm 9 00 pm 9 00 pm 9 00 pm 10 27 pm 5 2004 6 20 HDD 2004 06 19 11 00pm 4 2004 6 19 HDD 2004 06 18 07 00pm 3 2004 6 18 HDD 2004 06 17 09 00pm 3 2004 6 17 HDD 2...

Page 143: ...nge settings of a DVD RAM disc load the DVD RAM disc Viewing disc information Disc information 1 From the Quick Menu select Dics information by then press ENTER You can view information about the loaded disc To change the number or name of the DVD RAM disc 1 Press to select Edit Disc Number or Edit Disc Name then press the ENTER button 2 Following the procedure on page 30 enter a new name for the ...

Page 144: ...ess ENTER To cancel select No All title information is registered Notes To use title information in a DVD RAM disc recorded on another device as the Library data of the recorder be sure to follow the procedure of Registering a disc manually to add said data to the Library system This information cannot be added automatically If you record content on a DVD RAM disc on the recorder and edit the cont...

Page 145: ...2 is erased To cancel select No Deleting all the Library information only Use this feature when you want to rearrange the whole Library information from the beginning 1 Press LIBRARY 2 Press QUICK MENU 3 Press to select Library management and press ENTER 4 Press to select Delete All DVD RAM information or Delete all library information Delete all DVD RAM information Deletes all Library information...

Page 146: ...the Library database 2 Press LIBRARY 3 Press QUICK MENU 4 Press to select Library management then press ENTER 5 Press to select Re inst all backup then press ENTER 6 Press to select Yes then press ENTER To cancel select No Note Do not use a DVD RAM disc which contains Library Management data registered to another recorder for backup data storage Library Management format may vary depending on the ...

Page 147: ...s the specified title Checking remaining space You can check the remaining space of each disc prior to recording Library HDD DVD RAM Viewing remaining space DVD space remaining 1 From the Quick Menu select DVD space remaining by then press ENTER You can view the recording titles and the estimated space remaining per disc Note You can rearrange the list by selecting Arrange Narrowing or Jump from t...

Page 148: ......

Page 149: ...Function Setup You can change the default settings to customize performance to your preference Customizing the Function Settings ...

Page 150: ...he selection by or other buttons then press ENTER To select another item in the same group repeat steps 3 to 4 To shift to another group press the O button then repeat steps 2 to 4 5 Press SETUP The setup display disappears and the setting is completed TIMESLIP HDD DVD EASY NAVI INSTANT SKIP INSTANT REPLAY SETUP ENTER T SEARCH CLEAR 3 1 2 VCR Plus REC MODE EXTEND TV CODE 4 5 6 DELETE 10 7 8 9 0 PL...

Page 151: ...Details To select a preferred language for disc menus To select a preferred language for the sound track To select a preferred language for subtitles To turn on or off a function that makes faint sounds easier to hear even if you lower the volume during late hour playback To turn on or off the vocal output during DVD KARAOKE disc playback To turn the parental lock function on or off To turn on or ...

Page 152: ...ve to background pictures To turn on or off the start up screen setting that makes the background picture appear automatically when turning on the power To turn the screen saver on or off To select a display status when no video signals are present To select where you turn on or off closed caption To turn on or off the confirmation beeper announcing when each remote command is received To select w...

Page 153: ... To set the aspect ratio for DVD R RW recording To set the audio for DVD R RW recording To set whether or not chapters are to be automatically created at a specified interval for DVD R RW recording To activate or deactivate the 3D digital noise reduction To activate or deactivate the 3D digital filter to execute Y C Brightness Color separation To turn on or off a function that makes a recording au...

Page 154: ...urther language choice After pressing the ENTER button follow steps 1 4 below 1 Obtain the language code of the preferred language from the Language Code List page 171 2 Select the first character by pressing the buttons or the ADJUST button 3 Press the buttons to shift Select the second character by pressing the buttons or the ADJUST button 4 Press the ENTER button Note Some DVD video discs may n...

Page 155: ...e only for a DVD KARAOKE disc recorded in Dolby Digital Multi Channel format If you want to enjoy the KARAOKE function connect an amplifier or other such device to this recorder DVD parental lock DVD VIDEO DVD video discs equipped with the Parental Lock function have a predetermined limitation level The limitation level or limitation method may differ depending on the disc For example the total di...

Page 156: ...ted its limitation level corresponds to the following settings Level 7 NC 17 Level 3 PG Level 6 R Level 1 G Level 4 PG13 To change the limitation level of the Parental Lock function Follow step 1 3 above To change the password 1 Press the STOP button 4 times after selecting On and Off in order and then press the ENTER button The password is cleared 2 Enter a new 4 digit password by using the numbe...

Page 157: ...R button Progressive conversion DVD VIDEO VCD DVD R DVD RW HDD DVD RAM There are two types of source content in pictures recorded in DVD video discs film content pictures recorded from films at 24 frames per second and video content video signals recorded at 30 frames per second Make this selection according to the type of content being viewed Auto Select this position normally The DVD player auto...

Page 158: ...utput Customizing the function settings Continued Function Setup Analog 2ch Select this when a TV or other audio device is connected to this recorder via the ANALOG output connectors PCM Select this when a 2ch digital stereo amplifier is connected to this recorder When you play back a disc recorded in Dolby Digital or MPEG1 format the sound is converted to the PCM 2ch format and output Virtual sur...

Page 159: ... In time slip mode the playback pause is released If this function is set to On the recorder if freezes may return to the normal by leaving it for about 15 minutes or longer Off Deactivates the screen protector function On Activates the screen protector function Note Toshiba does not guarantee that this function protects the TV screen by all means Background Selects a screen color when receiving n...

Page 160: ... DVD VIDEO VCD CD DVD R DVD RW HDD DVD RAM Sets how far back is replayed when the INSTANT REPLAY button is pressed 5 sec 10 sec 30 sec 5 min Title thumbnail point DVD R DVD RW HDD DVD RAM For recorded titles sets how far a scene from the start is set as the title thumbnail 0 sec 3 sec 10 sec 35 sec 1 min 5 min Note Thumbnails can also be changed to other scenes See page 100 HDD RAM title play HDD ...

Page 161: ... video signals of TV broadcasts or other external input Press the buttons to select the source and the buttons to select the mode Only use this setting when you cannot adjust the brightness satisfactorily with the Custom picture setting in the Picture Audio settings Page 157 of this recorder Important This setting changes the video signal to record and the recorded signal is not returned to the or...

Page 162: ...s selection when dubbing Select when recording DVD Video CHP create DVD RW DVD R To set whether chapters are to be automatically created at a selected interval during DVD R RW recording Off Chapters are not set 5 min 10 min 15 min 20 min To set the interval at which chapters are automatically created to 5 10 15 or 20 minutes Note The number of chapters has the upper limit which varies depending on...

Page 163: ...enre name onto the menu Genre names registered here are displayed in the Genre on the Quick Menu 1 Press the buttons to select a position in the Current Genre List you want to change then press the ENTER button A list of genres appears You can turn the pages using the button 2 Press the buttons to select a genre then press the ENTER button A list of genre names appears 3 Press the buttons to selec...

Page 164: ...D does not function correctly initializing the HDD may solve the situation If you initialize the HDD all titles and library information stored in the HDD are permanently deleted 1 Press the buttons to select Start then press the ENTER button 2 Confirm the message press the buttons to select Start and then press the ENTER button Initialization of the HDD starts If you want to cancel the initializin...

Page 165: ...Others Before calling service personnel Error codes on the display window Recording duration Language Code List Specification ...

Page 166: ...r for adjustment Playback A DVD or CD does not play The format of the recorded data does not correspond to this recorder or the region number is neither 1 nor ALL Check the disc A defective or dirty disc is inside Change the disc The HDD mode is selected Press the DVD button The HDD does not play The DVD mode is selected Press the HDD button During playback picture noise appears Picture noise may ...

Page 167: ...osite of PROTECT page 8 The disc is protected by a PC or the recorder Disable the protection on the device which protected the disc The disc space is not sufficient Delete unwanted data page 50 or prepare a new disc The disc is not initialized Initialize the disc page 28 The disc may contain errors Complete the physical format on the disc page 29 The physical format on the disc is not completed Co...

Page 168: ...ers 23 ft from the receptor of this recorder There are obstacles between the remote control and this recorder Remove any obstacles The receptor is disturbed by sunlight or fluorescent light Change the place of this recorder or shield the light The remote mode is not appropriate Adjust the remote mode of the remote control and this recorder page 48 INSTALLATION GUIDE Clock The clock blinks Complete...

Page 169: ...ferent resolutions detected in the same part ERR 1A Different sound quality modes detected in the same part ERR 1B Invalid control information detected ERR 1C Parts created in other recorder ERR 1D Parts created with DVD compatible mode Off detected ERR 1E Invalid parts detected ERR 1F Unexpected error detected ERR 2E Menu encode error detected ERR 2F Overflow of the menu size detected ERR 30 Exce...

Page 170: ...01 01 01 01 01 01 01 01 01 01 01 01 01 01 01 01 01 01 04 20 59 41 26 12 01 50 41 32 25 18 12 06 01 56 51 47 43 40 36 33 30 28 25 22 20 18 16 14 12 10 08 07 05 04 02 01 95 70 65 60 56 53 50 47 45 42 40 38 37 35 34 33 31 30 29 28 27 26 26 25 24 23 23 22 22 21 21 20 20 19 19 18 18 18 21 23 08 37 41 14 10 27 00 48 48 59 19 47 22 04 52 44 42 43 48 56 08 22 39 59 20 44 09 36 05 35 06 39 13 48 24 01 05 0...

Page 171: ...NA NE NO OC OM OR PA PL PS PT QU RM RN RO RU RW SA SD SG SH SI SK SL SM SN SO SQ SR SS ST SU SV SW TA TE TG TH TI TK TL TN TO TR TS TT TW UK UR UZ VI VO WO XH YO ZU Guarani Gujarati Hausa Hindi Croatian Hungarian Armenian Interlingua Interlingue Inupiak Indonesian Icelandic Hebrew Yiddish Javanese Georgian Kazakh Greenlandic Cambodian Kannada Kashmiri Kurdish Kirghiz Latin Lingala Laotian Lithuani...

Page 172: ...p p 75Ω Sync signal negative Pin jack x 2 systems 2 at rear S VIDEO input Y 1 0Vp p 75Ω Sync signal negative Mini DIN4 Pin x 3 systems C 0 286Vp p 75Ω 2 at rear 1 in front S VIDEO output Y 1 0Vp p 75Ω Sync signal negative Mini DIN4 Pin x 2 systems C 0 286Vp p 75Ω 2 at rear COMPONENT output Y PB PR Y output green 1 0Vp p 75Ω Sync signal negative Pin jack x 1 system PB PR output blue red 0 7Vp p 75Ω...

Page 173: ...F 95 F 5 C 35 C Position Horizontal Clock display 12 hour digital display Clock accuracy Quartz monthly deviation approximately 30 seconds The design and specifications may change without prior notice The Illustrations and screens described in this manual may be exaggerated or simplified for easy recognition and may be slightly different from the actual unit ...

Page 174: ...CHARGES FOR THE DVD PLAYER RECORDER TO AND FROM THE SERVICE STATION Rental Units The warranty for rental units begins with the first rental or thirty 30 days from the date of shipment to the rental firm whichever comes first Commercial Units DVD PLAYER RECORDER s sold and used for commercial purposes have a limited ninety 90 day warranty Owner s Manual and Demographic Card You should read this own...

Page 175: ...BY THE LAW OF ANY STATE OF THE U S A AS HEREBY LIMITED THE FOREGOING WARRANTY IS EXCLUSIVE AND IN LIEU OF ALL OTHER WARRANTIES GUARANTEES AGREEMENTS AND SIMILAR OBLIGATIONS OF TACP WITH RESPECT TO THE REPAIR OR REPLACEMENT OF ANY PARTS IN NO EVENT SHALL TACP OR BE LIABLE FOR CONSEQUENTIAL OR INCIDENTAL DAMAGES No person agent distributor dealer or company is authorized to change modify or extend t...

Page 176: ...EIL Lecteur DVD DVD magnétoscope combo Cinéma maison dans une boîte Enregistreur DVD DVD Portatif DURÉE DE LA GARANTIE 12 MOIS GARANTIE CANADIENNE 1 Toshiba du Canada Limitée TCL offre au Canada les garanties limitées suivantes aux consommateurs origin aux Veuillez conserver votre facture comme preuve d achat Pour obtenir une garantie canadienne veuillez vous inscrire en ligne à www toshiba ca Inf...

Page 177: ...177 Recording Playback Others Introduction Editing Function setup Library Memo ...

Page 178: ...178 Memo ...

Page 179: ...179 Recording Playback Others Introduction Editing Function setup Library Memo ...

Reviews: