


User Manual
Page 25
Installa
tion
Instruc
tions
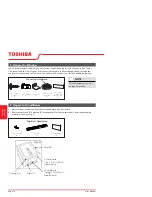
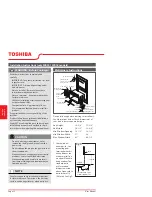
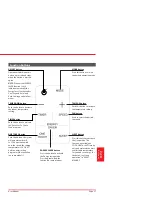
9. Add two foam inserts to holes in top of cabinet where shipping
screws were removed from (see Fig. 6).
10. Your unit may come with internal packaging. This packaging
must be removed prior to installing the air conditioner back into
the cabinet. (see Fig. 7).
Fig. 6
Fig. 7
Shipping
Packaging
Plastic
Tie
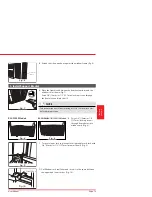
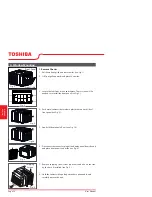
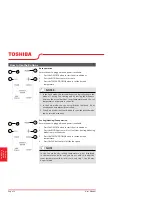
2 Install Top Angle and Side Bracket
1. Attach foam gasket to top angle above holes as shown in Fig. 6.
2. Install top angle and side retainers to cabinet as shown in Fig. 8
(10 screws).
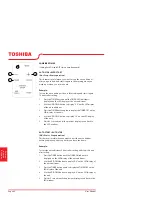
Fig. 10
TOP VIEW
Air Conditioner
Cabinet
Plastic
Frame
Locking
Screw
Hole
Window
Filler Panel
“I” Section
Fig. 8
5/16”
long
hex
-head
Plastic Frame
Side Retainer
Window Filler Panel
Fig. 9
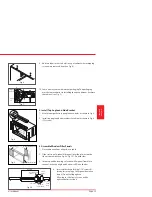
3 Assemble Window Filler Panels
1. Place cabinet on fl oor, a bench, or a table.
2. Slide I section of window fi ller panel into side retainer on the
side of the cabinet (see Fig. 9 & Fig. 10). Do both sides.
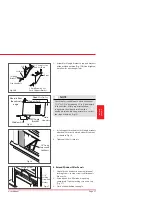
3. Insert top and bottom legs of window fi ller panel frame into
channel in the top angle and bottom rail. Do both sides.
4. Insert washer head locking 7/16” screws (2)
into holes in top leg of fi ller panel frame (see
step 6). Do not totally tighten.
Allow leg to slide freely. Screws will be
tightened after section 6.


