


67
Function pla
ybac
k (D
VD)
Press
C
C
C
C
C
/
D
D
D
D
D
/
B
B
B
B
B
/
A
A
A
A
A
or Number buttons (0–9) to se-
lect the desired file.
• In case the folder includes more than 15 files, press
B
B
B
B
B
or
A
A
A
A
A
to display next file list.
• When
PLAY
has been pressed after displaying the file
menu, or when the disc tray has been closed using
PLAY
, playback begins automatically starting from the
first file. In this case, if the first file is an MP3/WMA file,
only MP3/WMA files are played back in order. If the
first file is a JPEG file, the first JPEG file is played back.
MP3/WMA playback
ENTER
▲
/
▼
/
/
STOP
0–9
Place a CD-R/RW on which MP3 or WMA files
have been recorded onto the disc tray, or insert
a Media card on which MP3 or WMA files have
been recorded into the media card slot on the
front panel.
1
3
Press ENTER.
The selected file starts playing back.
4
Press STOP to end playback.
About file menu
5
PLAY
TOP MENU
!" # # "
$% &! '
(
)
*+
, &-.
+ *
/
"+0
1
' # "
234
- ,
&.
,
!"# $ %
&
'
()
* $ +,
) (
-
).
/
%
012
3
+ *
$,
*
!
3 4
CD
CARD
Press DVD/CARD to select the DVD (CD) mode or
the CARD mode.
A file menu screen will appear on the screen.
Press
B
B
B
B
B
/
A
A
A
A
A
or ENTER to select folder.
2
To eject the Media card
Confirm the Media card is not in use now. Pull the card out
slowly and straight.
Note:
Do not remove the card while it is in use. If removed while in
use, information on the card may be lost.
Notes:
• During MP3/WMA/JPEG-Playback, you cannot use SEARCH,
A-B Repeat functions.
• You can use Repeat (Track or All), Random functions and
Program playback for MP3/WMA/JPEG Playback
61 62
.
Notes:
• The picture menu is displayed when the FUJICOLOR CD
or the Kodak Picture CD are played. To display the file
menu, press
TOP MENU
.
• In the case of a CD containing a mixture of MP3, WMA and
JPEG files, the files are played back by selecting them from
the file menu.
• MP3 or WMA file on the Kodak Picture CD is not recog-
nized on this unit.
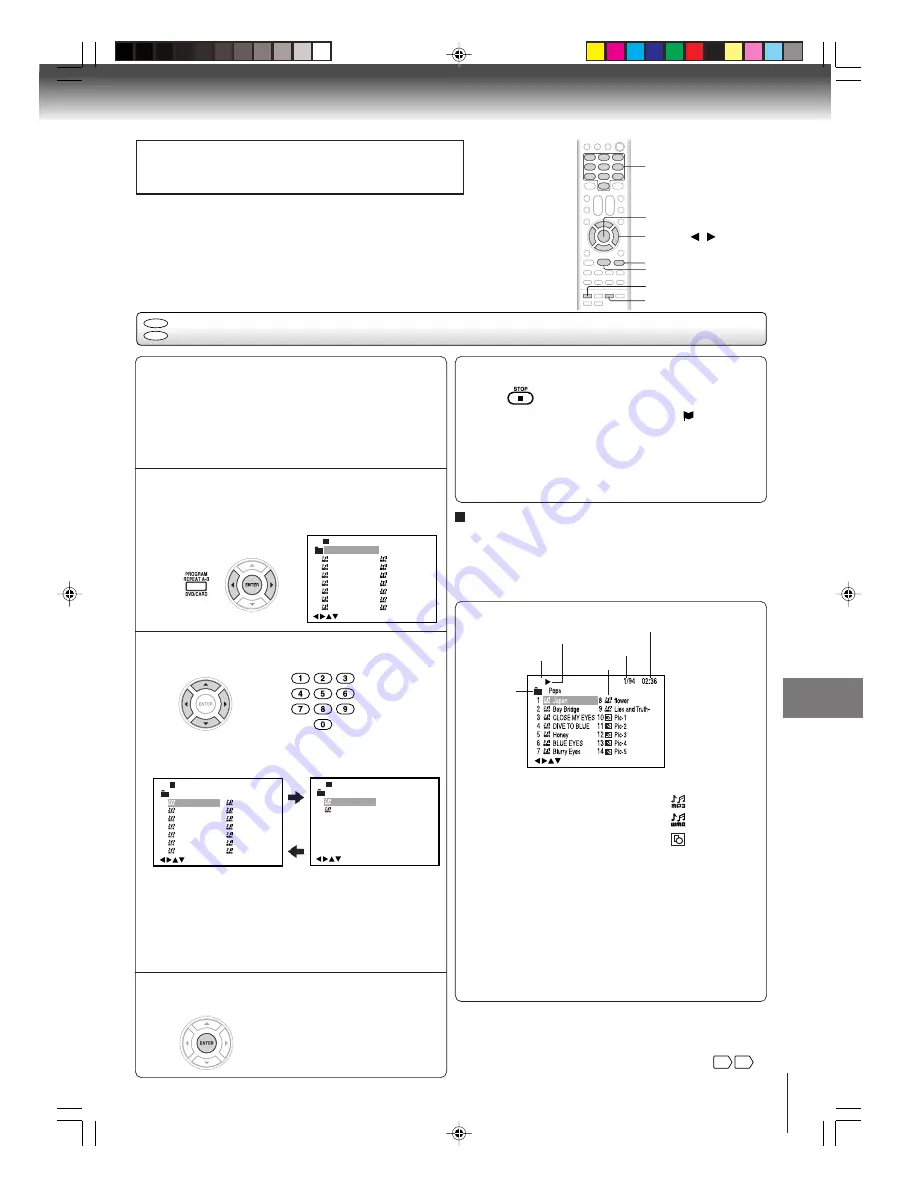
Operation
Media type
Folder
File number
File type
Elapsed time
: MP3-file
/0-9/Enter/Play Mode/DVD Menu
: WMA-file
: JPEG-file
Media type
CD:
CD-R/RW
SD:
SD (Secure Digital
TM
) memory card
MMC:
MMC (MultiMediaCard
TM
)
X
D:
X
D-Picture Card
MS:
Memory Stick
TM
(Pro)
File type
CD
• The unit records the stopped point. “
” appears
on the screen. Press
PLAY
to resume playback
(from the scene point).
• If you press
STOP
again, unload the disc or change
the DVD mode and CARD mode, the unit will clear
the stopped point.
DVD/CARD
Ad
v
anced pla
ybac
k (D
VD)
CAUTION
Do not insert any foreign objects into the Media card slot as this
can result in a risk of fire or electric shock.
Note:
When the media card is inserted, the unit is
changed to the CARD mode automatically.
Place a CD-R/RW on which MP3, WMA or JPEG files have
been recorded onto the disc tray or insert a Media card on
which MP3, WMA or JPEG files have been recorded into
the media card slot on the front panel.
5U30101B [E]p66-68
4/1/05, 3:28 PM
67