DISASSEMBLY INSTRUCTIONS
B1-1
1. REMOVAL OF MECHANICAL PARTS
AND P.C. BOARDS
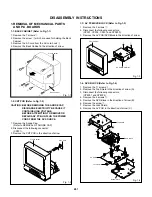
1-1: BACK CABINET (Refer to Fig. 1-1)
1-3: AV PCB/DVD BLOCK (Refer to Fig. 1-3)
1.
2.
3.
Remove the 2 screws
1
.
Disconnect the following connectors:
(CP301, CP302, CP401 and CP3800).
Remove the AV PCB/DVD Block in the direction of arrow.
Fig. 1-3
AV PCB/DVD Block
1
1
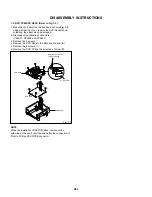
1-4: DVD BLOCK (Refer to Fig. 1-4)
1.
2.
3.
4.
5.
6.
7.
8.
Remove the 11 screws
1
.
Remove the Top Shield in the direction of arrow (A).
Disconnect the following connectors:
(CP8001 and CP8002).
Remove the 4 screws
2
.
Remove the DVD Block in the direction of arrow (B).
Remove the screw
3
.
Remove the Jack Shield.
Remove the AV PCB in the direction of arrow (C).
Fig. 1-4
1-2: CRT PCB (Refer to Fig. 1-2)
CAUTION: BEFORE REMOVING THE ANODE CAP,
DISCHARGE ELECTRICITY BECAUSE IT
CONTAINS HIGH VOLTAGE.
BEFORE ATTEMPTING TO REMOVE OR
REPAIR ANY PCB, UNPLUG THE POWER
CORD FROM THE AC SOURCE.
1.
2.
3.
Remove the Anode Cap.
(Refer to REMOVAL OF ANODE CAP)
Disconnect the following connector:
(CP801).
Remove the CRT PCB in the direction of arrow.
CRT PCB
Front Cabinet
Fig. 1-2
Front Cabinet
1
1
1
1
1
1
1
1
1
1
1
(A)
3
2
(B)
(C)
2
2
2
Top Shield
DVD Block
AV PCB
Bottom Plate
Jack Shield
1.
2.
3.
4.
Remove the 7 screws
1
.
Remove the screw
2
which are used for holding the Back
Cabinet.
Remove the AC cord from the AC cord hook
3
.
Remove the Back Cabinet in the direction of arrow.
Fig. 1-1
Front Cabinet
1
2
Back Cabinet
3
1
1
1
1
1
1


