background image

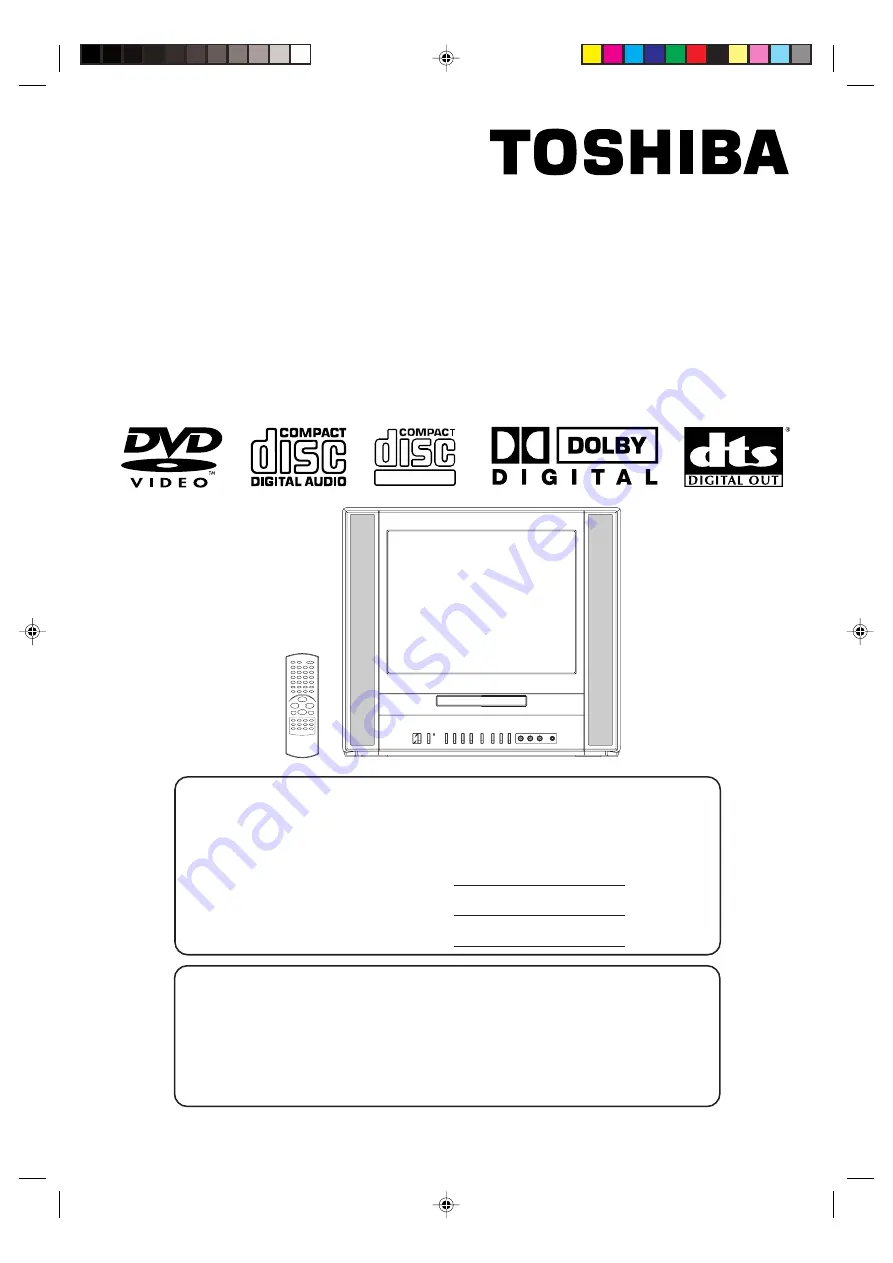
COMBINATION 14” FLAT COLOR TELEVISION AND
DVD/CD PLAYER
COMBINÉ TÉVÉVISEUR COULEUR PLAT DE 14
POUCES ET DVD/CD

Owner’s Manual
Manuel d’instructions

MD14FN1C/P/R

DIGITAL VIDEO

Before operating the unit, please read this manual thoroughly.

Avant de mettre cet appareil en marche, veuillez lire attentivement ce manuel.

TV/CATV MODE SELECTION

SELECTION DU MODE TV/CATV

When shipped from the factory, the TV/CATV menu option is set to the
“CATV”(Cable Television) mode.
If not using CATV, set this menu option to the “TV” position.
Lors de la fabrication de l'appreil, l'option du menu TV/CATV est réglée au mode “CATV”
(câblodistribution).
Si vous n'utilisez pas la câblodistribution, choisissez l'option “TV”.

ATTENTION

For your protection in the event of theft or loss of this product, please fill in the informa-
tion listed below which is for your own personal records.
Pour votre protection en cas de vol ou de perte de l’appareil, veuillez inscrire ci-dessous
les renseignements demandés pour vos registres personnels.

Date of Purchase

:

Date d'achat

:

Serial No.

:

Numéro de série

:

Place of Purchase

:

Lieu d'achat

:

 5G10201C [E] (Cover)

14/08/2003, 16:35

1

Summary of Contents for MD14FN1C

Page 1: ...f not using CATV set this menu option to the TV position Lors de la fabrication de l appreil l option du menu TV CATV est réglée au mode CATV câblodistribution Si vous n utilisez pas la câblodistribution choisissez l option TV ATTENTION For your protection in the event of theft or loss of this product please fill in the informa tion listed below which is for your own personal records Pour votre pr...

Page 2: ...his equipment generates uses and can radiate radio frequency energy and if not installed and used in accordance with the instructions may cause harmful interference to radio communications However there is no guarantee that interference will not occur in a particular installation If this equipment does cause harmful interference to radio or television reception which can be determined by turning t...

Page 3: ...should never be blocked by placing the unit on a bed sofa rug or other similar surface This unit should never be placed near or over a radiator or heat source This unit should not be placed in a built in installation such as a bookcase or rack unless proper ventilation is provided or the manufacturer s instructions have been adhered to 10 POWER SOURCE This unit should be operated only from the typ...

Page 4: ...ING Do not attempt to service this unit yourself as opening or removing covers may expose you to dangerous voltage or other hazards Refer all servicing to qualified service personnel For example a When the power supply cord or plug is damaged b If liquid has been spilled or objects have fallen into the unit c If the unit has been exposed to rain or water d If the unit does not operate normally by ...

Page 5: ...age 28 DISC Do not use a cracked deformed or repaired disc These discs are easily broken and may cause serious personal injury and product malfunction 29 NOTE TO CATV SYSTEM INSTALLER This reminder is provided to call the CATV system installer s attention to Article 820 40 of the NEC that provides guidelines for proper grounding and in particular specifies that the cable ground shall be con nected...

Page 6: ...nd is intended for home and other limited viewing uses only unless otherwise authorized by Macrovision Corporation Reverse engineering or disassembly is prohibited Title 2 Chapter 1 Chapter 2 Chapter 1 Chapter 2 Chapter 3 Notes on discs Track 1 Track 2 Track 3 Track 4 Track 5 Do not touch the playback side of the disc Do not attach paper or tape to discs Fingerprints and dust on the disc cause pic...

Page 7: ...es Title selection DVD menu 28 Advanced function Additional information Setting language 29 Setting the aspect ratio of TV screen Setting on screen display 30 Dynamic Range Control 31 Parental control setting 32 To change the parental level 33 Temporary disabling of rating level by DVD disc 34 Connections to other equipments 35 Language code list 37 Problems and troubleshooting 38 Reception distur...

Page 8: ...PLAY button OPEN CLOSE button Disc tray SKIP buttons POWER button COAXIAL DIGITAL AUDIO OUT jack RF IN jack Headphone jack CHANNEL UP DOWN buttons VOLUME UP DOWN buttons AUDIO L R VIDEO IN jacks Power indicator Remote sensor 5G10201C E P06 11 14 08 2003 16 35 8 ...

Page 9: ...n in the menu 19 25 32 ZOOM CH RTN Switch between present last channel 15 Zoom 25 CH Select channel of TV 15 Cursor buttons 13 17 19 23 25 28 33 VOL Adjust volume of TV 14 Cursor buttons 13 17 19 23 25 28 RETURN Remove DVD set up menu 29 34 ENTER Enter information in the menu 13 23 25 26 28 34 FWD REV Fast Forward Review playback 24 PLAY Playback 23 24 26 28 34 PLAY MODE Select playback mode 26 SK...

Page 10: ...ration If the AC cord plug is plugged in for the first time wait for about 5 seconds before pressing the POWER button Polarized AC Cord Plug One blade is wider than the other AC Outlet Wider Hole and Blade Power source Replace the compartment cover Install two AAA batteries supplied paying attention to the polarity diagram in the battery compartment Slide the battery compartment cover in the direc...

Page 11: ...75 ohm VHF Cable and 300 ohm UHF Twin lead Wires Antenna Jack Antenna Jack Antenna Jack Combiner Antenna Jack Combiner Connect the 75 ohm Cable from the Combination VHF UHF Antenna to the Antenna Jack If your Combination VHF UHF Antenna has a 300 ohm Twin lead Wire the use of the 300 75 ohm Matching Transformer may be necessary Connect the UHF 300 ohm Twin lead Wire to the Combiner not supplied Co...

Page 12: ...D BASIC CABLE TV SERVICE WITH SCRAMBLED PREMIUM CHANNELS Splitter B A Incoming 75 ohm CATV Cable A B Switch 75 ohm Cable to TV DVD Incoming 75 ohm CATV Cable 75 ohm Cable to TV DVD Converter Descrambler Antenna Jack Antenna Jack Antenna Jack Converter Descrambler This TV DVD has an extended tuning range and can tune most cable channels without using a Cable TV Converter box Some cable companies of...

Page 13: ...er menu options Press MENU in the TV mode The TV menu screen will appear Press MENU until the MENU screen is cleared Press or to select the LANGUAGE option then press or button 1 2 3 Press or until the OPTION menu appears To turn on the TV DVD press POWER The Power indicator will light NOTES If the unit does not operate properly or No key operation by the unit and or the remote control Static elec...

Page 14: ...ses so do the number of bars If the volume decreases the number of green bars also decreases CATV Mode Direct Channel Selection When the TV CATV menu option is in the CATV position channels can be selected as follows TO SELECT CATV CHANNELS 1 9 Press 0 twice then 1 9 as needed Example to select channel 2 press 002 10 12 Press 0 then the remaining 2 digits Example to select channel 12 press 012 13 ...

Page 15: ...to return to the last channel you were watching SLEEP To set the TV DVD to turn off after a preset amount of time press SLEEP on the remote control The clock will count down 10 minutes for each press of SLEEP 120 110 10 0 After the sleep time is programmed the display will appear briefly every ten minutes to remind you that the sleep timer is operating To confirm the sleep timer setting press SLEE...

Page 16: ...ords requiring emphasis Words that are sung usually appear enclosed by musical notes For television programs broadcasting with Closed Captions look in your TV guide for the Closed Captions symbol CC When selecting Closed Captions the captioning will be delayed approximately 10 seconds If no caption signal is received no captions will appear but the television will remain in the Caption Mode Misspe...

Page 17: ...ore selecting channels they must be pro grammed into the TV DVD s memory In addition to normal VHF and UHF channels this TV DVD can receive up to 113 Cable TV channels To use this TV DVD with an antenna set the TV CATV menu option to the TV mode When shipped from the factory this menu option is in the CATV mode TV CATV SELECTION Press or to select the TV or CATV mode Press MENU until the MENU scre...

Page 18: ...The TV will begin memorizing all the channels available in your area Press MENU until the MENU screen is cleared 1 2 3 4 TO ADD DELETE CHANNELS Press or to select ADD or DELETE whichever function you want to perform 5 7 Select the desired channel to be memorized or deleted using Direct Channel Selection 0 9 or CH or 1 Press or to select the ADD DELETE 4 Press or until SETUP menu appears 3 Press ME...

Page 19: ...ments to the factory preset levels Press MENU in the TV mode The TV menu screen will appear Picture controls are factory preset but you can adjust them individually as follows Picture control adjustment Press or until PICTURE menu appears NOTE The CONTRAST default setting is set to maximum at the factory Press or to select the item you want to adjust 1 2 3 4 5 MENU BRIGHTNESS CONTRAST 0 32 0 0 0 C...

Page 20: ...ain the STEREO appears on the screen This means that Stereo broadcasting is avail able You can enjoy stereo sound from the left and right speakers When Mono broadcasting is received no indication is displayed If the broadcast signal is not strong enough or clear stereo sound is not available press AUDIO to change to mono sound The noise should be eliminated Press it again to return to the stereo s...

Page 21: ... CD not equipped with PBC function Version 1 1 Sound and movie can be played on this TV DVD in the same way as an Audio CD Video CD equipped with PBC function Version 2 0 In addition to operation of a Video CD not equipped with the PBC function you can enjoy playback of interactive software with search function by using the menu displayed on the TV screen Menu Playback Some of the functions descri...

Page 22: ...er button 1 in the stop mode then press ENTER Preparation Before DVD CD operation please make preparations as follows 1 2 3 Insert the AC cord plug into a standard 120V 60Hz polarized AC outlet If the AC cord plug is plugged in for the first time wait for about 5 seconds before pressing POWER NOTE When connecting to other equipment unplug the unit from the AC outlet Press POWER on the unit or on t...

Page 23: ...tray closes automatically and unit turns off NOTES If a non compatible disc is loaded Incor rect Disc Region Code Error or Paren tal Error will appear on the TV screen ac cording to the type of loaded disc If these appear check your disc again See pages 21 and 32 Some discs may take a minute or so to start playback When you set a single faced disc label downwards ie the wrong way up and press PLAY...

Page 24: ...NOTE The Video CD can not play Reverse SLOW Slow motion Playback To resume normal playback press PLAY Locating a chapter or track NOTE The unit is capable of holding a still video image or On screen display image on your television screen indefinitely If you leave the still video image or On screen display image displayed on your TV for an ex tended period of time you risk permanent damage to your...

Page 25: ...point to playback Press Number buttons 0 9 to input the number If you input a wrong number press CANCEL Refer to the package supplied with the disc to check the numbers 1 Press JUMP during play back 3 Locating desired scene Press ENTER 4 Playback starts When you change the title playback starts from Chapter 1 of the selected title Some discs may not work in the above operation Press to view a diff...

Page 26: ...KIP STOP SKIP SLOW PAUSE SLOW REPEAT A B ZOOM CH RTN CANCEL DVD MENU CH CH RETURN JUMP REV SETUP MENU VOL VOL Program Total 3 0 24 54 1 5 8 29 2 8 8 54 3 3 7 31 4 __ Enter 0 9 Cancel Play PlayMode Audio CD Video CD On screen Operation display All Repeats entire disc Track Repeats the current track Off Resumes normal playback Random Play Plays the tracks in random order Program Plays the tracks in ...

Page 27: ...d af ter pressing the SUBTITLE button sev eral times the language is not recorded on the disc Changing soundtrack language is can celled when you open the disc tray The initial default language or available lan guage will be heard if the disc is played back again Changing subtitle language is cancelled when you open the disc tray Some functions may not work on some DVDs You may not be able to turn...

Page 28: ...t 1 Press TOP MENU during playback Title menu appears on the screen 2 Press or to select the desired title 3 Title selection Some DVDs allow you to select the disc contents using the menu When you play back these DVDs you can select the sub title language and soundtrack language etc using the DVD menu 1 Press DVD MENU during playback The DVD menu appears on the screen Press DVD MENU again to resum...

Page 29: ...VD mode Press SETUP in the stop mode Press or to select Language then press or ENTER 2 Press or to select OSD Language then press or ENTER 3 Press or to select de sired language e g Eng lish then press ENTER The menu returns to Lan guage menu automatically If you want to return to the previous menu press or RETURN 4 Repeat steps 2 3 for other Language setting Other Menu Audio Subtitle If you want ...

Page 30: ...re with black bands at the top and bottom of screen 4 3 Panscan It displays the wide picture on the whole screen with left and right edges automatically cut off If you want to return to the previous menu press or RETURN 4 Press SETUP to remove the Menu screen NOTE If the DVD disc is not formatted in the pan scan style it displays 4 3 style Setting the aspect ratio of TV screen You can select the a...

Page 31: ... Off Dynamic Range Control 1 Press TV DVD to select DVD mode Press SETUP in the stop mode Press or to select Sound 2 Press or ENTER to se lect DRC 3 Press or ENTER to se lect On or Off If you want to return to the previous menu press or RETURN 4 Press SETUP to remove the Menu screen DRC Dynamic Range Control ena bles you to control the dynamic range so as to achieve a suitable sound for your equip...

Page 32: ...triction will not work 1 Press TV DVD to select DVD mode Press SETUP in the stop mode Press or to select Parental then press or ENTER 2 Press or to select Parental Level then press or ENTER 3 Press or to select a level from Off or 1 8 Press or ENTER to set the selected level Level Off The parental control setting does not func tion Level 8 Almost all DVD software can be played back Level 1 DVD sof...

Page 33: ...s or ENTER The Parental Level screen is displayed 6 Press or to select a level from Off or 1 8 and then press or ENTER 7 Press or to select Password and then press or ENTER 8 Press number buttons 0 9 to enter a 4 digit pass word Note You can enter a new password 9 Press ENTER The parental level is now changed and locked If you want to return to the previous menu press or RETURN Press SETUP to remo...

Page 34: ...ou wish to cancel the set rating level temporarily enter the 4 digit password Then press ENTER Alternatively if the password has not been set playback will commence If you don t know or have forgotten the password select STOP The setting screen will disappear Press OPEN CLOSE to remove the disc To quit entering press RETURN 4 Playback will commence if the entered password was cor rect NOTE This te...

Page 35: ...are using an Amplifier with a built in digital surround as follows you can enjoy the various audio systems including Dolby Digital Surround audio that sounds just like the movie NOTES When you make the connections above do not set DOLBY DIGITAL to DOLBY DIGITAL MPEG to MPEG to ON on the AV Amplifier If you do a loud noise will suddenly come out from the speakers affecting your ears or causing the ...

Page 36: ...the DVD mode this key will not operate Front of TV DVD Camcorder To Audio Video OUT VIDEO IN AUDIO IN L AUDIO IN R 2 Press GAME during Power off The TV DVD turns on and the GAME screen appears Game timer function After one hour the Game timer display will appear every 30 minutes for about 5 seconds showing how long the time has passed up to 4 hours NOTES You can also change the TV screen to LINE b...

Page 37: ...an 2425 Thai 3018 Bihari 1218 Hungarian 1831 Oriya 2528 Tibetan 1225 Breton 1228 Icelandic 1929 Panjabi 2611 Tigrinya 3019 Bulgarian 1217 Indonesian 1924 Pashto Pushto 2629 Tonga 3025 Burmese 2335 Interlingua 1911 Persian 1611 Turkish 3028 Byelorussian 1215 Irish 1711 Polish 2622 Turkmen 3021 Cambodian 2123 Italian 1930 Portuguese 2630 Twi 3033 Catalan 1311 Japanese 2011 Quechua 2731 Ukrainian 312...

Page 38: ...interference Picture wobbles or drifts Station or CATV experiencing problems tune to another station Make sure channels are set into memory CATV company is scrambling signal Check antenna orientation No CATV reception Check all CATV connections Set TV CATV menu option to the CATV mode Station or CATV system problems try another station Make sure TV CATV menu option is in the appropriate mode If us...

Page 39: ...h slow motion play repeat play or program play etc cannot be performed Some discs may not do some of the functions No 4 3 16 9 picture The setup does not match your TV No on screen display Select Display On No surround sound The setup does not match your stereo system The remote control does not function Aim at the remote control at the remote sensor Operate within Approx 5 Meters or reduce the li...

Page 40: ...such as drills or hair dryers SNOW If the TV DVD is located far from the TV station in a fringe reception area where the signal is weak small dots may appear in the picture If the signal is extremely weak the installation of a larger external antenna may be necessary RADIO FREQUENCY INTERFERENCE RFI Caused by two way radios this type of interference produces moving ripples or diagonal streaks in t...

Page 41: ...14 36 A W 37 59 AA WW 60 85 AAA ZZZ 86 94 86 94 95 99 A 5 A 1 100 125 100 125 01 5A Antenna input VHF UHF In 75 ohm coaxial Speaker 1 1 2 inches x 2 11 16 inches 38 1 mm x 68 6 mm 8 ohm x 2 Audio output power 2 5 W 2 5 W DVD CD player Signal system NTSC Applicable disc 1 DVD 12 cm 8 cm 2 CD 12 cm 8 cm Audio characteristics Frequency response DVD 4 Hz 22 KHz CD 4 Hz 20 KHz Input Video RCA 1 Vp p 75...

Page 42: ...volved in the replacement you are responsible for all transportation and insurance charges for the set to and from the Service Station Rental Units The warranty for rental units begins with the first rental or thirty 30 days from the date of shipment to the rental firm whichever comes first Commercial Units Products sold and used for commercial use have a limited ninety 90 day warranty for all par...

Page 43: ... incidental or consequential damages so the above provisions may not apply to you ATTENTION CANADIAN CONSUMERS Canadian consumers are requested to complete the special Canadian Warranty Registration Form enclosed and forward this completed form with a copy of bill of sale to TOSHIBA OF CANADA to Register and Validate their warranty Products purchased in the U S A and used in Canada are not covered...

Page 44: ...03 09 U Printed in Thailand Imprimé en Thailande 5G10201C F 38 BACK 14 08 2003 16 39 42 ...

Reviews: