background image

2

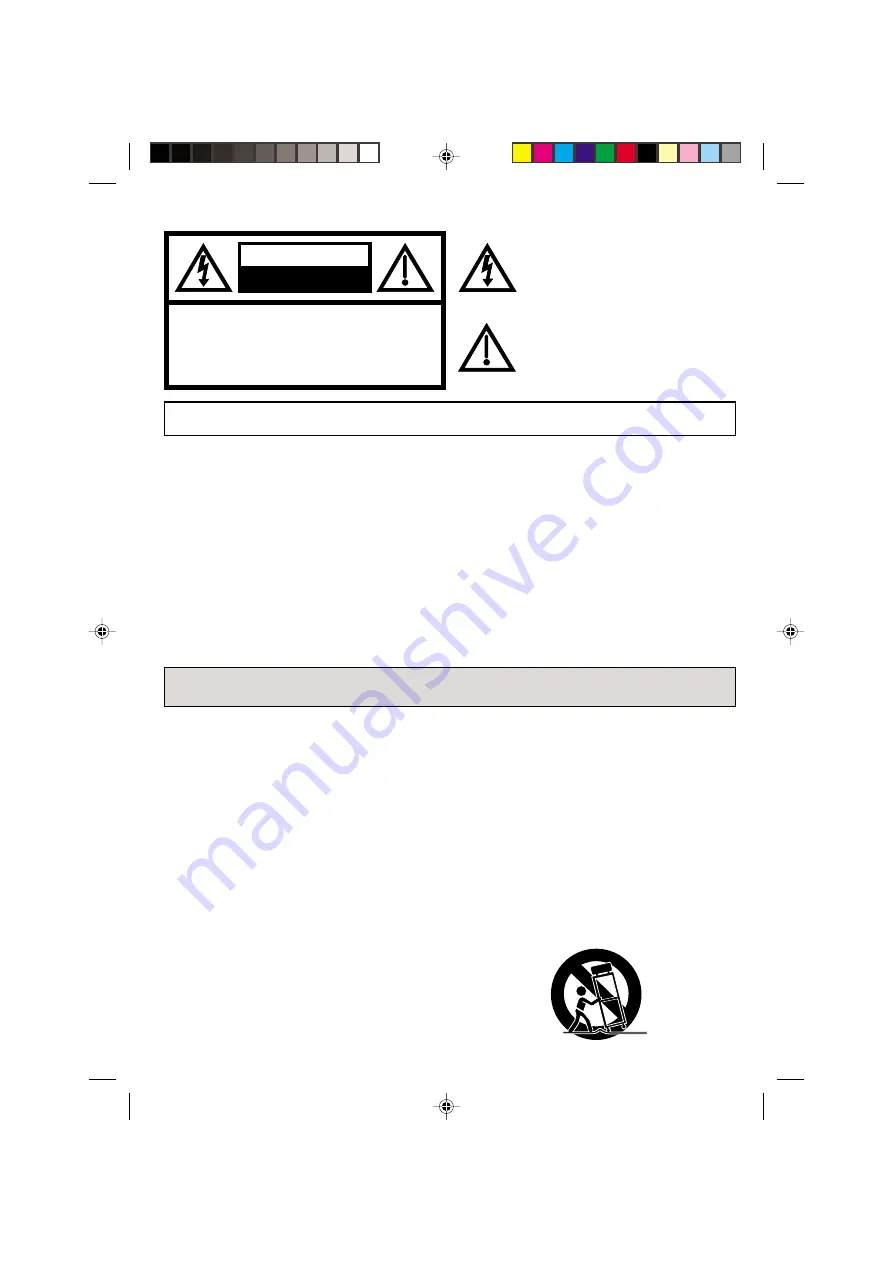
The exclamation point within an equilateral
triangle is intended to alert the user to the
presence of important operating and
maintenance (servicing) instructions in the
literature accompanying the appliance.

WARNING:

 This equipment has been tested and found

to comply with the limits for a Class B digital device,
pursuant to Part 15 of the FCC Rules. These limits are
designed to provide reasonable protection against
harmful interference in a residential installation. This
equipment generates, uses and can radiate radio
frequency energy and, if not installed and used in
accordance with the instructions, may cause harmful
interference to radio communications.
However, there is no guarantee that interference will not
occur in a particular installation. If this equipment does
cause harmful interference to radio or television recep-
tion, which can be determined by turning the equipment
off and on, the user is encouraged to try to correct the
interference by one or more of the following measures:

WARNING:

TO PREVENT FIRE OR SHOCK HAZARD, DO NOT EXPOSE THIS APPLIANCE TO RAIN
OR MOISTURE.

CAUTION:

The lightning flash with arrowhead symbol
within an equilateral triangle is intended to
alert the user to the presence of uninsulated
dangerous voltage within the product's
enclosure that may be of sufficient magnitude
to constitute a risk of electric shock.

2

1. READ INSTRUCTIONS

All the safety and operating instructions should be

read before the unit is operated.

2. RETAIN INSTRUCTIONS

The safety and operating instructions should be

retained for future reference.

3. HEED WARNINGS

All warnings on the unit and in the operating

instructions should be adhered to.

4. FOLLOW INSTRUCTIONS

All operating and use instructions should be followed.

5. CLEANING

Unplug this unit from the wall outlet before cleaning.

Do not use liquid cleaners or aerosol cleaners.

Use a damp cloth for cleaning.

6. ATTACHMENTS

The manufacturer of this unit does not make any

recommendations for attachments, as they may cause

hazards.

IMPORTANT SAFEGUARDS

PORTABLE CART WARNING

(symbol provided by RETAC)

S3125A

- Reorient or relocate the receiving antenna.
- Increase the distance between the equipment and receiver.
- Connect the equipment into an outlet on a circuit

different from that to which the receiver is connected.

- Consult the dealer or an experienced radio/TV techni-

cian for help.

CAUTION:

 Changes or modifications not expressly

approved by the party responsible for compliance with
the FCC (Federal Communications Commission) Rules
could void the user's authority to operate this equipment.

COPYRIGHT:

 It is permissible to record television

programs, films, video tapes and other material only in
the event that third party copyrights and other rights are
not violated.

7. WATER AND MOISTURE

Do not use this unit near water. For example, near a

bathtub, washbowl, kitchen sink, or laundry tub, in a

wet basement, or near a swimming pool.

8. ACCESSORIES

Do not place this unit on an unstable cart, stand,

tripod, bracket, or table. The unit may fall, causing

serious injury, and serious damage to the unit.

8A.

An appliance and cart combination should be moved

with care. Quick stops, excessive force, and uneven

surfaces may cause the appliance and cart combina-

tion to overturn.

TO REDUCE THE RISK OF ELECTRIC
SHOCK, DO NOT REMOVE COVER
(OR BACK). NO USER-SERVICEABLE
PARTS INSIDE. REFER SERVICING
TO QUALIFIED SERVICE PERSONNEL.

RISK OF ELECTRIC SHOCK

DO NOT OPEN

CAUTION

  4F11701A COV-07

10/16/01, 1:35 PM

2

Summary of Contents for M4F2C

Page 1: ...iversal remote control from your local retailer please contact the remote manufacturer for the required programming code TV CATV MODE SELECTION When shipped from the factory the TV CATV menu option is set to the CATV Cable Television mode If not using CATV Cable TV set this menu option to the TV mode 4F11701A COV 07 10 16 01 1 35 PM 1 W525 ...

Page 2: ...ing instructions should be adhered to 4 FOLLOW INSTRUCTIONS All operating and use instructions should be followed 5 CLEANING Unplug this unit from the wall outlet before cleaning Do not use liquid cleaners or aerosol cleaners Use a damp cloth for cleaning 6 ATTACHMENTS The manufacturer of this unit does not make any recommendations for attachments as they may cause hazards IMPORTANT SAFEGUARDS POR...

Page 3: ... they are not likely to be walked on or pinched by items placed upon or against them paying particular attention to cords at plugs convenience receptacles and the point where they exit from the appliance 13 LIGHTNING To protect your unit from a lightning storm or when it is left unattended and unused for long periods of time unplug it from the wall outlet and disconnect the antenna or cable system...

Page 4: ...teristics as the original parts Unauthorized substitutions may result in fire electric shock or other hazards 20 SAFETY CHECK Upon completion of any service or repairs to this unit ask the service technician to perform safety checks to determine that the unit is in proper operating condition 21 HEAT The product should be situated away from heat sources such as radiators heat registers stoves or ot...

Page 5: ...CR and the VCR fails to function simply unplug the unit from the wall outlet wait 10 minutes and plug it back in The VCR should return to normal operation Avoid extreme heat or cold 41 F 5 C 104 F 40 C Do not place the VCR on or near appliances which may cause electromagnetic interference e g TV speakers etc Doing so may cause erratic operation of the VCR including picture and or sound distortion ...

Page 6: ...cally turn on Automatic Playback When loading a cassette tape with out the erase prevention tab this VCR will automatically turn on and play back the cassette tape at the correct speed Automatic Rewind Stop Eject Power Off When a tape reaches its end during playback and recording it will automatically stop rewind stop eject the tape and the VCR will turn off Open the battery compartment cover Inst...

Page 7: ... and 9X or 15X in SLP 3 Speed Playback Plays three tape speeds SP LP SLP 2 Speed Record Records two tape speeds SP SLP Front Audio Video In Jacks A VCR or other video device may be hooked up for dubbing CAUTIONS FEATURES 6 LOCATION OF CONTROLS 8 BASIC CONNECTIONS 10 CATV CABLE TV CONNECTIONS 12 AUDIO VIDEO CONNECTIONS 14 SETTING THE VIDEO CHANNEL 15 LANGUAGE SELECTION 15 SETTING THE CLOCK 15 SETTI...

Page 8: ...he PLAY mode this button activates Forward Search 5 POWER button Turns the VCR power on and off 6 STOP EJECT button Press once to stop the tape in any mode Press again to eject the tape 7 CHANNEL buttons Used to select a channel for viewing or recording 8 REC button Press once to start normal recording Additional presses activate One touch Timer Recording 9 Remote Sensor Signals from the Remote Co...

Page 9: ...s a still image on the TV screen 24 ENTER button Used to enter the information in the menu mode 25 DIGITAL TRACKING button Allows automatic adjustment of tracking to minimize picture noise during playback 26 CANCEL button Used to clear the selected timer recording program 27 INPUT SELECT button Switches the program for viewing between the VCR and external input sources 28 DISPLAY button Displays t...

Page 10: ...isconnect the antenna from the TV and connect it to the VCR Then connect the VCR to the TV Below are 3 common methods of connecting an antenna system to a VCR Find the type of antenna system you are using and follow the connection diagram If both VHF and UHF antennas have 300 ohm twin lead flat wires use a combiner having two 300 ohm inputs and one 75 ohm output NOTE BASIC CONNECTIONS Combination ...

Page 11: ...HF antenna input TV with 300 ohm UHF and 75 ohm VHF antenna inputs TV with 300 ohm UHF and 300 ohm VHF antenna inputs VCR TO TV CONNECTION After you have connected the antenna to the VCR you must connect the VCR to the TV Below are 3 common methods of connecting your VCR to a TV Find the type of TV you are using and follow the connection diagram This VCR has a single 75 ohm output for connection t...

Page 12: ...ng another ALLOWS Recording of channels through the converter box scrambled and unscrambled Using the programmable timer to record only the channel selected at the converter box PREVENTS Recording one channel while watching another Using the VCR tuner to select channels 1 2 VCR Incoming Cable TV VHF UHF IN ANT OUT IN VCR Converter Descrambler Incoming Cable TV VHF UHF IN ANT OUT IN VCR Incoming Ca...

Page 13: ...led channels while recording another channel Using the VCR tuner to select channels VHF UHF IN ANT A B OUT IN VCR Splitter Converter Descrambler TV VHF UHF IN ANT A B OUT IN VCR Converter Descrambler A B Switch TV Incoming Cable Splitter ALLOWS Recording of nonscrambled channels Recording of one channel while watching another Watching premium channels through the converter while recording nonscram...

Page 14: ...To ANT IN To UHF VHF OUT TV AUDIO Cord not supplied AUDIO VIDEO CONNECTIONS AUDIO VIDEO CONNECTION 1 Connect the VIDEO OUT jack on the VCR to the VIDEO IN jack on the TV 2 Connect the AUDIO OUT jacks on the VCR to the AUDIO IN jacks on the TV 3 Set the VIDEO TV selector of your TV to VIDEO STEREO AMPLIFIER CONNECTIONS Connect the AUDIO OUT jacks on the VCR to the AUX IN jacks on the stereo amplifi...

Page 15: ...MA LANGUE ENGLISH FRANCAIS ESPAÑOL 1 Press the MENU button Press the TRACKING SET or button to select the LANGUAGE option then press the ENTER button SETTING THE CLOCK 1 MONTH DAY TIME YEAR 3 1 12 THU 00 AM 2000 ENTER CANCEL MENU ENTER CANCEL MENU MONTH DAY TIME YEAR 3 29 8 FRI 30 AM 2002 2 NOTES After a power failure or disconnection of the power the timer settings will be lost In this case reset...

Page 16: ...ed with an audio video cable turn the TV and this VCR on and select the video input mode on the TV ENTER MENU CH SET UP TV CATV AUTO CH MEMORY ADD DELETE 1 Press the MENU button Press the TRACKING SET or button to select the CH SET UP option then press the ENTER button 2 Press the TRACKING SET or button to select the AUTO CH MEMORY mode then press the ENTER button 3 The auto tuning will start The ...

Page 17: ...e prevention tab playback will start auto matically 2 Press the PLAY button Playback will start will appear on the screen for about 4 seconds Press the STOP button once The tape will stop but remain fully loaded and ready to play will appear on the screen for about 4 seconds LOADING UNLOADING Use only video cassette tapes marked Push the center of the tape until it is automatically retracted AUTOM...

Page 18: ...ilize the still picture will appear if you press the DISPLAY button To cancel press the DISPLAY button again 1 Press the MENU button Press the TRACKING SET or button to select the AUTO REPEAT option 2 Press the ENTER button to select the ON position 3 Press the MENU button If you press the PLAY button the tape will play over and over until the repeat mode is canceled ENTER MENU MENU CLOCK SET TIME...

Page 19: ...it viewing one channel while recording another See pages 12 13 RECORDING ONE PROGRAM WHILE WATCHING ANOTHER After recording break off the erase prevention tab if you do not wish to record over the tape Cover the hole with adhesive tape Be careful the tape does not extend past the edges of the cassette housing Erase prevention tab Adhesive tape TO PREVENT AN ACCIDENTAL RECORDING Screwdriver NOTE Si...

Page 20: ...NGUAGE IDIOMA LANGUE NO NOISE BACKGROUND 26 SU ENTER CANCEL MENU START END DATE CH ENTER CANCEL MENU DATE START END CH CH 125 OTR 0 30 NOTES Press the REC button to increase the time needed for recording See the chart To cancel OTR press the STOP button or turn off the power CH 125 The One touch Timer Recording feature provides a simple and convenient way to make a timed recording EXAMPLE One touc...

Page 21: ...e tape from 00 00 00 a minus sign will be displayed in front of the time When you load a tape the counter will change to 00 00 00 The counter does not function on nonrecorded blank sections of the tape When you rewind fast forward or play tapes through blank sections the counter stops 00 00 00 SP CH 125 8 30 AM THU DAY OF THE WEEK CHANNEL TAPE SPEED REAL TIME COUNTER CLOCK NOTE Do not overlap prog...

Page 22: ... press the PAUSE button 4 Press the PLAY button on the playback VCR then press the PAUSE STILL button 5 Press the PAUSE STILL button on both the VCRs simultaneously to begin the duplicating process DUPLICATING A VIDEO TAPE LINE 2 1 Load a blank cassette tape with the erase prevention tab intact into the recording VCR Load a previously recorded tape into the playback VCR or CAMCORDER 2 Press the IN...

Page 23: ...to produce clear pictures To help prevent video head clogging use only good quality VHS tapes Discard worn out tapes VIDEO HEAD CLOGGING VIDEO HEAD CLEANING Video head cleaning is needed when the playback picture becomes unclear This signifies that the heads are getting dirty and can occur when playing poor quality or damaged tapes If the heads require cleaning use a high quality head cleaning sys...

Page 24: ... option setting The erase prevention tab of the video cassette is broken off INPUT SELECT is set to the LINE mode The time is not set correctly The recording start end time is not set correctly The TIMER button has not been pressed The T REC indicator is not lit SYMPTOM CAUSE POSSIBLE SOLUTION PAGE The AC power cord is not connected Cassette is not inserted Connect the AC power cord to the AC outl...

Page 25: ...ary Heads MONO Sound 1 Track 120V 60Hz Approx 8 watts 181 Channel Freq Synthesized VHF 2 13 UHF 14 69 CATV 14 36 A W 37 59 AA WW 60 85 AAA ZZZ 86 94 86 94 95 99 A 5 A 1 100 125 100 125 01 5A Channel 3 or 4 Switchable In RCA 1Vp p 75 ohm Out RCA 1Vp p 75 ohm In RCA 8dB 50K ohm Out RCA 8dB 1K ohm UHF VHF IN 75 ohm coaxial UHF VHF OUT 75 ohm coaxial F FWD REW Time Speed Search Dimensions Weight Remot...

Page 26: ...oduct This is one way to enable TACP THI to provide you with better customer service and improved products Failure to return the Demographic card will not affect your rights under this warranty Your Responsibility The above warranties are subject to the following conditions 1 You must retain your bill of sale or provide other proof of purchase 2 You must notify an Authorized TACP THI Service Stati...

Page 27: ... or limitation of incidental or consequential damages so the above provisions may not apply to you ATTENTION CANADIAN CONSUMERS Canadian consumers are requested to complete the special Canadian Warranty Registration Form enclosed and forward this completed form with a copy of bill of sale to TOSHIBA OF CANADA to Register and Validate their warranty Products must be purchased from an Authorized Can...

Page 28: ...28 4F11701A U 01 11 Printed in Thailand 4F11701A P20 BACK 10 16 01 1 33 PM 28 ...

Reviews: