background image


5

INSTALLATION 

The JK-UC1 was created to be wired directly to a maximum of 

(32) 

receivers. This connections can 

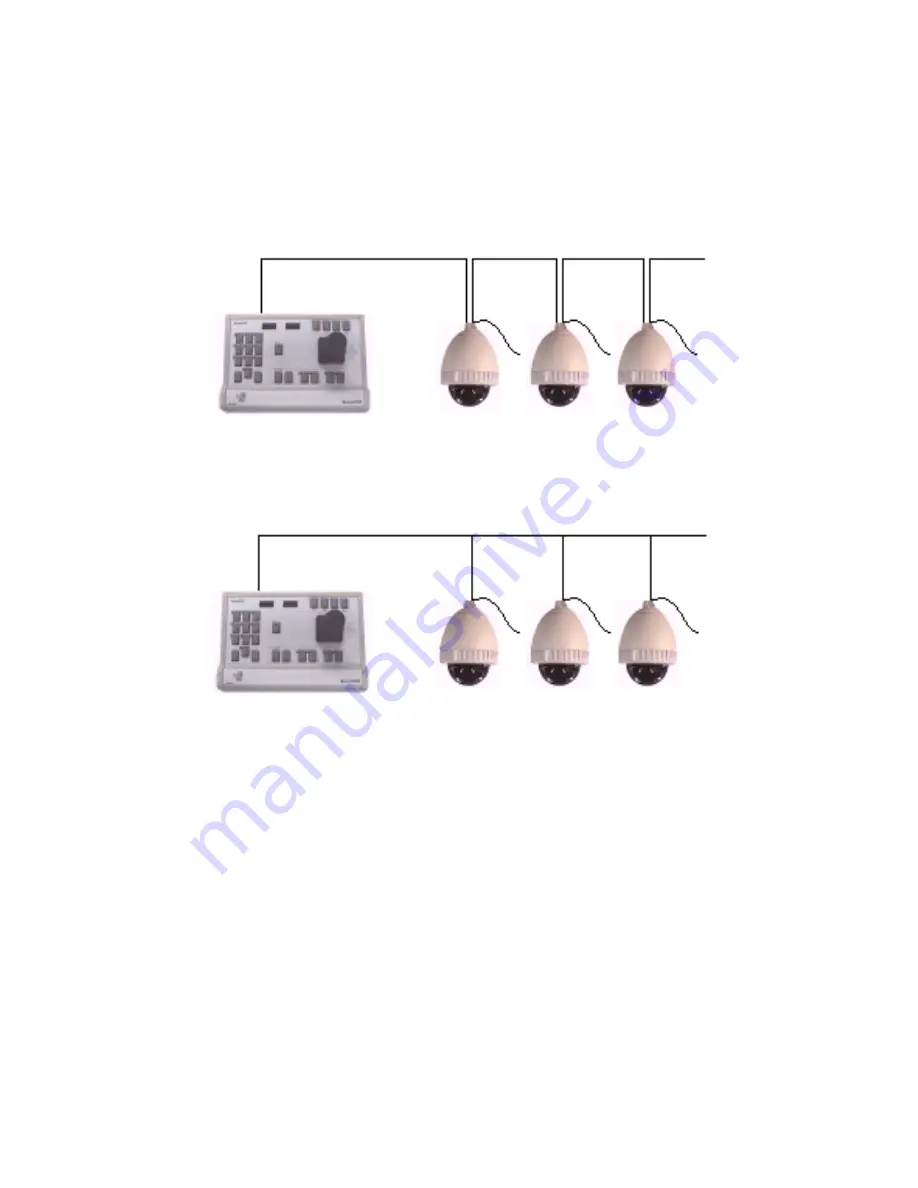
be done based upon a Daisy Chain Configuration (fig.1), a Star Configuration (fig. 2), or any 
combination of the above. It is important to remember NOT to connect more than


(32) 

receivers in a 

Star Configuration (parallel to one another). 
 

Daisy Chain 

Figure  2 

                                                                            
                                                                          Bus Configuration 


Figure  3


The installation requires a video switcher to route the cameras output, and display it in a monitor.


Summary of Contents for JK-UC1

Page 1: ...Installation and Operation Manual JK UC1 Universal Controller ...

Page 2: ...Compensation 11 AF Trigger 11 WB Trigger 12 IR Filter 13 Version 13 Scanning Functions 13 Scan Limits 14 Patterns 14 Start Pattern 14 End Pattern 14 Set Preset 15 Clear Preset 15 Go to Preset 15 Special Presets 15 Remote Reset 16 Soft Reset for the JK UC1 16 SPECIFICATIONS 17 GENERAL 17 Ambient Operating 17 ELECTRICAL 17 Keyboard Communication 17 Others 17 Ilustrations Figure 1 4 Figure 2 5 Figure...

Page 3: ...his manual prior to installation and operation of the JK UC1 or any other accessory of the system REGULATORY NOTICES The JK UC1 complies with the limits of a Class A Digital Device as described in part 15 of the FCC rules This implies that the JK UC1 does not generate harmful interference when operated in a commercial environment This equipment generates uses and can radiate radio frequency energy...

Page 4: ...Manual this one 7 A plastic bag Figure 1 The lack of any of the above mentioned items MUST be referred to the dealer as soon as possible DESCRIPTION The JK UC1 Universal Controller was designed to control up to 255 Toshiba P or Pelco P compatible cameras directly wired to it A special Switcher is needed to route video to the monitor The JK UC1 has a 3 axis joystick that lets you control the zoom p...

Page 5: ...n Configuration fig 1 a Star Configuration fig 2 or any combination of the above It is important to remember NOT to connect more than 32 receivers in a Star Configuration parallel to one another Daisy Chain Figure 2 Bus Configuration Figure 3 The installation requires a video switcher to route the cameras output and display it in a monitor ...

Page 6: ...ker 2 Wire the transmission wires into pins 3 TX and 6 TX See fig 3 Figure 4 3 Place the JK UC1 unit in its assigned location It is recommended for them not to be farther than 2 meters to be plugged with the cable included in the kit but this is not needed In other cases the cable is a standard one to one UTP cable ended on both sides in RJ 45 connectors It is important for the data and power cabl...

Page 7: ...t be done whatsoever However if the unit is going to act as a slave unit in the RS 485 line every jumper on the A group must be taken off Refer to fig 5 In case the unit is going to use a RS 232 communication line the jumpers on the B group must be changed to the left side as shown in fig 6 This is the case when trying to communicate the unit and a PC In case the communication would be RS 485 no c...

Page 8: ...8 Figure 7 ...

Page 9: ...s strongly recommended to practice every function several times to get used to the operation of the system To simplify operations the JK UC1 has shortcuts to access each of those modes even though it keeps the Pelco procedure to access them From this point and on this manual will describe the shortcuts to access the different commands At the end of this section there is a cross reference table to ...

Page 10: ...10 ...

Page 11: ...tart the input again 3 Once the number of the camera appears on the left display press CAMERA key The controller will display Cam on the right side for a moment and then will come back to the normal display situation Example If the unit has the camera 23 selected and you want to select camera number 125 1 Input 1 then 2 then 5 in the number keypad The display will show 125 023 2 Press CAMERA key T...

Page 12: ... this procedure 1 Press the Shift key so that the light in it turns on 2 Press the IRIS IN key The JK UC1 will display W B on the right display for a moment After that the result of the sequence will be seen in the screen and the displays will go back to show the selected camera number ...

Page 13: ... the sequence will be seen in the monitor and the displays will go back to show the selected camera number Scanning Functions There are five kinds of scanning functions implemented in the JK UC1 according to the amount of functions that could be included in your dome Auto Scan Auto Patrol Random Scan Frame Scan Pattern The definition of each one is in each dome s manual To stop any of these scanni...

Page 14: ...sition at which you want to set the STOP 2 Define if this position is going to be the Right Scan Limit or the Left one 3 To set the Right Manual Scan Limit c Type down 91 using the number keypad d Press Preset The JK UC1 will display RMLm on the right display for a moment After that the Stop is settled and the displays goes back to show the selected camera number 4 To set the Left Manual Scan Limi...

Page 15: ...oment After that the preset is erased and the displays will go back to show the selected camera number Go to Preset To go to a Preset follow this sequence 1 Type down the number of the preset you want to go to using the number keypad 2 Press the Preset key The JK UC1 will display PrSt on the right display for a moment After that the dome will go to the selected preset and the displays will go back...

Page 16: ...K UC1 can send a RESET Command to the dome camera To do so go to Preset number 257 Soft Reset for the JK UC1 In case of need the JK UC1 can be reset by going to the Preset number 258 This procedure runs the initial sequence clears all buffers and starts anew ...

Page 17: ...n LED Ambient Operating Temperature 20º to 120ºF 7º to 49ºC Humidity 10 90 non condensing ELECTRICAL Input Voltage 9 VAC or 9 VDC Power Consumption 2 watt Connector Type RJ 45 8 pin modular female Keyboard Communication Interface RS 485 Protocol Toshiba P Pelco P Baud Rate 4800 bps Communication Parameters Parameters 8 data bits odd parity 1 stop bit Others Weight 5 9 Pounds 2 2 Kg Length 10 6 in ...

Reviews: