background image

30

( 8 )  Setting USER area

s7HEN53%2ISSELECTEDFORTHE!2%!OFTHEAUTOMATICSHUTTERORFOR!7"THELIGHTMEASUREMENTZONESCANBE

changed.

s4HE53%2AREAISCOMPOSEDOFZONESWITHVERTICAL XHORIZONTAL AREASANDEACHAREACANBESETTO/.

OFF.


1

 Set the output to area menu.

Set the output to the area menu by referring to the item “7.2 (1) (1.1) (e) Confirming the contents of the 
measurement light area selected by automatic shutter” and “7.2 (3) (3.1) (e) Confirming the contents of the zone 
area selected by AWB”.

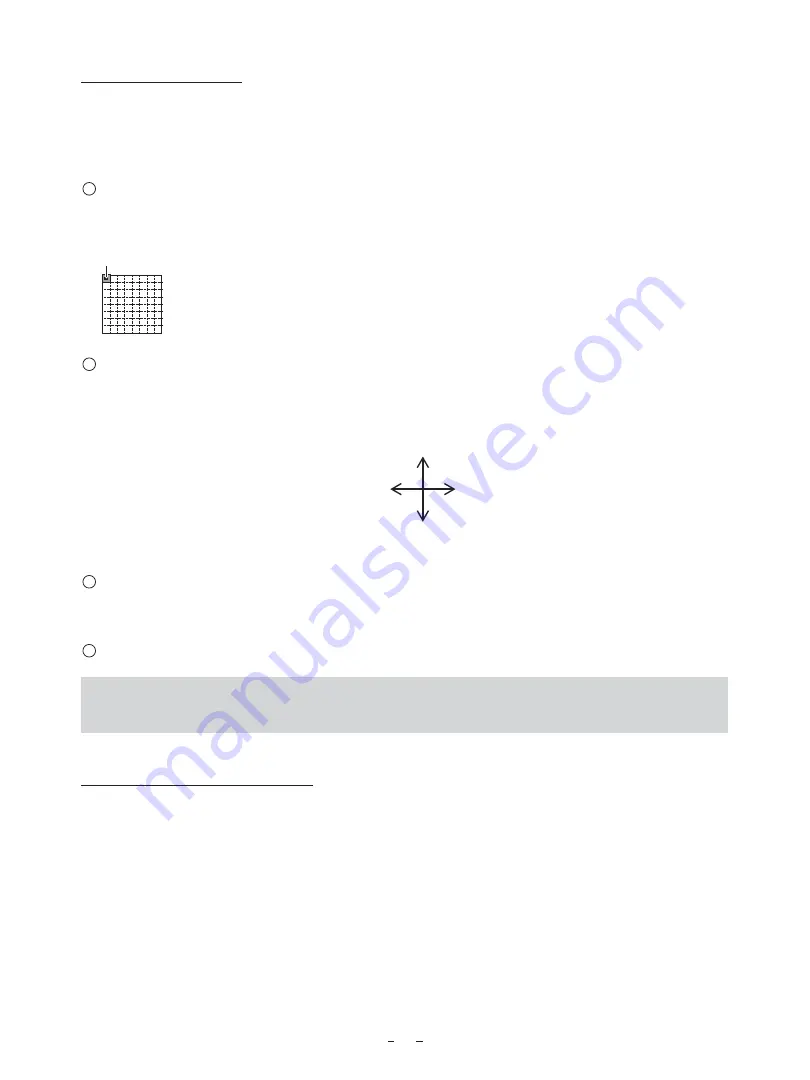
Cursor


2

 Move the cursor to the zone to be modified.

4HECURSORMOVESUPDOWNRIGHTANDLEFTBYPUSHINGTHE;-%.550=;-%.5$/7.=;$!4!50=;$!4!$/7.=

buttons.

[MENU UP]

Move to up

Move to down

[MENU DOWN]

Move to left [DATA DOWN]

[DATA UP] Move to right


3

 Select ON/OFF for the zone.

3ELECT/.EFFECTIVE OR/&&INEFFECTIVE BYPUSHINGTHE;0!'%=BUTTON

When ON is selected, the selected area will be displayed brightly, and when OFF is selected, it will be dimmed.


4


0USH;$)30=BUTTONTORETURNTOTHEMENU

Note:

OFF can not be selected for all 64 zones because the automatic shutter function and AWB function will not

PERFORMCORRECTLYh!2%!.'./4!6!),!",%vDISPLAYS 

( 9 )  Returning to factory settings

The contents set of each scene file can be returned to the factory default status (preset status).

 3ELECTASCENElLETOSETTOTHEFACTORYDEFAULTSTATUSBYPRESSINGTHE;&),%=BUTTON
 )FTHECOLORBARPATTERNORCHARACTERSAREDISPLAYEDONTHESCREENPRESSTHE;$)30=BUTTONTODISABLETHECOLORBAR

pattern and character display.

 0USH;-%.5$/7.=AND;$!4!$/7.=BUTTONSSIMULTANEOUSLYFORAPPROXSECOND

(4)  The preset operation starts. When the preset operation finishes, the character PRESET OK is displayed for 

approx. 1 second.

*  Only the scene files selected presently are set at the time of shipment from the factory. If you wish to have all the 

scene files set as the factory shipment setting, perform the above operation for each scene file.

Summary of Contents for IK-CT2D

Page 1: ...equipment could be voided if you make changes or modifications not expressly approved by the party responsible for compliance to Part 15 of the FCC Rules This manual is made from recycled paper For Customer Use Enter below the Serial No which is located on the bottom of the cabinet Retain this information for future ref erence Model No IK CT2D Serial No Following information is only for EU member s...

Page 2: ...dropping invasion of foreign objects etc may result in fire and or electric shock Immediately disconnect the power source and contact your dealer Avoid installing in a shower room or a bathroom This may result in fire and or electric shock Do not operate in places where the product may get wet This may result in fire and or electric shock Do not repair disassemble and or modify by yourself This may r...

Page 3: ...bility and shall not be responsible for any damages or losses incurred by the user in any of the following cases 1 Fire earthquake or any other act of God acts by third parties misuse by the user whether inten tional or accidental use under extreme operating conditions 2 Malfunction or non function resulting in indirect additional or consequential damages including but not limited to loss of expec...

Page 4: ... nuclear facilities or systems or any other applications where product failure could lead to injury to persons or loss of life or catastrophic property damages Accordingly Toshiba disclaims any and all liability arising out of the use of the product in any critical applications TABLE OF CONTENTS 1 CAUTIONS ON USE AND INSTALLATION 6 2 COMPONENTS 6 3 ITEMS CONTROLLED BY THE SCREEN DISPLAY 7 4 NAMES ...

Page 5: ...l outline gain 27 5 2 Change of detail boost frequency 27 5 3 Change of horizontal and vertical detail balance 27 HANGING 2 IGITAL OISE 2EDUCTION 27 6 PROCESS3 28 6 1 Changing matrix color correction ON OFF 28 6 2 Selection of color for correction 28 6 3 Changing HUE and GAIN of selected color 28 6 4 Changing the total Chroma gain simultaneously for all colors in the matrix 28 7 OPTION 29 7 1 Chan...

Page 6: ...trips or white dots may occur This is not a malfunction s 7HEN NOT USING THE CAMERA FOR EXTENDED PERIODS of time Switch the control unit off and disconnect the power supply s VOID USING OR STORING THE CAMERA IN THE FOLLOWING places Places filled with highly flammable and corrosive gas Places near gasoline benzene or paint thinner Places subject to strong vibration Places containing chemicals such as...

Page 7: ...R PAINT 10 0 10 0 AWB B PAINT 10 0 10 0 AWB area 02 3 4 02 3 4 02 3 4 02 3 4 02 3 4 USER USER area is possible to set in 64 zones PRESET A MANUAL R GAIN 100 0 100 0 MANUAL B GAIN 100 0 100 0 Gamma correction ON OFF ON Gamma correction level 10 0 10 0 Black gamma correction level LOW NORMAL HIGH NORMAL Master pedestal 200 0 200 0 Red pedestal 100 0 100 0 Blue pedestal 100 0 100 0 ETAIL GAIN 0 10 31...

Page 8: ...nates to indicate the unit is powered on 3 POWER switch Turns power on or off 4 FILE button To switch the scene files 5 FREEZE button To freeze the display 6 30 BUTTON Changes the display mode 7 PAGE button To switch and select menus 8 MENU UP button To select the function to be confirmed or changed on the menu 9 5 7 BUTTON To select the function to be confirmed or changed on the menu 10 4 50 7 BUTTO...

Page 9: ...K CT2H option 4HE 6 DIGITAL VISUAL INTERFACE IS THE CONNECTION INTERFACE STANDARD FOR mAT PANEL DISPLAY 0 SUCH AS DISPLAYS 4HERE ARE THREE TYPES OF 6 CONNECTORS NAMELY 6 FOR BOTH DIGITAL ANALOG 6 EXCLUSIVELY FOR DIGITAL AND 6 EXCLUSIVELY FOR ANALOG 5SE A COMMERCIALLY AVAILABLE 6 CABLE FOR THIS CAMERA CONTROL UNIT 5 1 2 USB Connection DC IN12V USB USB cable commercial product IK CT2H option IK CT2D...

Page 10: ...to the control unit and camera head s 2ECOMMENDED COMPUTER 3 7INDOWS 6ISTA Windows 7 Windows 8 8 1 CPU Intel Pentium compatible CPU x86 or X64 CPU 1 GHz or better Memory 512 MB or more Please note that the camera control unit may not work correctly depending on the cables operating ENVIRONMENT AND COMPUTER BEING USED IRECT8 NEEDS TO BE INSTALLED SEPARATELY FOR SOME VIEWER SOFTWARE Refer to the ins...

Page 11: ... 18 1 9 17 3 11 19 4 12 20 5 13 21 6 14 22 7 15 23 8 16 24 ON OFF KEY LOCK DC IN 12V REMOTE DVI D USB 3 4 2 1 1 2 3 4 5 8 7 9 6 1 5 6 TERMINAL REMOTE terminal 6 TERMINAL 1 6 1 1 ATA 13 2 6 2 48 2 ATA 14 6 3 3 28 3 ATA 3HIELD 15 4 4 4 16 OT 0LUG ETECT USBterminal 5 5 17 ATA 1 6 BUS 6 6 18 ATA 2 7 7 19 ATA 3HIELD 3 8 8 20 4 9 9 ATA 21 5 10 ATA 22 LOCK 3HIELD 11 ATA 3HIELD 23 Clock 12 24 Clock ...

Page 12: ...BLINKING AND THE RESULT APPEARS FOR approx 1 second Display Meaning ABB OK Automatic black balance adjustment finished correctly ABB NG CLOSE LENS Automatic black balance adjustment cannot be done because light cannot be shielded Shield the light or cover the lens ABB NG Automatic black balance adjustment cannot be performed Operate the automatic black balance again 6 2 7HITE ALANCE For white balan...

Page 13: ...umination or opening the lens iris 7 LEVEL HIGH Automatic white balance adjustment cannot be performed because the video level is too high Adjust the video level by decreasing the illumination or closing the lens iris 7 4 0 7 Automatic white balance adjustment cannot be performed because the color temperature is too low If the C TEMP is set to 5600K set to 3200K If the message appears with the C T...

Page 14: ...B 䊲 䊲 䊲 䊲 FILE C 䊲 䊲 䊲 䊲 FILE D 䊲 䊲 䊲 䊲 FILE E s F THE COLOR BAR PATTERN IS DISPLAYED ON THE SCREEN PRESS THE 30 BUTTON TO SWITCH TO THE VIDEO SIGNAL SCREEN s 7HEN THE BUTTON IS PRESSED WHILE THE VIDEO SIGNAL SCREEN IS DISPLAYED THE CURRENT SCENE lLE SELECTION AT THAT TIME IS DISPLAYED FOR APPROX SECONDS IN THE UPPER RIGHT CORNER OF THE SCREEN F THE BUTTON IS PRESSED AGAIN while the position is di...

Page 15: ...ANGING THE setting in AUTO mode 2 MANUAL Manual gain Gain adjustment is performed on the GAIN menu The adjustment range is from 0 to 18dB in 1dB steps Refer to the item 7 2 2 2 2 Changing gain in MANUAL mode 3 OFF Gain is fixed at 0 dB Note White red green or blue dots may occur when the gain is increased This is not a malfunction just certain characteristics of the CMOS sensor becoming more visibl...

Page 16: ...s may not be supported depending on the viewer software you are using Resolution 1 220 x 220 YUY2 approx 60FPS 2 440 x 440 YUY2 approx 60FPS 3 640 x 480 YUY2 approx 30FPS Exposure time AUTO ON Electronic shutter enters the AUTO mode AUTO OFF Electronic shutter enters the MANUAL mode In the manual mode it can be set from OFF to 1 3000 s White balance White balance enters the AWB mode The color temp...

Page 17: ...you operate the on screen menu AWB and other menus 7 1 Using the Menus When the power turns on the normal screen showing only the video signal appears Change the output to each SCREEN VIDEO SIGNAL OUTPUT COLOR BAR SCREEN NDEX MENU MENUS AND AREA MENU BY USING THE 30 0 5 50 AND 5 7 BUTTONS MENU IS SELECTED WHEN PUSHING THE 0 BUTTON AFTER MOVING THE h v ON THE SCREEN BY THE 5 50 5 7 BUTTON WHILE THE...

Page 18: ...ure time from eleven speed settings OFF 1 100s 1 125s 1 250s 1 500s 1 1000s 1 2000s 1 3000s 1 4000s 1 6500s 1 13000s SS Shutter speed can be set by the horizontal scanning time 1H unit Notes s F THE SHUTTER SPEED IS INCREASED THE SENSITIVITY IS DECREASED ACCORDING TO THE SPEED LICKER MAY OCCUR UNDER discharge lamp lighting such as fluorescent tubes s F A FAST MOVING OBJECT IS SHOT ITS IMAGE MAY BE ...

Page 19: ... Move the v TO 6 BY PUSHING THE 5 50 5 7 BUTTONS 2 3ELECT THE VIDEO LEVEL BY PUSHING THE 4 50 4 7 BUTTONS 4 50 The value increases by pushing 100 0 100 The value decreases by pushing 4 7 b Changing the automatic shutter detection ratio between peak and average value 1 Move the v TO 0 6 BY PUSHING THE 5 50 5 7 BUTTONS 2 3ELECT THE RATIO BETWEEN PEAK AND AVERAGE VALUE BY PUSHING THE 4 50 4 7 BUTTONS...

Page 20: ... the image which is divided into an 8 x 8 grid PRESET A PRESET B PRESET D PRESET C PRESET E USER Custom Selection e Confirming the contents of the measurement light area selected by the automatic shutter 1 Move the v TO 2 30 9 BY PUSHING THE 5 50 5 7 BUTTONS 2 REA SCREEN APPEARS BY PUSHING THE 4 50 4 7 BUTTONS When AREA is set to USER the setting can be changed on the area menu When changing the ar...

Page 21: ...2 3ELECT THE SHUTTER SPEED BY PUSHING THE 4 50 4 7 BUTTONS DATA DOWN DATA UP OFF 1 100s 1 125s 1 250s 1 500s 1 1000s 1 2000s 1 3000s 1 4000s 1 6500s 1 13000s 1 3 Changing the setting in SS Synchro Scan mode Shutter mode AUTO MANUAL SS 1 SHUTTER FILE A Synchro scan setting 1 218H to 217 218H OFF MODE SS SYNCHRO SCAN OFF MODE SS Move up and down by pushing MENU UP DOWN Select the desired value by pu...

Page 22: ...elect the desired value by pushing DATA UP DOWN a Changing the maximum gain 1 Move the v TO 8 BY PUSHING THE 5 50 5 7 BUTTONS 2 3ELECT THE DESIRED VALUE OF MAXIMUM GAIN BY PUSHING THE 4 50 4 7 BUTTONS 4 50 0dB 18dB 4 7 2 2 Changing gain in MANUAL mode 2 GAIN FILE A Gain mode AUTO MANUAL OFF MODE MANUAL MANUAL 0dB Manual gain setting 0dB to 18dB 1dB step Move up and down by pushing MENU UP DOWN Sel...

Page 23: ...elect the desired value by pushing DATA UP DOWN a Changing color temperature setting 1 Move the v TO 4 0 BY PUSHING THE 5 50 5 7 BUTTONS 2 3ELECT EITHER OR BY PUSHING THE 4 50 4 7 BUTTONS b Changing R PAINT 1 Move the v TO 2 0 4 BY PUSHING THE 5 50 5 7 BUTTONS 2 3ELECT THE DESIRED VALUE OF RED PAINT BY PUSHING THE 4 50 4 7 BUTTONS 4 50 Red is increased 10 0 10 Red is decreased 4 7 c Changing B PAI...

Page 24: ... Changing gain in MANUAL mode White balance mode AWB MANUAL Red gain adjustment 100 to 100 3 WHT BAL FILE A Blue gain adjustment 100 to 100 MODE MANUAL R GAIN 0 Color temperature setting 3200K 5600K B GAIN 0 C TEMP 3200K Move up and down by pushing MENU UP DOWN Select the desired value by pushing DATA UP DOWN a Changing the red gain 1 Move the v TO 2 BY PUSHING THE 5 50 5 7 BUTTONS 2 3ELECT THE DE...

Page 25: ...MMA selections When OFF is selected GAMMA and BLACK GAMMA are not displayed So the setting for GAMMA and BLACK GAMMA cannot be made R PED 0 B PED 0 Gamma correction ON OFF 4 PROCESS1 FILE A GAMMA ON OFF OFF M PED 0 Master pedestal setting 200 to 200 Red pedestal setting 100 to 100 Blue pedestal setting 100 to 100 Menu when GAMMA OFF is selected Move up and down by pushing MENU UP DOWN Select the d...

Page 26: ...aster pedestal 1 Move the v TO 0 BY PUSHING THE 5 50 5 7 BUTTONS 2 3ELECT THE DESIRED VALUE OF THE MASTER PEDESTAL BY PUSHING THE 4 50 4 7 BUTTONS 4 50 0 RISES 200 0 200 0 DECREASES 4 7 b Changing R PED red pedestal 1 Move the v TO 2 0 BY PUSHING THE 5 50 5 7 BUTTONS 2 3ELECT THE DESIRED VALUE OF RED PEDESTAL BY PUSHING THE 4 50 4 7 BUTTONS 4 50 2 0 RISES 100 0 100 2 0 DECREASES 4 7 c Changing B P...

Page 27: ...setting the screen outline thickness 2 Move the v TO 4 2 1 BY PUSHING THE 5 50 5 7 BUTTONS 3ELECT THE DETAIL BOOST FREQUENCY BY PUSHING THE 4 50 4 7 BUTTONS 4 50 Thin outline 1 10 16 Thick outline 4 7 5 3 Change of horizontal and vertical detail balance 1 This is the item for changing the ratio of the vertical detail quantity to the horizontal one 2 Move the v TO 6 BY PUSHING THE 5 50 5 7 BUTTONS ...

Page 28: ...ion 1 Move the v TO 2 BY PUSHING THE 5 50 5 7 BUTTONS 2 3ELECT THE CORRECTION COLOR BY PUSHING THE 4 50 4 7 BUTTONS DATA UP R R Ye Ye Ye G G G Cy Cy Cy B B B Mg Mg Mg R DATA DOWN If the matrix color correction is OFF correction color cannot be selected 6 3 Changing HUE and GAIN of selected color 1 Move the v TO THE DESIRED ITEM BY PUSHING THE 5 50 5 7 BUTTONS 2 3ELECT THE DESIRED VALUE OF COLOR BY...

Page 29: ...g the detailed signal output 1 5SE THE 5 50 AND 5 7 BUTTONS TO ALIGN THE h v WITH 4 54 2 3ELECT OR WITH THE 4 50 AND 4 7 BUTTONS 7 3 Changing the type of DVI monitor receiver 1 5SE THE 5 50 AND 5 7 BUTTONS TO ALIGN THE h with MONITOR 2 3ELECT 0 OR 46 WITH THE 4 50 AND 4 7 BUTTONS s 0 When using a monitor for a computer s 46 7HEN USING A 46 MONITOR 7 4 Changing the FREEZE display 1 5SE THE 5 50 AND...

Page 30: ...ed the selected area will be displayed brightly and when OFF is selected it will be dimmed 4 0USH 30 BUTTON TO RETURN TO THE MENU Note OFF can not be selected for all 64 zones because the automatic shutter function and AWB function will not PERFORM CORRECTLY h 2 4 6 v DISPLAYS 9 Returning to factory settings The contents set of each scene file can be returned to the factory default status preset st...

Page 31: ...tion The shutter speed can be set by the horizontal scanning period 1H 1 Setting by 1H 1 218H to 217 218H lets you set a shutter speed to any fraction of the horizontal scanning period from 1 218H to 217 218H in increments of 1 ...

Page 32: ...Y s S THE SHUTTER MODE SET CORRECTLY s S THE MONITOR ON AND IN WORKING CONDITION s S THE IMAGE SIGNAL OUTPUT MODE SET CORRECTLY Poor color s S THE MONITOR ADJUSTED CORRECTLY s S THE WHITE BALANCE OF THE CAMERA ADJUSTED CORRECTLY s RE THE MATRIX COLOR CORRECTION AND CHROMA GAIN SET CORRECTLY s S THE ILLUMINATION SUFlCIENT Noise appears s S THE CONNECTOR ON THE CABLE TO THE CAMERA SCREWED ON SECUREL...

Page 33: ...STANDARD Sensitivity F6 3 standard 2000 lx 3000K Minimum illumination 100 lx F4 GAIN 18dB GAMMA OFF 3000K Ambient temperature 0 C to 40 C 32 F to 104 F Ambient humidity ESS THAN NON CONDENSING Weight Approx 600 g 1 32 lbs External dimension 110 W 40 H MM v 7 1 57 H v excluding protrusions Scene file user memories White balance AWB Automatic white balance MANUAL Gain AUTO Automatic gain control MANU...

Page 34: ... 10 EXTERNAL APPEARANCE DIAGRAM 5NIT MM INCH FREEZE DC IN 12V REMOTE DVI D ON OFF USB KEY LOCK 6 0 24 186 7 32 110 4 33 62 0 1 2 44 0 004 4 M3 BD Front Rear 40 1 57 44 6 1 76 27 1 06 139 0 15 5 472 0 006 ...

Page 35: ...ed This manual is made from recycled paper IF THIS PRODUCT IS NOT IN GOOD WORKING ORDER AS WARRANTED ABOVE YOUR SOLE AND EXCLUSIVE REMEDY SHALL BE THE REPAIR OR REPLACEMENT OF THE PRODUCT IN NO EVENT WILL ISD OR ITS PARENT COMPANY OR ANY ASP BE LIABLE TO YOU OR ANY THIRD PARTY FOR ANY DAMAGES IN EXCESS OF THE PURCHASE PRICE OF THE PRODUCT THIS LIMITATION APPLIES TO DAMAGES OF ANY KIND INCLUDING AN...

Page 36: ......

Reviews: