background image


Summary of Contents for HCV-1JBU

Page 1: ...Document VF010H07A Rev 1 INSTRUCTION MANUAL INSTALLATION OPERATION MAINTENANCE HCV 1JBU Vacuum Contactor 1 5kV 600A HCV 1KAU Vacuum Contactor 1 5kV 720A Issued 4 20 Manufactured in the USA ...

Page 2: ......

Page 3: ...oshiba address all correspondence to Field Service Department Toshiba International Corporation 13131 West Little York Road Houston Texas 77041 USA or call 713 466 0277 800 231 1412 800 527 1204 Canada Fax 713 466 8773 Please complete the following information for your records and retain with this manual Model ___________________________________ Serial Number _____________________________ Date of ...

Page 4: ......

Page 5: ...sly injured or killed if you do not follow instructions Severe property damage might also occur Means that you might be injured if you do not follow instructions Equipment damage might also occur NOTE Gives you helpful information Note The contents of this manual will not become apart of or modify the warranty policy The terms of which are set forth at the end of this manual READ SAFETY SIGNS To a...

Page 6: ...e with established safety practices 4 Be trained and authorized to perform the service maintenance or repair of this equipment 5 Be trained in the proper care and use of protective equipment such as rubber gloves hard hat safety glasses face shield flash clothing etc in accordance with established practices 6 Be trained in rendering first aid SAFETY CODES Toshiba HCV 1JBU and HCV 1KAU vacuum conta...

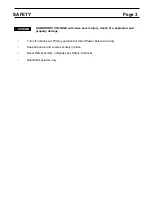
Page 7: ... injury death fire explosion and property damage Turn off and lock out Primary and Control Circuit Power before servicing Keep all panels and covers securely in place Never Defeat Modify or Bypass any Safety Interlocks Qualified Operators only DANGER ...

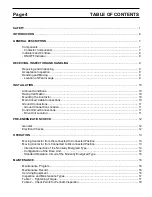
Page 8: ...s 11 Ground Connection Location 11 Control Circuit Connections 11 Drive Unit Location 11 PRE ENERGIZATION CHECK 12 General 12 Electrical Checks 12 OPERATION 13 Moving Contactor from Disconnected to Connected Position 13 Moving Contactor from Connected to Disconnected Position 13 Internal Connection of the Normally Energized Type 14 Configuration of the Drive Unit 14 Standard Operation Circuit of t...

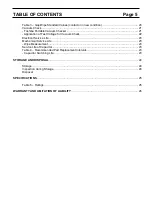
Page 9: ... Voltage for Vacuum Check 22 Electrical Service Life 23 Mechanical Service Life 23 Wipe Measurement 23 Service Life of Capacitor 23 Table 4 Recommended Part Replacement Intervals 23 Capacitor Switching Life 23 STORAGE AND DISPOSAL 24 Storage 24 Inspection during Storage 24 Disposal SPECIFICATIONS 25 Table 5 Ratings 25 WARRANTY AND LIMITATION OF LIABILITY 26 ...

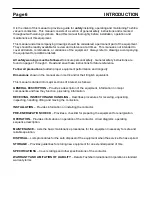
Page 10: ...nsions shown in the manual are in metric and or their English equivalent This manual is divided into major sections of interest as follows GENERAL DESCRIPTION Provides a description of the equipment information on major components and how they function plus rating information RECEIVING INSPECTION AND HANDLING Describes procedures for receiving unpacking inspecting handling lifting and moving the c...

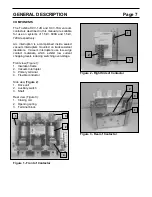
Page 11: ...stant insulators Vacuum interrupters use low surge contact materials which exhibit low current chopping levels reducing switching overvoltage Front view Figure 1 1 Insulation frame 2 Vacuum Interrupter 3 Primary terminal 4 Flexible conductor Side view Figure 2 1 Drive unit 2 Auxiliary switch 3 Shaft Rear view Figure 3 1 Closing coil 2 Opening spring 3 Terminal block Figure 1 Front of Contactor Fig...

Page 12: ...owing indicator is provided On Off Indicator Indicates if the contactor is OFF Green or ON Red When the indicator reads OFF the main contacts of the contactor are open When the indication is ON the main contacts are closed See Figure 4 Figure 4 ON OFF Indicator ...

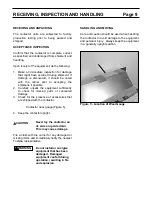
Page 13: ...iciently to check for missing parts or concealed damage 3 Check for the presence of accessories that are shipped with the contactor Contactor wear gauge Figure 5 4 Keep the contactor upright Never lay the contactor on its side or upside down This may cause damage File a claim with the carrier for any damaged or missing items and immediately notify the nearest Toshiba representative Do not install ...

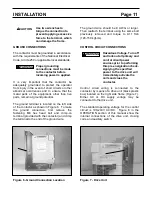
Page 14: ...ion MOUNTING THE CONTACTOR The contactor is designed to mount to a flat vertical surface If there are any noticeable gaps between the contactor and the mounting surface fill them in using flat washers as spacers Fasten the contactor using four 4 M8 hex head bolts The tightening torque should be 120 150 kgf cm 9 11 ft lb See Table 1 for tightening torque specifications MAIN CIRCUIT CABLE CONNECTION...

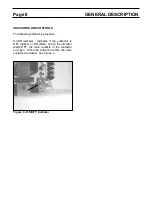
Page 15: ...bolt and crimp on terminal provided with the contactor and crimp the terminal to the end of the ground wire Figure 6 Ground Connection Location The ground wire should be 8 AWG or larger Then reattach the terminal using the same bolt previously removed and torque to 9 11 ft lb 120 150 kgf cm CONTROL CIRCUIT CONNECTIONS Hazardous Voltage Turn off and lock out all primary and control circuit power so...

Page 16: ...pment must be removed Install all panels guards and covers if removed Check for any loose connections and confirm that all wiring is correct per wiring diagrams A supply of spare parts should be established Instruction manuals and diagrams should be collected and filed ELECTRICAL CHECKS Electrical shock hazard Do not touch energized components during a test using auxiliary power An electrical insu...

Page 17: ...t control power to move the contactor to the ON position 2 Verify that the position indicator reads ON Red MOVING THE CONTACTOR FROM THE ON TO THE OFF POSITION TO MOVE THE CONTACTOR TO THE OFF POSITION 1 Turn OFF circuit control power to move the contactor to the OFF position 2 Verify that the position indicator reads OFF Green ...

Page 18: ...TIMER POWER VOLTAGE DETECT A1 A2 OSCILLATION LEGEND 52 CC Closing Coil T1 T4 Terminal Block A1 A2 Closing Supply AC DC LEGEND 52 CC Closing Coil T1 T2 Terminal Block A1 A2 Closing Supply AC DC 16 15 14 13 12 11 26 25 24 23 22 21 52 CC 52 CC Auxiliary Switch Drive Unit A1 A2 Closing Supply AC DC T4 T3 T2 T1 U V W R S T Vacuum Bottles 1 2 5 6 ...

Page 19: ... t I n t e r l o c k L o c a l R e m o t e O N O F F O F F A 2 A 1 C R 1 6 1 5 1 4 1 3 1 2 1 1 2 6 2 5 2 4 2 3 2 2 2 1 V C T T G L 5 2 C C 5 2 C C T 2 T 1 2 E O v e r l o a d O N 1 0 0 1 1 0 V 2 0 0 2 2 0 V A C D C A u x i l i a r y S w i t c h D r i v e U n i t C R C R R L LEGEND 52 CC Closing Coil T1 T2 Terminal Block GL Green Light RL Red Light CR Control Relay A1 A2 Closing Supply AC DC ...

Page 20: ...s to contaminate insulating materials Contaminated insulators can allow a short circuit or ground fault to occur NOTE Refer to the SAFETY section of this manual for important information MAINTENANCE RECORD Keep a permanent record of all maintenance work At a minimum this record should include information on 1 Items inspected 2 Reports of any testing 3 Equipment condition 4 Corrective actions or ad...

Page 21: ...mponents Inspection Frequency Once every 6 months 3 Periodic Inspection Inspection is performed with the contactor de energized The lubrication of sliding and rotating parts is checked and the mechanism is lubricated if needed Inspection Frequency Once every 1 2 years or every 20 000 operations normal NOTE Refer to Table 2 for the schedule of Periodic Inspections 4 Unscheduled Inspection Inspectio...

Page 22: ...pection Check for rust deformation discoloration or damage Wipe with clean dry cloth Lubricate if necessary Smooth operation Visual inspection or touch Check lubrication Make sure moving parts operate smoothly Apply a small amount of lubrication Main Circuit Terminals and movable conductors Visual inspection Tighten using screwdriver or wrench Make sure there is no discoloration or loose fasteners...

Page 23: ...s Drive unit Visual inspection Check for overheating and discoloration Replace if damaged Wiring Visual inspection Tighten using a screwdriver Check for discoloration and tightness Repair if disconnected Tighten if loose See Table 1 for tightening torque specifications Insulation Resistance Measure ment Resistance from main circuit to ground Measure insulation resistance between phases between ele...

Page 24: ... close operation by electric operation test to confirm the correct operation If not normal check and repair If necessary replace faulty parts Table 3 Gap Wipe Standard Values contactor in new condition Parts Gap Wipe Allowable Wear Vacuum Interrupter Normally energized type 0 091 0 098 in 2 3 2 5 mm 0 091 0 102 in 2 3 2 6 mm 0 051 in 1 3 mm Auxiliary Switch a contact 0 157 0 016 in 4 0 4 mm 0 118 ...

Page 25: ...ng this test with recommended voltage and normal contact spacing is extremely low and well below the maximum permitted by standards As an additional safety measure however it is recommended that all personnel keep at least 1 meter 3 3 ft away from the vacuum circuit breaker while this test is performed Radiation exposure hazard X rays may cause illness or injury Stay at least 1 meter 3 3 ft away f...

Page 26: ...illi amperes the interrupter has a sufficient vacuum level After the test is complete discharge any residual static charge from the primary terminals of the circuit breaker If a vacuum checker or AC hi pot tester is not available a DC hi potential test may be conducted If a DC test is conducted the test voltage must be increased to 14kV DC The test duration for DC tests and the criteria for accept...

Page 27: ...ife of the vacuum interrupters is 500 000 operations For the components listed in Table 4 replacement or detailed inspection and cleaning are recommended after the indicated number of operations Figure 13 Wipe Measurement Table 4 Recommended Part Replacement Intervals Part Name Number of Operations for Replacement Vacuum Interrupter 500 000 Auxiliary Switch 200 000 Moveable Core Detailed inspectio...

Page 28: ...TION DURING STORAGE Routine scheduled inspection is necessary if storage is for an extended period The unit should be checked for condensation moisture corrosion and vermin Prior to installation the contactor should be carefully examined for evidence of physical damage corrosion or other deterioration Refer to the PRE ENERGIZATION Section of this manual The MAINTENANCE section of this manual descr...

Page 29: ...imes 7 2 close 100 times Rated Breaking Current kA 4 8 close open 25 times 5 76 close open 25 times Rated Insulation Level kV AC 10 Impulse 45 AC 10 Impulse 30 Rated Short Time Current kA 9 0 1 sec 3 6 30 sec 10 8 1 sec 4 3 30 sec Method of Operation Non latch Mechanical Operation Million 2 5 Electrical Operation Million 0 5 Operational Voltage Standard 100 240V AC DC Auxiliary Switch 3 N O 3 N C ...

Page 30: ...IVE REMEDY OF THE PURCHASER ITS CUSTOMERS AND USERS OF THE EQUIPMENT AND PARTS FOR BREACH OF THE FOREGOING WARRANTY THE COMPANY WILL HAVE NO OBLIGATIONS TO DISASSEMBLE ANY EQUIPMENT OR PART WHICH IS DEFECTIVE WITHIN THE TERMS OF THE ABOVE WARRANTY OR TO INSTALL ANY REPAIRED OR REPLACEMENT PART OR EQUIPMENT OR TO PAY ANY COSTS INCURRED IN CONNECTION WITH ANY SUCH DISASSEMBLY OR INSTALLATION THE COM...

Page 31: ...TOSHIBA TOSHIBA INTERNATIONAL CORPORATION 13131 W Little York Road Houston TX 77041 U S A Tel 713 466 0277Fax 713 466 8773 Printed in U S A ...

Reviews: