Connecting to a Computer
- 59 -
Setup
1
15
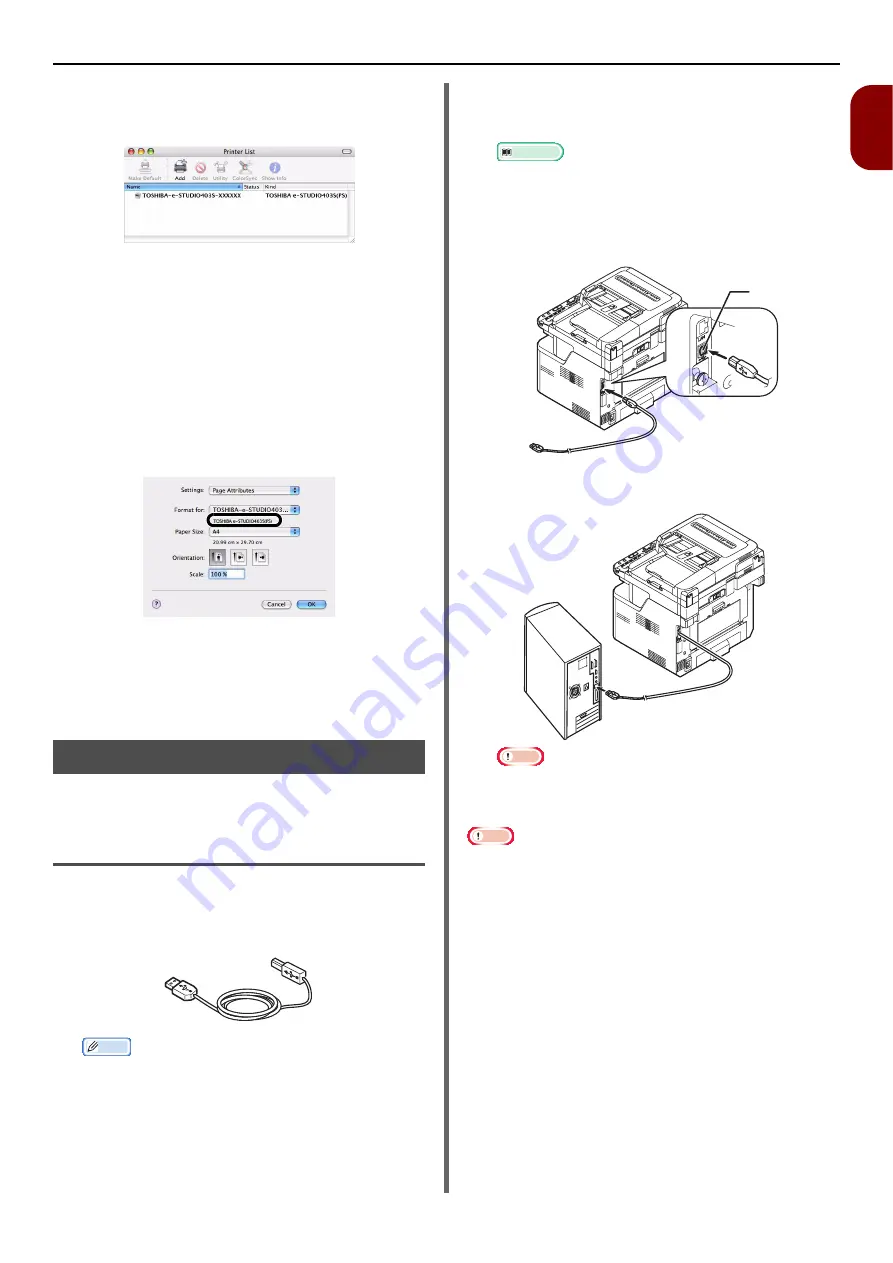
Check that the name of your machine is
displayed in [
Printer List
], and then
close the window.
16
From the [
Go
] menu, select
[
Applications
] > [
TextEdit
].
17
Select the [
File
] menu > [
Page setup
].
18
Select the name of your machine from
[
Format for
].
19
Check that [
TOSHIBA
e-STUDIO403S(PS)
] or [
TOSHIBA
e-STUDIO403S(PCL)
] is displayed
correctly under [
Format for
].
20
Click [
OK
].
21
Remove "Software DVD-ROM" from the
computer.
The installation is complete.
USB Connection
Perform the following procedure to connect your
machine to a computer via USB.
Connecting a USB Cable
1
Prepare a USB cable.
A USB cable is not supplied with your machine.
Prepare an USB 2.0 cable separately.
Memo
z
Use a USB 2.0 Hi-Speed cable for a USB 2.0 Hi-Speed
connection.
2
Hold down the power switch for about a
second to turn on the power and the
computer.
Reference
z
"Turning Off Your Machine" P. 24
3
Plug one end of the USB cable into the
USB interface connector on the back of
the machine.
4
Plug the other end of the USB cable into
the computer's USB interface connector.
Note
z
For Windows OSs, do not plug the other end of the
USB cable into the computer until prompted during
driver installation.
Note
z
Do not plug the USB cable into the network interface
connection. Doing so may damage your machine.
2


