


3 PRINT FUNCTIONS
90 Setting up Print Options
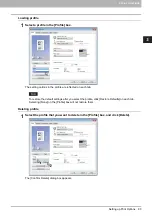
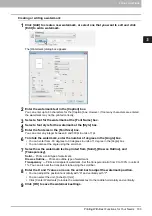
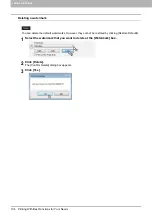
4) Use Custom Margin
Enables you to set the custom margins. You usually set margins in your application. If you cannot set them
in the application, use this option. Select the check box and click [Details] to open the dialog box. Select
[Units], set the right, left, top, and bottom margins, and then click [OK] to enable them.
-
Margin
— Enter the value from 4.2 to 100 mm/ 0.17 to 3.94 inches.
-
Units
— Select the unit, [inch] or [mm], for values.
-
Restore Defaults
— Restores the margins to the default settings.
If the application has the function to set margins, be sure to set them in the application.
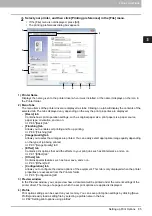
[Image Quality] tab
The [Image Quality] tab allows you to select how images are printed.
1) Smoothing
Prints texts and graphics smoothly.
2) Distinguish Thin Lines
Select this check box to print thin lines clearly.
3) Use Black for All Text
Prints all texts in 100% black except white texts.
1
2
3
Summary of Contents for e-STUDIO2303AM
Page 1: ...MULTIFUNCTIONAL DIGITAL SYSTEMS User s Guide ...
Page 6: ......
Page 10: ...8 CONTENTS ...
Page 34: ......
Page 72: ......
Page 138: ......
Page 160: ......
Page 179: ...7 MAINTENANCE AND INSPECTION Regular Cleaning 178 Cleaning Charger 179 ...
Page 182: ......
Page 192: ...190 INDEX ...
Page 193: ...e STUDIO2303AM 2803AM ...


