background image

21

Getting Started

Turning the camcorder on and getting started 

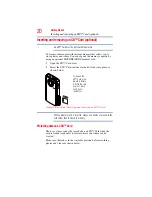
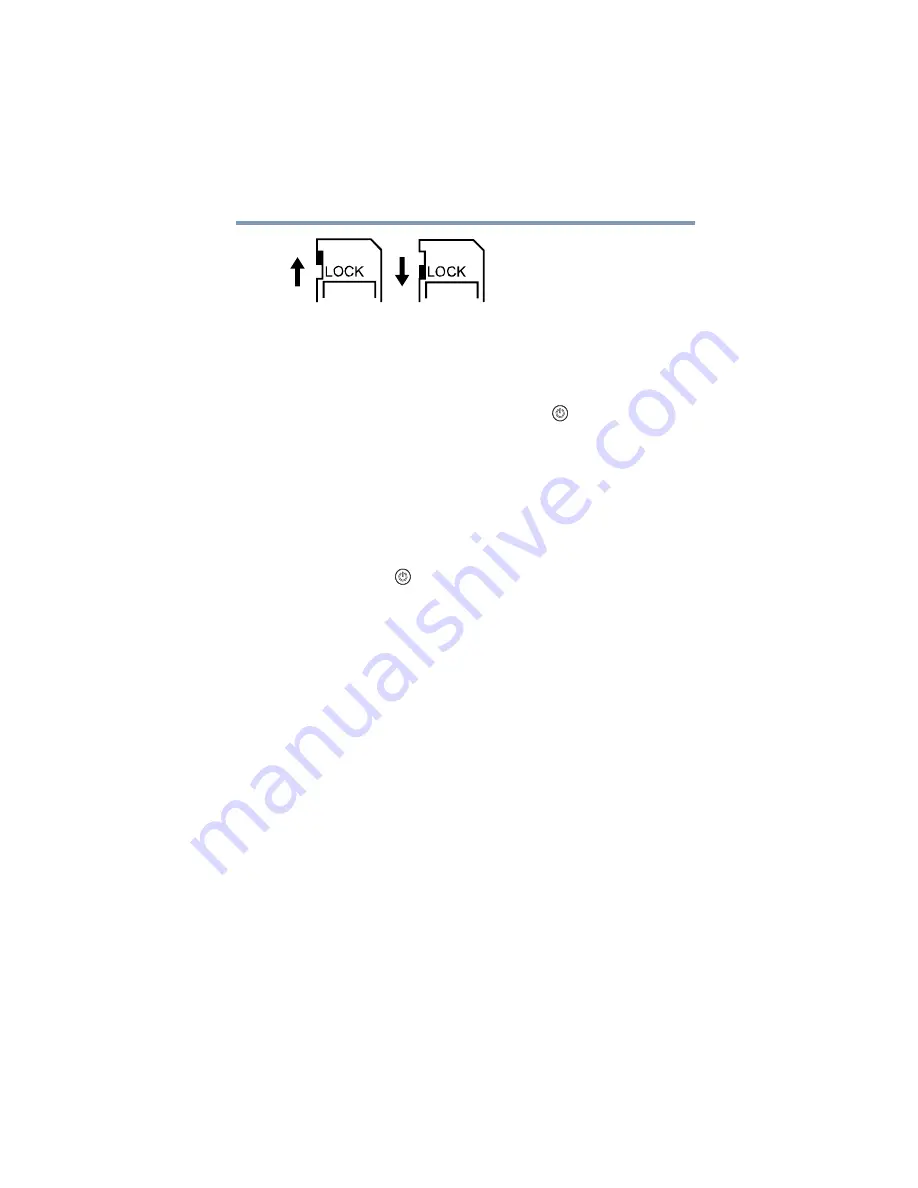
(Sample Illustration) Protecting data on an SD™ Card

Turning the camcorder on and getting started 

To turn on the camcorder, press the Power (

) button for 

approximately one second to turn it on. 

To record videos:

 In Record mode, press the Video button. Press it 

again to stop recording.

To take a photo:

 In Record mode, press the Photo button.

To view recorded videos/photos:

 Press the Playback button.

Turning off the camcorder

Press the Power (

) button for approximately one second to turn 

the camcorder off. 

Write-protected

Writeable

position

position

Summary of Contents for B10

Page 1: ...GMAA00308012 05 11 English Español CAMILEO B10 User sManual ...

Page 2: ...ommunications However there is no guarantee that interference will not occur in a particular installation If this equipmentdoescause harmful interference to radioortelevision reception which can be determined by turning the equipment off and on the user is encouraged to try to correct the interference by one or more of the following measures Reorient or relocate the receiving antenna Increase the ...

Page 3: ...ater and dry hands before using 3 Do not expose the camcorder to high temperature or leave it in direct sunlight Doing so may damage the camcorder 4 Use the camcorder with care Avoid pressing hard on the camcorder body 5 For your own safety avoid using the camcorder when there is a storm or lightning 6 Do not use batteries of different specifications Doing so may lead to the potential for serious ...

Page 4: ...B cable or AC adaptor AC adaptor sold separately or an optional Toshiba battery charger to charge the battery Never attempt to charge the battery with any other charger Safety icons This manual contains safety instructions that must be observed to avoid potential hazards that could result in personal injuries damage to your equipment or loss of data These safety cautions have been classified accor...

Page 5: ...k is a registered trademark of Facebook Inc HDMI the HDMI Logo and High Definition Multimedia Interface are trademarks or registered trademarks of HDMI Licensing LLC Intel Intel Core Celeron Centrino and Pentium are trademarks or registered trademarks of Intel Corporation or its subsidiaries in the United States and other countries Mac is a trademark of Apple Inc registered in the U S and other co...

Page 6: ...r view 13 Underside view 13 Chapter 2 Getting Started 14 Loading the battery 14 Charging the battery 15 Inserting and removing an SD Card optional 20 Protecting data on an SD Card 20 Turning the camcorder on and getting started 21 Turning off the camcorder 21 Chapter 3 Record Mode 22 Button functions 22 LCD screen information 23 Notification icons 24 ...

Page 7: ...D screen information 44 Notification icons 45 Playback mode operations 46 Video Playback 47 Photo Playback 47 Delete a file in Playback mode 48 Chapter 5 Camcorder Settings 49 Setup menu 49 Menu Sound 50 TV 50 Language 51 Time settings 51 Format 52 Default setting 53 Chapter 6 Viewing Photos and Videos on TV 54 Connecting to a high definition 16 9 wide TV 54 Installing bundled software 55 Chapter ...

Page 8: ... account information for a Web site 60 Webcam mode 61 ArcSoft MediaImpression 62 Chapter 9 Specifications 65 Operating Environment Conditions 66 Chapter 10 Troubleshooting 67 Chapter 11 Other Information 69 Toshiba Support 69 Before you call 69 Contacting Toshiba 70 Toshiba s technical support Web site 70 Toshiba voice contact 70 Warranty 71 Online Warranty Information 71 Warranty Service 71 ...

Page 9: ...n for easy viewing of photos and videos Video recording at full HD resolution of 1920 x1080p HDTV connectivity via an HDMI cable HDMI cable sold separately Easy playback of recorded high definition videos on wide screen HDTV Built in CAMILEO Uploader allowing you to easily upload videos captured by the camcorder to the Internet for Windows based systems only ISO and white balance can be set to aut...

Page 10: ...ng users to increase storage capacity Check the Components Unpack the box and make sure all listed items below are included Sample Illustration Components Preinstalled in the camcorder Be sure to remove the protective film on the lens before using NOTE MENU OK CAMILEO B10 Camcorder USB cable Quick Start Guide CD ROM Software User s Manual this Manual Cleaning cloth Hand Lithium ion Rechargeable ba...

Page 11: ... port Mac compatibility Mac OS 10 5 or above CPU Intel Pentium 2 Duo 2 4 GHz or above 1 GB system memory 1 GB free HDD space DVD ROM Available USB 2 0 port The LCD screen is manufactured using extremely high precision technology However some tiny black and or bright dots white red blue or green may appear on the LCD screen These dots are a normal result of the manufacturing process and do not affe...

Page 12: ...e button In Record mode Zoom out In Playback mode Go to the delete screen When playing a video press to decrease volume Move between option items During playback Go to previous video photo In Record mode Zoom in Zoom in Up Thumbnail In Playback mode Go to the video photo thumbnail button screen When playing a video press to increase volume Move between option items Right button In Playback mode Go...

Page 13: ...tion Underside view Power button Light button Press to toggle ON OFF Internet upload button In Playback mode press to Light Microphone Multi indicator Battery cover Speaker SD Card cover select the current file to tag for Lens upload connected to your computer press to launch the CAMILEO Uploader for When the camera is Digital light Windows based systems only Strap hook Tripod socket Mini HDMI por...

Page 14: ...rotective film on the battery before use To properly connect the battery 1 Slide the battery cover up and remove 2 Remove the battery 3 Pull the protective film off Sample Illustration Removing the protective film 4 Reinsert the battery making sure it is lined up with the correct polarity marks Protective film Li ion battery ...

Page 15: ...e your camcorder before use Turn off the camcorder A blinking light indicates active charging and a solid light indicates that charging is complete In AC charging mode the light will turn off automatically after 5 minutes It may take up to 8 hours to charge the battery via USB and up to 4 5 hours via AC adaptor Actual time may vary Sample Illustration Charging the battery Li ion battery Polarity m...

Page 16: ...never transporting it to avoid exposing the terminals to another conductive object which could result in serious injury Always cover the metal terminals with insulating tape when disposing of the battery to prevent accidental short circuiting which could result in serious injury Never drive a nail or any other sharp object into the battery hit battery with a hammer or other object or step on it Do...

Page 17: ...ect battery Always use the battery supplied Other batteries have different voltage and terminal polarities Use of non conforming batteries could generate smoke or cause fire or rupture possibly resulting in serious injury Battery safety Never allow caustic electrolyte fluid leaked from the battery to contact your eyes body or clothing Use appropriate protective gloves when handling a damaged batte...

Page 18: ...ble minor injury due to heat exposure Do not turn on the product s power again until an authorized Toshiba service provider has checked it for safety Continued use could cause a fire or rupture possibly resulting in serious injury or product failure including but not limited to the loss of data Disposal of used batteries Always dispose of used batteries in compliance with all applicable laws and r...

Page 19: ...first turning off the power and disconnecting the AC adaptor AC adaptor sold separately Inserting the battery When installing a battery or before moving the product always make sure the battery is inserted correctly and securely If the battery falls out while you are carrying the product you could be injured or the battery could be damaged Do not use an impaired or exhausted battery Never continue...

Page 20: ...lot until it locks into place as shown below Sample Illustration Inserting and removing an SD Card When a memory card is inserted videos and photos are saved to the card rather than the built in memory Protecting data on an SD Card Photos or videos cannot be recorded on an SD Card when the card is locked read only however photos and videos can be viewed Make sure the lock is in the writeable posit...

Page 21: ...er button for approximately one second to turn it on To record videos In Record mode press the Video button Press it again to stop recording To take a photo In Record mode press the Photo button To view recorded videos photos Press the Playback button Turning off the camcorder Press the Power button for approximately one second to turn the camcorder off Write protected Writeable position position ...

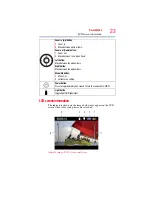
Page 22: ... functions Video button 1 Press to begin recording 2 Press it again to stop recording Photo button Press to take a photo Playback button Switch between Record Playback mode Return Exit button 1 Return to the previous screen 2 Exit ...

Page 23: ...icators Zoom in Up button 1 Zoom in 2 Move between option items Zoom out Down button 1 Zoom out 2 Move between the option items Left button Move between the option items Right button Move between the option items Menu OK button 1 Menu ON 2 Validate the setting Power button Press for approximately one second to turn the camcorder ON OFF Light button Toggle light ON Digital Light 4 3 2 1 5 7 6 ...

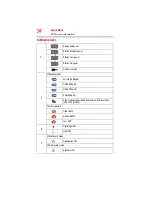
Page 24: ...Battery No power DC power mode 2 Video Resolution Full HD 1080p 30 HD60 720p 60 HD30 720p 30 VGA 430p 30 Slow motion videos will be recorded in QVGA resolution 320 x 240 QVGA Photo resolution High 16MP Standard 5MP Low 3MP 3 Digital light ON Light ON 4 Video Record mode Stabilization ON Photo Record mode Self timer ON ...

Page 25: ...ecorded Press the Video button again to stop recording Press the Playback button to view a recorded video The resolution settings available are 5 Recording time Pause Recording The remaining amount of photos that can be taken at the current resolution settings Current number of photos taken 6 Motion Detection Video Record mode only 7 Zoom meter 1x 16x 16x Digital zoom Video Quality Full HD 1080 30...

Page 26: ... Light button The Digital Light icon appears on the screen 2 Press the Light button again The Light icon appears on the screen The light turns providing illumination while recording 3 Press the Video Photo button to start recording or to take a photo 4 Press the Light button again to turn it off The light is disabled automatically when battery power is low Using Digital zoom To zoom in out press t...

Page 27: ...ge Time Setting Format Default Setting Delete Video Delete Photo Select and Delete Delete All Operation Screen 1 In Record mode Press the MENU OK button The Menu screen appears The options available are Video Setting Photo Setting Effects Setup and Delete 2 Use the Directional buttons to select the desired option and then press the OK button to enter the settings menu 3 Use the Directional buttons...

Page 28: ...ptions are Light Resolution Stabilization Motion Detect Slow Motion Pre Record Time Lapse and Continuous Play ON Turns the light ON providing illumination when recording OFF Turns the light OFF Digital Light Extendsthedynamic rangeofhighcontrastandbacklight so objects appear brighter and clearer Operation Screen 1 In the Video Setting menu select the Light icon and then press the OK button to ente...

Page 29: ...creen 1 In the Video Setting menu select the Resolution icon and then press the OK button to enter the settings menu 2 Use the Directional buttons to select the desired option 3 Press the OK button to validate the new setting 4 Select the Return Exit icon and then press the OK button or press the Return Exit button to exit Operation Screen 1 In the Video Setting menu select the Stabilization icon ...

Page 30: ...K button to enter the settings menu 2 Use the Directional buttons to select the desired option 3 Press the OK button to validate the new setting 4 Select the Return Exit icon and then press the OK button or press the Return Exit button to exit The camcorder will begin recording automatically if movement is detected It stops recording when movement stops Operation Screen 1 In the Video Setting menu...

Page 31: ...layed back as one video file The Time Lapse settings available are Operation Screen 1 In the Video Setting menu select the Pre Record icon and then press the OK button to enter the settings menu 2 Use the Directional buttons to select the desired option 3 Press the OK button to validate the new setting 4 Select the Return Exit icon and then press the OK button or press the Return Exit button to ex...

Page 32: ...n Screen 1 In the Video Setting menu select the Continuous Play icon and then press the OK button to enter the settings menu 2 Use the Directional buttons to select the desired option 3 Press the OK button to validate the new setting 4 Select the Return Exit icon and then press the OK button or press the Return Exit button to exit Operation Screen 1 In Record mode press the MENU OK button The Menu...

Page 33: ...eofhighcontrastandbacklight so objects appear brighter and clearer Operation Screen 1 In the Photo Setting menu select the Light icon and then press the OK button to enter the settings menu 2 Use the Directional buttons to select the desired option 3 Press the OK button to validate the new setting 4 Select the Return Exit icon and then press the OK button or press the Return Exit button to exit Hi...

Page 34: ...on to enter the settings menu 2 Use the Directional buttons to select the desired option 3 Press the OK button to validate the new setting 4 Select the Return Exit icon and then press the OK button or press the Return Exit button to exit Operation Screen 1 In the Photo Setting menu select the Self Timer icon and then press the OK button to enter the settings menu 2 Use the Directional buttons to s...

Page 35: ...tional buttons to select the desired option 3 Press the OK button to validate the new setting 4 Select the Return Exit icon and then press the OK or press the Return Exit button to exit In Photo mode when the camcorder is aimed at face s the face frame s appear on the screen Operation Screen 1 In the Photo Setting menu select the Date Printing icon and then press the OK button to enter the setting...

Page 36: ... higher ISO setting When this function is activated the date appears on the corner of each photo Auto Sets the ISO setting automatically according to conditions 800 ISO 800 1600 ISO 1600 Operation Screen 1 In the Photo Setting menu select the ISO icon and then press the OK button to enter the settings menu 2 Use the Directional buttons to select the desired option 3 Press the OK button to validate...

Page 37: ... one photo every five seconds 10 seconds Displays one photo every ten seconds OFF Disables Slideshow Operation Screen 1 In the Photo Setting menu select the Slideshow icon and then press the OK button to enter the settings menu 2 Use the Directional buttons to select the desired option 3 Press the OK button to validate the new setting 4 Select the Return Exit icon and then press the OK button or p...

Page 38: ...the settings menu The Effects menu appears 3 The Effects menu options are Scene Filter and White Balance Auto Automatically adjusts to current conditions Skin Adjusts skin tones to appear more natural Night Use in low light conditions or at night Backlight Use when the subject is brightly lit from behind Operation Screen 1 In the Effects Setting menu select the Scene icon and then press the OK but...

Page 39: ...ite The image is converted to black and white Classic The image is converted to sepia Negative The image is converted to a negative of the original Operation Screen 1 In the Effects Setting menu select the Filter icon and then press the OK button to enter the settings menu 2 Use the Directional buttons to select the desired option 3 Press the OK button to validate the new setting 4 Select the Retu...

Page 40: ...elect the White Balance icon and then press the OK button to enter the settings menu 2 Use the Directional buttons to select the desired option 3 Press the OK button to validate the new setting 4 Select the Return Exit icon and then press the OK button or press the Return Exit button to exit Operation Screen 1 In Record mode Press the MENU OK button The Menu screen appears 2 Use the Directional bu...

Page 41: ... button to delete the selected video s 4 Select the Return Exit icon and then press the OK button or press the Return Exit button to exit Operation Screen 1 In the Delete menu select the DELETE PHOTO icon and then press the OK button to enter the settings menu 2 Use the Directional buttons and press the OK button to select the desired thumbnail photo s Check mark s will indicate the selected file ...

Page 42: ...s the OK button to delete the selected photo s and video s 4 Select the Return Exit icon and then press the OK button or press the Return Exit button to exit Yes Delete all videos and photos in the built in memory when no SD Card is installed or delete all videos and photos on the installed SD Card No Do not delete all videos and photos in the built in memory when no SD Card is installed or do not...

Page 43: ...ve the following functions in Playback mode Video button Press to switch to Video Playback mode Photo Button Press to switch to Photo Playback mode Playback button Switch between Record Playback mode Return Exit button 1 Return to the previous screen 2 Exit ...

Page 44: ...e during video playback Zoom out Down button 1 View the Delete screen 2 Press to decrease volume during video playback Left button View the previous video photo Right button View the next video photo Menu OK button Press to play pause a video Internet upload button In Playback mode press to tag the current video photo to upload to the Internet for Windows based systems only Onscreen notification i...

Page 45: ...GA 430p 30 Slow motion videos will be recorded in QVGA resolution 320 x 240 QVGA Photo resolution High 16MP Standard 5MP Low 3MP 3 The current video or photo file is selected to upload to the Internet 4 Playback time counter Current number of photos taken The remaining amount of photos that can be taken at the current resolution settings 5 Volume control 6 Current number Total number of videos 00 ...

Page 46: ...os in the built in memory or on an SD Card use the Playback mode Operation Screen 1 In Video Photo Record mode press the Playback button to switch to Video Photo Playback mode 2 Press the Zoom in Up button to view the video photo thumbnail screen 3 Select the video photo file and then press the OK button ...

Page 47: ... rewind 4 Press the OK button to stop 5 Use the Zoom in Up Zoom out Down buttons to adjust the volume 6 Press the Internet upload button to select and tag the current video to upload to Internet for Windows based systems only Operation Screen 1 In the Photo Playback mode use the Right Left buttons to view the next previous photo 2 Press the OK button to pause the slideshow 3 Press the Internet upl...

Page 48: ...w the delete screen 2 Select the icon and then press the OK button Select the icon and then press the OK button to delete the current video photo Select the icon and then press the OK button Select the icon and then press the OK button to delete the current video photo 3 Select the icon and then press the OK button Select the icon and then press the OK button to delete the current video photo 4 Se...

Page 49: ... the MENU OK button The Menu screen appears 2 Use the Directional buttons to select the Setup icon and then press the OK button to enter the settings menu 3 The Setup Menu options are Menu Sound operation sound TV Language Time Setting Format and Default Setting scroll down to view ...

Page 50: ... select the desired option 3 Press the OK button to validate the new setting 4 Select the Return Exit icon and then press the OK button or press the Return Exit button to exit NTSC 60Hz USA Canada Japan South Korea Taiwan etc PAL 50Hz UK Europe China Australia Singapore Hong Kong etc Operation Screen 1 In the Setup menu select the TV icon and then press the OK button to enter the settings menu 2 U...

Page 51: ...e new setting 4 Select the Return Exit icon and then press the OK button or press the Return Exit button to exit Operation Screen 1 In the Setup menu select the Time Setting icon and then press the OK button to enter the settings menu 2 Use the Right Left buttons to select the Year Month Day Hour or Minute 3 Use the Up Down buttons to adjust the numeric value 4 Select the icon and then press the O...

Page 52: ...lled or delete all videos and photos on the installed SD Card No Do not delete all videos and photos in the built in memory when no SD Card is installed or do not delete all videos and photos on the installed SD Card Operation Screen 1 In the Setup menu select the Format icon and then press the OK button to enter the settings menu 2 Use the Directional buttons to select the desired option 3 Press ...

Page 53: ...ter the settings menu 2 Choosing Yes performs the operation and No cancels the operation 3 Select the Return Exit icon and then press the OK button or press the Return Exit button to exit Setting Default Factory Setting Resolution Video Full HD 1080 30 Photo Standard 5M Light OFF Stabilization ON Motion Detection OFF Slow Motion OFF Pre Record OFF Time Lapse OFF Continuous Play OFF Self Timer OFF ...

Page 54: ...o view images or videos from your camcorder on a TV 1 Connect the HDMI cable HDMI cable sold separately to your camcorder s HDMI Out port 2 Connect the other end of the cable to a television 3 Set the video input source of your TV to HDMI Sample Image Connecting a high definition TV 16 9 ...

Page 55: ... accessible while the camcorder is connected to a TV or an HDTV Installing bundled software The CD ROM supplied with your camcorder contains two software applications To install the bundled software 1 Insert the CD ROM into your computer s optical disc drive The autorun screen appears 2 Click Install Application Software Follow the onscreen instructions to complete the installation Detailed inform...

Page 56: ...e computer and camcorder with the supplied mini USB 2 0 cable The multi indicator light blinks 2 To access photos and videos on your SD Card Videos and photos can be found on your computer at My Computer SD DCIM 100MEDIA path will vary depending on name of SD Card 3 To access photos and videos in the camcorder s internal memory Videos and photos can be found on your computer at My Computer DV DCIM...

Page 57: ...n these Web sites The bundled software ArcSoft MediaImpression can also be used to upload video clips to these Web sites You must have Internet access to upload videos to a Web site CAMILEO Uploader for Windows based systems only CAMILEO Uploader To upload files to the Internet 1 Select files in Video Photo Playback mode by pressing the Internet upload button The selected files appear in blue fram...

Page 58: ...EO Uploader application automatically for Windows based systems only It may be necessary to first install ArcSoft MediaImpression onto your computer to view videos photos in the CAMILEO Uploader If ArcSoft MediaImpression is not installed you may be asked to install the H 264 Codec ffdshow a free software under GPL license to view videos in the CAMILEO Uploader correctly 4 Choose the Web site you ...

Page 59: ...efore uploading Click CANCEL to stop uploading Sample Image CAMILEO Uploader screen Cancel To upload video photo files selected manually to a Web site 1 Follow steps 2 and 3 in CAMILEO Uploader on page 57 2 Choose the Web site you wish to upload to 3 Click on the Videos or Photos tab to view the Videos Photos thumbnail page using the scroll bar to change pages On the Video thumbnail page click the...

Page 60: ...your Facebook account by email after registering it If the privacy setting of your Facebook account is set to the highest security level you may have limited access to the CAMILEO Uploader 1 Choose the Web site 2 Click the Settings tab to view the setup screen 3 Fill in your account information and then click OK Save 4 To save your account information and avoid re entering your login information c...

Page 61: ...order to your computer using the supplied USB 2 0 cable Press the Playback button to switch to the Webcam mode The indicator light glows blue In this mode you can implement live video conference meetings and multimedia communications Sample Illustration Connecting the camcorder to a computer ...

Page 62: ... ArcSoft MediaImpression 2 Click Start All Programs and then ArcSoft MediaImpression The ArcSoft MediaImpression main screen appears on your desktop 3 Click Videos Sample Image ArcSoft MediaImpression main screen 4 The operation screen appears Select the folder that contains the video files you want to upload Select the files in the display area ...

Page 63: ...s to the Internet ArcSoft MediaImpression Click Upload to the Internet on the bottom menu Sample Image Selecting files 5 Fill in your site account information in the blanks and then click Login Sample Image Entering account information ...

Page 64: ...64 Uploading Video and Photo files to the Internet ArcSoft MediaImpression 6 Fill in the information on the video clips and then click Upload Sample Image Uploading to the Internet ...

Page 65: ...er Electronic LCD screen 2 in 5 08cm LCD screen Storage media Built in 128MB memory partial memory is used for firmware code SD SDHC SDXC card slot support up to 64GB Image resolution High 4608 x 3456 16M pixels Interpolated Standard 2592 x 1944 5M pixels Low 2048 x 1536 3M pixels Video resolution Full HD 1080 30 1920 x 1080 30fps HD 720 60 1280 x 720 60fps HD 720 30 1280 x 720 30fps VGA 480 30 64...

Page 66: ... condensation allowed ISO Auto 800 1600 Self timer 10 second delay Light Light ON Light OFF Digital Light ON File format Photo JPG Video MP4 H 264 Image play Single image Slideshow PC interface Mini USB 2 0 port TV out Mini HDMI Battery Lithium ion rechargeable battery Dimensions 2 2 W x 4 3 H x 0 7 in D 56 W x 108 H x 18mm D Weight 2 9 oz 83g without battery ...

Page 67: ...hotos look blurry and dark The camcorder extends photo exposure time under low light indoor conditions Keep the camcorder and the target subject steady for several seconds when taking photos The shutter sounds when a photo is taken 3 How do I charge the battery You must use the supplied USB cable or AC adaptor AC adaptor sold separately The camcorder must be turned OFF A blinking light confirms th...

Page 68: ...Removable Disk indicates the external memory SD SDHC SDXC card installed in the camcorder path will vary depending on name of SD Card DVAP indicates the built in CAMILEO Uploader application for Windows based systems only Do not format the disk or delete the application The CAMILEO Uploader application may not function ...

Page 69: ...stigate other sources of assistance first Try the following before contacting Toshiba Review the documentation supplied with your product If a problem occurs when you are running software applications consult the software documentation for troubleshooting suggestions Contact the software company s technical support department for assistance Consult the reseller or dealer from whom you purchased yo...

Page 70: ...ed States at 888 592 0944 Outside the United States at 949 583 3305 Toshiba Phone Service Center for Latin America Specialized technical service in Spanish Hours Phone charges apply Monday through Friday from 8 00 a m to 9 00 p m EST Argentina 0 800 666 3701 Chile 800 64 6526 Costa Rica 0 800 011 1123 El Salvador 800 6601 Honduras 949 587 6836 Panama 00 8000 44 7813 Peru 0 800 5 3817 Uruguay 000 4...

Page 71: ...toshiba com accessories1yr Warranty Service Customers located in the fifty 50 United States and District of Columbia may obtain warranty service by visiting the Toshiba Acclaim Web site at www acclaim toshiba com or by contacting the telephone support center at 1 888 592 0944 Customers located outside the fifty 50 United States and District of Columbia may obtain warranty service by contacting the...

Page 72: ......

Page 73: ...CAMILEO B10 Manualdelusuario ...

Page 74: ...rá interferencias en una instalación en particular Si este equipo provoca interferencias perjudiciales en la recepción de radio o televisión lo que se puede determinar apagando y encendiendo el equipo recomendamos al usuario que intente corregir la interferencia adoptando una o varias de las medidas siguientes Cambiar la orientación o la ubicación de la antena receptora Aumentar la distancia entre...

Page 75: ...se la videocámara con cuidado No presione el cuerpo de la videocámara con fuerza 5 Para su seguridad personal no utilice la videocámara durante una tormenta ni cuando relampaguea 6 No utilice baterías de especificaciones diferentes ya que se podrían causar daños graves 7 Extraiga la batería cuando no esté utilizando la videocámara durante un período prolongado ya que una batería deteriorada puede ...

Page 76: ...ional Nunca trate de cargar la batería con cualquier otro tipo de cargador Íconos de seguridad Este manual contiene instrucciones de seguridad que deben seguirse a fin de evitar posibles peligros que podrían tener como consecuencia lesiones personales daños al equipo o pérdida de datos Son advertencias de seguridad que están clasificadas de acuerdo con la gravedad del peligro y están representadas...

Page 77: ...arca registrada de Facebook Inc HDMI el logotipo de HDMI y High Definition Multimedia Interface son marcas comerciales o marcas registradas de HDMI Licensing LLC Intel Intel Core Celeron Centrino y Pentium son marcas comerciales o marcas registradas de Intel Corporation o de sus subsidiarias en Estados Unidos y otros países Mac es una marca comercial de Apple Inc registrada en Estados Unidos y otr...

Page 78: ...quisitos del sistema 11 Vista frontal 12 Vista posterior 13 Vista inferior 13 Capítulo 2 Para comenzar 14 Inserción de la batería 14 Carga de la batería 15 Inserción y extracción de una tarjeta SD opcional 19 Protección de datos en una tarjeta SD 20 Encender la videocámara y empezar a usarla 21 Cómo apagar la videocámara 21 ...

Page 79: ...ción de Video 28 Opciones de configuración de Fotografía 33 Efectos 38 Eliminación de archivos 40 Capítulo 4 Modo Reproducir 44 Funciones de los botones 44 Información sobre la pantalla de cristales líquidos LCD 45 Íconos de notificación 46 Operaciones del modo Reproducir 47 Reproducción de video 48 Reproducción de fotografía 48 Eliminar un archivo en el modo Reproducir 49 Capítulo 5 Configuracion...

Page 80: ...O Uploader 59 Para cargar archivos de video fotografía manualmente a un sitio web 61 Configuración de la información de cuenta de un sitio web 62 Modo Cámara web 63 ArcSoft MediaImpression 64 Capítulo 9 Especificaciones 67 Condiciones ambientales de funcionamiento 68 Capítulo 10 Solución de problemas 69 Capítulo 11 Información adicional 71 Asistencia técnica de Toshiba 71 Antes de contactar a Tosh...

Page 81: ...Pantalla LCD a color para visualizar video y fotografías con mayor facilidad Grabación de video con resolución de alta definición completa HD de 1920 x1080p Conectividad HDTV a través de un cable HDMI cable HDMI vendido por separado Fácil reproducción de videos grabados en alta definición en un televisor de pantalla ancha de alta definición CAMILEO Uploader integrado que permite transferir fácilme...

Page 82: ...mara Ranura de tarjeta de memoria que permite aumentar la capacidad de almacenamiento Revise los componentes Desempaque la caja y asegúrese de que estén incluidos los artículos enumerados a continuación Ilustración de muestra Componentes Preinstalada en la videocámara Asegúrese de retirar la película protectora del lente antes de usar la videocámara NOTA MENU OK CAMILEO B10 Videocámara Cable USB C...

Page 83: ...d con Mac Mac OS 10 5 o superior CPU Intel Pentium 2 Duo 2 4 GHz o superior 1 GB de memoria del sistema 1 GB de espacio libre en el disco duro DVD ROM Un puerto USB 2 0 disponible La pantalla de cristales líquidos LCD se fabrica utilizando una tecnología de altísima precisión Sin embargo podrían aparecer en la pantalla algunos puntos diminutos negros y o brillantes blancos rojos azules o verdes Es...

Page 84: ... pantalla de eliminación Cuando esté reproduciendo un video presione este botón para disminuir el volumen Moverse entre las distintas Durante la reproducción Ir al video fotografía anterior En el modo Grabar Efectuar Botón para efectuar En el modo Reproducir Ir a la pantalla de imágenes acercamientos Arriba miniaturizadas de video fotografía Cuando esté reproduciendo un Moverse entre las distintas...

Page 85: ...onar para alternar entre luz Botón para cargar a Internet En el modo Reproducir presionar Luz Micrófono Indicador múltiple Cubierta de la Parlante Cubierta de la tarjeta SD para seleccionar y marcar el archivo Lente corriente para cargarlo a Internet a la computadora presione este botón para ejecutar la aplicación CAMILEO Uploader solamente Cuando la cámara está conectada encendida apagada luz dig...

Page 86: ... de usarla Para conectar correctamente la batería 1 Deslice la cubierta de la batería hacia arriba y retírela 2 Saque la batería 3 Quite la película protectora Ilustración de muestra Cómo quitar la película protectora 4 Inserte de nuevo la batería asegurándose de que quede alineada con las marcas de polaridad correctas Película Protectora Batería de iones de litio ...

Page 87: ... del uso Apague la videocámara Una luz intermitente indica que se está cargando la batería y una luz sólida indica que se completó la carga Cuando se utiliza el modo de carga con CA la luz se apaga automáticamente después de 5 minutos El tiempo de carga a través de USB es hasta de 8 horas y a través del adaptador de CA hasta de 4 5 horas El tiempo efectivo puede variar Ilustración de muestra Cómo ...

Page 88: ...oner sus terminales a otro objeto conductor lo cual podría ocasionar lesiones graves Al desechar la batería siempre cubra las terminales metálicas con cinta de aislar para evitar un cortocircuito accidental que podría ocasionar lesiones graves Nunca inserte clavos ni objetos punzocortantes golpee con un martillo ni con algún otro objeto ni pise la batería ya que podría provocar un incendio o explo...

Page 89: ...inistrada con la videocámara Hay otras baterías que tienen distintos voltajes y polaridades en las terminales El uso de baterías no compatibles podría generar humo o provocar un incendio o ruptura que podría ocasionar lesiones graves Seguridad de la batería Si la batería tiene una fuga nunca permita que el fluido electrolítico cáustico entre en contacto con sus ojos cuerpo o ropa Use guantes prote...

Page 90: ...or No vuelva a encender la alimentación del producto hasta que un representante de servicio autorizado de Toshiba haya comprobado que no acarrea ningún riesgo Si continúa usando la batería podría provocar un incendio o una ruptura que podría ocasionar lesiones graves o fallas al producto incluyendo entre otras la pérdida de datos Desecho de baterías usadas Siempre deseche las baterías usadas de co...

Page 91: ...o Inserción de la batería Al instalar una batería o antes de mover el producto siempre asegúrese de que la batería esté insertada correctamente y de modo seguro Si la batería llega a caerse mientras traslada el producto usted podría sufrir lesiones o la batería podría dañarse No use una batería dañada o agotada Nunca continúe usando una batería después de que se haya afectado su capacidad de recar...

Page 92: ...fotografías se guardan en la tarjeta en lugar de la memoria integrada Protección de datos en una tarjeta SD En una tarjeta SD que esté bloqueada de lectura solamente no se pueden grabar fotografías o videos pero sí se pueden ver Asegúrese de que el bloqueo esté en la posición de grabable antes de grabar fotos o videos como se muestra a continuación Ilustración de muestra Protección de datos en una...

Page 93: ...ente un segundo Para grabar videos En el modo Grabar presione el botón Video Presiónelo de nuevo para detener la grabación Para tomar una fotografía En el modo Grabar presione el botón Fotografía Para ver videos fotografías registrados Presione el botón Reproducir Cómo apagar la videocámara Presione el botón de encendido durante aproximadamente un segundo para apagar la videocámara ...

Page 94: ...nar para iniciar la grabación 2 Presionar de nuevo para detener la grabación Botón Fotografía Presionar para tomar una fotografía Botón Reproducir Para alternar entre el modo Grabar y el modo Reproducir Botón Regresar Salir 1 Para regresar a la pantalla anterior 2 Salir ...

Page 95: ...ar acercamientos Arriba 1 Efectuar acercamientos 2 Moverse entre las distintas opciones Botón para efectuar alejamientos Abajo 1 Efectuar alejamientos 2 Moverse entre las distintas opciones Botón Izquierda Moverse entre las distintas opciones Botón Derecha Moverse entre las distintas opciones Botón Menú OK 1 Menú ENCENDIDO 2 Validar la configuración Botón de encendido Presionar durante aproximadam...

Page 96: ...mentación Modo de alimentación con corriente continua 2 Resolución de video Full HD 1080p 30 HD60 720p 60 HD30 720p 30 VGA 430p 30 Los videos en cámara lenta se registran en resolución QVGA 320 x 240 QVGA Resolución de fotografía Alta 16MP Estándar 5MP Baja 3MP 3 Luz digital ENCENDIDA Luz ENCENDIDA 4 Modo Grabar video Estabilización ACTIVADA Modo Grabar fotografía Autotemporizador ACTIVADO ...

Page 97: ...deo Presione el botón Video de nuevo para detener la grabación Presione el botón Reproducir para ver el video grabado Las configuraciones de resolución disponibles son 5 Tiempo de grabación Pausar grabación Número restante de fotografías que se pueden tomar con la configuración de resolución actual Número actual de fotografías tomadas 6 Detección de movimiento en el modo Grabar video solamente 7 C...

Page 98: ...la aparece el ícono de Luz digital 2 Presione de nuevo el botón Luz En la pantalla aparece el ícono de Luz La luz se enciende suministrando iluminación mientras se graba 3 Presione el botón Video Fotografía para iniciar la grabación o tomar una fotografía 4 Presione el botón Luz de nuevo para apagar la luz La luz se deshabilita automáticamente cuando la carga de la batería está baja Uso del zoom d...

Page 99: ...ido TV Idioma Ajuste de la hora Formatear Configuración predeterminada Eliminar video Eliminar fotografía Seleccionar y eliminar Eliminar todo Operación Pantalla 1 En el modo Grabar presione el botón MENÚ OK Aparece la pantalla del Menú Las opciones disponibles son Configuración de video Configuración de fotografía Efectos Configuración y Eliminar 2 Utilice los botones de Dirección para selecciona...

Page 100: ...n Luz Resolución Estabilización Detección de movimiento Cámara lenta Pregrabación Tiempo de espera y Reproducción continua ENCENDIDA Enciende la luz y suministra iluminación mientras se graba APAGADA Apaga la luz Luz digital Extiende la gama dinámica para el alto contraste y la luz de fondo para que los objetos se vean más claros y más iluminados Operación Pantalla 1 En el menú de configuración de...

Page 101: ...e Video seleccione el ícono Resolución y luego presione el botón OK para entrar en el menú de configuración 2 Utilice los botones de Dirección para seleccionar la opción deseada 3 Presione el botón OK para validar la nueva configuración 4 Seleccione el ícono Regresar Salir y luego presione el botón OK o presione el botón Regresar Salir para salir Operación Pantalla 1 En el menú de configuración de...

Page 102: ... de configuración 2 Utilice los botones de Dirección para seleccionar la opción deseada 3 Presione el botón OK para validar la nueva configuración 4 Seleccione el ícono Regresar Salir y luego presione el botón OK o presione el botón Regresar Salir para salir Apenas detecta un movimiento la videocámara empieza a grabar automáticamente Cuando el movimiento se detiene la grabación se detiene Operació...

Page 103: ...vo de video Las configuraciones de Tiempo de espera disponibles son Operación Pantalla 1 En el menú de configuración de Video seleccione el ícono Pregrabación y luego presione el botón OK para entrar en el menú de configuración 2 Utilice los botones de Dirección para seleccionar la opción deseada 3 Presione el botón OK para validar la nueva configuración 4 Seleccione el ícono Regresar Salir y lueg...

Page 104: ...ne el botón OK para validar la nueva configuración 4 Seleccione el ícono Regresar Salir y luego presione el botón OK o presione el botón Regresar Salir para salir Operación Pantalla 1 En el menú de configuración de Video seleccione el ícono Reproducción continua y luego presione el botón OK para entrar en el menú de configuración 2 Utilice los botones de Dirección para seleccionar la opción desead...

Page 105: ... de configuración de Fotografía son Luz Resolución Autotemporizador Seguimiento de caras Impresión de fecha ISO y Presentación de diapositivas ENCENDIDA Enciende la luz y suministra iluminación mientras se graba APAGADA Apaga la luz Luz digital Extiende la gama dinámica para el alto contraste y la luz de fondo para que los objetos se vean más claros y más iluminados Operación Pantalla 1 En el menú...

Page 106: ...a 1 En el menú de configuración de Fotografía seleccione el ícono Resolución y luego presione el botón OK para entrar en el menú de configuración 2 Utilice los botones de Dirección para seleccionar la opción deseada 3 Presione el botón OK para validar la nueva configuración 4 Seleccione el ícono Regresar Salir y luego presione el botón OK o presione el botón Regresar Salir para salir Operación Pan...

Page 107: ...eleccionar la opción deseada 3 Presione el botón OK para validar la nueva configuración 4 Seleccione el ícono Regresar Salir y luego presione el botón OK o presione el botón Regresar Salir para salir En el modo Fotografía cuando la videocámara se dirige hacia una cara o caras aparece el marco de la cara o caras en la pantalla Operación Pantalla 1 En el menú de configuración de Fotografía seleccion...

Page 108: ...volver granulosa Cuando se activa esta función la fecha aparece en la esquina de cada fotografía Auto Establece la configuración ISO automáticamente de acuerdo con las condiciones 800 ISO 800 1600 ISO 1600 Operación Pantalla 1 En el menú de configuración de Fotografía seleccione el ícono ISO y luego presione el botón OK para entrar en el menú de configuración 2 Utilice los botones de Dirección par...

Page 109: ...tografía cada cinco segundos 10 segundos Mostrar una fotografía cada diez segundos APAGADA Deshabilita la presentación de diapositivas Operación Pantalla 1 En el menú de configuración de Fotografía seleccione el ícono Presentación de diapositivas y luego presione el botón OK para entrar en el menú de configuración 2 Utilice los botones de Dirección para seleccionar la opción deseada 3 Presione el ...

Page 110: ...Filtro Balance de blancos Auto Ajusta las condiciones corrientes automáticamente Piel Ajusta los tonos de la piel para que aparezcan más naturales Noche Utilizar en condiciones de baja iluminación o en la noche Luz de fondo Utilizar cuando hay una luz brillante detrás del sujeto Operación Pantalla 1 En el menú de configuración de Efectos seleccione el ícono Escena y luego presione el botón OK para...

Page 111: ...rezcan los íconos en la pantalla LCD Auto Sin efectos de filtro Blanco y negro La imagen se convierte a blanco y negro Clásico Da a la imagen una apariencia sepia Negativo La imagen se convierte en una versión negativa del original Operación Pantalla 1 En el menú de configuración de Efectos seleccione el ícono Filtro y luego presione el botón OK para entrar en el menú de configuración 2 Utilice lo...

Page 112: ...el ícono Balance de blancos y luego presione el botón OK para entrar en el menú de configuración 2 Utilice los botones de Dirección para seleccionar la opción deseada 3 Presione el botón OK para validar la nueva configuración 4 Seleccione el ícono Regresar Salir y luego presione el botón OK o presione el botón Regresar Salir para salir Operación Pantalla 1 En el modo Grabar presione el botón MENÚ ...

Page 113: ...s videos seleccionados 4 Seleccione el ícono Regresar Salir y luego presione el botón OK o presione el botón Regresar Salir para salir Operación Pantalla 1 En el menú Eliminar seleccione el ícono ELIMINAR FOTOGRAFÍA y luego presione el botón OK para entrar en el menú de configuración 2 Utilice los botones de Dirección y presione el botón OK para seleccionar las fotografías miniaturizadas que desee...

Page 114: ...egresar Salir y luego presione el botón OK o presione el botón Regresar Salir para salir Sí Eliminar todos los videos y fotografías en la memoria integrada cuando no está instalada una tarjeta SD o eliminar todos los videos y fotografías en la tarjeta SD instalada No No eliminar todos los videos y fotografías en la memoria integrada cuando no está instalada una tarjeta SD o no eliminar todos los v...

Page 115: ...raciones del Menú Cuando está instalada una tarjeta SD solamente se eliminan los videos y fotografías almacenados en la tarjeta No se pueden eliminar los videos o las fotografías si la tarjeta está protegida contra escritura NOTA ...

Page 116: ...las siguientes funciones Botón Video Presionar para cambiar al modo Reproducir video Botón Fotografía Presionar para cambiar al modo Reproducir fotografía Botón Reproducir Para alternar entre el modo Grabar y el modo Reproducir Botón Regresar Salir 1 Para regresar a la pantalla anterior 2 Salir ...

Page 117: ...urante la reproducción de video Botón para efectuar alejamientos Abajo 1 Ver la pantalla Eliminar 2 Presionar para disminuir el volumen durante la reproducción de video Botón Izquierda Ver el video la fotografía previa Botón Derecha Ver el video la fotografía siguiente Botón Menú OK Presionar para reproducir pausar un video Botón para cargar a Internet En el modo Reproducir presionar para seleccio...

Page 118: ...D60 720p 60 HD30 720p 30 VGA 430p 30 Los videos en cámara lenta se registran en resolución QVGA 320 x 240 QVGA Resolución de fotografía Alta 16MP Estándar 5MP Baja 3MP 3 El video o la fotografía actual está seleccionado para cargarlo a Internet 4 Contador de tiempo de reproducción Número actual de fotografías tomadas Número restante de fotografías que se pueden tomar con la configuración de resolu...

Page 119: ... en la memoria integrada o en una tarjeta SD Operación Pantalla 1 En el modo Grabar video fotografía presione el botón Reproducir para cambiar al modo Reproducir video fotografía 2 Presione el botón para efectuar acercamientos Arriba para ver la pantalla en miniatura de videos fotografías 3 Seleccione el archivo de video fotografía y luego presione el botón OK ...

Page 120: ... para detener la reproducción 5 Utilice los botones para efectuar acercamientos Arriba y alejamientos Abajo para ajustar el volumen 6 Presione el botón Cargar a Internet para seleccionar y marcar el video que desee cargar en Internet solamente para sistemas basados en Windows Operación Pantalla 1 En el modo Reproducir fotografía utilice los botones Derecha Izquierda para ver la fotografía siguient...

Page 121: ... para ver la pantalla de eliminación 2 Seleccione el ícono y luego presione el botón OK Seleccione el ícono y luego presione el botón OK para eliminar el video fotografía corriente Seleccione el ícono y luego presione el botón OK Seleccione el ícono y luego presione el botón OK para eliminar el video fotografía corriente 3 Seleccione el ícono y luego presione el botón OK Seleccione el ícono y lueg...

Page 122: ...del Menú 2 Utilice los botones de Dirección para seleccionar el ícono Configuración y luego presione el botón OK para entrar en el menú de configuración 3 Las opciones del menú Configuración son Menú del sonido sonido de funcionamiento TV Idioma Ajuste de la hora Formatear y Configuración predeterminada desplazarse hacia abajo para ver las opciones ...

Page 123: ...cción para seleccionar la opción deseada 3 Presione el botón OK para validar la nueva configuración 4 Seleccione el ícono Regresar Salir y luego presione el botón OK o presione el botón Regresar Salir para salir NTSC 60Hz EE UU Canadá Japón Corea del Sur Taiwán etc PAL 50Hz Reino Unido Europa China Australia Singapur Hong Kong etc Operación Pantalla 1 En el menú Configuración seleccione el ícono T...

Page 124: ...ación 4 Seleccione el ícono Regresar Salir y luego presione el botón OK o presione el botón Regresar Salir para salir Operación Pantalla 1 En el menú Configuración seleccione el ícono Ajuste de la hora y luego presione el botón OK para entrar en el menú de configuración 2 Utilice los botones Derecha Izquierda para seleccionar el año mes día hora o minutos 3 Utilice los botones Arriba Abajo para aj...

Page 125: ...eta SD o eliminar todos los videos y fotografías en la tarjeta SD instalada No No eliminar todos los videos y fotografías en la memoria integrada cuando no está instalada una tarjeta SD o no eliminar todos los videos y fotografías en la tarjeta SD instalada Operación Pantalla 1 En el menú Configuración seleccione el ícono Formatear y luego presione el botón OK para entrar en el menú de configuraci...

Page 126: ...y luego presione el botón OK o presione el botón Regresar Salir para salir Configuración Configuración predeterminada en fábrica Resolución Video Full HD 1080 30 Fotografías Estándar 5M Luz APAGADA Estabilización ACTIVADA Detección de movimiento DESACTIVADA Cámara lenta DESACTIVADA Pregrabación DESACTIVADA Tiempo de espera DESACTIVADO Reproducción continua DESACTIVADA Autotemporizador DESACTIVADO ...

Page 127: ...eos almacenados en la videocámara a través de un televisor 1 Conecte el cable HDMI cable HDMI vendido por separado al puerto de salida HDMI de la videocámara 2 Conecte el otro extremo del cable a un televisor 3 Fije la fuente de entrada de video del televisor en HDMI Ilustración de muestra Conexión de un televisor de alta definición 16 9 Modo AV ...

Page 128: ...accesibles cuando la videocámara esté conectada a un TV o a un HDTV Instalación del paquete de software incluido El CD ROM suministrado con la videocámara contiene dos aplicaciones de software Para instalar el paquete de software incluido 1 Inserte el CD ROM en la unidad de discos ópticos de la computadora Aparece la pantalla de ejecución automática 2 Haga clic en Instalar software Para terminar e...

Page 129: ...ados en su videocámara a una computadora y enviarlos por correo electrónico a sus amigos o colocarlos en Internet Para hacerlo 1 Conecte la computadora y la videocámara con el mini cable USB 2 0 que se suministra como se muestra a continuación La luz del indicador múltiple se ilumina 2 Para acceder a fotografías y videos en su tarjeta SD los videos y fotografías se pueden encontrar en la computado...

Page 130: ...afías y videos en la memoria interna de la videocámara los videos y fotografías se pueden encontrar en la computadora bajo Mi PC DV DCIM 100MEDIA 4 En esta carpeta puede ver eliminar mover o copiar todos los videos fotografías que desee 5 Para editar videos o fotografías utilice la aplicación incluida ArcSoft MediaImpression ...

Page 131: ...luido ArcSoft MediaImpression también se puede utilizar para transferir videoclips a estos sitios web Para transferir videos a un sitio web debe tener acceso a Internet CAMILEO Uploader solamente para sistemas basados en Windows CAMILEO Uploader Para cargar archivos en Internet 1 Seleccione los archivos en el modo Reproducir video fotografía presionando el botón Cargar a Internet Los archivos sele...

Page 132: ...cación CAMILEO Uploader solamente para sistemas basados en Windows Para ver videos fotografías en CAMILEO Uploader podría ser necesario instalar primero ArcSoft MediaImpression en la computadora Si ArcSoft MediaImpression no está instalado puede que le soliciten que instale H 264 Codec ffdshow un software gratuito con licencia GPL para ver videos correctamente en el CAMILEO Uploader 4 Seleccione e...

Page 133: ...ransferencia del archivo Imagen de muestra Pantalla de CAMILEO Uploader Cancelar Para cargar archivos de video fotografía manualmente a un sitio web 1 Siga los pasos 2 y 3 en la sección CAMILEO Uploader en la página 59 2 Seleccione el sitio a donde desea transferir los archivos 3 Haga clic en la ficha Video o Fotografías para ver la página de videos fotografías en miniatura utilizando la barra de ...

Page 134: ...pués de registrarla Si la configuración de la privacidad en su cuenta de Facebook está establecida en el nivel más alto de seguridad podría tener acceso limitado a CAMILEO Uploader 1 Seleccione el sitio web 2 Haga clic en la ficha Configuración para ver la pantalla de configuración 3 Escriba la información de su cuenta y luego haga clic en OK Guardar 4 Para guardar la información de la cuenta y ev...

Page 135: ...computadora utilizando el cable USB 2 0 que se suministra Presione el botón Reproducir para pasar al modo de Cámara web La luz indicadora se ilumina de color azul En este modo usted puede efectuar videoconferencias en vivo y comunicaciones multimedia Ilustración de muestra Cómo conectar la videocámara a una computadora ...

Page 136: ...ara subir archivos de video a Internet 1 Instale ArcSoft MediaImpression 2 Haga clic en Inicio Todos los programas y luego en ArcSoft MediaImpression Aparece la pantalla principal de ArcSoft MediaImpression en el escritorio 3 Haga clic en Videos Imagen de muestra Pantalla principal de ArcSoft MediaImpression ...

Page 137: ...e video que desea transferir Seleccione los archivos en el área de visualización Haga clic en Upload to the Internet Cargar a Internet en el menú inferior Imagen de muestra Cómo seleccionar los archivos 5 Escriba la información de su cuenta en los espacios en blanco y luego haga clic en Login Iniciar sesión Imagen de muestra Cómo escribir la información de la cuenta ...

Page 138: ...argar archivos de video y fotografías en Internet ArcSoft MediaImpression 6 Llene la información relativa a los videoclips y luego haga clic en Upload Cargar Imagen de muestra Cómo subir los archivos a Internet ...

Page 139: ...ital Obturador Electrónico Pantalla LCD Pantalla LCD de 5 08 cm 2 pulgadas Medios de almacenamiento Memoria integrada de 128 MB memoria parcial utilizada para el código del firmware Compatible con ranuras de tarjetas SD SDHC SDXC hasta 64 GB Resolución de imagen Alta 4608 x 3456 16 megapíxeles interpolados Estándar 2592 x 1944 5 megapíxeles Baja 2048 x 1536 3 megapíxeles Resolución de video Full H...

Page 140: ...uz de día Fluorescente Tungsteno ISO Auto 800 1600 Autotemporizador Demora de 10 segundos Luz Luz encendida Luz apagada Luz digital encendida Formato de archivo Fotografía JPG Video MP4 H 264 Reproducción de imagen Imagen individual Presentación de diapositivas Interfaz de PC Puerto mini USB 2 0 Salida TV Mini HDMI Batería Batería recargable de iones de litio Dimensiones Anc x Alt x Prof 56 x 108 ...

Page 141: ...de interiores aparecen oscuras y borrosas La videocámara extiende el tiempo de exposición de las fotografías en interiores o en condiciones de baja iluminación Mantenga la videocámara y el objetivo firmes durante varios segundos mientras toma las fotografías El obturador emite un sonido cuando se toma una fotografía 3 Cómo se carga la batería Debe utilizar el cable USB suministrado o el adaptador ...

Page 142: ...ble Disk indica la memoria externa tarjeta SD SDHC SDXC instalada en la videocámara la ruta varía de acuerdo con el nombre de la tarjeta SD DVAP indica la aplicación integrada CAMILEO Uploader solamente para sistemas basados en Windows No formatee el disco o elimine la aplicación La aplicación CAMILEO Uploader podría no funcionar ...

Page 143: ...ro a otras fuentes de asistencia técnica Intente lo siguiente antes de comunicarse con Toshiba Consulte la documentación suministrada con el producto Si el problema se produce mientras está ejecutando una aplicación de software consulte las sugerencias sobre posibles soluciones de problemas en la documentación del software Póngase en contacto con el personal de asistencia técnica del fabricante de...

Page 144: ...ro de asistencia al cliente de Toshiba Al 888 592 0944 dentro de Estados Unidos Al 949 583 3305 desde fuera de Estados Unidos Centro de Asistencia Telefónica de Toshiba para América Latina servicio en español Horas Hay cargos por la llamada De lunes a viernes de 8 00 a m a 9 00 p m hora estándar del este Argentina 0 800 666 3701 Chile 800 64 6526 Costa Rica 0 800 011 1123 El Salvador 800 6601 Hond...

Page 145: ...toshiba com accessories1yr Servicio de garantía Los clientes en los cincuenta 50 estados de Estados Unidos y en el Distrito de Columbia pueden obtener el servicio en garantía visitando el sitio Toshiba Acclaim en www acclaim toshiba com o llamando al centro de asistencia telefónica 1 888 592 0944 Los clientes por fuera de los cincuenta 50 estados de Estados Unidos y el Distrito de Columbia pueden ...

Reviews: