background image

English

   - 10 -

(*) 

LCN is the Logical Channel Number system that organizes 

available  broadcasts  in  accordance  with  a  recognizable 

channel number sequence (if available).

Note:

 Do  not  turn  off  the  TV  while  initializing  first  time 

installation. Note that, some options may not be available 

depending on the country selection.

Using SatcoDX Feature

You can perform SatcoDX operations using the 

Installation>Satellite Settings

 menu. In the 

SatcoDX


menu, there are two options regarding to the SatcoDx.
You can download or upload SatcoDX data. In order 

to perform these functions a USB device must be 

connected to the TV.
You can upload current services and related satellites 

& transponders in TV, to a USB device.
Additionally you can download one of the SatcoDx 

files stored in USB device, to the TV. 
When you select one of these files, all services and 

related satellites and transponders in the selected 

file will be stored in the TV. If there are any installed 

terrestrial, cable and/or analog services, they will be 

kept and only satellite services will be removed. 
Afterwards, check your antenna settings and make 

changes if necessary. An error message stating “

No 

Signal

” may be displayed if the antenna settings are 

not configured properly.

E-Manual (if available)

You  can  find  instructions  for  your TV’s  features  in 

the E-Manual. 

To use E-Manual, press to the 

Info 

button while main 

menu is displayed on the screen or press 

Quick Menu


button, select 

Information


Booklet

 and press 

OK

.

By using the directional buttons select a desired 

category. Every category includes different topics. 

Select a topic and press 

OK

 to read instructions.

To close the E-Manual screen press the 

Exit

 or 

Menu


button.

Note:

 The contents of the E-Manual may vary according to 

the model.

Teletext Services

Press the 

Text

 button to enter. Press again to activate 

mix mode, which allows you to see the teletext page and 

the TV broadcast at the same time. Press once more 

to exit. If available, sections in the teletext pages will 

become colour-coded and can be selected by pressing 

the coloured buttons. Follow the instructions displayed 

on the screen.

Digital Teletext

Press the 

Text

 button to view digital teletext information. 

Operate it with the coloured buttons, cursor buttons 

and the 

OK

 button. The operation method may differ 

depending on the contents of the digital teletext. Follow 

the instructions displayed on the digital teletext screen. 

When the 

Text

 button is pressed again, the TV returns 

to television broadcast.

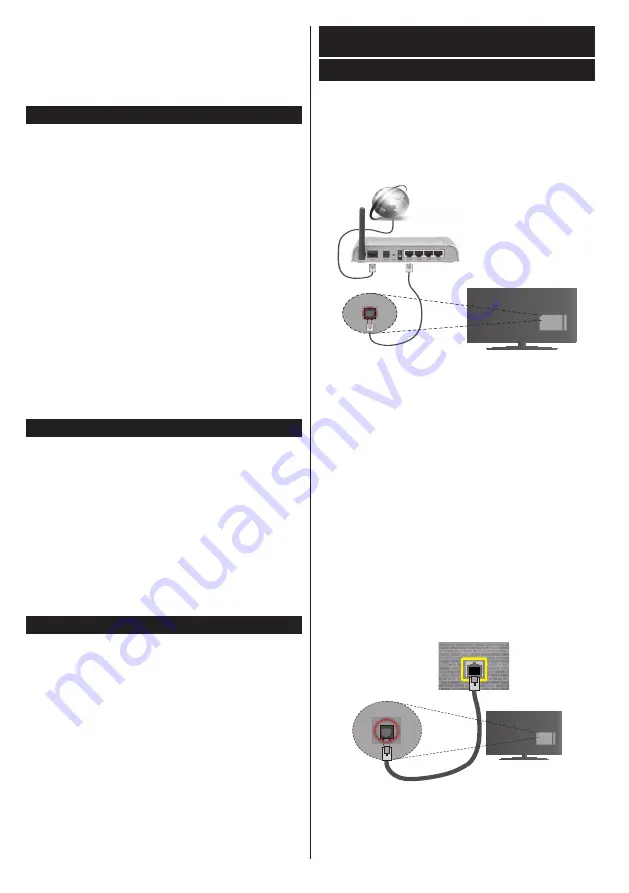
Connectivity

Wired Connectivity

To Connect to a Wired Network

• 

You must have a modem/router connected to an 

active broadband connection.

• 

Connect your TV to your modem/router via an 

ethernet cable. There is a LAN port at the rear 

(back) of your TV.

Broadband ISP connection

LAN (ethernet) cable

LAN input on the rear  

side of the TV

• To access and play shared files, you must select the 

Media Browser

. Press the 

Menu

 button and select 

Media Browser

. Press 

OK

 to continue. Select the 

desired file type and press 

OK

. You must always 

use the 

Media Browser

 screen to access and play 

shared network files.

• 

PC/HDD/Media Player or any other devices that are 

compatible should be used with a wired connection 

for higher playback quality.

To  configure  wired  settings  please  refer  to 

the  Network/Internet  Settings  section  in  the


System>Settings

 Menu.

• 

You might be able to connect your TV to your LAN 

depending on your network’s configuration. In such 

a case, use an ethernet cable to connect your TV 

directly to the network wall outlet.

LAN input on the rear  

side of the TV

network  

wall socket

Summary of Contents for 55U6763DAT

Page 1: ...OPERATING INSTRUCTIONS ÇALIŞTIRMA TALİMATLARI 55U6763DAT COLOUR TELEVISION WITH REMOTE CONTROL UZAKTAN KUMANDALI RENKLİ TELEVİZYON ...

Page 2: ...ct 2 Features 6 Accessories Included 6 TV Control Operation 6 Inserting the Batteries into the Remote 7 Connect Power 7 Antenna Connection 7 Notification 7 Remote Control 8 Switching On Off 9 First Time Installation 9 E Manual if available 10 Teletext Services 10 ...

Page 3: ...lled with liquids such as vases cups etc on or over the TV e g on shelves above the unit Do not expose the TV to direct sunlight or do not place open flames such as lit candles on the top of or near the TV Do not place any heat sources such as electric heaters radiators etc near the TV set Do not place the TV on the floor and inclined surfaces To avoid danger of suffocation keep plastic bags out o...

Page 4: ... WARNINGS Read the instructions before mounting your TV on the wall The wall mount kit is optional You can obtain from your local dealer if not supplied with your TV Do not install the TV on a ceiling or on an inclined wall Use the specified wall mounting screws and other accessories Tighten the wall mounting screws firmly to prevent the TV from fall Do not over tighten the screws WARNING Apparatu...

Page 5: ...country please contact your local city office or the shop where you purchased the product Disposal of batteries and or accumulators The crossed out wheeled dust bin symboI indicates that batteries and or accumulators must be collected and disposed of separately from household waste If the battery or accumulator contains more than the specified values of lead Pb mercury Hg and or cadmium Cd defined...

Page 6: ...rmity Statement This product is carrying the CE Mark in accordance with the related European Directives Responsible for CE Marking is VESTEL Elektronik Sanayi ve Ticaret A Ş This product is labeled with the CE Mark in accordance with the related European Directives notably RoHS Directive 2011 65 EU Furthermore the product complies with the Ecodesign Directive 2005 32 EC EuP and 2009 125 EC ErP and...

Page 7: ...Programme Source and Standby On functions of the TV Note The position of the joystick may differ depending on the model To change volume Increase the volume by pushing the joystick right Decrease the volume by pushing the joystick left To change channel Scroll through the stored channels by pushing the joystick up or down To change source Press the centre of the joystick in the sources list will a...

Page 8: ...hts Reserved For DTS patents see http patents dts com Manufactured under license from DTS Licensing Limited DTS the Symbol DTS and the Symbol together are registered trademarks and DTS 2 0 Digital Out is a trademark of DTS Inc DTS Inc All Rights Reserved For DTS patents see http patents dts com Manufactured under license from DTS Licensing Limited DTS DTS HD the Symbol DTS or DTS HD and the Symbol...

Page 9: ...a 19 Subtitles Turns subtitles on and off where available 20 Stop Stops the media being played 21 Rapid advance Moves frames forward in media such as movies 22 Screen Changes the aspect ratio of the screen 23 My button 2 24 Text Displays teletext where available press again to superimpose the teletext over a normal broadcast picture mix 25 Media browser Opens the media browsing screen 26 Exit Clos...

Page 10: ...sing or buttons Direct If you have a single receiver and a direct satellite dish select this antenna type Press OK to continue Select an available satellite on the next screen and press OK to scan for services Single Satellite Cable If you have multiple receivers and a single satellite cable system select this antenna type Press OK to continue Configure settings by following instructions on the ne...

Page 11: ...n Note The contents of the E Manual may vary according to the model Teletext Services Press the Text button to enter Press again to activate mix mode which allows you to see the teletext page and the TV broadcast at the same time Press once more to exit If available sections in the teletext pages will become colour coded and can be selected by pressing the coloured buttons Follow the instructions ...

Page 12: ...ts that you use The transmission may also be cut off or may get disconnected depending on the radio wave conditions DECT phones or any other WiFi 11b appliances The standard values of the transmission speed are the theoretical maximum values for the wireless standards They are not the actual speeds of data transmission The location where the transmission is most effective differs depending on the ...

Page 13: ...s a standard for streaming video and sound content by Wi FiAlliance This feature provides the ability to use your TV as wireless display device Using with mobile devices There are different standards which enable sharing of screens including graphical video and audio content between your mobile device and TV Plug the wireless USB dongle to TV first if the TV doesn t have internal WiFi feature Then...

Page 14: ...walls of your network allow the TV wireless connection Try searching for wireless networks again using the Network Internet Settings menu screen If the wireless network does not function properly try using the wired network in your home Refer to the Wired Connectivity section for more information on the process If the TV does not function using the wired connection check the modem router If the ro...

Page 15: ... playback If a problem occurs with the network please switch your television off at the wall socket and back on again Trick mode and jump are not supported with theAudio Video Sharing feature Note There may be some PC s which may not be able to utilize the Audio Video Sharing feature due to administrator and security settings such as business PC s For best home network streaming with this TV the N...

Page 16: ...English 15 Find out all you need to know about the latest trend setting TV technology on our website www toshiba tv com You can review your TV user manual online or download as you like ...

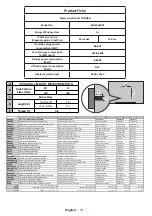
Page 17: ...WANDMONTAGE METINGEN Grootte booropening mm Schroefgroote Lengte X Draad Y Suomi VESA SEINÄASENNUKSEN MITAT Reikäkuvion koot mm Ruuvinkoot Pituus x Kierre Y Norsk VESA VEGGMONTERINGSMÅL Hullmønster størrelser mm Skruestørrelser Lengde x Tråd Y Dansk VESA VÆGMONTERINGS MÅL Hulmønster størrelser mm Skruestørrelser Længde X Tråd Y Русский РАЗМЕРЫ НАСТЕННОГО КРЕПЛЕНИЯ VESA Размеры системы отверстий Ра...

Reviews: