background image

To zoom in/out photos

During the Single View mode or Slide Show mode, 
the zoom function can be used.

RED button (Zoom in)

x1 

S

 x

2


S

 x4 

S

 x8 zoom

GREEN button (Zoom out)

x8 

S

 x4 

S

 x

2


S

 x1 zoom

RETURN button: 

Normal playback




buttons:

 Vertical or Horizontal scrolling

Note: 

Using the zoom function while in the 

Slide Show


mode will stop the slideshow and zoom in the photo.

 To close the Photo Viewer

Press 

EXIT

.

File Compatibility

See page 

2

4

Viewing movie fi les 

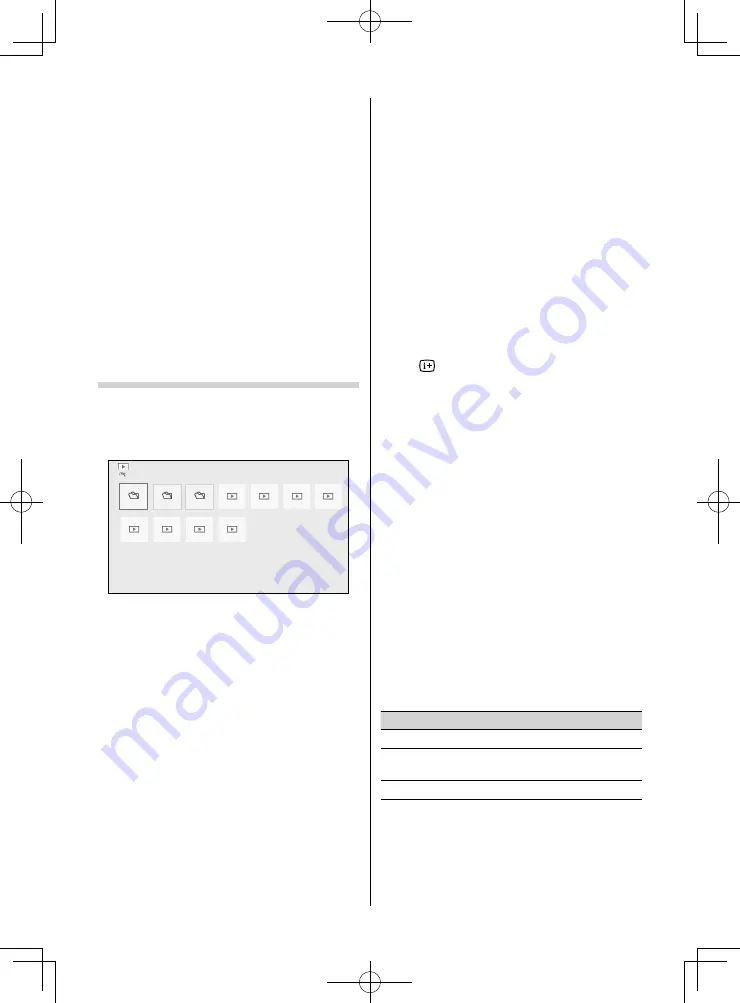
You can select movies from a 

Multi View

 of 

available fi les.

Multi View

/C:

XXXXX

XXXXX

XXXXX

XXXXXXXX.mpg

XXXXXXXX.mpg

XXXXXXXX.mpg

XXXXXXXX.mpg

XXXXXXXX.mpg

XXXXXXXX.mpg

XXXXXXXX.mpg

XXXXXXXX.mpg

Movie

Press 

 or 

 to select a fi le or folder. 

P

U


P

u

 buttons can be used to page up/down the 

Multi View

 when there are more fi les than will 

fi t onto one screen.

When you select a folder, press 

OK

 to move to 

the next layer. Press 

RETURN

 to move back to 

the previous layer.

With the desired fi le selected, press 

OK

 or 


(play) to start playback.

Press 

v

 to stop playback.

Note: 

If playback fi nishes before 

v

 is pressed, the screen will 

return to the 

Multi View

.

During playback:

• 

 Press 

W

 to pause.

PAUSE may not be available depending on the 
contents.

• 

 To resume normal playback, press 

 (play).

• 

 To play in fast reverse or fast forward directions, 
press 

CC

 or 

cc

 during playback. Each time you 

press the 

CC

 or 

cc

, the playback speed will 

change.

• 

 Press 

z

 to skip to the beginning of the next 

chapter. Double-tap it to skip to the next content.
Press 

Z

 to skip to the beginning of the current 

chapter. Double-tap it to return to the previous 
content.
If the content is not categorized into chapters, 
press 

z

 to skip to the next content, or press 

Z

 to 

skip to the beginning of the current content. Press 

Z

 again to skip to the beginning of the previous 

content.

• 

Press 

 to display the fi le status information 

(content number, movie title, progress time etc.).

Notes: 

• 

 The information may not be correctly displayed 
depending on the contents.

• 

 During playback, you can adjust the 

PICTURE

 and 

SOUND

 menu functions from the 

Quick Menu

.

• 

 The playback speed (

CC

 / 

cc

) may not change 

depending on the contents.

To select subtitle and audio languages

• 

 Press 

SUBTITLE

 repeatedly to select your 

preferred subtitle language.

• 

 Press 

s

 repeatedly to select your preferred 

audio language.

Note: 

This feature is not available depending on the 
contents.

 Setting the repeat mode

Press 

QUICK

 to open the 

Quick Menu

.

Press 

 or 

 to select 

Repeat

.

Press 

 or 

 to select 

Off 

All

 or 

1

.

Mode

Description

Off 

The fi le is played back only once.

All

Files in the same folder are repeatedly 
played back.

1

The same fi le is repeatedly played back.

Press 

RETURN

.

– 21 –

32P2300Series̲EN.indd   21

32P2300Series̲EN.indd   21

2013/03/19   19:43:43

2013/03/19   19:43:43

Summary of Contents for 32P2300 Series

Page 1: ...LED и LCD телевизоры Toshiba 32P2306EV 39P2300DG Инструкция пользователя ...

Page 2: ... these numbers in the spaces provided below Refer to them whenever you call upon your TOSHIBA dealer regarding this product Model number Serial number 32P2300 Series 2013 TOSHIBA CORPORATION All Rights Reserved VX1A00270000 TD J 32P2300Series EN indd 1 32P2300Series EN indd 1 2013 03 19 19 43 39 2013 03 19 19 43 39 ...

Page 3: ...the unit protruding over the edge of the surface and assemble as indicated Note Extreme care should always be used when attaching the pedestal stand to avoid damage to the LCD panel 1 4 3 2 Warning Ensure the power cable is not pinched when attaching the pedestal stand as this could cause an electric shock M5 2 2 32P2300Series EN indd 2 32P2300Series EN indd 2 2013 03 19 19 43 40 2013 03 19 19 43 ...

Page 4: ...use an injury 4 Always connect the power plug to an appropriate electrical outlet equipped with 110 240 V AC 50 60 Hz Never use the TV outside the specified voltage range It may cause a fire or an electric shock About the fuse only for E models In a three pin earthing type the fuse fitted in this plug is approved by ASTA or BSI to BS1362 It should only be replaced by a correctly rated Welcome toTo...

Page 5: ...rhead power lines or other electric light or power circuits If the aerial falls down or drops it may cause an injury or an electric shock Use 1 Never place hot objects or open flame sources such as lighted candles or nightlights on or close to the TV High temperatures can melt plastic and lead to fires 2 The apparatus shall not be exposed to dripping or splashing and that no objects filled with li...

Page 6: ...a dry cloth This dust may cause a fire due to reduced insulation on the plug Important information 1 About LCD screen If you have the LCD screen facing to the sun the LCD screen will be damaged Be aware of locating the TV close to a window or outdoors Never press the LCD screen strongly or scratch it and never put anything on it These actions will damage the LCD screen 2 About cabinet and LCD scre...

Page 7: ...tery disposal Never mix battery types or combine used batteries with new ones Notes If the remote control does not operate correctly or if the operating range becomes reduced replace both batteries with new ones If the batteries are dead or if you will not use the remote control for a long time remove the batteries to prevent battery acid from leaking into the battery compartment Effective range w...

Page 8: ...on 12 Number buttons 0 9 13 To display the Channel List 14 To return to the previous programme 15 To display on screen information Initial Index function for Teletext 16 This button turns the sound off on 17 To exit menu 18 To access the Quick Menu 19 Teletext on Superimpose Teletext off 20 Teletext control buttons Four coloured buttons Red Green Yellow Blue 21 To reveal concealed text When using ...

Page 9: ...t it is possible that some HDMI devices may not operate properly with this TV Connecting HDMI or DVI devices The HDMI input on your TV receives digital audio and uncompressed digital video from an HDMI and uncompressed digital video from a DVI device This input is designed to accept HDCP programme material in digital from CEA 861 D compliant consumer electronic devices such as a set top box and DV...

Page 10: ...1 Press 1 on the remote control or on the TV left side panel to switch to the standby mode Notes When the TV will not be used for a long period of time such as during vacation or travel remove the power plug from the wall outlet The TV will automatically turn off in 15 minutes based on No Signal Power Down settings page 16 if no signal is detected The TV will automatically turn itself off after ap...

Page 11: ...he automatic colour system selection A may have malfunctioned or sound system selection is wrong In such a case select another colour and or sound system page 29 D Position skip selection Press or to turn the position skip option on 8 or off The position will then be skipped when you select channels with PU or Pu The 8 mark will appear beside a position number when you use the Number button on the...

Page 12: ...3 PICTURE page 14 Device Information page 20 Learning about the menu system We suggest you familiarize yourself with the display charts before using the menu system Press MENU to display menu then press or to select main menu headings Press or to select an item Press or to select or adjust setting Press OK to display the next menu Press EXIT to close the menu Press RETURN to return the previous me...

Page 13: ... menu press or to select Manual Tuning menu and then press OK 2 Press or to select the channel ABCD then press Manual Tuning Pos 0 1 ABCD 2 EFGH 3 IJKL MNOP 4 5 6 7 Label 3 Press to select the new position 4 then press 4 Press to select the channel MNOP then press 5 Press to select the new position 1 then press 6 Confirm new Manual Tuning menu Selecting the video input source to view 1 Press o on ...

Page 14: ...a 16 9 broadcast when available Due to the range of wide screen formats 16 9 14 9 20 9 etc you may see bars on the top and bottom of the screen 4 3 Use this setting to view a true 4 3 broadcast Super Live This setting will enlarge a 4 3 image to fit the screen by stretching the image horizontally and vertically holding better proportions at the centre of the image Some distortion may occur PC Norm...

Page 15: ... mode is not available in the Eco Mode Game mode is available in external input mode other than aerial input When you select Game mode suitable widescreen formats will be selected PC mode is available in RGB PC input mode or HDMI input mode Activating the picture preferences You can customise current Picture Mode settings as desired Use the menus PICTURE and Picture Settings Use the items Backligh...

Page 16: ...nu SOUND Use the item MTS Note If you experience noise with a particular programme on whose channel reception is usually good try setting MTS mode to Auto then press s to switch to e Mono monaural Selecting the Dual 1 or Dual 2 mode You can hear only Dual 1 or Dual 2 sound selected whenever bilingual programmes are received Use the menu SOUND Use the item Dual Notes When the MTS setting is in Mono...

Page 17: ...ems On Timer and Sleep Timer Use the button OK Number buttons 0 9 and Configure the following settings in On Timer Enable On Timer Select On or Off Input Select an input source Position Select a channel Volume Select a volume Time Until Power On Set a time until the timer turns on After configuring the settings select Done and press OK Press EXIT to exit the menu Set the Standby mode by pressing 1...

Page 18: ...e 1 4 option enables the display of different language when using Teletext Use the menu PREFERENCES Use the item Teletext Language Language 1 English German Dutch Flemish Russian Bulgarian Ukranian Lettish Lithuanian Czech Slovak Estonian Language 2 Polish German Dutch Flemish Estonian Lettish Lithuanian French Serbian Croatian Slovenian Czech Slovak Rumanian Language 3 English French Hebrew Turki...

Page 19: ...simply entering the 3 digit page number but NEVER press OK or you will lose the favorite already stored Teletext buttons on the remote control Below is an introduction to the teletext buttons on your remote control and their functions To display a page of teletext Press TEXT to display teletext Press again to superimpose the teletext over a normal broadcast picture Press again to return to normal ...

Page 20: ... menus PREFERENCES Display Settings and PC Settings Use the item Reset select Yes and press OK Note When a PC is connected using HDMI none of these function will be available Using the Media Player This TV allows you to enjoy movie music and photo files stored on a USB device connected to the USB port Terminology The TV can control and play content from a USB device Notes Do not insert remove USB ...

Page 21: ...pg XXXXXXXX jpg XXXXXXXX jpg XXXXXXXX jpg XXXXXXXX jpg Photo The initial highlighted position will be on the top left thumbnail in the Multi View 1 Press or to select a photo or folder PU Pu buttons can be used to page up down the Multi View when there are more photos than will fit onto one screen 2 When you select a folder press OK to move to the next layer Press RETURN to move back to the previo...

Page 22: ...rward directions press CC or cc during playback Each time you press the CC or cc the playback speed will change Press z to skip to the beginning of the next chapter Double tap it to skip to the next content Press Z to skip to the beginning of the current chapter Double tap it to return to the previous content If the content is not categorized into chapters press z to skip to the next content or pr...

Page 23: ...in your registration code locate the DivX VOD section in your device setup menu Go to vod divx com for more information on how to complete your registration DivX Certified to play DivX and DivX Plus HD H 264 MKV video up to 1080p HD including premium content To playback DivX Plus HD content To play in fast reverse or fast forward directions press CC or cc during playback Each time you press CC or ...

Page 24: ...lable depending on the contents To play in fast reverse or fast forward directions press CC or cc during playback Each time you press CC or cc the playback speed will change Press z to skip to the next track Press Z to skip to the beginning of the current track Press Z again to skip to the beginning of the previous track To set the repeat mode 1 Press QUICK to open the Quick Menu 2 Press or to sel...

Page 25: ...3 FLV1 VC 1 WMV9 Maximum number of files 4096 per folder Maximum viewable resolution 1920x1080 Some files may not be played Audio MPEG 1 2 Layer2 MPEG 1 2 Layer3 Dolby Digital AC 3 L PCM ADPCM MPEG 2 4 LC AAC MPEG 4 HE AAC WMA7 8 9 Std MPEG 2 PS mpg mpeg dat Video MPEG 1 Video MPEG 2 Video Audio MPEG 1 2 Layer2 MPEG 1 2 Layer3 Dolby Digital AC 3 L PCM MPEG 2 4 LC AAC MPEG 4 HE AAC MPEG 2 TS ts trp...

Page 26: ... MP4 mp4 m4v Video H 264 MPEG 4 AVC MPEG 4 part2 DivX Plus HD MJPEG Audio MPEG 1 2 Layer3 Dolby Digital AC 3 L PCM ADPCM MPEG 2 4 LC AAC MPEG 4 HE AAC ASF asf wmv xvid Video MPEG 4 part2 DivX Plus HD Xvid VC 1 WMV9 Audio L PCM ADPCM WMA7 8 9 Std DivX divx div Video DivX Plus HD Audio MPEG 1 2 Layer2 MPEG 1 2 Layer3 Dolby Digital AC 3 PCM ADPCM Xvid xvid Video Xvid Audio MPEG 1 2 Layer2 MPEG 1 2 La...

Page 27: ... LC AAC MPEG 2 HE AAC MPEG 4 HE AAC RA COOK RA Lossless Flash Video FLV1 flv Video Sorenson H 263 FLV1 H 264 MPEG 4 AVC Audio MPEG 1 2 Layer3 L PCM ADPCM MPEG 2 4 LC AAC MPEG 4 HE AAC Flash Video F4V f4v Video H 264 MPEG 4 AVC Audio MPEG 1 2 Layer3 MPEG 2 4 LC AAC 3GPP 3gp Video Sorenson H 263 FLV1 MPEG 4 part2 H 264 MPEG 4 AVC Audio MPEG 4 LC AAC MPEG 4 HE AAC DVD Video ISO iso Video MPEG 1 Video...

Page 28: ...A wma WMA7 8 9 Std RealAudio ra rm rmvb Dolby Digital AC 3 MPEG 2 4 LC AAC MPEG 4 HE AAC RA COOK RA Lossless WAV wav L PCM ADPCM MKA mka MPEG 1 2 Layer 2 MPEG 1 2 Layer 3 Dolby Digital AC 3 MPEG 2 4 LC AAC L PCM ADPCM MPEG 1 2 Layer 1 MPEG 2 5 Layer 3 MPEG 2 4 HE AAC WMA7 8 9 Std RA COOK RA Lossless 27 32P2300Series EN indd 27 32P2300Series EN indd 27 2013 03 19 19 43 43 2013 03 19 19 43 43 ...

Page 29: ...he screen are caused or some parts of the screen do not light up When you just buy and start to use this TV a flickering may be caused in the screen In this case switch off the TV then switch on it again to cure the condition Some pixels of the screen do not light up The LCD display panel is manufactured using an extremely high level of precision technology however sometimes some pixels of the scr...

Page 30: ...odel 32P2300 Series Power source 110 240 V AC 50 60 Hz Power consumption 32 55 W 0 4 W Dimensions 32 734 W 543 H 180 D mm Mass Weight 32 5 0 kg TV system Aerial input Channel coverage PAL B G CCIR VHF 2 12 UHF 21 69 CATV X Z 2 S1 S41 PAL I UK VHF UHF 21 69 CATV PAL D K CHINA VHF 1 12 UHF 13 57 CATV Z1 Z38 SECAM B G CCIR VHF 2 12 UHF 21 69 CATV X Z 2 S1 S41 SECAM D K OIRT VHF 1 12 UHF 21 69 CATV X1...

Page 31: ...PONENT Standard video V VIDEO INPUT Component video Y PB CB PR CR A V Audio L Mono R o 2 Input Phono jacks A V O AUDIO FIXED Output Phono jacks Audio L Mono R o RGB PC Input Mini D sub 15 pin Analogue RGB o PC HDMI 1 Input AUDIO 3 5 mm Diameter stereo o HDMI 1 2 Input type A 19 pin A V Digital HDMI Lip Sync USB port Media Player Interface version USB 2 0 USB class Mass Storage Support file system ...

Page 32: ...OMPLIANCE WITH THE VC 1 STANDARD VC 1 VIDEO AND OR ii DECODE VC 1 VIDEO THAT WAS ENCODED BY A CONSUMER ENGAGED IN A PERSONAL AND NON COMMERCIAL ACTIVITY AND OR WAS OBTAINED FROM A VIDEO PROVIDER LICENSED TO PROVIDE VC 1 VIDEO NO LICENSE IS GRANTED OR SHALL BE IMPLIED FOR ANY OTHER USE ADDITIONAL INFORMATION MAY BE OBTAINED FROM MPEG LA L L C SEE HTTP WWW MPEGLA COM THIS PRODUCT IS LICENSED UNDER T...

Page 33: ...32P2300Series EN indd 32 32P2300Series EN indd 32 2013 03 19 19 43 44 2013 03 19 19 43 44 ...

Page 34: ...лекты Домашние кинотеатры Пульты ДУ Blu ray и DVD плееры Подставки и крепления HD медиаплееры Чистящие средства 3D очки Установка и подключение Wi Fi адаптеры камеры и др аксессуары Телевизионные антенны Ресиверы цифрового телевидения ...

Reviews: