Note:
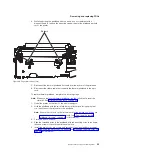
Be sure to note the orientation of the flat cable, paying close attention to
the blue stripe on each end of the cable and the length of each leg of the
cable.
Notes:
1. Notice that one end of the cable is longer than the other. The longer end should
be installed into the printhead.
2. Do not reverse flip the cable during installation.
3. An improperly installed cable will result in no communication between the logic
card and the thermal print head.
To replace the thermal printhead flat cable, complete the following step:
1. Orient the cable so the longest end is facing up and the blue stripe facing away
from you.
2. Slide the long end of the cable into the printer unit just under the printhead
mount.
3. Route the rest of the cable through the printer unit frame toward the logic card.
4. Connect the cable to the printhead; then install the printhead (see “Removing
the thermal printhead” on page 58 for information on how to replace the
printhead).
5. Connect the opposite end of the cable to the logic card; then replace the logic
card (see “Removing the logic card” on page 60 for information on how to
replace the logic card).
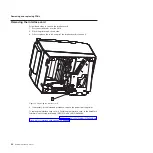
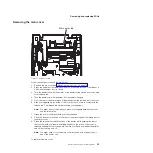
Removing the cutter motor and paper door assembly
Follow these steps to remove the cutter motor and paper door assembly:
1. Follow the steps in “Removing the logic card” on page 60 to access the cutter
motor and paper door assembly cable connector.
Note:
Do not disconnect any cables other than the cutter motor and paper door
assembly cable from the logic card.
2. Remove the two screw that hold the cutter motor to the unit and remove the
cutter motor.
Removing and replacing FRUs
62
SureMark Hardware Service
Summary of Contents for 1NA
Page 2: ......
Page 8: ...vi SureMark Hardware Service ...
Page 10: ...viii SureMark Hardware Service ...
Page 12: ...x SureMark Hardware Service ...
Page 16: ...xiv SureMark Hardware Service ...
Page 18: ...xvi SureMark Hardware Service ...
Page 46: ...28 SureMark Hardware Service ...
Page 56: ...38 SureMark Hardware Service ...
Page 88: ...70 SureMark Hardware Service ...
Page 90: ...Assembly 1 Models 1NR 1NA and 1ND 1 2 3 4 5 7 6 72 SureMark Hardware Service ...
Page 92: ...Assembly 1 continued 74 SureMark Hardware Service ...
Page 108: ...90 SureMark Hardware Service ...
Page 109: ......
Page 110: ...G362 0565 05 ...

