background image

57

There is a wide range of audio and video

equipment that can be connected to your

TV.
Connection diagrams at the and of this sec-

tion show you where the different equipment

should be connected at the back side of the

TV.

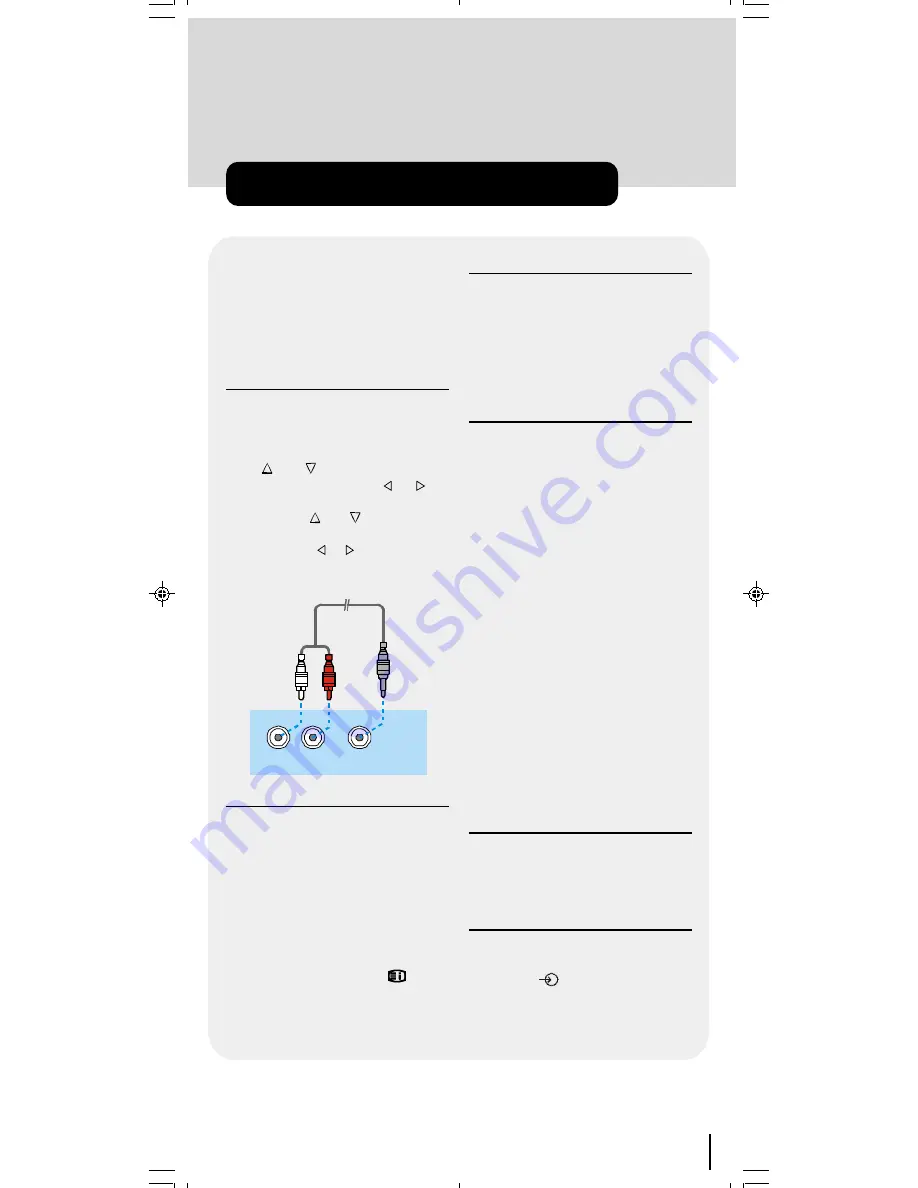
PC Sound Connection

• Connect the PC Audio output to the TFT

PC Audio In

 socket with stereo connec-

tion cable.

•  In  the  main  menu  select  "Feature"  us-

ing  “ ”  or  “ ”  button  then  enter  the
Feature  menu  pressing  “ ”,  “ ”  or

“

OK

”  button.  Come  on  "PC  Sound

Mode" using “ ” or “ ” button and se-

lect 

AV-3

 from the TV, AV-1, 

AV-2 and AV-3

options using  “ ”, “ ” or “

OK

” button.

•

 Source

 also should be selected as 

PC

in  the  main  menu.

$ 8',2,1

/

$ 8',2,1

5

3&$ XGLR

2XW

Via the Euroconnector

Your  TV  set  has  2  Euroconnector  sock-

ets.    If  you  want  to  connect  peripherals

(e.g. video, decoder, etc.) which have Eu-

roconnectors,  to  your  TV,  use 

SCART 

in-

put.
If an external device is connected via Euro-

connector  sockets  TV  is  switched  to  AV

mode  automatically.  In  this  case  if  both

sockets  are  connected  SCART-1  has  the

precedence.
In AV mode if you press the  “

” button

the  TV  status  OSD  is  displayed  on  the

screen.

Via Ant Input

If you want to connect to your TV, periph-

erals  like  video  recorders  or  decoders,

but the device you want to connect does

not have Euroconnector, you should con-

nect it to the ANT input of your TV set.

If  the  VCR  is  connected  via  antenna

input  it  is  suggested  to  use  the  Pro-

gramme  0.

Decoder

Cable TV offers you a wide choice of pro-

grammes. Most of them are free, others are

to be paid for by the viewer. This means that

you will need to subscribe to the broadcast-

ing  organisation  whose  programmes  you

wish to receive. This organisation will supply

you a corresponding decoder unit to allow

the programmes to be unscrambled.
For further information ask your dealer. See

also the booklet supplied with your decoder.

Connect a decoder with an aerial

socket to the TV

• Connect the aerial cable.

Connect a decoder without an

aerial socket to the TV

• Connect the decoder to your TV with a

eurocable  (RCA  Jack  Cable)  to

EXTERNAL  

(RCA Jack) (optional). When

your decoder has a Euroconnector / RCA

Jack you can obtain better picture quality if

you  connect  a  eurocable  (RCA  Jack

Cable)  to 

EXTERNAL 

(RCA  Jack)

(optional).

TV and Video Recorder

• Connect the aerial cables.
Better picture quality can be obtained if you

also  connect  a  eurocable  to 

EXTERNAL

socket  (optional)

.

Playback NTSC

Connect NTSC VCR player to one of two Eu-

roconnectors at the back of the TV.
Then, press “

“ button to select AV-1 or

AV-2.

Connect  Peripheral  Equipment

50052932-1552UK (TOSHIBA UK)17 INCH TFT-IDTV-WO WM-dilek p65

11 05 2004 15:30

57

Summary of Contents for 17WLT46B

Page 1: ...Owners Manual TOSHIBA The power to open people s eyes 17WLT46B ...

Page 2: ...Menu 50 Other Features 50 TV Status 50 Programme Swap P P 50 Double digit 50 Personal Preferences PP 51 Sound Indicator 51 Picture Mode 51 Sleep Timer Indicator 51 Mute Indicator 51 No Signal Detection TV 51 No Signal Detection PC 51 Volume Bar 52 AV Modes 52 Signal Out Of Range 52 PC Mode 52 Installation 52 Switching from TV to PC 52 Main Menu in PC mode 52 Sound Menu 52 Picture Menu 53 PIP Pictu...

Page 3: ... INSTRUCTIONS Your TV is designed to operate on 230 V 50Hz current only Connecting it to another power source may dam age the TV The wires in the mains lead are co loured as follows Blue Neutral Brown Live IMPORTANT The colours of the wires in the mains lead from your TV may not be the same as the coloured markings identifying the terminals in your plug So please follow these in structions Connect...

Page 4: ... 2 AV 3 S VIDEO PC Yellow FEATURE Feature Menu Blue INSTALL Installation Menu Hold Subtitle Update GUIDE Index Page Reveal PC Switch from TV to PC Expand WIDE Aspect ratio Mix PIP on PIP off Teletext Time Red SOUND Sound Menu Page up Green PICTURE Picture Menu Page down Mute I II Mono Stereo Dual I II Volume P CH Programme Down Personal Preference M MENU Menu Cursor Down Cursor Left 0 2 RemoteCont...

Page 5: ...7 1 1 5 5 5 9 5 63 5 63 5 79 9 227 723 29 5 With certain combinations of connectors and leads the back cover may not be easily fitted If the cover is left off this in no way infringes safety requirements Control Panel ...

Page 6: ...rman Nicam are available Multilanguage OSD Teletext Fastext 7 pages Toptext It is possible to connect headphone A P S Automatic programming system All programmes can be named Programme swapping between last watched two programmes Forward or backward automatic tuning Sleep timer Child lock Auto 4 3 16 9 Cinema Subtitle Zoom and Panorama modes Automatic sound mute when no trans mission When no valid...

Page 7: ... When replacement parts are required be sure the service technician has used re placement parts which are specified by the manufacturer or have the same speci fications as the original one 8 Servicing Please refer all servicing to qualified per sonnel Do not remove cover as this may result in electric shock 9 Naked Flame Sources Do not place naked flame sources on the apparatus WARNING When the de...

Page 8: ...he TV before con necting any external device Sockets for external connections are at the back of the TV For connection of other devic es via Euroconnector refer to the manuals of the related devices Inserting batteries in the remote control handset Remove the battery cover located on the back of the handset by gently pull ing upwards from the indicated part Insert two AAA R03 UM4 or equivalent typ...

Page 9: ...te control so that a programme number is select ed or Press P Ch button on the right side of the TV or press P CH or P CH but tons on the remote control so that last switched off programme is selected By either ways the TV will switch on and diminishes the brightness of the led To switch the TV off NOTE To switch the TV off completely re move the mains plug from the socket Press the button on the ...

Page 10: ...nd by mode after loading process You can terminate silence mode any time you want by pressing P CH P CH or numeric keys Tuning In Your TV will switch on in the digital mode Because this is the first time that the TV has been used there are no channels stored in the memory and the following menu is displayed on the screen Press SELECT key on the remote control to start the automatic search The TV w...

Page 11: ...casts are found the TV will display a message You should then refer to the Tips Troubleshooting Guide to estab lish the cause of the problem After Automatic search is finalized the following menu appears If you select Yes DUQLQJ RQWLQXH DFN DQFHO OO 3UHVWRUHG 3URJUDPPHV LOO H UDVHG After A P S is completed program table is displayed on the screen See the Programming menu in terrestrial TV section ...

Page 12: ... channel Similarly pressing the P CH key when the first channel is displayed will select the last channel in the channel list You can also select the required channel using its channel list number Channel numbers are entered using the number keys on the remote control handset and can be up to three digits long Hint The channel list numbers are as signed by the broadcasters Be cause not all channel...

Page 13: ...programme data If the name and times of the programme is not available then No Information Available is displayed in the infor mation banner The information banner gives a number of facts on the channel se lected and the programmes on it The name of the channel is dis played along with its channel list number and an indication of the strength of the signal received on this tuning channel The name ...

Page 14: ...r P CH keys are used to move to an other unlocked channel Channel List You can also select the required channel directly from the on screen channel list First bring up the menu with the MENU key on the remote control hand set Using the or keys on the re mote control make sure that the first item Channel List is highlighted in yellow and press the SELECT key to display the channel list ...

Page 15: ... When you leave the Channel List screen by pressing MENU key the channel showing on the quar ter screen is selected for normal viewing on the whole screen Electronic Program Guide The fourth way of selecting a channel is with the electronic programme guide or EPG The EPG is accessed by pressing the GUIDE key Like the Channel List the EPG screen displays a list of the stored channels in pages of fi...

Page 16: ...r similar infor mation along with the start and fin ish times are displayed at the top left inside the dark blue text window Hint Not all channels broadcast all the programme information data Some channels do not provide the current and next event data and or the pro gramme details In this case the programme names and or the details are not displayed This is not a fault with your TV Moving the hig...

Page 17: ... next event is too long to fit into the text window on the EPG screen a scroll bar appears on the right hand side of the window and the text can be scrolled up or down using the YELLOW and BLUE keys on the remote control Using or keys will display the next previous 5 channels in the list Pressing the SELECT key while the next event details are displayed will set a reminder to watch that programme ...

Page 18: ... the or keys to high light the Current Languages line and press SELECT key Use the or keys to highlight the soundtrack language required and press SE LECT key Normal viewing with the required language soundtrack can be resumed by pressing the MENU key If the programme has no alternative language soundtrack broadcast the Language Menu will not be available but a message No Multi Language Available ...

Page 19: ...y require the teletext keys to be pressed to acti vate the digital teletext pages In both cases moving through the different pages of informa tion is accomplished in a variety of ways dependent on the indi vidual broadcasters but includ ing use of the and SELECT keys to select items from on screen menus and the coloured keys to jump directly to particular pages You can exit any digital teletext ch...

Page 20: ...de is not changed by pressing 79 DTV key scart mode will be automati cally detected For example if a dvd player is connected to VCR scart and powered on then the IDTV will immediately switch to VCR mode The IDTV will switch to TV mode if dvd player is switched off 79 DTV KEY If there is no connected VCR de vice The 79 DTV key is used to toggle TV and DIGITAL TV modes When the IDTV is in TV mode th...

Page 21: ...guage This function selects which language soundtrack you will hear when switching to a channel broadcasting with multi ple soundtracks See also Every day operation Audio Control Highlight the Audio Language line in the Configuration menu and use the or keys to cycle through the language options Return to normal TV viewing by pressing the MENU key Digital terrestrial television channels can broadc...

Page 22: ...uage is activated subtitle will be displayed on the screen if any matching subtitles are available Digital teletext and subtitles can not be activated at the same time When you set the subtitle language from the configuration menu and try to activate digi tal teletext by pressing or colour buttons the following message ap pears Therefore if you want to activate the digital teletext you should set ...

Page 23: ...he IDTV is left in standby mode Both automatic upgrade methods result in standby mode either upgraded or not If the automatic upgrade is set to Dis able then this function will not work Manual upgrade starts if the Search for New Version button is pressed After pressing the Search for New Version button the IDTV tunes to each fre quency that have been stored in its database and looks for the new s...

Page 24: ...ing message appears Downloading will be displayed on the screen by a message and a progress bar together with a percentage button will indicate the status User can cancel the upgrade any time by pressing the MENU key advanced operation 6RIWZDUH 8 SJUDGH RPSOHWHG VHDUFKLQJ IRU XSJUDGH 1R QHZ VRWZDUH ZDV IRXQG After loading the software into memory it will be written permanently This situation will ...

Page 25: ...24 When the upgrade is finished a message box indicating this will appear and the IDTV will go to standby in order the changes to take place advanced operation ...

Page 26: ...LECT key to display the Channel List The Channel List screen dis plays the list of channels in the TV s memory with a quarter screen image window showing the selected channel and can be used to change channels for viewing delete channels from the memory edit the name of the channel as it appears in the list and on screen lock a channel against viewing by younger members of the family and set up fa...

Page 27: ...me unrecognisable You can edit the names to suit your prefer ences with the Edit Name func tion Highlight the channel to be re named highlight the EDIT NAME button at the base of the screen using the or keys and press SELECT key The high lighted channel name appears on the right of the screen with the first character highlighted by a cursor Any of the 16 characters that make up a channel name can ...

Page 28: ...0 channels in one jump using or keys Now select the LOCK button at the base of the screen with the or keys and press SELECT key Locked Channel A window requesting the PIN code is displayed and the four digit code should be entered us ing the number keys on the re mote control followed by the SELECT key A lock icon is then displayed alongside the chan nel name in the channel list Hint The PIN is fa...

Page 29: ...he Installation Menu setting locks only the Installation menu see Advanced operation Re instal lation and the Disabled setting allows free access to any of the menus You must return to normal TV viewing by pressing the MENU key three times to activate the lock Now any attempt to access the locked menus will display the PIN request window and the menus will only be displayed on entry of the correct...

Page 30: ...vourite channels only and the EPG will list the favourite chan nels only other channels can still be accessed by channel list number or from the Channel List menu screen Any channel can be a favourite channel and the Channel List menu is used to label those channels you want as favourites Display the Channel List menu screen by highlighting Channel List on the Main Menu and pressing SELECT key Use...

Page 31: ...be activated if one or more channels in the channel list are marked as favourites Similarly if the favourite status is removed from all the chan nels in the Channel List the favourite mode is turned off automatically Programme Reminders and Timers With the greatly extended channel choice that digital terrestrial television brings it is all too easy to miss a favourite programme The TV has two faci...

Page 32: ...ts can be set and each is displayed in the Timer screen showing the event number the channel to be selected the start time end time date and the mode whether that event is active and will be acted on or not To set an event highlight its mode button using the or keys and press SELECT key to display the timer entry window Here the five settings of channel name start time end time date and frequency ...

Page 33: ...tal terrestri al TV at the time the timer event starts a message is flashed onto the screen announcing that the TV is Switching to timer channel so you understand what is hap pening While watching Analog TV broadcasting you can get Digital TV broadcasting from EXT 2 For this option you must set Av 2 Output in Feature menu to DIGI TAL mode See Analog TV section Feature menu Start and end time of Di...

Page 34: ...ish to reinstate a channel previously deleted from the channel list or you want to watch new channels which have started broadcasting Press the MENU key to display the Main Menu and using the or keys highlight the Installation line and press SELECT key to display the In stallation Menu You can either perform a First Time Installation effectively resetting the TV to its ex factory condition or just...

Page 35: ...e to air channels or manually searching one specified broadcast frequency only for any channels to be found there Press the MENU key to display the Main Menu and using the or keys highlight the Installation line and press SELECT key to display the Installation Menu Highlight the Add New Channels line and press key to display the options Select Automatic Search with the or keys and press SELECT key...

Page 36: ...ation of whether any channels are likely to be found If only the signal level graph shows a high value then it is likely that an ana logue channel occupies that broadcast frequency If the signal quality bar is high as well then it is a digital frequency and digital channels will probably be found Again channels which duplicate those already in the channel list are ig nored However the manual chann...

Page 37: ...annel is found you should then refer to the Trou bleshooting Guide to establish the cause of the problem When you have finished watching digital terrestrial TV you may wish to switch the IDTV to standby to save power even when the television is turned off without harm to the television or itself The IDTV is returned to standby by pressing the key on the remote control handset Hint In standby the T...

Page 38: ...ames are selected for demostration so you may see different names on this Common Interface menu Our IDTV has two slots for insertion of modules however you can see up to two names of modules in this menu option RPP RQ QWHUIDFH RPP RQ QWHUIDFH Figure 1 Common Interface Menu with modules inserted into the slots Figure 2 Common Interface without any module inserted The user can choose one of the butt...

Page 39: ... the common interface module can display a list of items chan nel list subscription information module information etc and an inquiry message for pin control changing module ratings etc You can see List box and Inquiry box taken from the Viaccess module This section can only dem onstrate a few of the modules information and for each of the module you want to use you will see different names button...

Page 40: ...Menu and the key to highlight Language then press SELECT key to display the Language menu screen Then using the or keys on the remote control make sure that the selected language is highlighted in yellow and press the SELECT key to change the language Return to the Main Menu by pressing the MENU key advanced operation TV SETUP To be able to go through TV menu functions you can use this item The di...

Page 41: ...control handset of your TV is designed to control all the functions of the model you selected The functions will be described in accordance with the menu system of your TV Functions of the menu system are de scribed in Menu System section Volume Setting Press key to increase volume Press key to decrease volume A volume level scale slider will be dis played at the middle of the bottom on the screen...

Page 42: ...select Balance Press key to change balance right ward Press P P programme swap key to select the last selected programme This key provides swapping between last two selected programmes For example select programme 8 then select programme 2 Now if you press P P key programme 8 will be se lected If you press the same key again programme 2 will be selected and so on press the same key again pro gramm...

Page 43: ...ey will turn on and off this feature If the current sound system is Mono and the sound effect is set ON then the sound will be heard as if it is Stereo If the current sound system is Stereo switching this effect on will make the sound deeper Switching it off will make no change in Mono and Stereo 6RXQG 2Q To Change H Phone Line Out Settings Using or button select H Phone Line Out Press or button o...

Page 44: ...r Classic Jazz Rock Pop and Flat The predefined options can not be changed by the user If you want to change one of the frequency values of the predefined options the Mode must be switched to User option The 5 items below the Mode are avail able to adjust the sound settings in 5 frequency values 120 Hz 500 Hz 1 5 kHz 5 kHz and 10 kHz To change the values of 5 frequency options select one of the op...

Page 45: ...Pic ture using or key then enter the Picture menu pressing or OK key 0HQX Setting Brightness As you enter the picture menu Bright ness will be the first item Press key to increase brightness Press key to decrease brightness 3LFWXUH Setting Contrast Using or key select Contrast Press key to increase contrast level Press key to decrease contrast level 3LFWXUH Setting Colour Using or key select Colou...

Page 46: ...st ing Noise Reduction changings are effective at once Note 2 At moving pictures while Noise Reduction is at maxi mum level some picture distortions may occur If Noise Reduction is set to medium or minimum the picture will improve 3LFWXUH 0HGLXP Setting Hue During Playback NTSC system this will appear in AV mode only when NTSC vid eo source is applied Otherwise HUE option is invisible in Picture m...

Page 47: ...vent chil dren turning on off TV or changing pro grammes or adjustments etc without re mote control The Child Lock feature can be set On or Off by or key When Off is select ed there will be no difference in the oper ation of your TV When On is selected the TV can only be controlled by the remote control handset In this case the control panel but tons except button on the right side of the TV will ...

Page 48: ...Selecting Programme To select programme number you can use or key Digit Keys or The Double Digit key with digit keys QVWDOO 3 Selecting Band Band can be chosen either C or S by or key Selecting Channel Channel can be changed by or key by Digit Keys or by the Double Digit key with digit keys For band C 01 17 21 73 For band S 01 41 for all channel tables Selecting Search To start the search process ...

Page 49: ... programmes in TV mode ex cept the AV mode By cursor action programme selection is done automatically In order to select programme is also possible by using digit or double digit key In this way pro gramme selection gets also automati cally The TV Status is changed by the programme selection too When using double digit key in order to select a pro gramme the Programme Number in TV Status OSD is di...

Page 50: ... again erases the selected programme from the programme list and the programmes below shift one up Pressing Blue key cancels the activated Delete process Autostore To enter Autostore menu press to the Blue key To learn the features of this function see Autostore below Autostore searches and stores all chan nels automatically on your TV according to the transmission of programme sys tems in your ar...

Page 51: ... are displayed on the upper left of the screen and Sleep Timer shows the time left on the upper right screen if enabled The sound indicator and picture mode are displayed with them too They are displayed after pro gramme change during 3 seconds 3 Programme Number 35 Programme Name 4 charac ters These OSD s are displayed when a new programme is entered by digit key or by pressing P P P CH P CH 79 D...

Page 52: ...utomatically to stand by Mute Indicator It is placed in the upper middle of the screen when enabled and it stays there until it is disabled To cancel mute there is two alternative the first one is pressing to key this volume is set to the preceding value and the second one is increasing the volume level thus it starts at the minimum level to increase By decreasing the volume level in mute state mu...

Page 53: ... played like Signal out of range and screen is blanked PCMode Installation Power off both Computer and Display before making any connections The monitor comes with a 15 pin PC cable Connect end of the signal cable to the 15 pin connector on the rear of the Computer 3LQ 0LQL 6XE RQQHFWRU Tighten the screws of the Display cable until the connectors are fastened se curely finger tighten only If you a...

Page 54: ...PIP window becomes green PIP position is changed by key There are six different PIP positions PIP size is de creased by key and increased by key Three different PIP size are avail able Programme in the PIP window is in creased decreased by P CH P CH keys AV mode is also available in PIP window Digit keys are inactive for PIP window PIP window is removed from the screen by key PIP is available in D...

Page 55: ...tored will be displayed for few sec onds at the bottom of menu Source Menu In the Main menu select Source using or key then enter the Source menu pressing or OK keys 6RXUFH Select the available sources of TV AV 1 AV 2 AV 3 S Video PC or Digital by pressing or OK keys PIP Source Menu This menu is available when the PIP dis played In the Main menu select PIP Source using or key then select the any a...

Page 56: ...page to be displayed To Select a Subcode Page Subcode pages are subsections of long Teletext pages that can only be displayed on the screen one section at a time Select the required Teletext page Teletext Teletext is an information system that dis plays text on your TV screen Using the Teletext information system you can view a page of information on a subject that is available in the list of cont...

Page 57: ...ular colour Press an appropriate Red Green Yel low or Blue button in order to reach the relevant page quickly For TOP text TOP text mode of operation will be activated au tomatically according to the transmission If TOP text transmission is present colour coded buttons will appear in status row If TOP text transmission is not present status row will not appear The subject heading for information m...

Page 58: ...ders or decoders but the device you want to connect does not have Euroconnector you should con nect it to the ANT input of your TV set If the VCR is connected via antenna input it is suggested to use the Pro gramme 0 Decoder Cable TV offers you a wide choice of pro grammes Most of them are free others are to be paid for by the viewer This means that you will need to subscribe to the broadcast ing ...

Page 59: ...hite inputs You should connect the jacks to the input in the same colour Connect the decoder to the video recorder Some video recorders have a special euro connector for decoder Connect a eurocable to the euroconnector of your decoder and to the special euroconnector of your video recorder See also the handbook of your video recorder To connect your video recorder to the TV see TV and Video Record...

Page 60: ... 138 7 8 2 1 38 7 5 8 2 138 7 6 57 62 7 9 9 3 21 3 1387 1 287 1 287 5 6 57 62 7 9 9 9 9 9 9 PeripheralEquipmentConnections 9 3 1 3 8 7 8 2 5 8 2 5 1 7 3 2 1 6 9 2 6 9 2 9 9 9 9 9 3 13 87 8 2 5 8 2 5 17 3 21 6 9 2 6 9 2 9 9 9 9 ...

Page 61: ...5RXQG RKP FRD LDO FDEOH ODW RKP WZLQ OHDG FDEOH 5HDU RI 79 5HDU RI 79 2XWGRRU QWHQQD RQQHFWLRQV Antenna Connections Peripheral Equipment Connections 17 1 0 25 5 8 2 1 5 9 2 1 1 287 1 2 8 7 DECODER FOR SATELLITE RECEIVER VIDEO HEADPHONE optional AUDIO ...

Page 62: ...ical sync frequency range of 50 75 Hz and a horizontal sync frequency range of 30 69 KHz The following table is an illustration of some of the typical video display modes RUL RQWDO 9HUWLFDO RU N 9HU RU 9HU 6 QF 3RODULW 0RGH UHT XHQF 5HVROXWLRQ The native resolution of the TFT LCD Panel is 1280 x 768 Therefore using Mode 14 is advised to get the best PC input display quality ...

Page 63: ...the screen with a slightly damp soft cloth Do not use abrasive solvents as they may damage the TV screen coating layer Colors of image on screen are abnormal For TV Have you selected the correct TV system Is your TV set or house aerial located too close to the loudspeakers non earthed audio equipment or neon lights etc Mountains or high buildings can cause double pictures or ghost images Sometimes...

Page 64: ...nd correctly con nected to the 15 pin Video Connector on the rear panel of the Computer Check that Video Card is firmly seated in card slot of Computer motherboard Check that the Brightness and or the Contrast adjustments of the Display have not been turned down to minimum levels Sound You can not hear any sound Did you perhaps interrupt the sound pressing key Are external speakers connected to th...

Page 65: ...le PANEL Size 17 1 43 cm diagonal Visible Picture Size 371 5 mm Horizontal x 223 5 mm Vertical Displayable Resolution 1280 x 768 maximum Non interlaced NUMBEROFPRESETCHANNELS 100 CHANNELINDICATOR On Screen Display RF AERIAL INPUT 75 Ohm unbalanced OPERATING VOLTAGE For adaptor 230 V AC 50 Hz For TV 12 V DC AUDIO German Nicam Stereo AUDIO OUTPUT POWER 2 x 3 WRMS 10 THD POWER CONSUMPTION W max 43 ST...

Reviews: